🧠 고민
사용자 입장에서 비밀번호 찾기를 난수를 통해 진행하는 것이 매우 불편한 프로세스라는 것을 느꼈다. 구글링해 보면 난수 기반 비밀번호 방식이 대부분인데, 유명 플랫폼들을 생각해 보면 난수 기반으로 되어 있는 곳은 본 적이 없던 것 같다... 따릉이는 난수 기반인 것 같던데... 흠 ~~ 몰라, 일단 사용자 편의성 개선시켜!!
🥹 난수 프로젝트 방식
- 비밀번호 찾기 요청
- 랜덤한 문자열로 강제로 비밀번호 변경
- 이메일로 임시 비밀번호 확인
- 임시 비밀번호로 로그인
- 다른 비밀번호로 변경 요청
다른 플랫폼을 참고한 결과 이런 방식을 사용하는 곳을 찾기 힘들었다.
그리고 이전 프로젝트부터 난수 방식으로 구현하여 사용해보니 번거로운 느낌이 많이 들었다.
😎 개선 된 현재 프로젝트 방식
- 비밀번호 찾기 요청
- 이메일로 인증번호 전송
- 인증번호 확인 후 비밀번호 변경
🧠 구현에 대한 고민 - 1
이메일로 인증번호 전송 시 2분 이라는 유효시간을 넣어두고 싶었다.
현재 프로젝트에서는 Redis를 활용하기 때문에 적극 활용하기로 하였다.
인증번호 확인 후 비밀번호를 변경하기 위해서 임시 토큰을 발급하기로 하였다.
현재 프로젝트에서는 jwt를 사용하기 때문에 temporary-token 을 제작 하여 현재 인증번호로 인증성공한 유저를 식별하는 식으로 진행 하였다.
🌊 상세 흐름
- 비밀번호 변경
시작->인증번호 생성 - 이메일로
인증 번호 전송->redis에 2분 시간으로 저장 - 인증 번호
인증 성공->임시 토큰 생성 (유효 시간 10분) - 비밀번호
변경 요청->임시 토큰 값을 통해 사용자를 식별 후 변경 진행 - 비밀번호
변경 완료->임시 토큰 값 초기화
🧠 구현에 대한 고민 -2
과거에 프로젝트에는 html을 따로 메일 전송 로직에 담아서 구현하였다.
커스터마이징이나 재활용하기에 좋은 방식은 아니였다.
☘️ thymeleaf 를 이용
비밀번호 변경이 아닌 다른 경우에 이메일을 전송할 일이 있을 수 있다.
없다하여도 유지보수성을 생각하여서 대비해두는 것이 좋다는 판단이였다.
그렇기 때문에 thymeleaf를 이용하여 이메일을 전송하기로 했다.
thymeleaf로 보낼 수 있나? 라고 생각하고 검색해보니 많은 자료들이 나와서 기분이 좋다 ㅎㅎ
🧠 구현에 대한 고민 -3
RestFul 한 API 를 제작하고 있기 때문에 엔드포인트명에 대한 고민을 많이 하게되었다.
API 엔드포인트가 총 3개가 필요하다.
1. 비밀번호 변경을 위한 아이디 검증 -> /password/reset/verification/login-id
2. 인증코드 검증 -> /password/reset/verification/code
3. 비밀번호 변경 요청 -> /password/reset
특정한 행위에 대한 일괄성과 엔드포인트를 보고 분명한 행위구분이 될 것 같아서 나름 만족스럽게 구분하게 된 것 같다.
🔨 구현
해당 행위는 Auth관련 된 행위들로 생각한다.
그렇기 때문에 Auth 관련된 디렉토리와 클래스에서 작업하였다.
⚙️ Dto 작성
validation 순서 지정에 대한 글은 이전 글에 기록되어 있습니다 ㅎㅎ
아이디 검증을 위한 dto
@Getter
@NoArgsConstructor
@Schema(name = "VerificationLoginIdDto: 인증번호 전송 Dto")
public class VerificationLoginIdDto {
    @NotBlank(message = "아이디가 입력되지 않았습니다.", groups = ValidationGroups.NotBlankGroup.class)
    @Pattern(regexp = "^[a-z0-9]{4,20}$", message = "아이디는 영어 소문자와 숫자만 사용하여 4~20자리여야 합니다.",
            groups = ValidationGroups.PatternGroup.class)
    @Schema(description = "아이디는 영어 소문자와 숫자만 사용하여 4~20자리입니다",
            example = "carumuch1234")
    private String loginId;


    @Builder
    public VerificationLoginIdDto(String loginId) {
        this.loginId = loginId;
    }
}
인증번호 검증을 위한 dto
@Getter
@NoArgsConstructor
@Schema(name = "VerificationCodeDto: 인증번호 인증 Dto")
public class VerificationCodeDto {

    @NotBlank(message = "아이디가 입력되지 않았습니다.", groups = ValidationGroups.NotBlankGroup.class)
    @Pattern(regexp = "^[a-z0-9]{4,20}$", message = "아이디는 영어 소문자와 숫자만 사용하여 4~20자리여야 합니다.",
            groups = ValidationGroups.PatternGroup.class)
    @Schema(description = "아이디는 영어 소문자와 숫자만 사용하여 4~20자리입니다",
            example = "carumuch1234")
    private String loginId;

    @NotBlank(message = "인증번호가 입력되지 않았습니다.", groups = ValidationGroups.NotBlankGroup.class)
    @Pattern(regexp = "^\\d{6}$", message = "인증번호는 4자리 숫자여야 합니다.",
            groups = ValidationGroups.PatternGroup.class)
    @Schema(description = "인증번호는 6자리 숫자 입니다.",
            example = "123456")
    private String code;

    @Builder
    public VerificationCodeDto(String loginId, String code) {
        this.loginId = loginId;
        this.code = code;
    }
}
새로운 비밀번호를 입력받기 위한 dto
@Getter
@NoArgsConstructor
@Schema(name = "ResetPasswordDto: 새 비밀번호 저장 Dto")
public class ResetPasswordDto {
    @NotBlank(message = "변경 할 비밀번호가 입력되지 않았습니다.", groups = ValidationGroups.NotBlankGroup.class)
    @Pattern(regexp = "^(?=.*[A-Za-z])(?=.*\\d)(?=.*[$@$!%*#?&])[A-Za-z\\d$@$!%*#?&]{8,16}$",
            message = "비밀번호는 8~16자리수여야 합니다. 영문 대소문자, 숫자, 특수문자를 포함 해야 합니다.",
            groups = ValidationGroups.PatternGroup.class)
    @Schema(description = "비밀번호는 8~16자리 수 입니다. 영문 대소문자, 숫자, 특수문자를 포함합니다.",
            example = "carbackgo1212!")
    private String newPassword;

    @Builder
    public ResetPasswordDto(String newPassword) {
        this.newPassword = newPassword;
    }
}
⚙️ 임시 jwt 생성 메서드
 @Transactional
    public String createTemporaryToken(String email){
        Long now = System.currentTimeMillis();

        long temporaryTokenValidityInMilliseconds = 600 * 1000; // 10분

        return Jwts.builder()
                .setHeaderParam("typ", "JWT")
                .setHeaderParam("alg", "HS512")
                .setExpiration(new Date(now + temporaryTokenValidityInMilliseconds))
                .setSubject("temporary-token")
                .claim(url, true)
                .claim(EMAIL_KEY, email)
                .signWith(signingKey, SignatureAlgorithm.HS512)
                .compact();
    }
저같은 경우에는 jwtTokenProvider 라는 클래스를 제작하여 토큰 제작에 전반적인 역할을 수행하도록 설계하였습니다.
⚙️ service 작성
AuthService
/**
     * 1. 비밀번호 찾기: 인증번호 전송
     */
    public void sendVerificationCode(VerificationLoginIdDto verificationLoginIdDto) {
        User user = userRepository.findByLoginId(verificationLoginIdDto.getLoginId())
                .orElseThrow(() -> new CustomException(ErrorCode.USER_NOT_FOUND));

        /* 메일 요소 */
        String email = user.getEmail();
        String name = user.getName();
        String code = mailService.createCode();

        if (redisService.getValues("CODE(" + SERVER + "):" + email) != null) {
            redisService.deleteValues("CODE(" + SERVER + "):" + email);
        }

        /* 인증코드 유호 시간 2분*/
        long codeValidityInMilliseconds = 120 * 1000;

        /* 레디스 저장 */
        redisService.setValuesWithTimeout("CODE(" + SERVER + "):" + email, code, codeValidityInMilliseconds);
        /* 이메일 발송 */
        mailService.sendVerificationCodeMail(name, email, code);
        log.info(name + " : " + "sendCodeMail" + "(" + new Date() + ")");
    }

    /**
     * 2. 비밀번호 찾기: 인증번호 검증
     */
    @Transactional
    public String verifyCode(VerificationCodeDto verificationCodeDto) {
        User user = userRepository.findLoginUserByLoginId(verificationCodeDto.getLoginId());
        String email = user.getEmail();
        String code = redisService.getValues("CODE(" + SERVER + "):" + email);

        if (!code.equals(verificationCodeDto.getCode())) {
            throw new CustomException(ErrorCode.INVALID_REQUEST);
        }
        return jwtTokenProvider.createTemporaryToken(email);
    }

    /**
     * 3. 비밀번호 찾기: 새 비밀번호 업데이트
     */
    @Transactional
    public void resetPassword(String email, String encodePassword) {
        User user = userRepository.findByEmail(email)
                .orElseThrow(() -> new CustomException(ErrorCode.USER_NOT_FOUND));
        user.updatePassword(encodePassword);
    }
mailService
@Service
public class MailService {

    private final JavaMailSender emailSender;
    private final SpringTemplateEngine templateEngine;

    private final String MAIL_ADDRESS;
    private final String HOST_ADDRESS;

    public MailService(JavaMailSender emailSender,
                       SpringTemplateEngine templateEngine,
                       @Value("${spring.mail.host}") String HOST_ADDRESS,
                       @Value("${spring.mail.username}") String MAIL_ADDRESS) {
        this.emailSender = emailSender;
        this.templateEngine = templateEngine;
        this.HOST_ADDRESS = "@" + HOST_ADDRESS.replace("smtp.", "");
        this.MAIL_ADDRESS = MAIL_ADDRESS;
    }

    /**
     * 인증코드 생성 -> 0 부터 9 까지 수를 6자리 숫자로 조합
     */
    public String createCode() {
        Random random = new Random();
        StringBuilder code = new StringBuilder();

        for (int i = 0; i < 6; i++) {
            int numbers = random.nextInt(10);
            code.append(numbers);
        }

        return code.toString();
    }

    public void sendVerificationCodeMail(String name, String email, String code){
        try {
            MimeMessage message = emailSender.createMimeMessage();

            message.addRecipients(MimeMessage.RecipientType.TO, email); // 보낼 이메일 설정
            message.setSubject("[카우머치] " + name + "님 인증 번호 안내드립니다."); // 이메일 제목
            message.setText(setVerificationCodeContext(code), "utf-8", "html"); // 내용 설정

            // 메일 이름 설정
             message.setFrom(new InternetAddress(MAIL_ADDRESS + HOST_ADDRESS, "카우머치"));

            emailSender.send(message); // 이메일 전송

        } catch (Exception e) {
            throw new CustomException(ErrorCode.INTERNAL_SERVER_ERROR);
        }
    }

    private String setVerificationCodeContext(String code) { // 타임리프 설정
        Context context = new Context();
        context.setVariable("code", code); // Template 전달 데이터
        return templateEngine.process("verificationCodeMail", context); // verificationCodeMail.html
    }
}
현재는 mail을 naver를 사용 중이지만 유지보수성을 생각하여 변경될 수 있다는 생각에
환경변수를 클래스 생성자에 주입 시점부터@이메일.com형식으로 맞추어 하드코딩 될 요소를 방지 했습니다.
✉️ Mail.html 작성
<!DOCTYPE html>
<html xmlns="http://www.w3.org/1999/xhtml" xmlns:th="http://www.thymeleaf.org" lang="en">
<body>
<div align="center" style="font-size: 15px">
  <h1>카우머치</h1>
  <span style="border: 1px solid; padding: 8px;font-size: 20px;" th:text="${code}"></span>
</div>
</body>
</html>
⚙️ Controller 작성
AuthControllerDocs
 @Operation(summary = "1. 비밀번호 찾기 -> 인증 번호 발급", description = "**성공 데이터:** true," +
            " 존재하는 아이디라면 해당 아이디의 이메일로 인증번호가 발급")
    @ApiResponses(value = {
            @ApiResponse(responseCode = "200", description = "이메일로 인증번호 전송 성공"),
            @ApiResponse(responseCode = "400", description = "찾을 수 없는 아이디 입니다."),
    })
    ResponseEntity<?> verificationLoginId(VerificationLoginIdDto VerificationLoginIdDto);

    @Operation(summary = "2. 비밀번호 찾기 -> 인증 번호 인증", description = "**성공 데이터:** 임시 토큰 쿠키 ")
    @ApiResponses(value = {
            @ApiResponse(responseCode = "200", description = "인증번호 인증 성공"),
            @ApiResponse(responseCode = "400", description = "인증번호가 잘 못 되었습니다."),
    })
    ResponseEntity<?> verificationCode(VerificationCodeDto verificationCodeDto);

    @Operation(summary = "3. 비밀번호 찾기 -> 새 비밀번호 업데이트", description = "**성공 데이터:** true , 임시 토큰 쿠키 초기화")
    @ApiResponses(value = {
            @ApiResponse(responseCode = "200", description = "새 비밀번호 업데이트 성공"),
            @ApiResponse(responseCode = "400", description = "잘못된 입력 데이터"),
            @ApiResponse(responseCode = "401", description = "유효시간 초과, 다시 시도")
    })
    ResponseEntity<?> resetPassword(ResetPasswordDto resetPasswordDto, HttpServletRequest request);
AuthController
/**
     * 1. 비밀번호 찾기: 인증 번호 전송
     */
    @PostMapping("/password/reset/verification/login-id")
    public ResponseEntity<?> verificationLoginId(@Validated(ValidationSequence.class) @RequestBody VerificationLoginIdDto verificationLoginIdDto) {
        authService.sendVerificationCode(verificationLoginIdDto);
        return ResponseEntity.status(CREATED).body(ResponseDto.success(OK, null));
    }

    /**
     * 2. 비밀번호 찾기: 인증 번호 인증
     */
    @PostMapping("/password/reset/verification/code")
    public ResponseEntity<?> verificationCode(@Validated(ValidationSequence.class) @RequestBody VerificationCodeDto verificationCodeDto) {

        String temporaryToken = authService.verifyCode(verificationCodeDto);

        /* 유효기간 10분 임시 토큰 발급 */
        ResponseCookie responseCookie = ResponseCookie.from("temporary-token", temporaryToken)
                .maxAge(600)
                .httpOnly(true)
                .secure(true)
                .build();
        return ResponseEntity
                .status(OK)
                .header(HttpHeaders.SET_COOKIE, responseCookie.toString())
                .body(ResponseDto.success(OK,null));
    }

    /**
     * 3. 비밀번호 찾기: 새 비밀번호트 업데이트
     */
    @PutMapping("/password/reset")
    public ResponseEntity<?> resetPassword(@Validated(ValidationSequence.class) @RequestBody ResetPasswordDto resetPasswordDto,
                                           HttpServletRequest request) {
        /* 쿠키의 Refresh token 추출 */
        String requestTemporaryToken = null;
        Cookie[] cookies = request.getCookies();
        for (Cookie cookie : cookies) {
            if (cookie.getName().equals("temporary-token")) {
                requestTemporaryToken = cookie.getValue();
            }
        }

        /* Temporary Token 추출 -> 해당 유저가 업데이트 중 인지 확인 */
        String email = jwtTokenProvider.getClaims(requestTemporaryToken).get("email").toString();

        /* 비밀번호 변경 */
        String encodePassword = bCryptPasswordEncoder.encode(resetPasswordDto.getNewPassword());
        authService.resetPassword(email, encodePassword);

        /*성공 시 쿠키 초기화*/
        ResponseCookie responseCookie = ResponseCookie.from("temporary-token", null)
                .maxAge(0)
                .path("/")
                .build();
        return ResponseEntity
                .status(CREATED)
                .header(HttpHeaders.SET_COOKIE, responseCookie.toString())
                .body(ResponseDto.success(OK, null));
    }
🎉 결과
이메일 인증번호

Redis의 인증번호
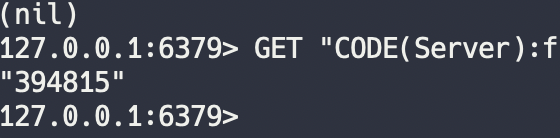
TTL 을 확인하니 120으로 잘 지정된 것 을 확인 !
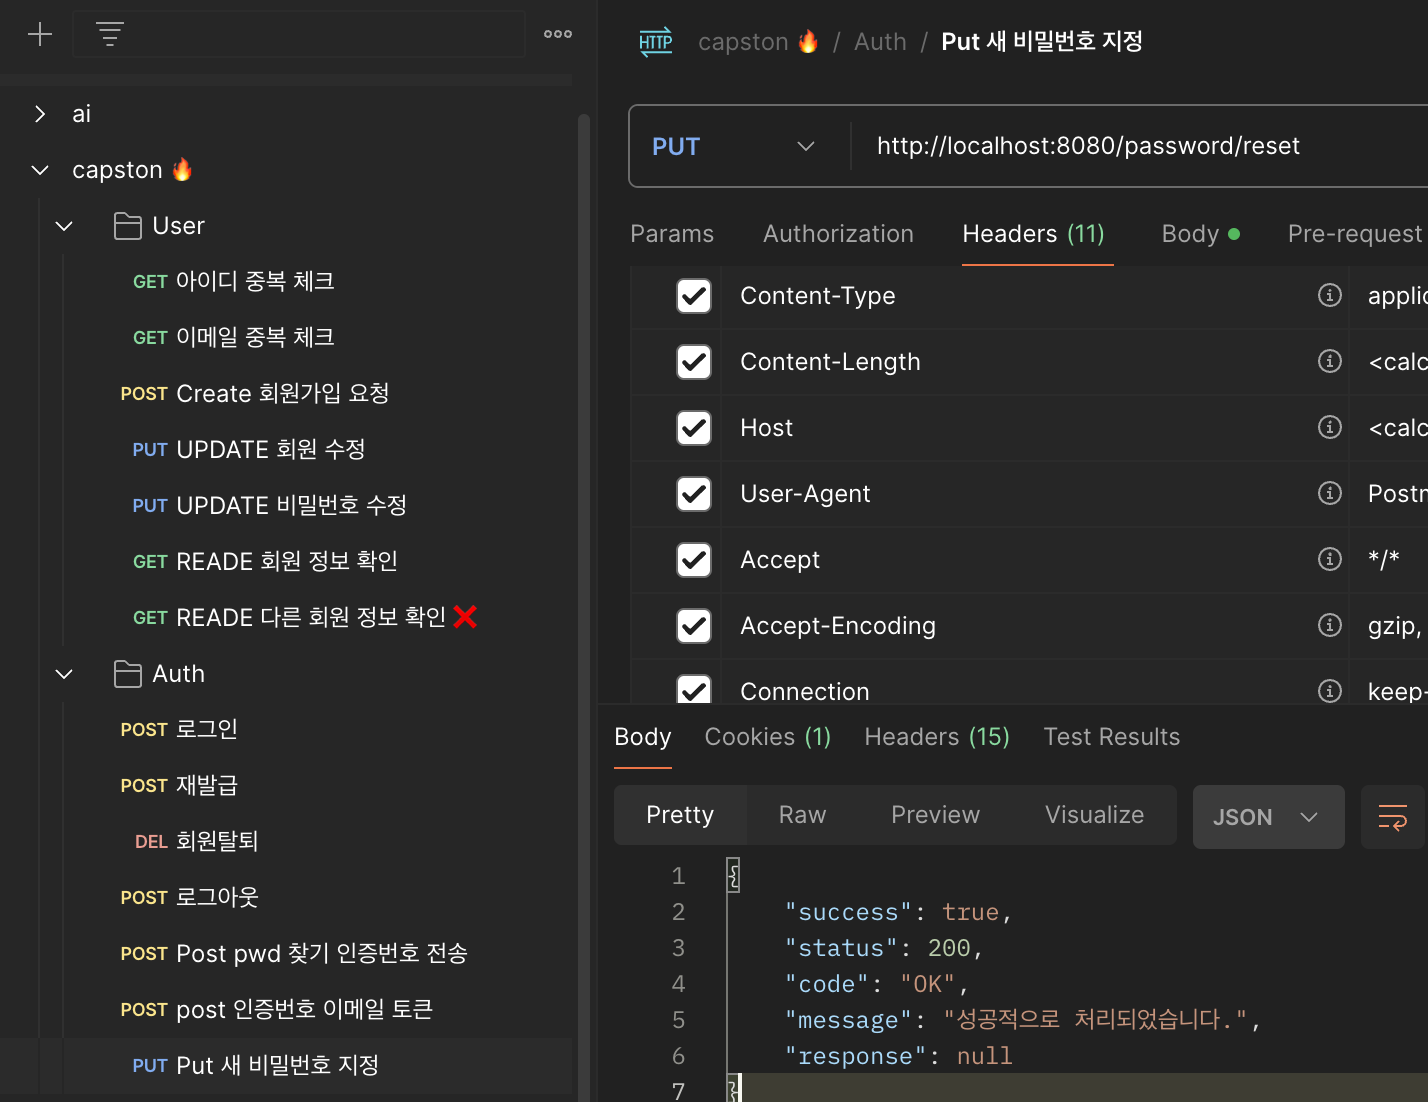
새로운 비밀번호로 변경
ref: https://velog.io/@ayoung0073/SpringBoot-타임리프를-이용한-이메일-전송