[NestJS] QueryBuilder vs Find Opertor (Feat. pagination | searching | seeder) #1
NestJS _TIL

시작하기에 앞서
이전 포스팅에서 Typeorm의 "Find Operator(find, findOne, findAndCount ...)"를 사용하여 Nest에서 Pagination을 어떻게 구현할 수 있는가에 대해 알아보았다.
※ 이전 포스팅 참고 -- [Nest] Pagination with TypeORM
하지만, 위의 글 마지막에서도 언급하였지만 Pagination은 물론이고 데이터베이스로부터 특정 데이터를 조회하는 방법은 "Find Operator" 만이 존재하는 것은 아니다.
TypeORM에서 레포지터리를 이용한 데이터 조회 및 가공 작업에는 "Find Operator" 이외에 "QueryBuilder"를 이용한 방법이 있다.
지금부터 담고자 하는 내용은 하나의 포스팅에 다 담긴 힘들것으로 생각이되어 시리즈로써 2~3장의 포스팅 정도로 나누어 기록할 예정이다.
이번 시리즈에선 QueryBuilder에 대해서 깊게 알아보지는 않을 것이다. nest에서 (Raw Query 구문을 제외한) 두 가지의 TypeORM을 통한 DB 데이터 접근 방식(Find operator, QueryBuilder)이 서로 어떤 특징을 지니는 지에 대해 비교를 통해 알아보고자 한다.
(장 단점 위주가 아닌 코드 작성위주로 알아보고 난 후, 생각을 정리할 것이다.)
이번 시리즈 전개 역시, 이전 포스팅에서 다루었던 "Nest에서 Pagination 구현하기"를 베이스로, Searching, Sorting 및 더미 데이터 생성하는 과정을 토대로 진행하고자 한다.
QueryBuilder 간단히 알아보기
QueryBuilder는 무엇인가
✔ TypeORM 공식문서 정의
QueryBuilder is one of the most powerful features of TypeORM - it allows you to build SQL queries using elegant and convenient syntax, execute them and get automatically transformed entities.
QueryBuilder는 TypeORM의 가장 강력한 기능 중 하나이다. 이를 통해 우아하고 편리한 구문을 사용하여 SQL 쿼리를 작성하고 실행하며, 자동으로 변환된 엔터티를 얻을 수 있다.
QueryBuilder는 Raw-Query문 만큼은 아니지만 매우 직관적으로 쿼리문을 작성할 수 있다. 즉, sql 쿼리문을 통해 구현할 수 있는 것을 최대한 비슷하게 작성함으로써 객체를 통해 접근하는것에 비해 조금 더 직관적일 수 있단 얘기다.
일단, 이번 포스팅은 QueryBuilder 패턴의 사용법 및 문법 적 개념 (내장 함수)등에 대해서 자세히 소개하는 글이 아니므로 해당 내용은 TypeORM 공식문서의 다양한 예제를 통해 참조 바란다.
QueryBuilder로 작성해 본 유저 데이터 페이지네이션
(로직에 필요한 엔티티, 레포지터리, DTO 객체 및 라우트 컨트롤러 등은 위에 링크로 담은 이전 포스팅 참고)
✔ Find Operator
async paginateWithFindOperator(pageOptionsDto: PageOptionsDto): Promise<PageDto<User>> {

    const [users, total] = await this.userRepository.findAndCount({
      take: pageOptionsDto.take,
      skip: pageOptionsDto.skip,
    });

    const pageMetaDto = new PageMetaDto({pageOptionsDto, total});
    const last_page = pageMetaDto.last_page;

    if (last_page >= pageMetaDto.page) {
      return new PageDto(users, pageMetaDto);
    } else {
      throw new NotFoundException('해당 페이지는 존재하지 않습니다');
    }
  }
✔ QueryBuilder
async paginateWithQueryBuilder(pageOptionsDto: PageOptionsDto): Promise<PageDto<User>> {

    const queryBuilder = this.userRepository.createQueryBuilder("users");

    queryBuilder
      .skip(pageOptionsDto.skip)
      .take(pageOptionsDto.take)

    const total = await queryBuilder.getCount();
    const { entities } = await queryBuilder.getRawAndEntities();

    const pageMetaDto = new PageMetaDto({ pageOptionsDto, total });
    const last_page = pageMetaDto.last_page;

    if (last_page >= pageMetaDto.page) {
      return new PageDto(entities, pageMetaDto);
    } else {
      throw new NotFoundException('해당 페이지는 존재하지 않습니다');
    }
  }
우린 TypeORM이 제공하는 두 기능인 "Find Operator"와 "QueryBuilder"를 통해 유저 데이터를 페이지네이션해보았다.
첫 번째 케이스는 이전 포스팅에 대해서 알아보았고, QueryBuilder 코드에 대해 간단히 알아보자.
find()와 count() 혹은 findAndCount()를 사용하여 전체 유저 데이터 및 총 데이터 수를 알아냈던것과 달리, 레포지터리에서 createQueryBuilder()를 호출한 뒤 바로 skip과 take 내장함수를 실행시킨 것을 확인할 수 있다. 또한 불러오고자하는 값 또한 "Find-Operator"의 option(skip or take)을 통해서 받아오는 것이 아닌 아래와 같이 생성한 queryBuilder 객체를 통해 조금은 직관적으로 받아온 것을 볼 수 있다.
const total = await queryBuilder.getCount();
const { entities } = await queryBuilder.getRawAndEntities();
사실 위의 예제는 그냥 이전 포스팅의 구문을 QueryBuilder로 어떻게 나타낼 수 있는 가를 알려준것에 불과하지 FindOperator와 QueryBuilder 방식 각각의 특징을 비교하기엔 턱없이 부족하다.
그래도 "TypeORM"을 공부하는 시각에서 저 단순한 예제에서도 미묘한(?) 차이를 느끼게 되었다.
그 느낌을 가지고 본격적으로 이번 포스팅을 진행해보고자 한다.
놀랍게도 여기까지가 서론이다....
typeorm-seeding 을 통한 더미데이터 생성
typeorm을 이용하여 pagination, sorting, searching 등의 기능을 구현해보는데 있어 직접 데이터를 생성하는 것은 비효율적이고 조금 더 눈에띄는 결과를 편하게 보기 위해 "더미 데이터(dummy data)"를 만들어보기로 하였다.
기존에는 nestjs-seeder를 활용하였다.
참고(npm. nestjs-seeder , velog. nestjs-seeder)
아래의 "typeorm-seeding"을 사용한 이유를 이해하는데 있어 지장이 없기 위해선 꼭 먼저 velog 포스팅을 읽고 오시는 것을 추천드립니다.
하지만 nestjs-seeder를 활용하는데 있어서 특정한 문제가 있었다. 해당 라이브러리로 테이블(Entity)에 더미 데이터를 insert시킬 때, 엔티티에서 @Factory() 데코레이터를 통해 (해당 데코레이터의 파라미터로 faker 콜백함수를 넣게 된다.) 구현하였다. 단일 테이블에 대해선 문제가 되지 않았지만, 두 테이블을 Foreign key를 통해 join 할 경우, 문제가 발생하였다. @ManyToOne, @OneToMany와 같은 연관관계를 가지는 컬럼에 대해 @Factory데코레이터를 적용시키게 되면 Foregin key 제약 조건에 있어서 에러를 띄우며 씹히게 되는 일이 일어났다.
nestjs-seeder 라이브러리를 사용하며 발생하게 된 위 이슈에 대해선 어떠한 해결책도 찾을 수 없었다. (물론 어딘가는 있을지도 모른다...)
typeorm은 orm의 하나이고, 어찌됬건 "Object"와 "RDBMS"를 매핑해주는 것이다. 즉, Foreign-key와 같은 특정한 제약에 있어, 엄격할 수 밖에 없다.
nestjs-seeder 라이브러리의 공식 문서에선 관계형 DB가 아닌, "mongoose"를 활용하여 소개해주고 있다. 이를 봐서, 뭔가 nest와는 별개로 "orm"에는 그다지 유용할 수 없는 라이브러리라고 판단하게 되었다.
그렇게 "typeorm-seeding"을 활용하여 더미데이터를 생성하게 되었다. 해당 내용은 공식 깃헙에 자세히 설명되어있다. 간단히 코드를 통해서만 보여주도록 하겠다.
seeder 빌드하기
✔ Product Entity 생성
// src/product/model/product.entity.ts

import { Column, Entity, ManyToOne, PrimaryGeneratedColumn } from "typeorm";

@Entity('products')
export class Product {

  @PrimaryGeneratedColumn()
  id: number;

  @Column()
  title: string;

  @Column()
  description: string;

  @Column()
  image: string;

  @Column()
  price: number;

}
✔ Product Repository 생성 ( 생략 )
✔ Factory 생성
// src/product/factories/product.factory.ts

import { faker } from "@faker-js/faker";
import { define } from "typeorm-seeding";
import { Product } from "../model/product.entity";

define(Product, () => {
  const product = new Product();
  product.title = faker.lorem.words(2);
  product.description = faker.lorem.words(10);
  product.image = faker.image.imageUrl();
  product.price = Math.floor(Math.random() * 100) + 10;
  return product;
})
==> `nestjs-seeder`와는 다르게 "define" 함수를 통하여 `faker` 구현체를 정의해줄 수 있다. ✔ seeder 생성
// src/product/seeds/product.seeder.ts

import { Connection } from "typeorm";
import { Factory, Seeder } from "typeorm-seeding";
import { Product } from "../model/product.entity";

export default class ProductsSeeder implements Seeder {
  public async run(factory: Factory, connection: Connection): Promise<void> {
      // 100개의 `raw` 생성
      await factory(Product)().createMany(100);
  }
}
✔ ormconfig 생성
db와 connection 하게끔 설정하는 부분이다. 해당 부분에서 entities 및 migration 또는 factories와 seeds를 설정해주는데 있어, 꼭 "상대경로"로 작성해주도록 한다.
// ormconfig.ts

export default {
  type: 'mysql',
  host: 'localhost',
  port: 3306,
  username: 'root',
  password: 'Janelevy0318@',
  database: 'admin',
  logging: true,
  autoLoadEntities: true,
  synchronize: true,
  entities: ["src/**/*.entity{.ts,.js}"],
  seeds: ["src/**/seeds/*{.ts,.js}"],
  factories: ["src/**/factories/*{.ts,.js}"],
}
경로는 본인의 디렉토리 설정에 따라 유동적으로 조절하면 된다.
seeder 실행하기
✔ scripts 설정
{
	"scripts": {
    	"seed": "ts-node -r tsconfig-paths/register ./node_modules/typeorm-seeding/dist/cli.js seed"
    }
}
✔ 실행하기
npm run seed

에러가 뜨지 않고 config 파일 로드 및, Factories와 Seeder 임포트, 그리고 결과적 실행이 완료되었다는 문구가 뜨면 우린 시더를 구현하게 된 것이다.
생성된 더미 데이터 확인해보기
postman에서 요청을 날려 확인해볼 수 있지만 편하게 mysql의 product 테이블에서 확인해보도록 하자.
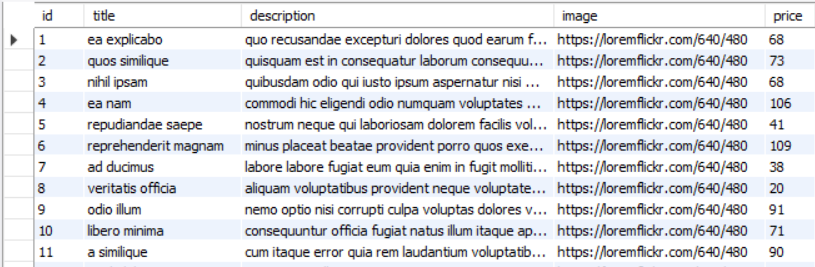
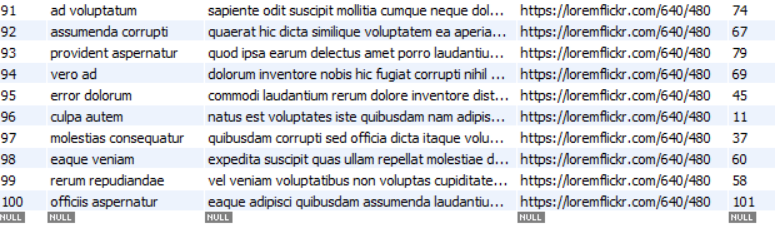
보다 시피, 가짜 데이터들이 (100개의 raw) 잘 주입된 것을 확인할 수 있다.
이제 시더를 통한 모든 준비는 끝이났고 본격적으로 아래에서 "Typeorm - QueryBuilder"를 이용해 특정 기능을 구현해보도록 하자.
( 해당 seeder에 관한 내용은 첨가 정도입니다. 이번 시리즈 포스팅의 핵심은 "Typeorm"의 QueryBuilder 방식과 FindOperator 방식의 비교입니다. 잊지 마세요. )
Searching | Pagination | Sorting with TypeORM QueryBuilder
첫 번째 접근) req.query를 통한 접근
✔ ProductService
@Injectable()
export class ProductService {
  constructor(private readonly productRepository: ProductRepository) {}

  async queryBuilder(alias: string) {
    return this.productRepository.createQueryBuilder(alias);
  }
}
레포지를 통해 typeorm의 createQueryBuilder 메서드를 호출 후 리턴한다. createQueryBuilder()의 인자로 받음과 동시에 컨트롤러로 넘겨주게 될 alias는 옵셔널 한 값이다. (일단 무시)
✔ ProductController
구현하고자하는 로직을 작성할 부분이다. 우리는 Get 요청 라우트 핸들러 파라미터로 Express의 Request객체를 받을 것이다. 그 후 해당 객체에 query를 호출하는 방식으로 사용하고자 한다.
일단 먼저, 전체 더미 데이터가 잘 응답하는지 확인해 볼 필요가 있다.
  @Get('backend')
  async backend(@Req() req: Request) {
    const builder = await this.productService.queryBuilder('products');

    return builder.getMany();
  }
포스트맨에서 아래와 같이 GET 요청을 날린다.
http://localhost:5000/api/products/backend그 후 응답을 확인해보면, find로써 조회를 하였을 경우와 동일한 것을 알 수 있다.
{
        "id": 1,
        "title": "ea explicabo",
        "description": "quo recusandae excepturi dolores quod earum facilis minus quaerat at",
        "image": "https://loremflickr.com/640/480",
        "price": 68
    },
    {
        "id": 2,
        "title": "quos similique",
        "description": "quisquam est in consequatur laborum consequuntur numquam doloribus occaecati dolore",
        "image": "https://loremflickr.com/640/480",
        "price": 73
    },
    {
        "id": 3,
        "title": "nihil ipsam",
        "description": "quibusdam odio qui iusto ipsum aspernatur nisi magnam voluptatum voluptatibus",
        "image": "https://loremflickr.com/640/480",
        "price": 68
    },

    // ........

    {
        "id": 99,
        "title": "rerum repudiandae",
        "description": "vel veniam voluptatibus non voluptas cupiditate modi quia labore ipsam",
        "image": "https://loremflickr.com/640/480",
        "price": 58
    },
    {
        "id": 100,
        "title": "officiis aspernatur",
        "description": "eaque adipisci quibusdam assumenda laudantium odio officia sit pariatur omnis",
        "image": "https://loremflickr.com/640/480",
        "price": 101
    }
]
자 이제 가공을 시작해보자.
req.query로써 쿼리문을 날리기 위해선 Express의 Request를 요청 파라미터로 받아올 필요가 있다. 그렇기 때문에 컨트롤러 라우터 내에서 작업해주어야 한다.
✔ Searching
클라이언트에서 요청에 따른 데이터 검색기능을 구현해보고자 한다. Request 의 query의 구현체를 잠시 살펴보면 Express.Request를 상속받음과 동시에 ReqQuery를 타입으로 가진다. 또한 ReqQuery는 ParsedQs 인터페이스를 구현체로 가지게 되는데 아래와 같다.
interface ParsedQs { [key: string]: undefined | string | string[] | ParsedQs | ParsedQs[] }즉, 우린 이를 통해 req.query.sth과 같이 요청 쿼리문의 key값을 정의해 줄 수있다. 아래 코드를 통해 알아보자.
// product.controller.ts

import { Controller, Get, Req } from '@nestjs/common';
import { ProductService } from './product.service';
import { Request } from 'express';

@Controller('products')
export class ProductController {

  constructor(private productService: ProductService) {}

  @Get('backend')
  async backend(@Req() req: Request) {
    const builder = await this.productService.queryBuilder('products');

    if (req.query.s) {
      builder.where("products.title LIKE :s OR products.description LIKE :s", {s: `%${req.query.s}%`});
    }

    return await builder.getMany();
  }
}
우린 조건문을 이용해서 먼저 요청 쿼리의 key 가 존재하는지 확인한다.
그 후, createQueryBuilder()를 통해 생성한 builder 객체에서 where문을 통해 검색기능을 구현하도록 접근한다.
builder.where("products.title LIKE :s OR products.description LIKE :s", {s: `%${req.query.s}%`});위 where 문을 간단히 알아보면 첫 번째 파라미터로 쿼리문이 전달된다. 이때 특정 문자열은 클라이언트의 요청에 의해서 결정되므로 우리가 정한 미지의 문자열 s로 받아준다. 그 후, 두번째 파라미터에서 해당 s에 대한 정의를 해준다.
쿼리문을 잠시 살펴보면 Raw Query 문과 거의 흡사한 것을 알 수 있다.
물론, OR문이 많아질수록 REGEXP로써 복잡한 패턴 검색을 용이하게 작성할 수 있지만 일반적으론 LIKE를 사용하게 된다.
SELECT * FROM admin.products
WHERE title LIKE '%duci%' OR description LIKE '%duci%'; queryBuilder를 통해 생성한 products alias를 통해 객체에 접근했다는 것을 제외하곤 Raw Query문과 흡사한것을 확인할 수 있다.
✔ Sorting
// product.controller.ts

import { Controller, Get, Req } from '@nestjs/common';
import { ProductService } from './product.service';
import { Request } from 'express';

@Controller('products')
export class ProductController {

  constructor(private productService: ProductService) {}

  @Get('backend')
  async backend(@Req() req: Request) {
    const builder = await this.productService.queryBuilder('products');

    if (req.query.s) {
      builder.where("products.title LIKE :s OR products.description LIKE :s", {s: `%${req.query.s}%`});
    }

    const sort: any = req.query.sort;

    if (sort) {
      builder.orderBy('products.price', sort.toUpperCase());
    }

    return await builder.getMany();
  }
}
이 부분은 딱히 볼 것은 없다. 우린 sort라는 문자열을 쿼리문의 key로써 받아줄 것이고, "ASC" | "DESC" 의 대문자만 허용되는 정렬 문자열을 조금 더 요청 시 유연하게 받아주기위해 toUppderCase()로써 받아주기로 한다.
ORDER BY price ASC(or DESC);이 구문역시 SQL문과 거의 흡사하게 작성을 할 수 있다.
✔ Pagination
페이지네이션은 해당 포스팅의 가장 처음 부분과 이전 포스팅에서 중점적으로 정의하였으므로 빠르게 넘어가보도록 하겠다. 단지, req.query.page를 통해 접근한 것만 알아두면 좋겠다.
// product.controller.ts

import { Controller, Get, Req } from '@nestjs/common';
import { ProductService } from './product.service';
import { Request } from 'express';

@Controller('products')
export class ProductController {

  constructor(private productService: ProductService) {}

  @Get('backend')
  async backend(@Req() req: Request) {
    const builder = await this.productService.queryBuilder('products');

    if (req.query.s) {
      builder.where("products.title LIKE :s OR products.description LIKE :s", {s: `%${req.query.s}%`});
    }

    const sort: any = req.query.sort;

    if (sort) {
      builder.orderBy('products.price', sort.toUpperCase());
    }

    const page: number = (req.query.page as any) > 0 ? parseInt(req.query.page as any) : 1;
    const take = 9;
    const total = await builder.getCount();

    builder.offset((page - 1) * take).limit(take);

    return {
      data: await builder.getMany(),
      total,
      page,
      last_page: Math.ceil(total / take),
    };
  }
}
한 가지 이전과 다른 점은 offset과 limit을 불러오는 부분이다.
우리는 앞서 offset은 skip, limit은 take를 이용하였다.
(사실 이 두 접근의 차이에 대해 알아보기 위해 일부러 offset과 limit 메서드를 사용하였다.)
builder.skip((page - 1) * take).take(take);즉, 위와 같이 offset -> skip, limit -> take로 변환하여도 구현하는데 있어 동일하게 적용된다.
그렇담 아무렇게나 막 써도 상관이 없을까?
"TypeORM"은 여기에 대해서 특정한 관점에서의 의견을 제시한다. 이것에 대해선 따로 다루기는 내용이 장황해지므로 따로 글로써 정리하고자 한다. (추후 링크를 달아두겠습니다.)
두 번째 접근) @Query를 이용하여 수정해보자.
query를 사용할 것이라면 req.query로 나타내는 것 보단, nest의 @Query() 데코레이터를 사용하는 것이 조금 더 직관적이고 코드분리에 있어서 좋지 않을까 생각이 든다.
✔ service 수정
// product.service.ts

@Injectable()
export class ProductService {
  constructor(private readonly productRepository: ProductRepository) {}

  async byQueryDecorator(page: number = 1, s: string, sort: string): Promise<any> {
    const queryBuilder = this.productRepository.createQueryBuilder("product");

    if (s) {
      queryBuilder.where("product.title LIKE :s OR product.description LIKE :s", {s: `%${s}%`})
    }

    if (sort) {
      queryBuilder.orderBy('product.price', sort.toUpperCase() as any)
    }

    const take = 9;
    const pageIndex: number = page as any > 0 ? parseInt(page as any) : 1;
    const total = await queryBuilder.getCount();

    queryBuilder
      .skip((pageIndex - 1) * take)
      .take(take)

    return {
      data: await queryBuilder.getMany(),
      total,
      pageIndex,
      last_page: Math.ceil(total / take),
    }
  }
}
✔ controller 수정
  // product.controller.ts

  @Get('byquery')
  async backendByQueryDecorator(
    @Query('page') page: number = 1,
    @Query('s') s: string,
    @Query('sort') sort: string
  ): Promise<any> {
    return await this.productService.byQueryDecorator(page, s, sort);
}pagination, sorting, searching 등을 시행하는 로직을 전부 서비스단으로 옮겼고, 컨트롤러에선 요청 쿼리를 받아오고, 서비스단에서 정의한 함수를 실행하는 간단한 코드만 작성할 수 있게 되었다. 물론, 사실 위와 같이 서비스 단에서 skip, take 와 같은 쉽게 수정하면 안되는 변수와 리턴값인 data및 metadata 들은 직접적으로 불러와주면 객체지향의 의존성에 위배되며, 좋지 못한 코드가 된다.
그에 따라, 우리는 해당 부분들을 따로 DTO 객체로써 분리해서 정의해 줄 수 있다. (관심사 분리를 통한 리팩토링 구현)
해당 리펙토링 및 모델 생성은 이번 포스팅에선 따로 다루지 않겠다. 코드를 작성하는 법을 알고 싶다면 이전 포스팅의 "리펙토링" 부분을 확인하면 되겠다.
✔ 요청을 통해 응답 검증 -- postman
http://localhost:5000/api/products/byquery?page=1&s=quo&sort=asc{
"data": [
{
"id": 53,
"title": "voluptate doloremque",
"description": "nobis ducimus est iure quos voluptatibus ducimus exercitationem doloribus voluptatem",
"image": "https://loremflickr.com/640/480",
"price": 11
},
{
"id": 64,
"title": "aspernatur quo",
"description": "quo optio nihil nam ab ut explicabo eius nulla dicta",
"image": "https://loremflickr.com/640/480",
"price": 22
},
{
"id": 19,
"title": "excepturi doloribus",
"description": "corporis esse quo exercitationem ab molestiae eum consequuntur vitae rerum",
"image": "https://loremflickr.com/640/480",
"price": 33
},
{
"id": 31,
"title": "minus nulla",
"description": "vitae illo dolor nihil id quod ab aperiam vel dolores",
"image": "https://loremflickr.com/640/480",
"price": 43
},
{
"id": 83,
"title": "natus enim",
"description": "similique eum sapiente ipsum dolor temporibus impedit doloremque quo sapiente",
"image": "https://loremflickr.com/640/480",
"price": 54
},
{
"id": 22,
"title": "deserunt culpa",
"description": "modi eos laborum ipsum ad adipisci quos vel fugiat quod",
"image": "https://loremflickr.com/640/480",
"price": 61
},
{
"id": 39,
"title": "recusandae temporibus",
"description": "magnam nostrum non ex quo labore minima deleniti quam facilis",
"image": "https://loremflickr.com/640/480",
"price": 61
},
{
"id": 1,
"title": "ea explicabo",
"description": "quo recusandae excepturi dolores quod earum facilis minus quaerat at",
"image": "https://loremflickr.com/640/480",
"price": 68
},
{
"id": 2,
"title": "quos similique",
"description": "quisquam est in consequatur laborum consequuntur numquam doloribus occaecati dolore",
"image": "https://loremflickr.com/640/480",
"price": 73
}
],
"total": 17,
"pageIndex": 1,
"last_page": 2
}세 번째 접근 ) Find-Operator를 이용하여 수정해보자
QueryBuilder 패턴을 통해 데이터 조회에 접근한 이전의 방법과 달리 이번엔 Find 함수를 통해 동일한 내용을 구현해보고자 한다.
먼저 구현체를 확인해보자. 관심사 분리를 통한 리펙토링 작업은 편의상 하지 않았다.
// product.service.ts

async byFindOperator(page: number, s: string, sort: string): Promise<any> {

    const take = 9;

    const [products, total] = await this.productRepository.findAndCount({
      take,
      skip: page ? page <= 0 ? page = 0 : (page - 1) * take : page = 0,
      where: s ? [
        {title: Like(`%${s}%`)},
        {description: Like(`%${s}%`)}
      ]: {}, // or null
      order: sort ? {
        price: `${sort.toUpperCase()}` as any
      }: {} // or null
    });

    return {
      data: products,
      meta: {
        total,
        page: page <= 0 ? page = 1 : page,
        last_page: Math.ceil(total / take)
      }
    }
  }
"typeORM"에서 제공하는 findAndCount()란 "메서드"를 이용하였다.
사실 앞서도 언급했듯이 위와 같은 경우는 단일 테이블에서만 적용되고 있으므로 크게 차이를 못 느끼는 것이 당연하다.
하지만, 언듯봐도 QueryBuilder 패턴을 이용하였을 경우가 아무래도 실제 쿼리와 거의 흡사하다보니 조금 더 직관적이고 세밀하게 조회문을 작성할 수 있는 것으로 보여진다.
그에 비해 find 함수를 사용하게 되면 직접 쿼리문을 파라미터로 넣는 것이 아닌 "Object"스럽게 접근하게 된다.
물론, 복잡성및 의존성이 커질수록 위와 같이 find 함수를 통한 접근은 어려워질 수도 있다. QueryBuilder 패턴 또한 TypeORM은 맞지만, 진정한 TypeORM이 추구하는 방향, 혹은 나온 배경을 생각해보면 Find-Operator를 통한 접근이 더 부합하지 않나 생각한다. (물론 저의 생각입니다.)
객체 언어만을 사용함으로 조금 더 전체적 코드들이 객체 지향스럽고, 일관성 있고(쿼리문 한정으론 물론 QueryBuilder or Raw Query가 더 일관성이 있다.) 가독성이 높아지게 된다.
사실, "searching"을 하는데 있어 LIKE 를 통한 where 절이 아닌, 오로지 javascript의 문법 만으로 구현할 수도 있다.
if (s) {
	products = products.filter((product) => {
        return product.title.includes(s) ||
              product.description.includes(s);
    })
}products는 테이블의 조회된 데이터 (모든 row)들에 대한 배열일 것이고, 해당 array로써 filter 메서드를 통해 접근한 코드이다.
하지만 위와 같이 작성할 땐, 더군다나 코드의 복잡성이 증가할 수록, 주의점이 어느 정도 필요하다. 또한, 모든 쿼리문을 쉽게 자바스크립트의 객체 문법으로써 대체할 수 있지는 않다고 생각한다. 즉, 그로 인해서 코드 진행에 있어 참조하고 있는 객체의 충돌 혹은 가독성의 이슈로 코드의 일관성을 깨뜨릴 수도 있다고 본다.
최종 리펙토링 코드
서비스 단에 중요로직을 위와 같이 전부 때려박는 것은 좋지 못하다. 그만큼 부담이 될 것이고, 재사용성에 있어 좋지 못하다.
관심사 분리를 통해 리펙토링을 진행하였고, 코드에 대한 설명은 따로 언급하지 않겠다. 코드에 대한 설명은 이전 포스팅을 참조 바란다. ⬇⬇
[링크참조]: Pagination -- Refectoring 구현하기 __velog
✔ PageDto
import { IsArray } from "class-validator";
import { PageMetaDto } from "./page-meta.dto";

export class PageDto<T> {

  @IsArray()
  readonly data: T[];

  readonly meta: PageMetaDto;

  constructor(data: T[], meta: PageMetaDto) {
    this.data = data;
    this.meta = meta;
  }
}
✔ PageMetaDto
import { PageMetaDtoParameters } from "./meta-dto-parameter.interface";

export class PageMetaDto {
  readonly total: number;
  readonly page: number;
  readonly take: number;
  readonly last_page: number;
  readonly hasPreviousPage: boolean;
  readonly hasNextPage: boolean;

  constructor({pageOptionsDto, total}: PageMetaDtoParameters) {
    this.page = pageOptionsDto.page <= 0 ? this.page = 1 : pageOptionsDto.page;
    this.take = pageOptionsDto.take;
    this.total = total;
    this.last_page = Math.ceil(this.total / this.take);
    this.hasPreviousPage = this.page > 1;
    this.hasNextPage = this.page < this.last_page;
  }
}
✔ PageOptionsDto
import { Type } from "class-transformer";
import { IsEnum, IsInt, IsOptional } from "class-validator";
import { Order } from "./page-order.enum";

export class PageOptionsDto {

  @Type(() => String)
  @IsEnum(Order)
  @IsOptional()
  readonly sort?: Order;

  @Type(() => String)
  @IsOptional()
  readonly s?: string = '';

  @Type(() => Number)
  @IsInt()
  @IsOptional()
  page?: number = 1;

  @Type(() => Number)
  @IsInt()
  @IsOptional()
  readonly take?: number = 9;

  get skip(): number {
    return this.page <=0 ? this.page = 0 : (this.page - 1) * this.take;
  }
}
✔ PageMetaDtoParameters
import { PageOptionsDto } from "./page-options.dto";

export interface PageMetaDtoParameters {
  pageOptionsDto: PageOptionsDto;
  total: number;
}
✔ Order
export enum Order {
  ASC = "asc",
  DESC = "desc"
}
✔ PageService
async byRefactoring(pageOptionsDto: PageOptionsDto): Promise<PageDto<Product>> {

    const [products, total] = await this.productRepository.findAndCount({
      take: pageOptionsDto.take,
      skip: pageOptionsDto.skip,
      where: [
        {title: Like(`%${pageOptionsDto.s}%`)},
        {description: Like(`%${pageOptionsDto.s}%`)}
      ],
      order: {
        price: pageOptionsDto.sort.toUpperCase() as any,
      },
    });

    const pageMetaDto = new PageMetaDto({pageOptionsDto, total});
    const last_page = pageMetaDto.last_page;

    if (last_page >= pageMetaDto.page) {
      return new PageDto(products, pageMetaDto);
    } else {
      throw new NotFoundException('해당 페이지는 존재하지 않습니다');
    }
  }
✔ PageController
@Get('byRefactoring')
async backendByRefactoring(
  @Query() pageOptionsDto: PageOptionsDto
): Promise<PageDto<Product>> {
  return await this.productService.byRefactoring(pageOptionsDto);
}
생각정리
이번 포스팅에선 지난 포스팅(링크 참조)의 연장선으로, nest에서 "TypeORM"으로 pagination, sorting, searching 과 같은 기능을 구현하는 법에 대해 알아보았다.
특히, searching을 구현하는데 있어 더 활용성 있는 데이터를 쉽게 얻기 위해 직접 테이블 내 데이터를 클라이언트에서 받아 insert하기 보단, "typeorm-seeding"과 "faker-js"를 통해 더미데이터를 구현하였다.
글의 중요한 핵심으론 (본인이 가장 중점을 두며 공부한 부분) searching, sorting과 같은 기능 구현도 있지만, "TypeORM"의 QueryBuilder 패턴과 FindOperator의 비교이다. (말 그대로 "비교"이다. 차이가 아닌 공통된 점을 중심으로 작성하는 방법이 어떻게 다른가에 대해 알아본 것이다.) 물론, 이번 글에서 진행한 코드의 경우엔 단일 테이블 내에서만 조회해본, 매우 단순한 쿼리문이기 때문에 조금 더 명확한 비교를 하기엔 부족하다.
다음 포스팅 에선 복수의 테이블간의 관계, 혹은 서브 쿼리문등으로 조금 더 복잡한 쿼리문을 가정해보고, 그 상황에서 QueryBuilder, FindOperator 이 두 패턴의 사용에 따른 효율성을 더 명확히 알아보고자 한다.