1. Accessing HTML using JS
The document object allows you to access the root node of the DOM tree.
Like accessing an element you can access the attributes of the different tags within HTML
a. Edit text
document.body.innerHTML = '내용 다 바꿈';Using
.innerHTMLyou can change all the text within a tag.
So how would you access specific elements?
You can use css selectors like tag, class, or id.
let blueElement = document.querySelector('.blue');
blueElement.style.backgroundColor = 'blue';
You can see that the
background-coloris.backgroundColor. This is because the hyphen annot be used within JavaScript when editing the style. When accessing the style property use camelCase.
function updateTitle() {
  let title = document.getElementById('h1-title');

  title.innerHTML = '바뀐 제목!!!';
}
b. Create elements
You can also create elements using the
.createElement(tagName)function. This function only creates the noew element so you have to append it somewhere. Use theappendChildfunction to add it in a element.
function addElement() {
  let listWrap = document.createElement('ul');
  let list = document.createElement('li');
  let listContent = document.createElement('span');

  listContent.innerHTML = "목록이다";
  list.appendChild(listContent);
  listWrap.appendChild(list);

  document.body.appendChild(listWrap);
}
c. Find HTML Elements using CSS selectors
using
querySelector()andquerySelectorAll()you can select HTML elements using CSS Selectors
let x = document.querySelectorAll("p.intro");querySelector() returns a single element while quertSelectorAll() returns an array of elements
2. Event
The web today includes a multitude of user interactions. Events allow for interactions to be placed on specific elements.
- Click Event
- Mouse Event
- Scroll Event
- Touch Event
- Resize Event
...
a. addEventListener()
The addEventListener funtion is used to attach an event ton a element.
element.addEventListener(event, function, useCapture);The first parameter refers to the type of event we want to listen for.
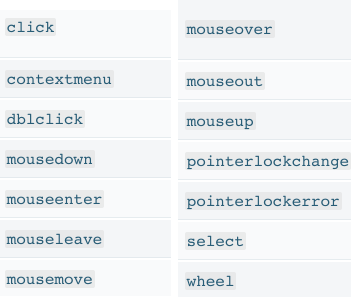
Frequently used Event types:
The second parameter refers to the function to call when the event occurs
The third parameter is boolean. Use it to choose between event bubbling or event capturing.
Mutiple Event Listeners can be added to a single element.
element.addEventListener("mouseover", myFunction);
element.addEventListener("click", mySecondFunction);
element.addEventListener("mouseout", myThirdFunction);
If you want to pass parameters into the function call a function from inside of the "anonymous function".
element.addEventListener("click", function(){ myFunction(p1, p2); });Event Bubbling / Event Capturing
Event Bubbling handles the child event fist then the parent event.
Event Capturing handles the parent event then the child event.
Default value is set as false, which refers to Event Bubbling.
b. removeEventListener()
Use to remove event handlers that have been attached
element.removeEventListener("mousemove", myFunction);Button example
This checks the value within the input boxes to see if they are filled and if they are equal to each other.
const thisIsButton = document.getElementsByClassName('login-btn')[0];

thisIsButton.addEventListener('click', function() {
  const password = document.getElementById('password').value;
  const rePassword = document.getElementById('re-password').value;

  if (!password) {
    alert('비밀번호를 입력해주세요!');
    return;
  }

  if (!rePassword) {
    alert('비밀번호 확인을 입력해주세요!');
    return;
  }

  if (password !== rePassword) {
    alert('비밀번호가 맞지 않습니다!');
    return;
  }

  alert('로그인 성공!!');
});
Key Event example
This takes in the key that is pressed and changes the innerHTML of the element with ID 'code' into the keycode of the key.
const thisIsPw = document.getElementById('password');
const thisIsCode = document.getElementById('code');

thisIsPw.addEventListener('keydown', function(event) {
  thisIsCode.innerHTML = event.keyCode;
});
Assignment
- input#re-password에 keyup 이벤트를 추가해주세요.
이벤트가 발생하면 실행될 함수에 아래의 기능을 만들어주세요.
- input#password 와 input#re-password의 value 속성을 통해 input에 작성된 값을 가져오고,
- 서로 같은지 아닌지 확인해서 같지 않다면
<p>태그의.alert클래스에 "비밀번호가 일치하지 않습니다" 라는 문구를 넣어주세요.- 서로 비밀번호가 같다면 "" 빈 문구를 넣어주시면 됩니다.
const repw = document.querySelector('input#re-password');
repw.addEventListener('keyup', function(e){
  const pw = document.querySelector("input#password").value;
  const rpw = document.querySelector("input#re-password").value;

  if(pw === rpw){
    document.querySelector('p.alert').innerHTML = "";
  }else{
    document.querySelector('p.alert').innerHTML = "비밀번호가 일치하지 않습니다";
  }

});
Flex-Box again!
Fully understand and memorize this page!!!
링크텍스트
