Spring Boot 프로젝트에 Swagger UI 적용, REST API 테스트 및 명세 만들기
⭐Spring Boot(Thymeleaf, JPA) 웹 쇼핑몰 만들기⭐
목록 보기
19/22

📖의존성 추가
SpringDoc OpenAPI Starter WebMVC UI 2.3.0
👉 최근 2024/3/12에 최신 버전 2.4.0이 업데이트 됐다. 그 전에 이미 2.3.0 버전을 적용해서 2.3.0 버전사용.
pom.xml
<dependency>
    <groupId>org.springdoc</groupId>
    <artifactId>springdoc-openapi-starter-webmvc-ui</artifactId>
    <version>2.3.0</version>
</dependency>
gradle
implementation 'org.springdoc:springdoc-openapi-starter-webmvc-ui:2.3.0'
📖.xml(application.properties) .yaml(application.yml)에 옵션 추가
📌.xml
# Springdoc-api
# 생성할 Springdoc's API docs 경로 커스텀
springdoc.api-docs.path=/custom-api-docs
# Enable or disable API doc groups
springdoc.api-docs.groups.enabled=true

# 생성할 Swagger UI page 경로 커스텀
springdoc.swagger-ui.path=/swagger-ui-custom.html
# Enable or disable the Swagger UI
springdoc.swagger-ui.enabled=true
# Order of API groups in the Swagger UI (ascending)
springdoc.swagger-ui.groups-order=ASC
# Sort APIs by tags alphabetically
springdoc.swagger-ui.tags-sorter=alpha
# Sort operations within each API alphabetically
springdoc.swagger-ui.operations-sorter=alpha
# Display request duration in the Swagger UI
springdoc.swagger-ui.display-request-duration=true
# Set the document expansion state in Swagger UI (none by default)
springdoc.swagger-ui.doc-expansion=none

# Disable caching for the Swagger UI
springdoc.cache.disabled=true
# Allow returning ModelAndView, useful in certain contexts
springdoc.model-and-view-allowed=true
📌.yml
springdoc:
  api-docs:
    path: /custom-api-docs
    groups:
      enabled: true
  swagger-ui:
    path: /swagger-ui-custom.html
    enabled: true
    groups-order: ASC
    tags-sorter: alpha
    operations-sorter: alpha
    display-request-duration: true
    doc-expansion: none
    cache:
      disabled: true
    model-and-view-allowed: true
사용준비 끝!
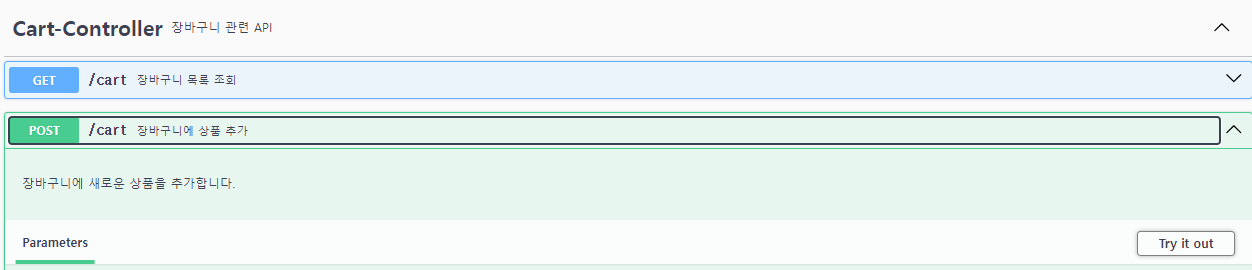
📖@Tag @Operation 어노테이션으로 컨트롤러 API 추가하기
위 과정을 잘 수행했으면 어노테이션을 사용할 수 있다. 가성비 좋은 2개만 사용해봄
📌@Tag
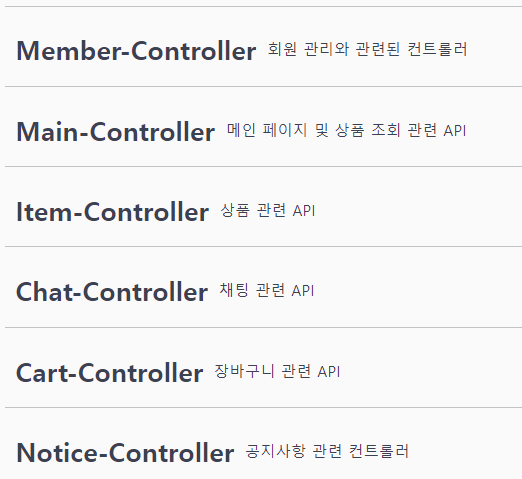
👉 컨트롤러 클래스에 name과 description을 사용하여 제목과 설명을 입력한다
👉 이런식으로 생성됨

📌@Operation
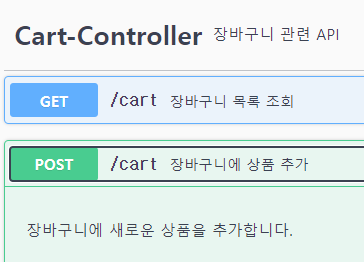
👉 API 매핑 메소드에 summary와 description을 사용하여 요약과 설명을 입력한다
👉 이런식으로 생성됨

📌html 페이지로 이동하기
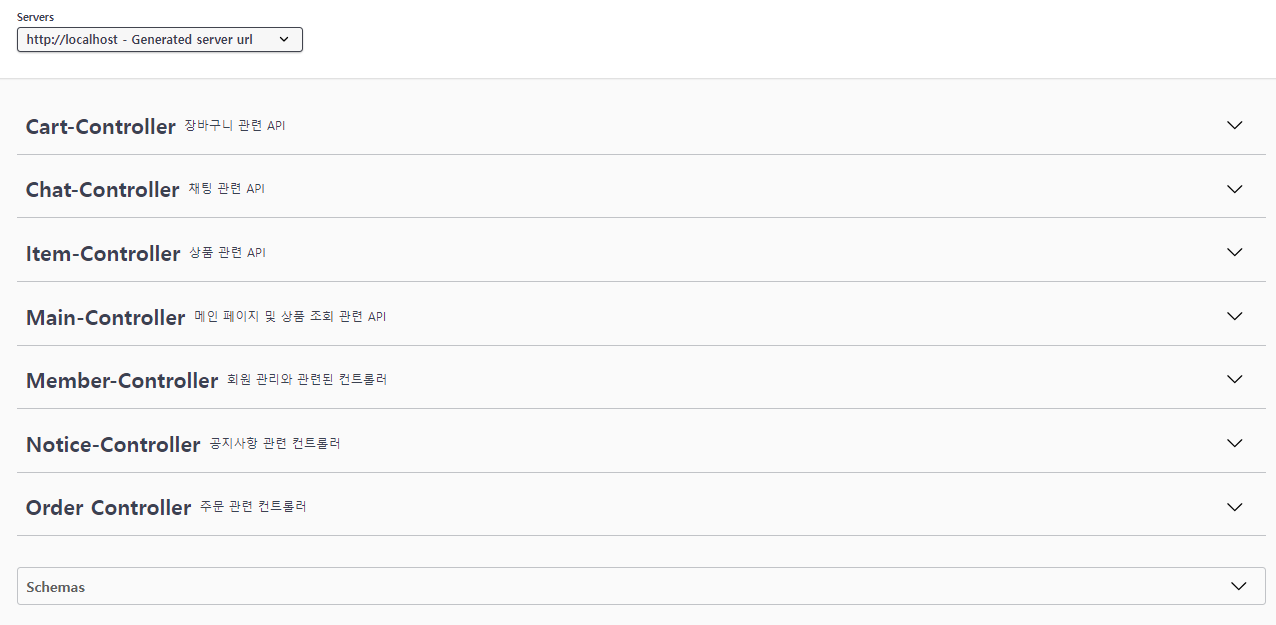
애플리케이션을 실행하고 본인 서버 URL에 커스텀해준 경로를 추가해준다
서버/swagger-ui-custom.htmlorhttp://서버/swagger-ui/index.html#/
👉 성공!
📌API 테스트 해보기

👉 클릭
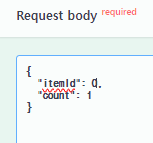
👉 입력
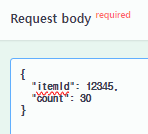

👉 실행
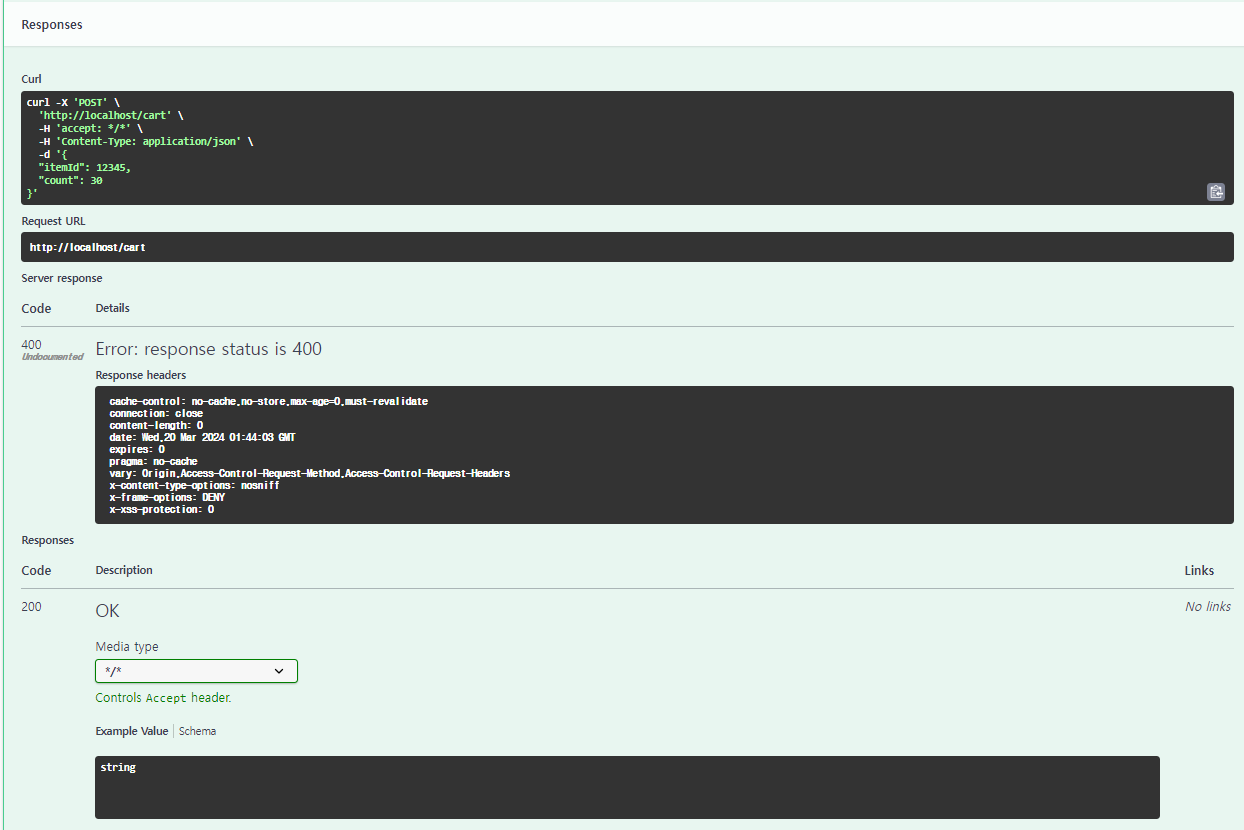
👉 요청이 실패했을 때, 성공했을 때의 결과값을 알려준다. 이런값들을 보며 API 명세를 작성할 수 있다.
❗테스트시 Failed to fetch 에러

👉 CORS 설정을 해줘야 한다.
📍WebMvcConfig.java 클래스
@Configuration
public class WebMvcConfig implements WebMvcConfigurer {

    ...

// 스웨거 테스트 요청 허용
    @Override
    public void addCorsMappings(CorsRegistry registry) {
        registry.addMapping("/**")
                .allowedOrigins("http://localhost") // 허락해줄 URL 입력
                .allowedMethods("GET", "POST", "PUT", "DELETE", "PATCH")
                .allowedHeaders("*")
                .allowCredentials(true);
    }

    ...

}
다음 포스팅에서는 Git Hub에 업로드하여 서버유무와 상관없이 다른사람들도 확인 할 수 있게끔 하겠습니다