스터디를 진행하면서 공부한 Spring Boot에 Swagger 적용하기에 대해 작성해보겠습니다.
Swagger는 RESTful API를 문서화하고 사용자가 테스트할 수 있게 도와주는 도구입니다.
코드에 작성한 어노테이션을 기반으로 API 명세서를 자동 생성해주기 때문에 API의 유지보수가 간단해지는 장점이 있습니다.
1. Swagger 접속 설정
실습에서 사용한 Spring Boot의 버전은 아래와 같습니다.
plugins {
	id 'java'
	id 'org.springframework.boot' version '3.3.10'
	id 'io.spring.dependency-management' version '1.1.7'
}
Springfox와 Springdoc이 있는데 Springfox는 업데이트를 해주지 않기 때문에 Spring Boot 특정 버전에서 제대로 동작하지 않는 문제가 있습니다. 그래서 최신 개발 환경에 적합한 Springdoc을 사용해줬습니다.
- build.gradle 파일에 아래의 의존성을 추가합니다
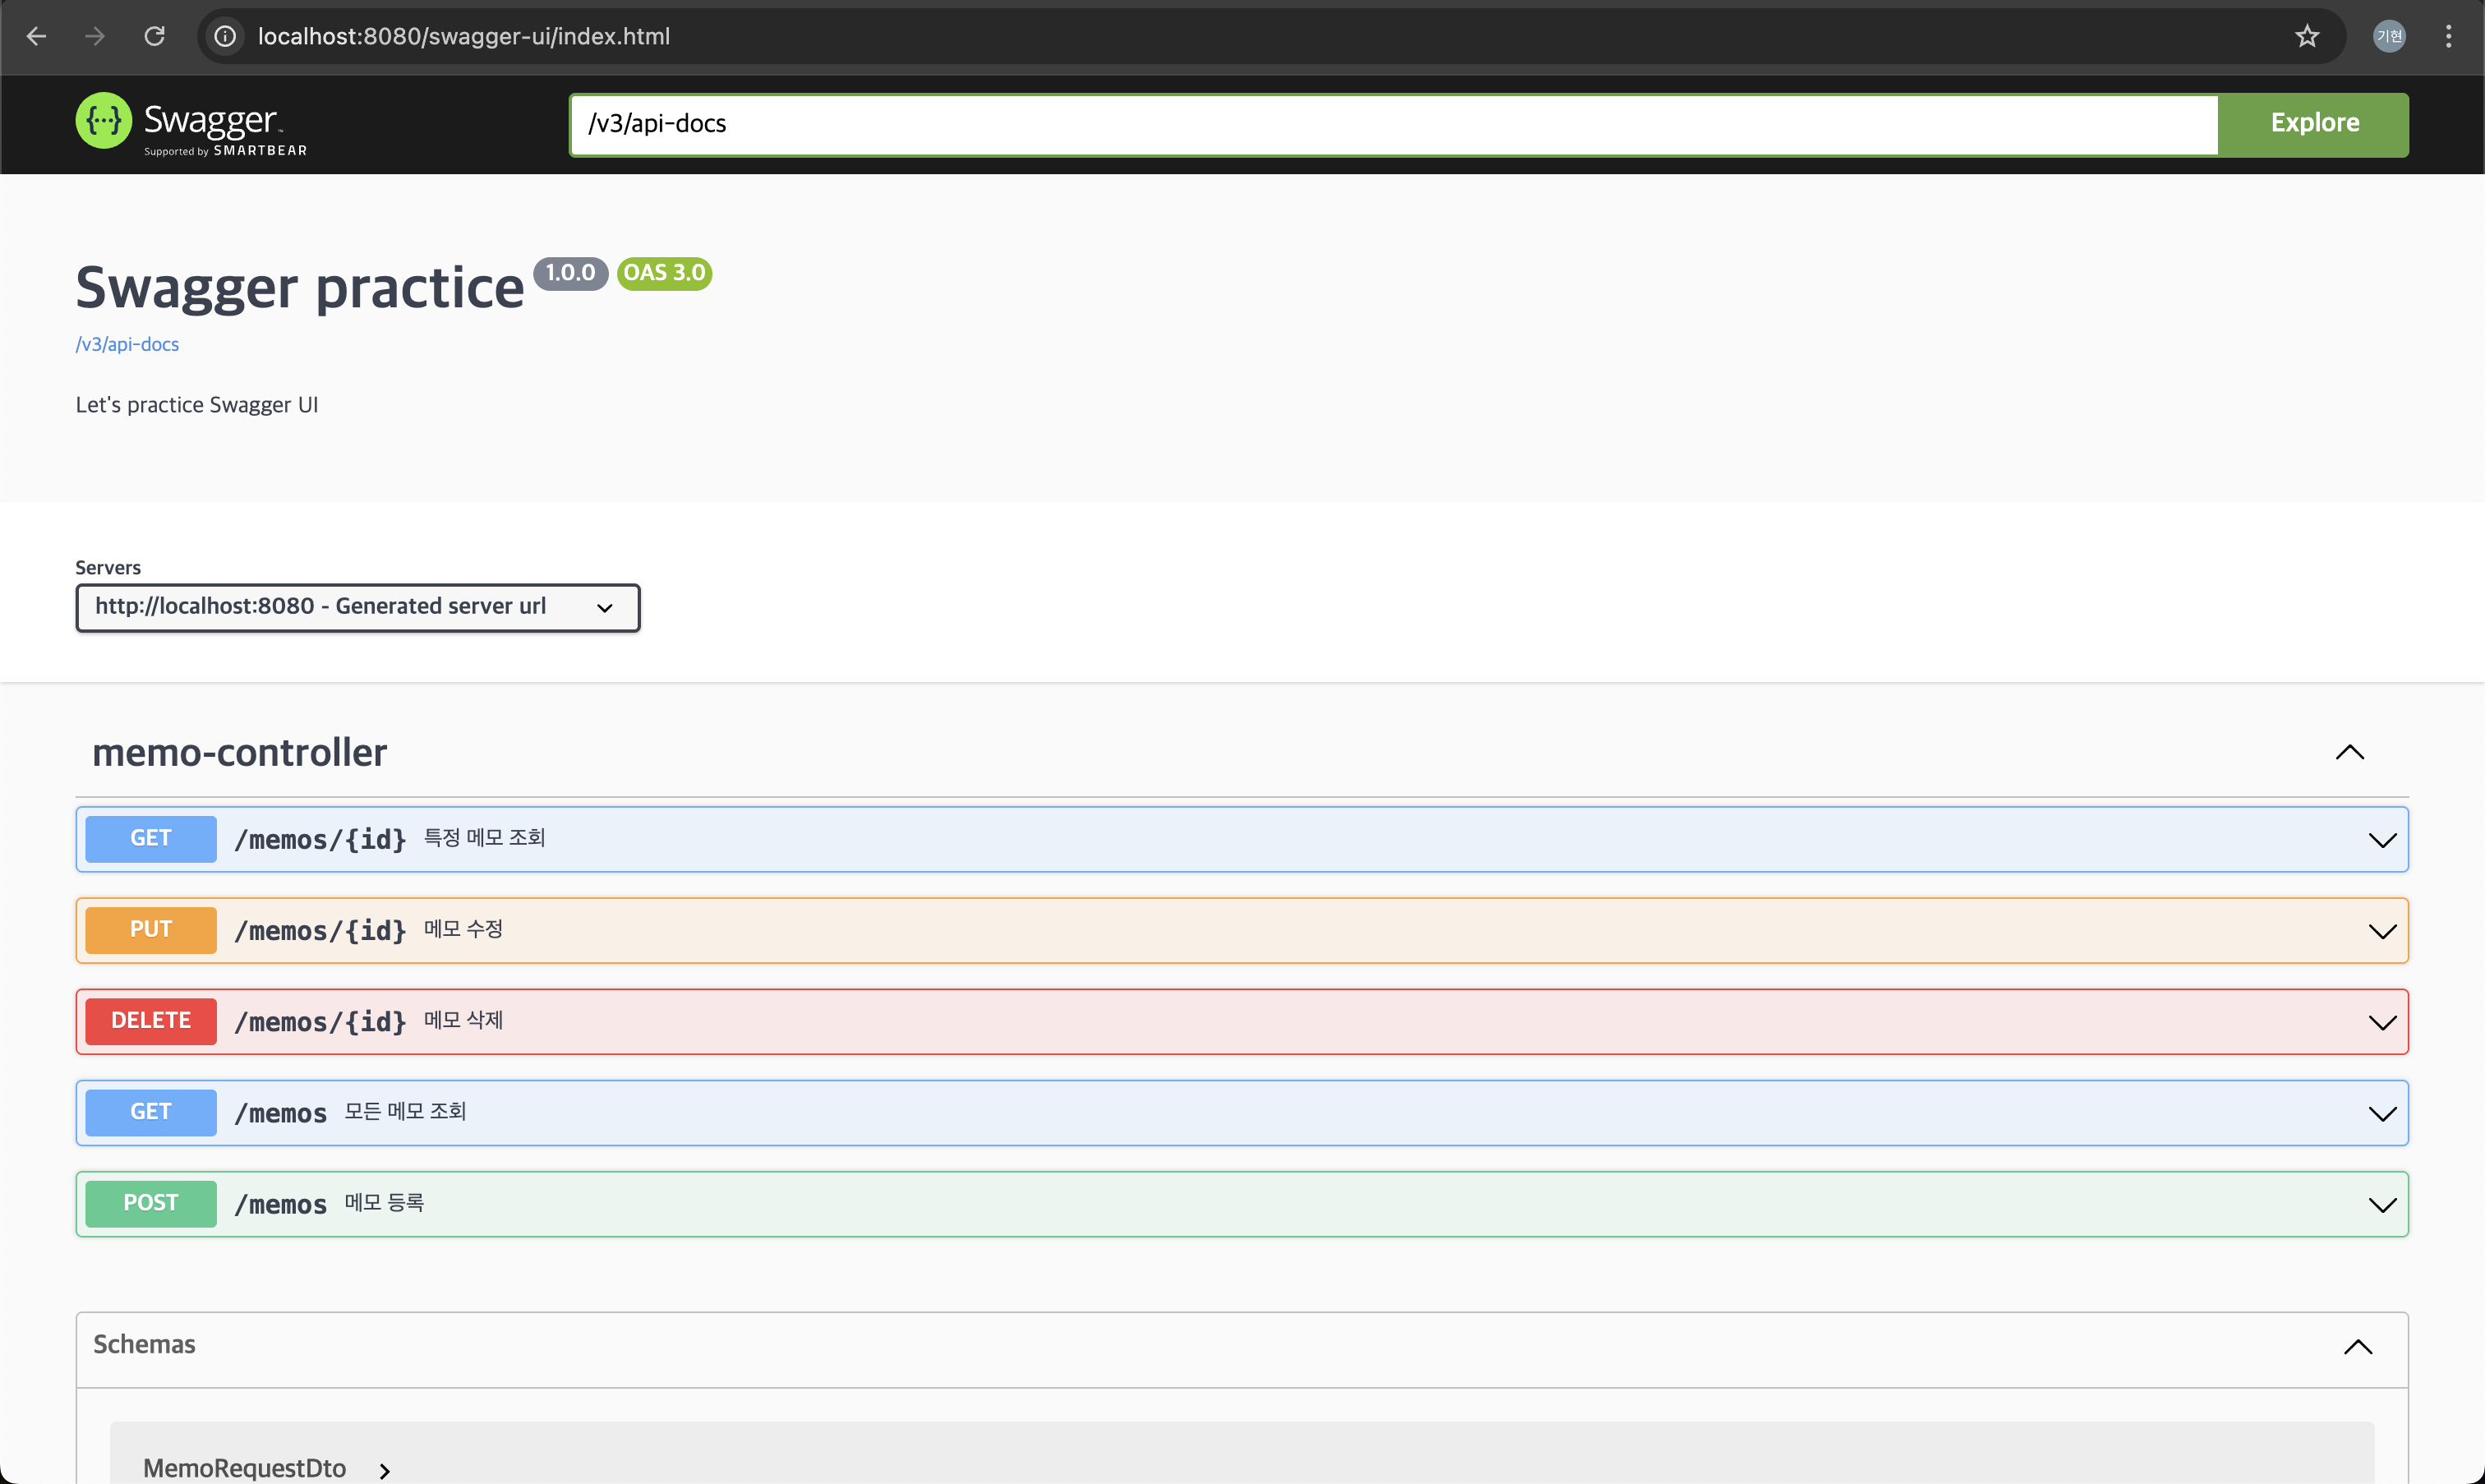
implementation 'org.springdoc:springdoc-openapi-starter-webmvc-ui:2.2.0' 2025년 4월 11일 기준으로 공식 문서에는 최신 버전이 2.8.6으로 나와있습니다. 저는 2.2.0을 적용했습니다. application을 실행시키고 http://localhost:8080/swagger-ui/index.html 에 접속하면 아래와 같은 화면이 나옵니다.(제가 어노테이션들을 적용시킨 후의 화면이라 기본 설정 화면과는 다릅니다.)
- 설정을 위해 SwaggerConfig 클래스를 생성하고 아래와 같은 형식으로 코드를 입력합니다.
@Configuration
public class SwaggerConfig {

    @Bean
    public OpenAPI openAPI() {
        return new OpenAPI()
                .components(new Components())
                .info(apiInfo());
    }

    private Info apiInfo() {
        return new Info()
                .title("Swagger practice") // API의 제목
                .description("Let's practice Swagger UI") // API에 대한 설명
                .version("1.0.0"); // API의 버전
    }
}
2. API 설정 어노테이션
- @Operation을 사용하면 각 API에 대한 설명을 적었습니다.
@GetMapping
@Operation(summary = "모든 메모 조회", description = "저장된 모든 메모를 조회하는 API")
public ResponseEntity<List<Memo>> getAllMemos() {
	return ResponseEntity.ok(memoService.getAllMemos());
}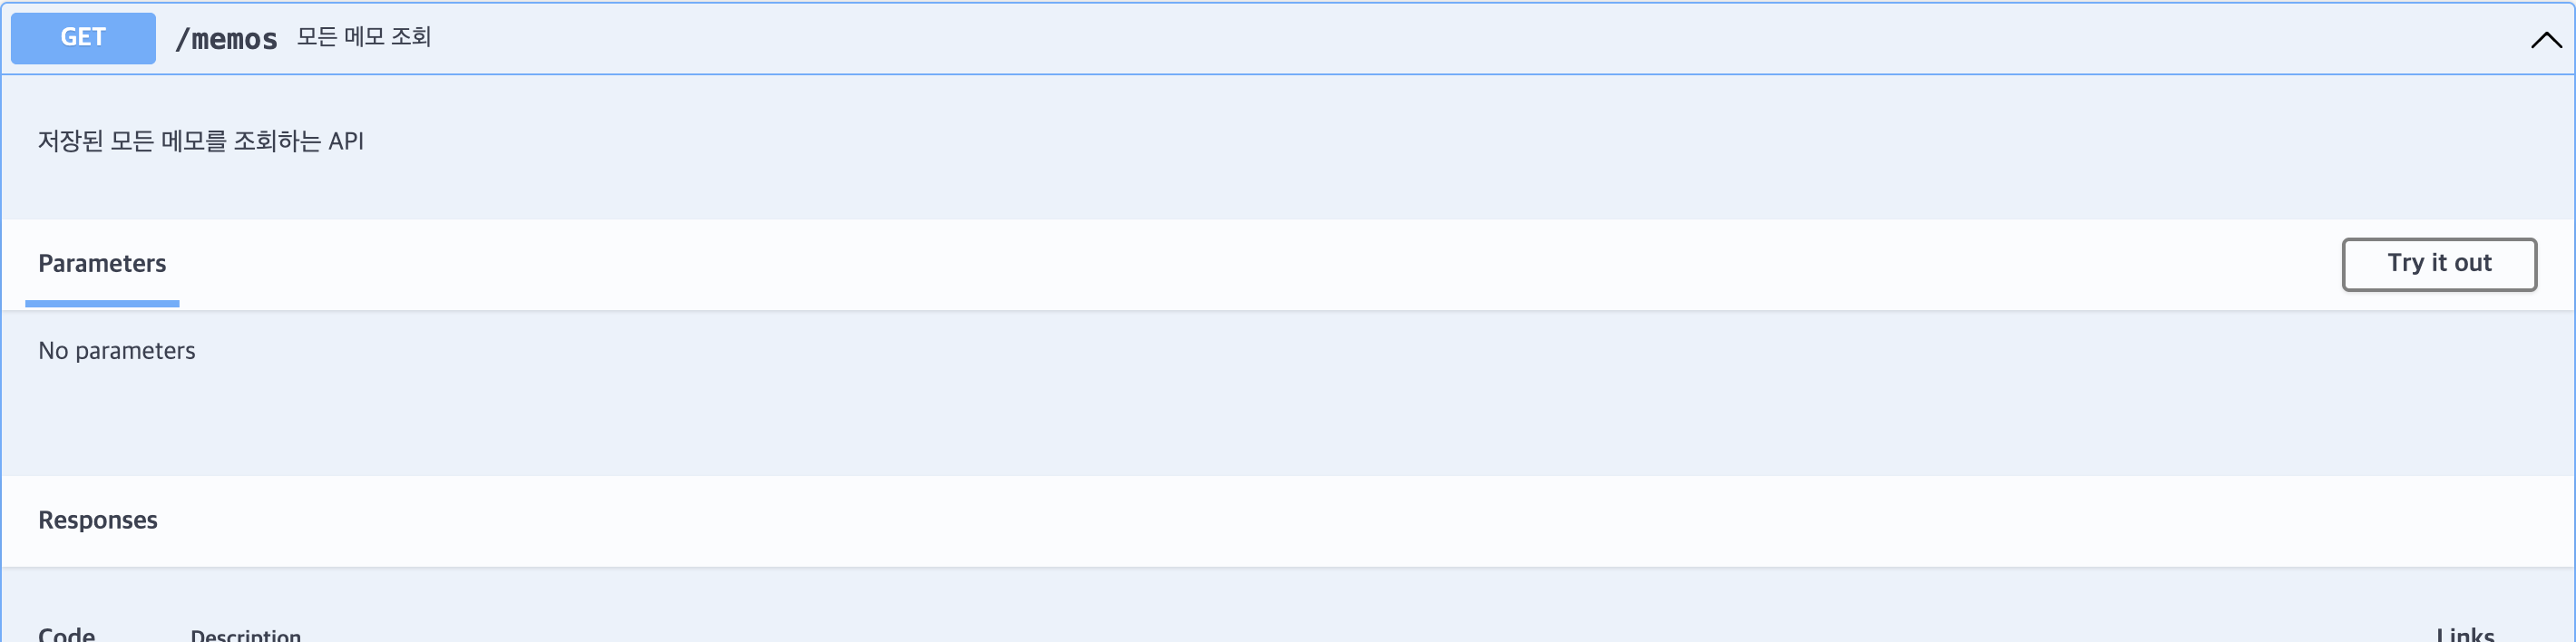
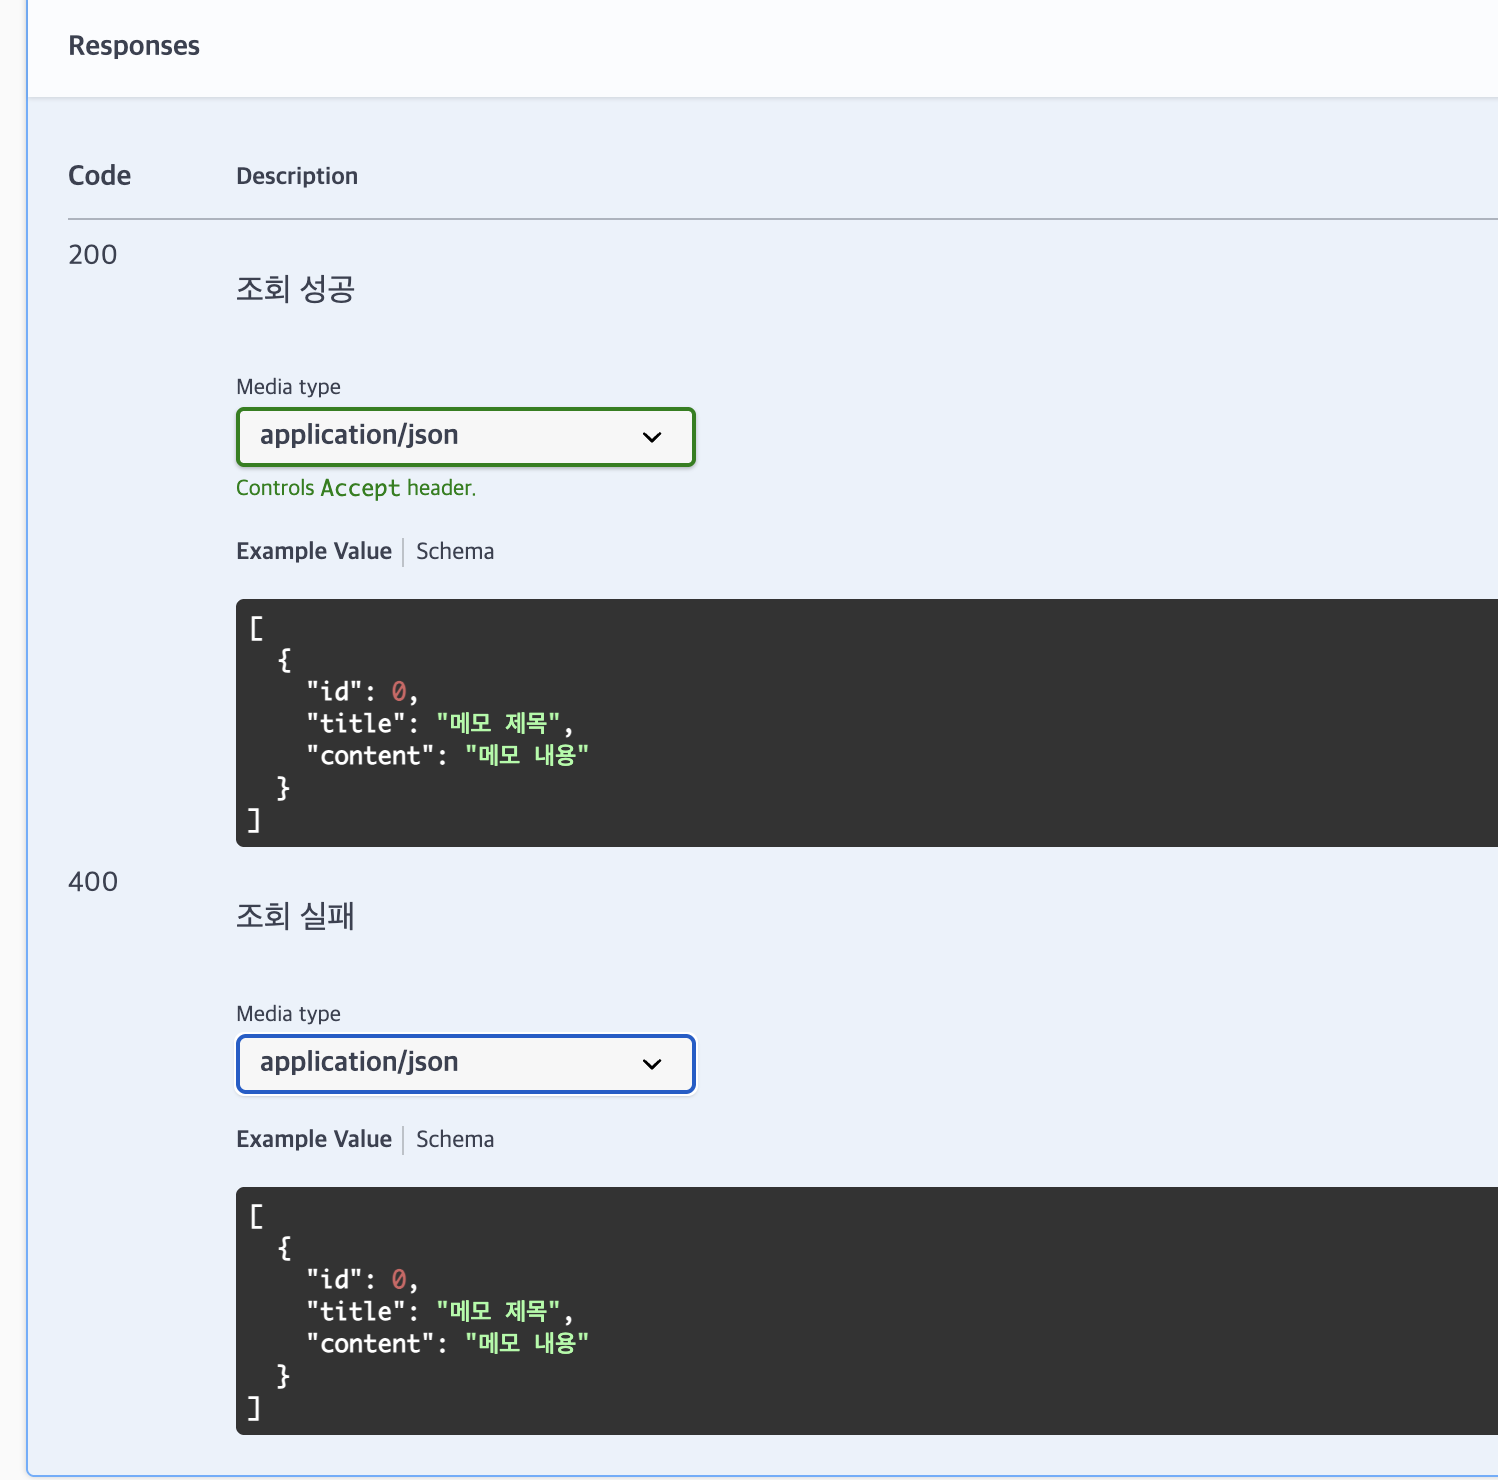
- @ApiResponses를 사용하여 응답 코드에 대한 정보를 나타내줬습니다.
@GetMapping(produces = "application/json")
@Operation(summary = "모든 메모 조회", description = "저장된 모든 메모를 조회하는 API")
@ApiResponses(value = {
	@ApiResponse(responseCode = "200", description = "조회 성공"),
    @ApiResponse(responseCode = "400", description = "조회 실패")
})
public ResponseEntity<List<Memo>> getAllMemos() {
    return ResponseEntity.ok(memoService.getAllMemos());
}
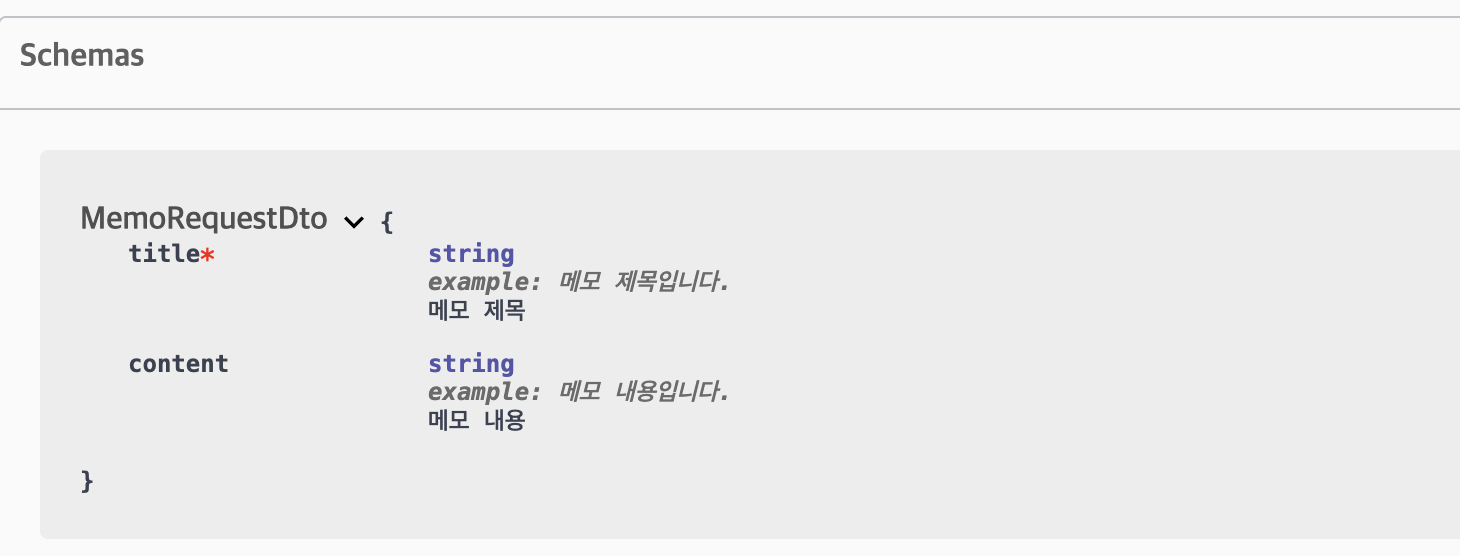
- @Scema를 사용해 해당 필드에 대한 설명을 작성했습니다.
@Getter
@NoArgsConstructor
@AllArgsConstructor
public class MemoRequestDto {

    @NotBlank(message = "제목은 비워둘 수 없습니다.")
    @Schema(description = "메모 제목", example = "메모 제목입니다.")
    private String title;

    @Schema(description = "메모 내용", example = "메모 내용입니다.")
    private String content;
}
이 외에도 API를 그룹화하는 @Tag와 파라미터에 대한 정보를 나타내는 @Parameters 등의 어노테이션이 더 있는데 필요하신 분들은 찾아보시면 좋을 것 같습니다!
위 블로그를 많이 참조했습니다!