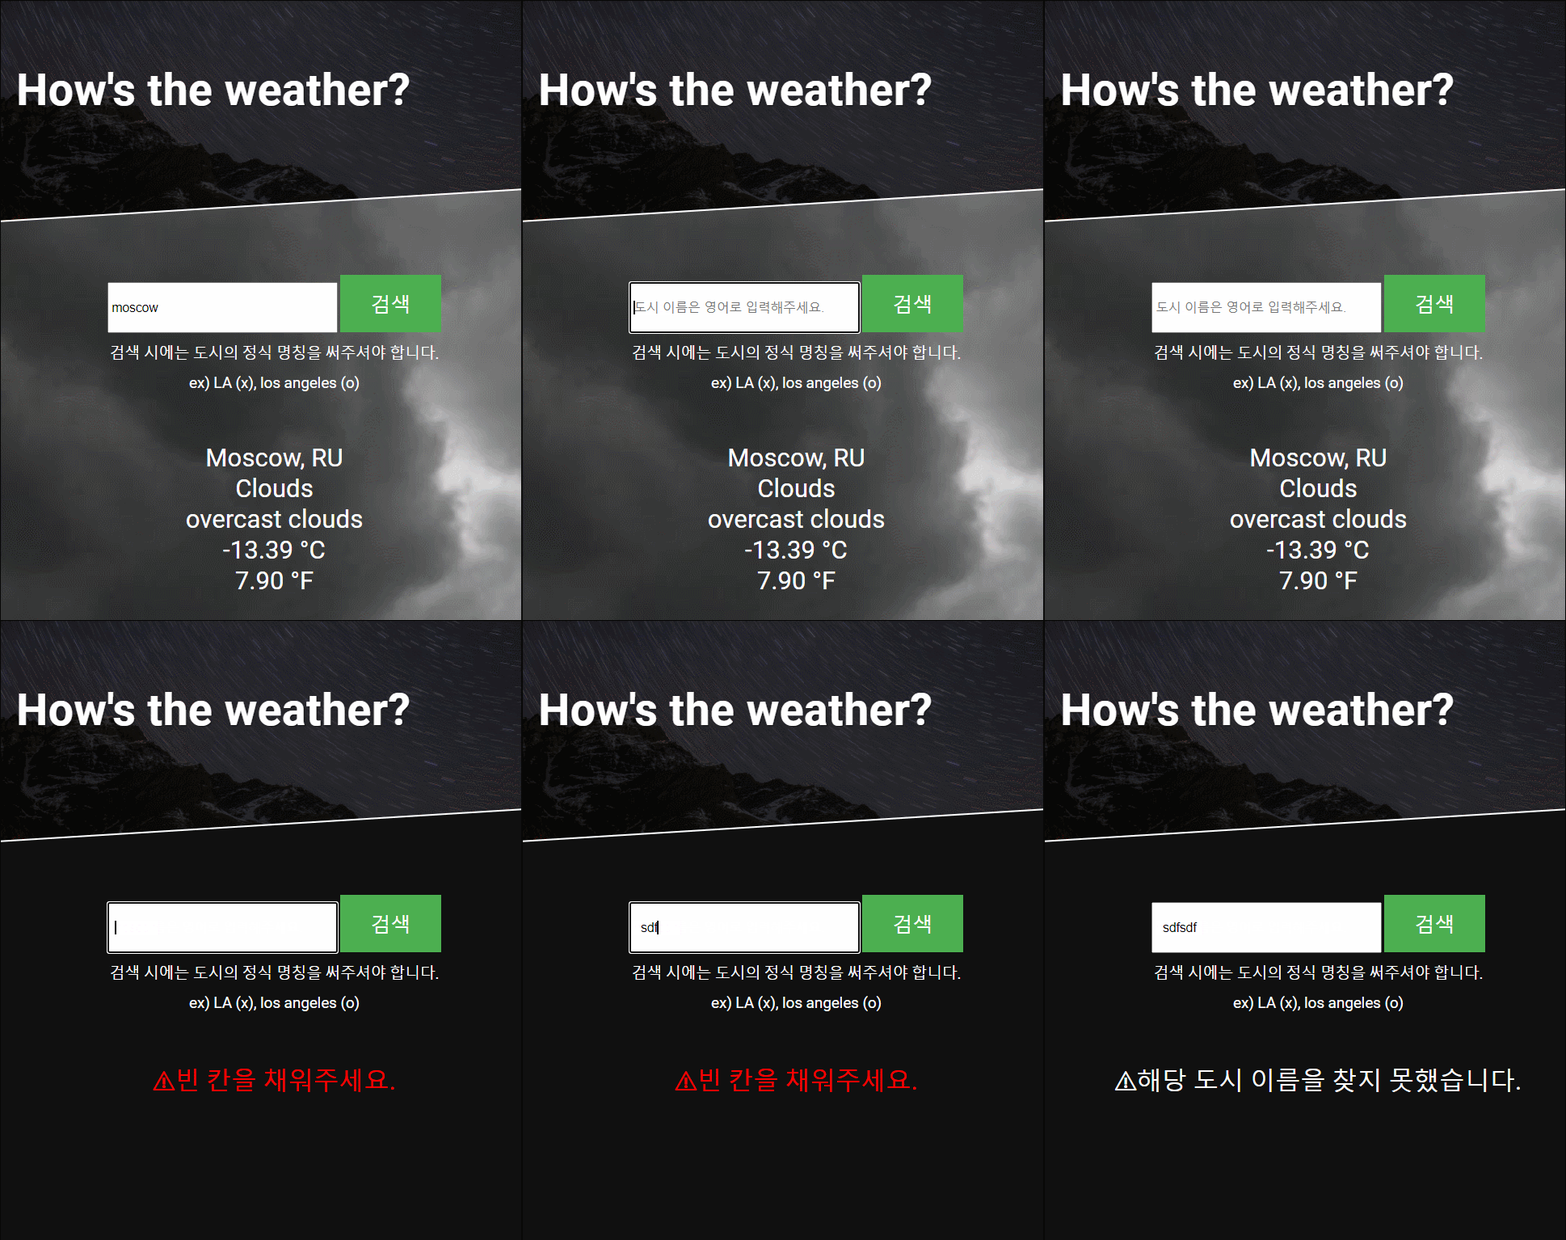
Bare minimum requirements
- OpenWeather API 를 통해 날씨 정보를 가져올 수 있어야 합니다.
- 가져온 데이터를 DOM을 이용해 웹 앱에 표시할 수 있어야 합니다.
- 다음 데이터는 필수입니다.
- 현재 온도
- 현재 날씨
- 선택한 도시
- 다음 데이터는 필수입니다.
- 웹 앱은 사용자 입력을 받아 도시를 선택할 수 있어야 합니다.
테스트 케이스는 없습니다. 다음 가이드를 따라가되 자유롭게 디자인하고 구현해 주세요.
전부 완성한 후 Pull Request 를 통해 과제를 제출하세요.
Getting Started
구현은 다음과 같은 과정으로 구성되어 있습니다.
-
Part 1
1.데이터 살펴보기
2.UI 디자인하기
3.하드코딩된 데이터와 DOM을 이용해서 구현하기 -
Part 2
- 하드코딩된 데이터 대신 서버에 직접 요청해보기
Sprint 완성본 github 링크


Sprint - 날씨 앱 TIL
Sprint 진행시, 어려웠던 점
- API를 받아올 때, fetch가 비동기 방식이라서 발생하는 문제점
function renderWeatherData() {
  // TODO: 여기에 DOM을 이용하여 날씨 데이터를 표시하세요

  const json = getData(); // 문제의 발생 지점!!

  console.log("this is ", json); // =>  undefined

  console.log(json.weather[0]["main"]); // => error
  console.log(json.weather[0]["description"]); // => error
}

function getData() {
  fetch(API_URL_OpenWeatherMap)
    .then(function (resp) {
      return resp.json();
    })
    .then(function (json) {
      // TODO:
      // 요청이 완료되고 나면 여기서부터 날씨 데이터(json)를 사용할 수 있습니다.
      // 하드코딩된 data를 대체하세요.

      return json;
    });
}

renderWeatherData();
fetch()가 비동기 방식이기 때문에 const json = getData();으로 할당하려고 해도 undefined가 뜬다. 다시 말해서, 데이터를 받아온 다음에 json에 할당하도록 만들어줘야 하는데, 구글링을 해도 이 방법을 찾을 수 없었다.
고민 끝에 내가 해결한 방법은 다음과 같다.
function renderWeatherData(json) {
  // TODO: 여기에 DOM을 이용하여 날씨 데이터를 표시하세요

  console.log("this is ", json); // => 성공적으로 데이터가 찍힌다.

  console.log(json.weather[0]["main"]);
  console.log(json.weather[0]["description"]);
}

function getData() {
  fetch(API_URL_OpenWeatherMap)
    .then(function (resp) {
      return resp.json();
    })
    .then(function (json) {
      renderWeatherData(json);
    });
}

getData();
.then()안에 renderWeatherData(json) 해줌으로써 데이터 받아와지면, 해당 함수의 매개 변수로 보내지도록 조치했다. 그 결과, 데이터가 성공적으로 콘솔에 찍혔다.
- CITYname이 변경되지 않음 ( scope error )
let CITYname = "los angeles";

let API_URL_OpenWeatherMap
= `http://api.openweathermap.org/data/2.5/weather?q=${CITYname}&appid=${APIkey}`;

let form = document.querySelector("form");

form.addEventListener("submit", function (e) {
  e.preventDefault();

  let text = document.querySelector("form input[type='text']");

  CITYname = text.value;

  getData();
});

console.log("도시 이름은?? ", CITYname); // => "los angeles"
addEventListener 안에서 CITYname을 text.value로 바꿔줬는데도 값이 바뀌지를 않았다. Scope의 범위를 생각해보면, 당연했던 건데... 이를 놓쳤다.
이 문제를 해결해주기 위해서 다음과 같이 코드를 바꿨다.
function getData(CITYname) {
  // 여기서 CITYname 이 seoul로 입력 되면서, 정상적으로 코드가 작동한다.
  API_URL_OpenWeatherMap
    = `http://api.openweathermap.org/data/2.5/weather?q=${CITYname}&appid=${APIkey}`;

  fetch(API_URL_OpenWeatherMap)
    .then(function (resp) {
      return resp.json();
    })
    .then(function (json) {
      renderWeatherData(json);
    });
}

let form = document.querySelector("form");

form.addEventListener("submit", function (e) {
  e.preventDefault();

  let text = document.querySelector("form input[type='text']");

  // text.value === 'seoul'
  CITYname = text.value;

  getData(CITYname);
});

console.log("도시 이름은", CITYname); // => "los angeles"
Sprint 진행시, 흥미로웠던 점
- DOM을 사용하지 않고, 받아온 데이터를 화면에 출력하기
DOM을 사용하지 않고도 아래와 같은 방식으로 받아온 데이터를 화면에 출력해줄 수 있었다.
function renderWeatherData(json) {
  // TODO: 여기에 DOM을 이용하여 날씨 데이터를 표시하세요

  console.log("this is ", json);

  console.log(json.weather[0]["main"]);
  console.log(json.weather[0]["description"]);

  let result = document.querySelector(".result");
  let tag = "";
  tag += "<section>";

  tag += '<div class="city">' + "City : " + json.name + "</div>";
  tag += '<div class="country">' + " Country : " + json.sys.country + "</div>";
  tag +=
    '<div class="weather">' +
    "Current Weather : " +
    json.weather[0]["main"] +
    "</div>";
  tag +=
    '<div class="weather">' +
    "description : " +
    json.weather[0]["description"] +
    "</div>";

  tag += '<div class="temp">';

  tag += `<div class="celsius">` + "celsius" + `</div>`;
  tag += `<div class="fahrenheit">` + "fahrenheit" + `</div>`;

  tag += "</div>";
  tag += "</section>";
  result.innerHTML = tag;
}
그러나, 도시명을 입력하지 않은 상태에서는 아무런 태그들이 존재하지 않기 때문에 태그들이 구성하고 있는 width와 height들이 사라지면서, 출력화면이 이상하게 나왔다.
무엇보다, innerHTML 사용을 지양해야 하기 때문에, 권장할 만한 방법은 아닌 것같다.
적어도, 내가 만들어놓은 코드에서는 검색결과에 따라 textContent만 바꿔주면 되기 때문에, DOM 사용해도 상대적으로 간단하다.

