
이 프로젝트는 Youtube '개발하는남자'의 'GetX 주요 기능 3가지 중 그 첫번째 Route 관리 #2' 강의를 참고했습니다.
단순 상태관리
Getx에서의 상태관리는 '단순 상태관리'와 '반응형 상태관리' 두 가지가 있어요.
이번 포스팅은 간단하게 숫자를 증가시키는 버튼을 구현해서 단순상태관리를 다뤄볼게요.
controller
먼저 getx를 활용한 controller 설정부터 해볼게요 !
controller 내부에서 숫자를 0으로 초기화 해주고,
숫자를 하나씩 증가시켜주는 increase() method를 만들어볼게요.
class는 GetxController를 상속받고 method 내부에서는 숫자가 증가했다는 것을 알려주는 update() method가 들어가게 돼요.
provider와 정말 비슷해요.
count_controller_with_getx.dart
import 'package:get/get.dart';

class CountControllerWithGetx extends GetxController {
  int count = 0;
  void increase() {
    count++;
    update();
  }
}
page
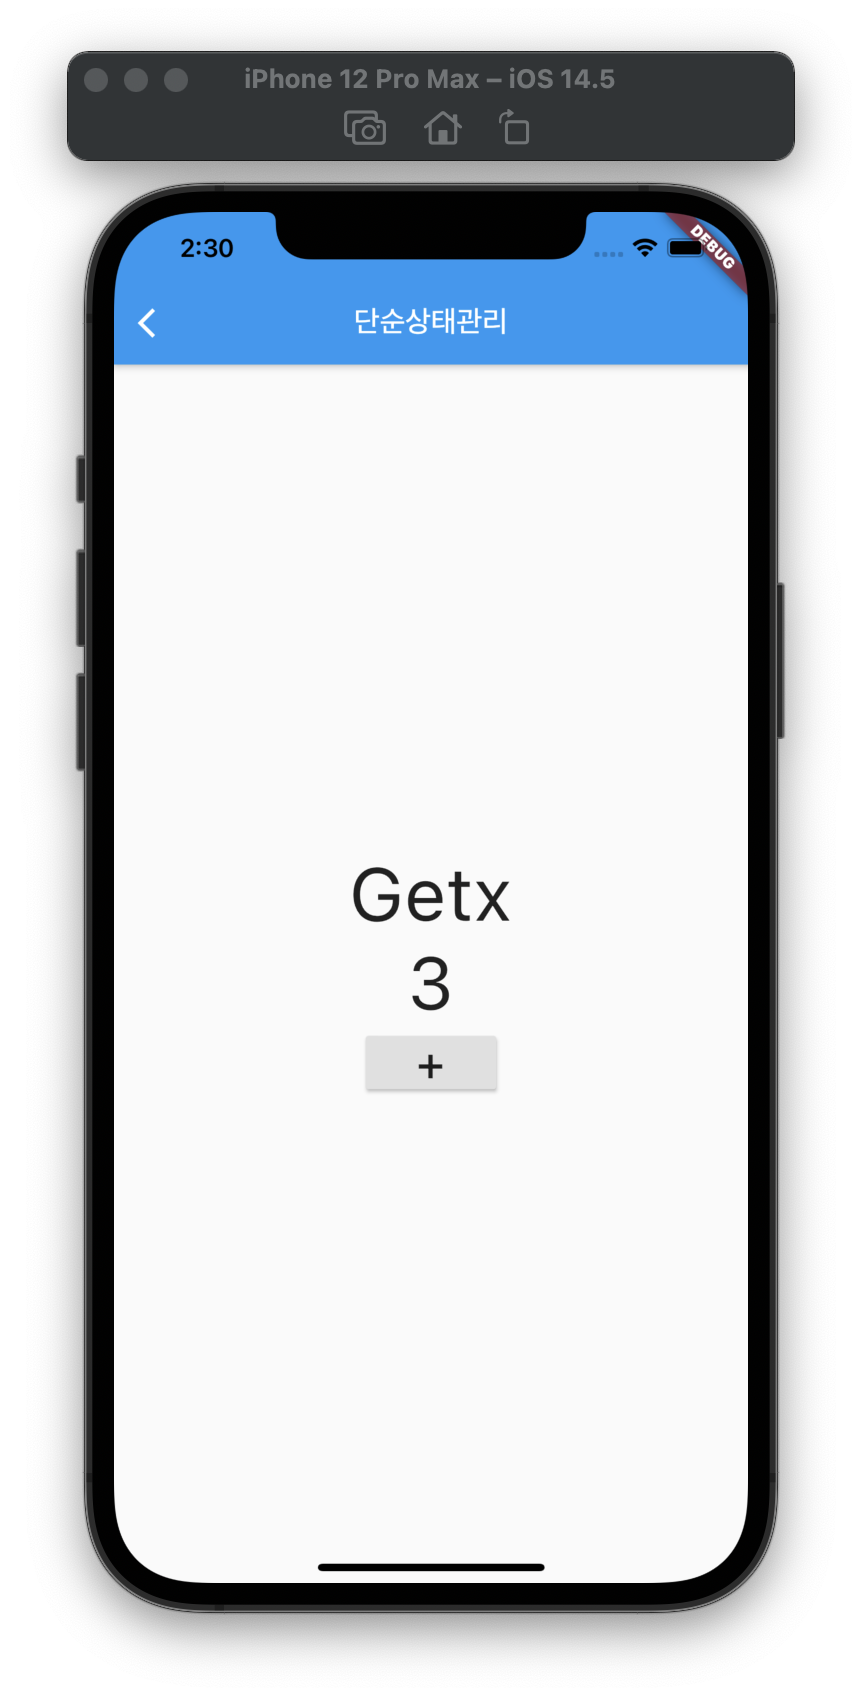
아래 page에서는 getx 를 이용한 숫자와 버튼을 띄워줘요.
Simple_state_manage_page.dart
class SimpleStateManagePage extends StatelessWidget {
Widget build(BuildContext context) {
Get.put(CountControllerWithGetx());
return Scaffold(
appBar: AppBar(
title: Text('단순상태관리'),
),
body: Center(
child: GetxState(),
),
);
}
}Get.put(ControllerWithGetx()) ; 가 보이시나요 ?
숫자의 상태를 변경해주기위해서는 controller가 필요해요.
Get.put() ; 을 하게되면 인스턴스가 생성되면서 선언한 인스턴스는 어디서든지 사용이 가능해져요.
사용할 곳은 GetxState가 될거에요.
GetxState class
page에서 인스턴스를 선언했으니 child인 GetxState class에서 불러올 수 있어요.
GetBuilder를 통해 text를 받아올 수있어요.
onPressed method 내에서 page에서 생성한 인스턴스를 불러와야해요.
한번 Get으로 생성된 인스턴스는 Get.find()로 쉽게 불러올 수 있어요.
get_state.dart
class GetxState extends StatelessWidget {
Widget build(BuildContext context) {
return Center(
child: Column(
mainAxisAlignment: MainAxisAlignment.center,
children: <Widget>[
Text(
'Getx',
style: TextStyle(fontSize: 50),
),
GetBuilder<CountControllerWithGetx>(
builder: (controller) {
return Text(
'${controller.count}',
style: TextStyle(fontSize: 50),
);
},
),
RaisedButton(
child: Text(
'+',
style: TextStyle(fontSize: 30),
),
onPressed: () {
Get.find<CountControllerWithGetx>().increase();
},
),
],
),
);
}
}
이렇게 되면 Getx를 통한 상태관리는 구현이 된거에요.
Provider와 굉장히 비슷한걸 알 수 있어요.
하지만 context와 Stateful이 전혀 사용되지 않았어요.
그게 장점인것 같아요. :)
** Get.find() 코드 간략화 Tip
번외로 인스턴스로 생성된 Controller를 불러올 때 Get.find() 코드의 간략화 하는 방법을 알아볼게요.
1. controller - static 처리
controller에서 static 전역으로 간단하게 접근할 수 있게 설정해주는거에요.
아래처럼 코드 한줄을 추가해줘요.
CountControllerWithGetx class
static CountControllerWithGetx get to => Get.find();이제 to로 controller에 간단히 접근할 수 있어요.
위에 실습한 코드와 비교해볼게요.
static 활용 X
Get.find<CountControllerWithGetx>().increase();static 활용 O
CountControllerWithGetx.to.increase();2. GetView
static 처리보다 더! 간단하게 접근할 수있는 방법이 있어요.
Get.find가 필요한 class를 StatelessWidget 상속 대신 GetView를 상속시켜주는 거에요.
GetView 처리 전
class GetxState extends StatelessWidget {GetView 처리 후
class GetxState extends GetView<CountControllerWithGetx> {괄호안에 class에서 사용할 controller를 지정해줘요.
class내에서 나오는 controller는 모두 CountControllerWithGetx contoller 라고 알려주는거에요.
그래서 Get.find()가 아래처럼 아주아주 간결해져요.
 // GetView 처리 전
 Get.find<CountControllerWithGetx>().increase();

  // GetView 처리 후
 controller.increase();
미세한 차이지만 괄호의 늪에서 빠져나올 수 있는 장점이 있어요. ㅎㅎㅎ

2개의 댓글

find를 불러오려면 부모 위젯에서 Get.put한것만 참조가능한건가요? 아니면 부모가 아니여도 아예 관계없는 다른 위젯에서도 참조가 가능한가요?
아주 쉽게 풀어써주셔서 이해에 많은 도움이 되었습니다. 감사합니다.