지난 포스팅에 이어서 이번에는 Retrofit을 이용해 앱에서 직접 push 알림을 보내는 방법을 알아보기로 합시다.
3. 앱에서 직접 push 알림 보내기
1) 디바이스 토큰 저장하기
① Realtime Database에 유저의 device token도 함께 저장해야 하므로, UserInfo 데이터 클래스를 아래와 같이 수정한다.
data class UserInfo (
    val uid : String? = null,
    val nickname : String? = null,
    val gender : String? = null,
    val region : String? = null,
    val age : String? = null,
    val token : String? = null
)
② 제대로 된 테스트를 위해서 Realtime Database에 저장된 모든 내용을 삭제한다.
③ 이제는 SplashActivity가 아닌 JoinActivity에서 디바이스 토큰을 받아와 UserInfo에 저장하자. createUserWithEmailAndPassword 메서드를 아래와 같이 수정한다.
- SplashActivity에서 디바이스 토큰을 받아오는 로직을 잘라내어 JoinActivity에 붙여넣는다.
auth.createUserWithEmailAndPassword(email.text.toString(), password.text.toString())
.addOnCompleteListener(this) { task ->
if (task.isSuccessful) {
Log.d("JoinActivity","회원가입 완료")
uid = FirebaseAuthUtils.getUid()
FirebaseMessaging.getInstance().token.addOnCompleteListener(
OnCompleteListener { task ->
if (!task.isSuccessful) {
Log.w("MyToken", "Fetching FCM registration token failed", task.exception)
return@OnCompleteListener
}
val token = task.result
val userInfo = UserInfo(uid, nickname, gender, region, age, token)
FirebaseRef.userInfo.child(uid).setValue(userInfo)
uploadImage(uid)
val intent = Intent(this, MainActivity::class.java)
startActivity(intent)
})
} else {
Toast.makeText(this, "이메일 형식이 잘못되었습니다.", Toast.LENGTH_SHORT).show()
}
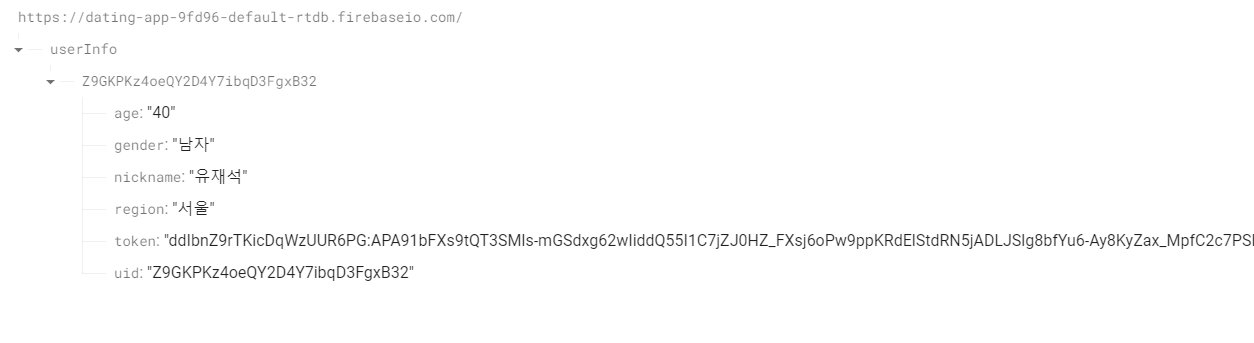
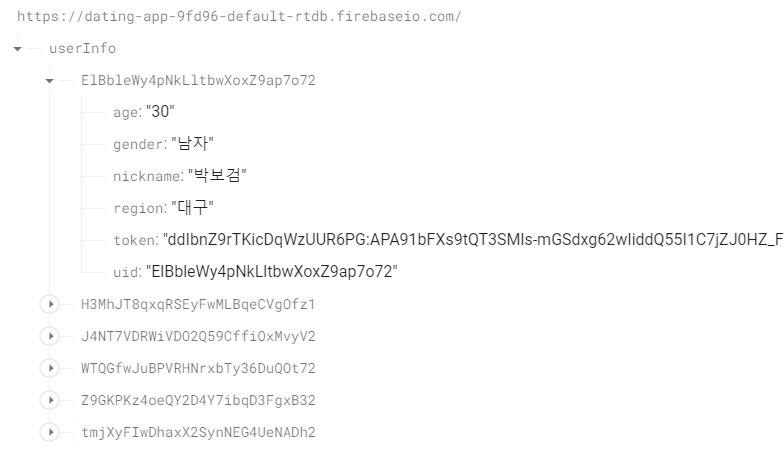
}④ 이제 앱을 실행한 후 회원가입을 해보면, Realtime Database에 유저 정보와 함께 device token이 저장되는 것을 확인할 수 있다.
⑤ 다시 남자 유저와 여자 유저를 충분히 생성해주도록 하자.
2) Retrofit 관련 의존성 추가하기
Retrofit은 안드로이드 앱에서 필요한 데이터를 서버로부터 가져오거나, 서버에 데이터를 전송하기 위한 목적으로 사용된다. Retrofit은 쉽고 간편할 뿐 아니라, 가독성도 높은 편이다.
① Module 수준의 build.gradle 파일의 dependencies에 Retrofit을 사용하기 위한 의존성을 추가한다.
implementation("com.squareup.retrofit2:retrofit:2.9.0")② gson 사용을 위한 의존성도 추가해주어야 한다.
implementation("com.squareup.retrofit2:converter-gson:2.9.0")※ gson
Gson은 Google이 개발한 오픈 소스 라이브러리로, Java 객체와 JSON 데이터 간의 직렬화(serialization) 및 역직렬화(deserialization)를 수행하는 데 사용된다. 즉, JSON 형식의 데이터를 자바 객체로 변환하거나, 자바 객체를 JSON 형식으로 변환하는 작업을 간단하게 처리할 수 있도록 돕는다.
③ 마지막으로 Android Coroutine 사용을 위한 의존성을 추가한다.
implementation ("org.jetbrains.kotlinx:kotlinx-coroutines-android:1.5.2")※ Coroutine
코루틴은 비동기적인 프로그래밍을 더 쉽고 효율적으로 다룰 수 있도록 도와주는 Kotlin의 기능이다. 코루틴을 사용하면 비동기 코드를 동기 코드처럼 작성할 수 있어 가독성을 높이고 유지보수를 용이하게 할 수 있다. 즉, 코루틴을 이용하면 기존의 콜백 기반 비동기 코드나 쓰레드 관련 복잡한 작업들을 좀 더 직관적으로 다룰 수 있게 된다.
3) push 알림 핸들링
① chat 디렉토리 하위로 FirebaseService라는 이름의 kotlin class를 생성한다. 그리고 아래의 내용을 입력한다.
class FirebaseService : FirebaseMessagingService() {
    override fun onNewToken(token: String) {
        super.onNewToken(token)
    }

    override fun onMessageReceived(message: RemoteMessage) {
        super.onMessageReceived(message)
    }
}
② AndroidManifest.xml 파일에 아래의 내용을 application 태그 안에 추가한다.
<application
	...
    <service
    	android:name=".chat.FirebaseService"
    	android:exported="false">
    	<intent-filter>
        	<action android:name="com.google.firebase.MESSAGING_EVENT" />
    	</intent-filter>
	</service>

    <activity
...- service: 백그라운드에서 실행되는 컴포넌트를 정의하는 데에 사용된다.
- name: .chat.FirebaseService 라는 클래스를 서비스로 정의한다. default 디렉토리가 생략된 형태이다.
- exported="false": 다른 앱 구성 요소와의 상호작용 여부를 나타낸다. FCM 서비스의 경우, 보안 상의 이유로 false로 설정하는 것이 권장된다.
- intent-filter: 어떤 유형의 인텐트를 처리할지 정의한다.
- action: 서비스가 처리할 인텐트의 액션을 정의한다. 여기서는 FCM 메시지를 수신하고 처리할 때 com.google.firebase.MESSAGING_EVENT에 대한 인텐트를 사용한다.
③ 이제 push 알림을 전송하면, 단순히 push 알림이 뜨는 것이 아니라, onMessageReceived() 메서드의 정의대로 push 알림이 핸들링된다.
- 아직은 아무것도 안 적었기 때문에, push 알림을 전송해도 아무런 일도 일어나지 않는다(push 알림이 도착하지 않는다).
④ 저번에 매칭 시 알림을 주기 위해 MainActivity에서 사용했던, createNotificationChannel()과 sendNotification() 메서드를 가져와서, FirebaseService의 onMessageReceived() 안에서 호출하면 된다.
override fun onMessageReceived(message: RemoteMessage) {
super.onMessageReceived(message)
val title = message.notification?.title.toString()
val body = message.notification?.body.toString()
createNotificationChannel()
sendNotification(title, body)
}
private fun createNotificationChannel() {
// Create the NotificationChannel, but only on API 26+ because
// the NotificationChannel class is new and not in the support library
if (Build.VERSION.SDK_INT >= Build.VERSION_CODES.O) {
val name = "name"
val descriptionText = "description"
val importance = NotificationManager.IMPORTANCE_DEFAULT
val channel = NotificationChannel("test", name, importance).apply {
description = descriptionText
}
// Register the channel with the system
val notificationManager: NotificationManager =
getSystemService(Context.NOTIFICATION_SERVICE) as NotificationManager
notificationManager.createNotificationChannel(channel)
}
}
private fun sendNotification(title : String, body : String) {
if(NotificationManagerCompat.from(this).areNotificationsEnabled()) {
var builder = NotificationCompat.Builder(this, "test")
.setSmallIcon(R.drawable.icon)
.setContentTitle(title)
.setContentText(body)
.setPriority(NotificationCompat.PRIORITY_DEFAULT)
.setAutoCancel(true)
with(NotificationManagerCompat.from(this)) {
if (ActivityCompat.checkSelfPermission(
this@FirebaseService,
Manifest.permission.POST_NOTIFICATIONS
) != PackageManager.PERMISSION_GRANTED
) {
return
}
notify(1, builder.build())
}
}
else {
Log.w("notification", "알림 수신이 차단된 상태입니다.")
}
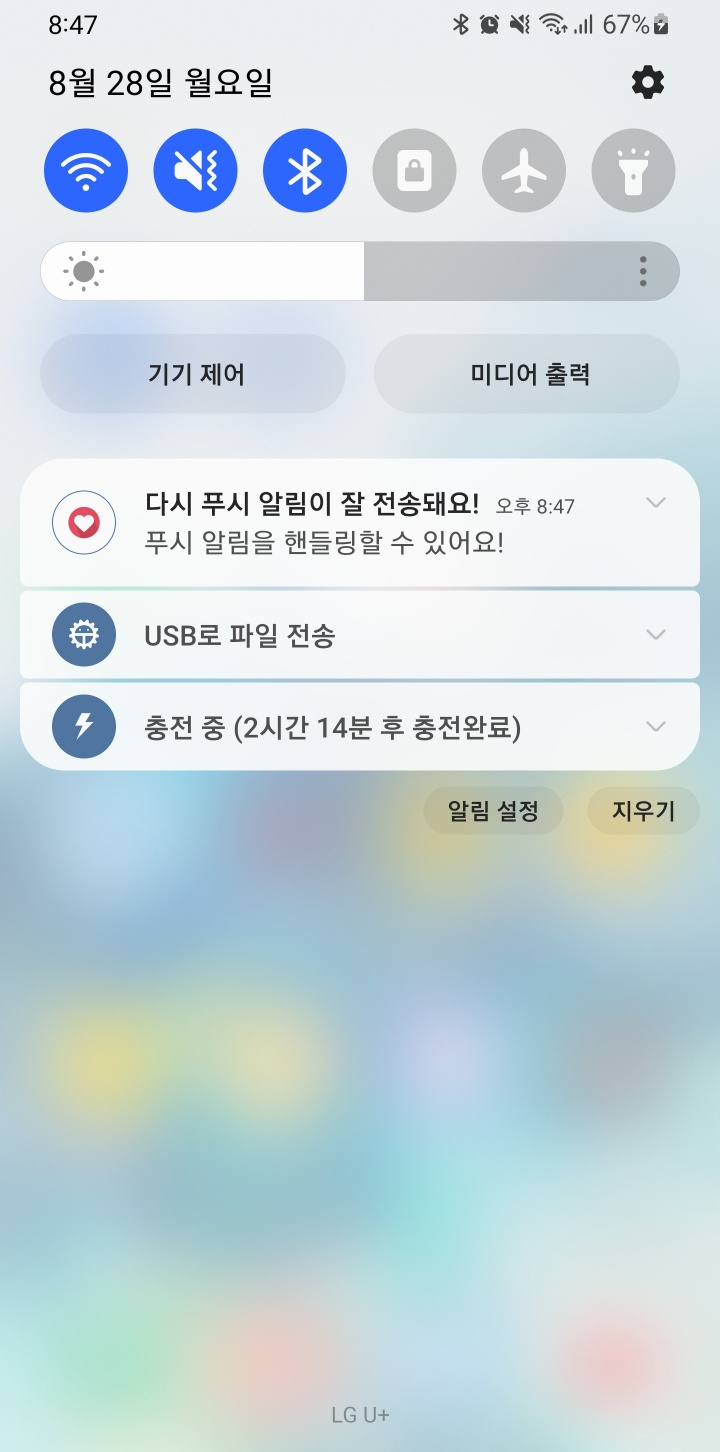
}⑤ 코드를 실행시킨 후 push 알림을 다시 전송해보면, push 알림이 잘 도착하는 것을 확인할 수 있다.
- push 알림을 탭하면, push 알림이 사라지면서 앱이 자동으로 실행된다.
4) 서버와 통신하기
① chat 디렉토리 하위로 retrofit이라는 패키지를 추가하고, 그 패키지 안에 Repository라는 이름의 kotlin class를 생성하자. 이후 아래의 내용을 입력한다.
class Repository {
companion object {
const val BASE_URL = "https://fcm.googleapis.com"
const val SERVER_KEY = "{Server-Key}"
const val CONTENT_TYPE = "application/json"
}
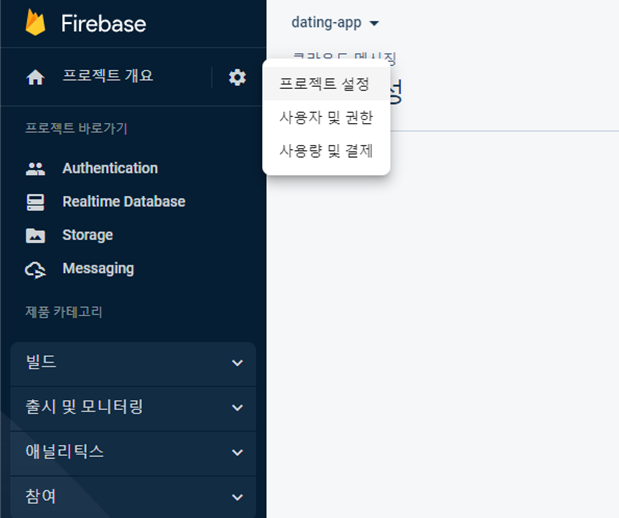
}② {Server-Key}에는 본인의 서버 키를 넣어야 한다. 프로젝트 개요 > 프로젝트 설정을 클릭한다.
③ 클라우드 메시징 탭에 들어가 Cloud Messaging API의 더보기 버튼을 클릭한 후 Google Cloud Console에서 API 관리 버튼을 클릭한다.
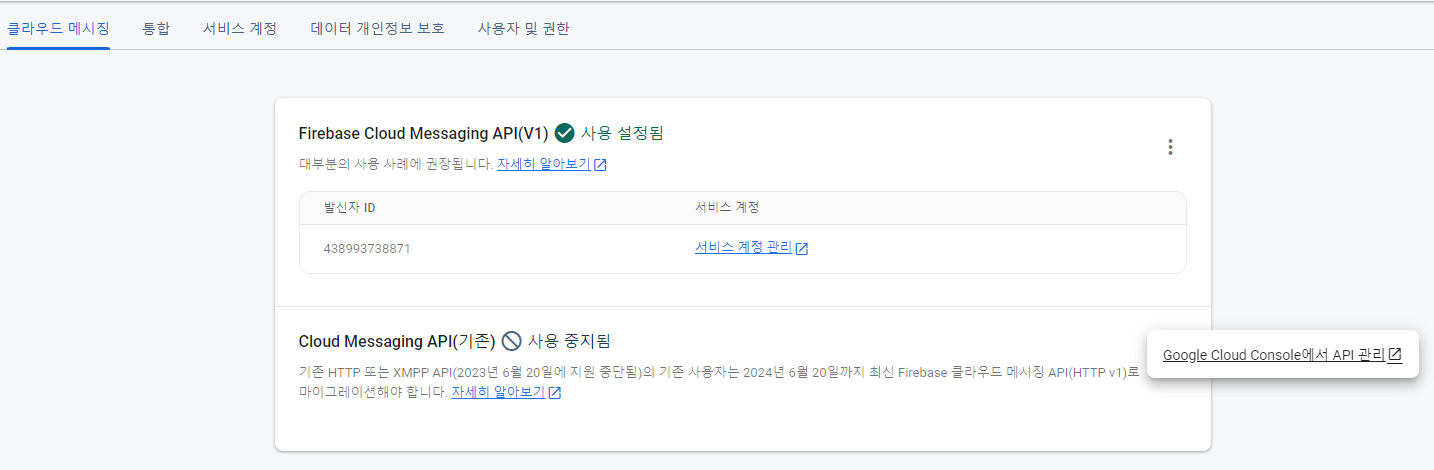
④ 사용 버튼을 클릭한다.
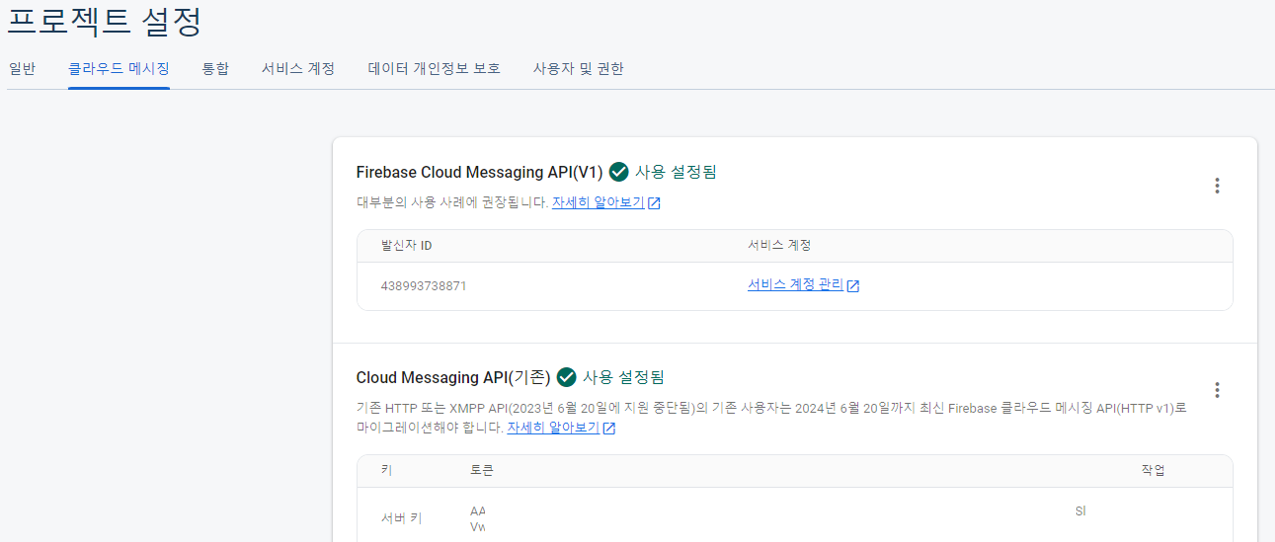
⑤ 다시 클라우드 메시징 탭으로 가서 새로고침을 눌러보면, 아래와 같이 서버키가 생성되어 있을 것이다. 이 값을 {Server-Key}에 넣어주면 된다.
⑥ 이번엔 retrofit 디렉토리 하위로 NoticeAPI라는 이름의 인터페이스와 NoticeModel, PushNotice라는 이름의 kotlin 클래스를 추가한다.
- NoticeAPI
- @Headers: HTTP 요청 헤더를 설정한다. Authorization 필드에 서버 키를 넣고, Content-Type 필드에 요청 바디의 형식을 설정한다.
- @Body: 요청 바디에 PushNotice 객체를 넣는다.
- suspend: 이 메서드가 코루틴 내에서 호출될 수 있음을 나타낸다.
- Response<ResponseBody>는 서버의 응답을 받는 객체로 응답 바디는 ResponseBody로 표현된다.
- Retrofit은 인터페이스를 기반으로 동작하도록 설계되었기 때문에 인터페이스를 사용하는 것이 권장된다.
interface NoticeAPI {
    @Headers("Authorization: key=$SERVER_KEY", "Content-Type:$CONTENT_TYPE")
    @POST("fcm/send")
    suspend fun postNotification(@Body notification: PushNotice) : retrofit2.Response<ResponseBody>
}- NoticeModel
data class NoticeModel (
    val title : String = "",
    val content : String = ""
)- PushNotice
data class PushNotice (
    val data : NoticeModel,
    val to : String
)
⑦ 계속해서 retrofit 디렉토리 하위에 RetrofitInstance라는 이름의 kotlin 클래스를 추가하자.
class RetrofitInstance {
    companion object {
        private val retrofit by lazy {
            Retrofit.Builder()
                .baseUrl(Repository.BASE_URL)
                .addConverterFactory(GsonConverterFactory.create())
                .build()
        }
        val api = retrofit.create(NoticeAPI::class.java)
    }
}
⑧ MatchingListActivity에 아래의 메서드를 추가한다.
private fun pushNotification(notification: PushNotice) = CoroutineScope(Dispatchers.IO).launch {
    RetrofitInstance.api.postNotification(notification)
}- CoroutineScope(Dispatchers.IO).launch: 코루틴을 생성하고 실행하는 부분이다. CoroutineScope로 코루틴을 생성하고, Dispatchers.IO(백그라운드 스레드)에서 코루틴을 실행한다.
- Retrofit 인스턴스의 api 중에서 NoticeAPI 인터페이스의 메서드를 호출한다.
⑨ 이제 listview.setOnItemClickListener를 아래와 같이 수정한다.
listview.setOnItemClickListener { parent, view, position, id ->
matchingChk(myLikeUserInfo[position].uid.toString())
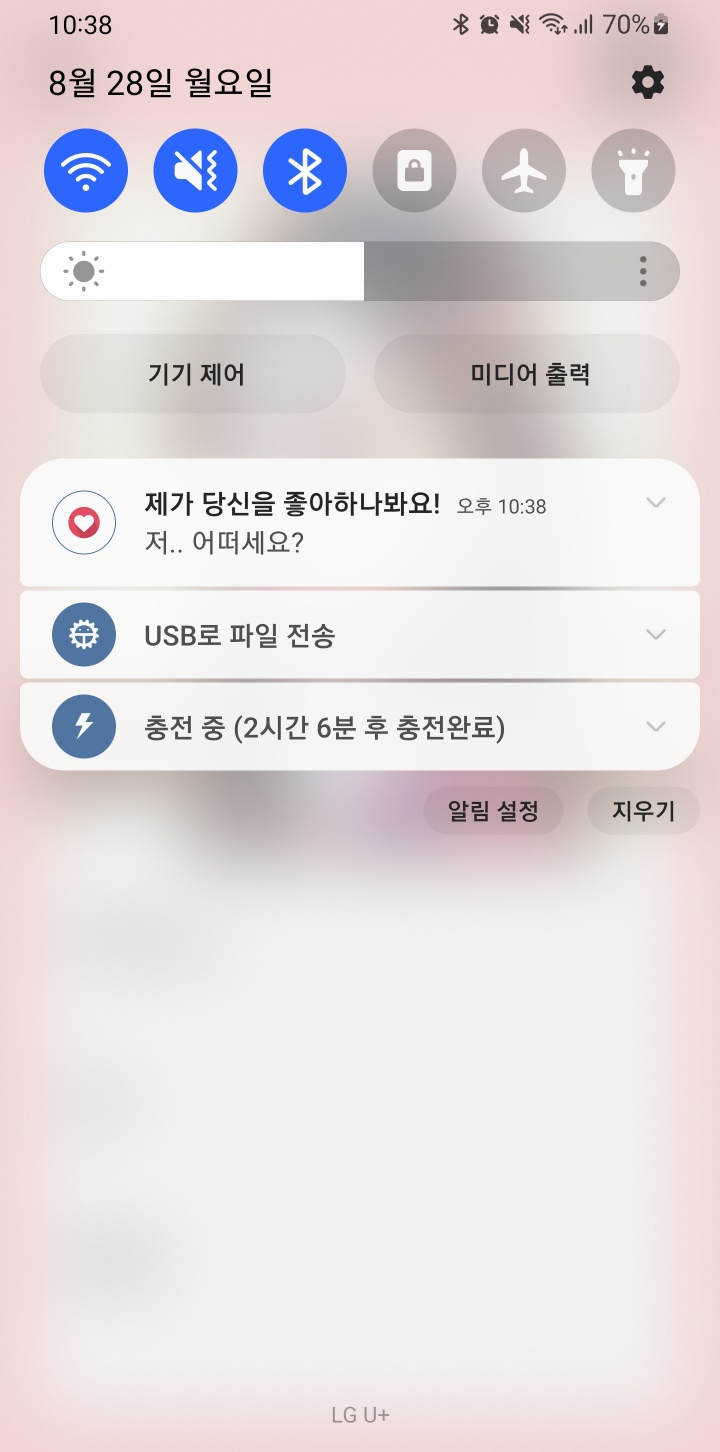
val noticeModel = NoticeModel("제가 당신을 좋아하나봐요!", "저 어떠세요?")
val pushNotice = PushNotice(noticeModel, myLikeUserInfo[position].token.toString())
pushNotification(pushNotice)
}⑩ 이제 코드를 실행해보자. 매칭리스트의 유저를 클릭했을 때 push 알림이 전송되어야 한다.
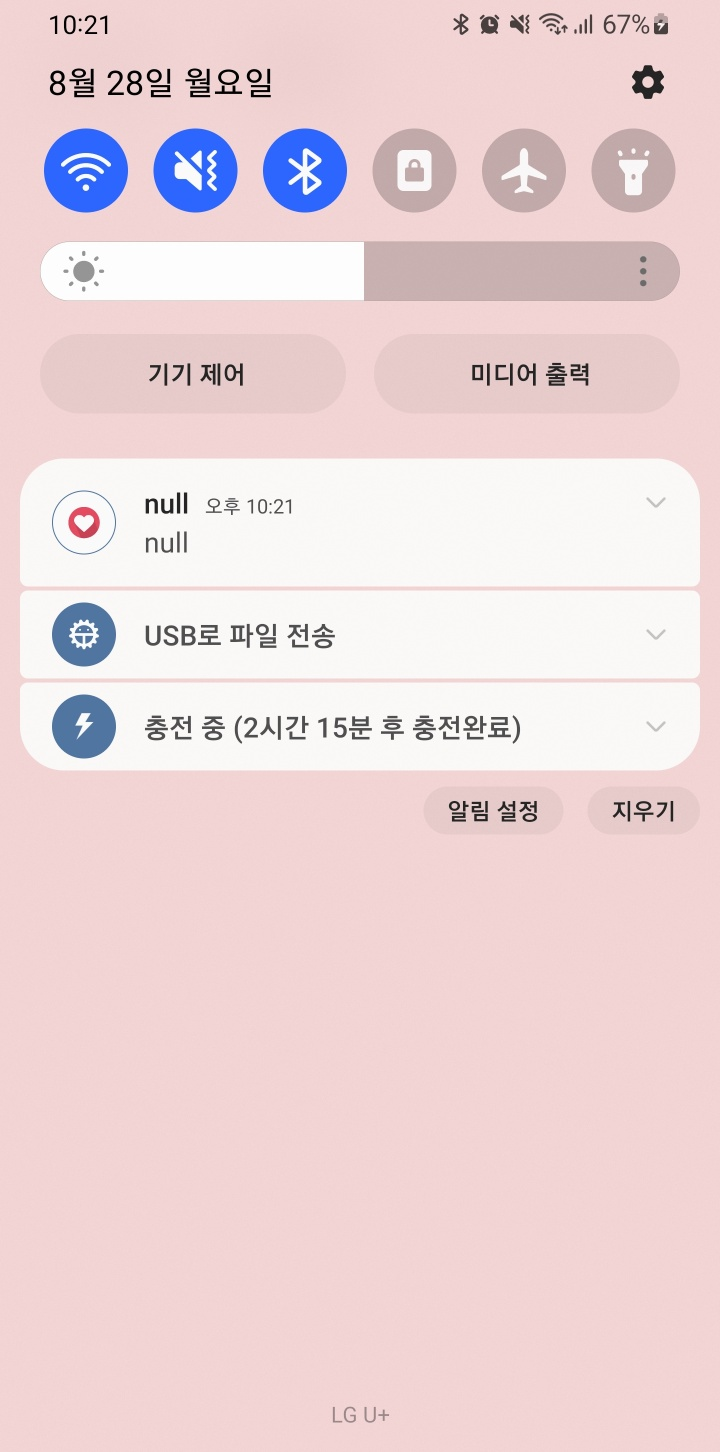
⑪ 그러나 push 알림의 제목과 내용이 모두 null로 나온다. FirebaseService의 onMessageReceived 메서드를 아래와 같이 수정하자.
- 현재까지 사용한 notification은 파이어베이스 콘솔로 푸시알림을 보낼 때에만 사용해야 한다.
- 앱에서 직접 push 알림을 보낼 때에는 notification 대신 data를 사용한다.
 override fun onMessageReceived(message: RemoteMessage) {
     super.onMessageReceived(message)
     val title = message.data["title"].toString()
     val content = message.data["content"].toString()
     createNotificationChannel()
     sendNotification(title, content)
}- data는 key-value로 이루어져있기 때문에, title과 content라는 key 값을 이용해 value를 추출해야 한다.
⑫ 이제 코드를 실행시켜보면, 정상적으로 push 알림이 도착할 것이다.