이번 포스팅에서는 저번 포스팅에서 만든 회원가입 및 로그인 페이지에서 실제로 회원가입 및 로그인을 처리할 수 있도록 구현해보고 서버를 사용하기 위한 기본 설정을 진행해보도록 하겠습니다.
1. 파이어베이스 연동하기
① 파이어베이스 콘솔에서 Chatting이라는 이름의 프로젝트를 생성한다.
② 앱을 등록하고 google-service.json 파일을 프로젝트의 app 디렉토리 안에 넣는다.
③ 프로젝트 수준의 build.gradle 파일에 아래의 내용을 입력한다.
id("com.google.gms.google-services") version "4.3.15" apply false④ 모듈 수준의 build.gradle 파일에 아래의 내용을 입력한다.
plugins {
  id("com.google.gms.google-services")
}
dependencies {
  implementation(platform("com.google.firebase:firebase-bom:32.2.2"))
  implementation("com.google.firebase:firebase-analytics-ktx")
  implementation("com.google.firebase:firebase-auth-ktx")
}
⑤ Authentication에 들어와서 이메일/비밀번호의 사용 설정 토글을 On으로 변경한다.
2. 회원가입 및 로그인 구현하기
① JoinActivity의 회원가입 버튼을 클릭했을 때 회원가입이 처리되도록 만들자.
class JoinActivity : AppCompatActivity() {

    private lateinit var auth: FirebaseAuth

    override fun onCreate(savedInstanceState: Bundle?) {
        super.onCreate(savedInstanceState)
        setContentView(R.layout.activity_join)

        auth = Firebase.auth

        val joinBtn = findViewById<Button>(R.id.joinBtn)
        joinBtn.setOnClickListener {
            val email = findViewById<TextInputEditText>(R.id.joinEmail)
            val password = findViewById<TextInputEditText>(R.id.joinPassword)

            auth.createUserWithEmailAndPassword(email.text.toString(), password.text.toString())
                .addOnCompleteListener(this) { task ->
                    if (task.isSuccessful) {
                        Toast.makeText(this, "가입을 환영합니다!", Toast.LENGTH_SHORT).show()
                        val intent = Intent(this, LoginActivity::class.java)
                        startActivity(intent)
                    } else {
                        Log.d("JoinActivity", "회원가입 실패")
                    }
                }
        }
    }
}
② 이번에는 LoginActivity의 로그인 버튼을 클릭했을 때 로그인이 처리되도록 만들어보자.
class LoginActivity : AppCompatActivity() {

    private lateinit var auth: FirebaseAuth

    override fun onCreate(savedInstanceState: Bundle?) {
        super.onCreate(savedInstanceState)
        setContentView(R.layout.activity_login)

        val loginBtn = findViewById<Button>(R.id.loginBtn)

        loginBtn.setOnClickListener {
            val email = findViewById<TextInputEditText>(R.id.email)
            val password = findViewById<TextInputEditText>(R.id.password)

            auth.signInWithEmailAndPassword(email.text.toString(), password.text.toString())
                .addOnCompleteListener(this) { task ->
                    if (task.isSuccessful) {
                        Log.d("LoginActivity", "로그인 완료")
                        val intent = Intent(this, MainActivity::class.java)
                        startActivity(intent)
                    } else {
                        Log.d("LoginActivity", "로그인 실패")
                    }
                }
        }
    }
}
3. 서버 설정 및 Entity Mapping
1) 기본 설정
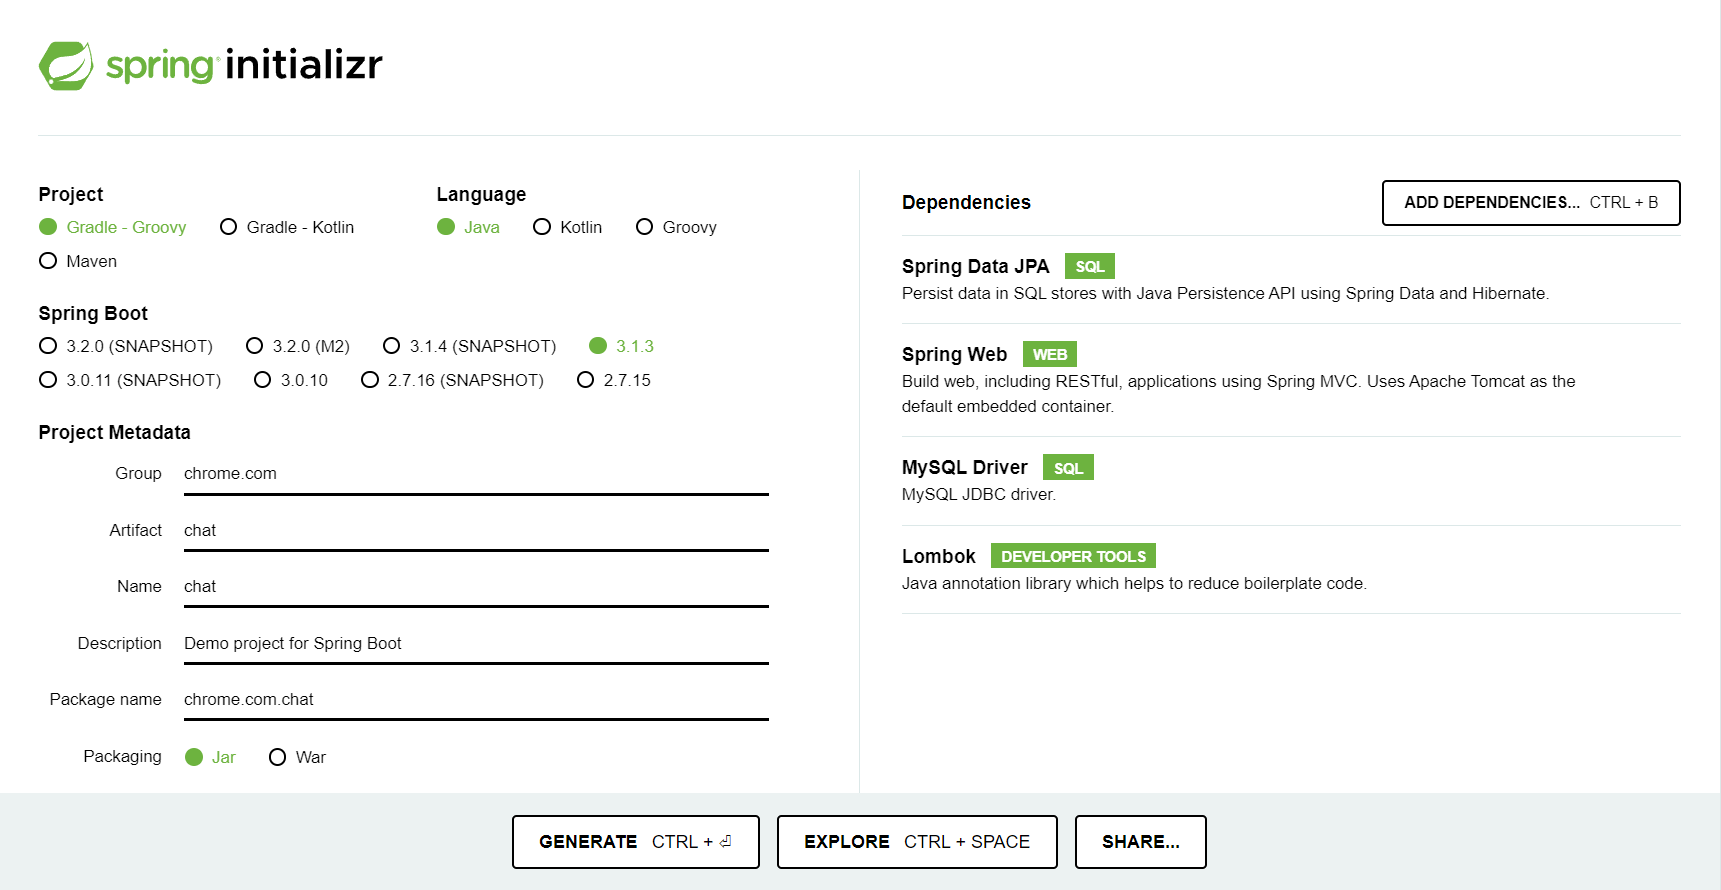
① https://start.spring.io/ 에서 스프링부트 프로젝트를 생성한다.
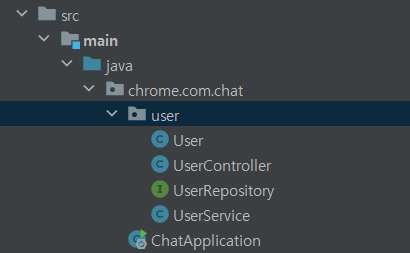
② default 패키지 하위로 user라는 패키지를 생성한다.
③ user 패키지 안에 User, UserController, UserService, UserRepository(인터페이스)를 생성한다.
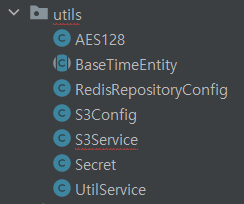
④ 이번에는 utils 패키지를 추가하고, 이 패키지 하위로 AES128, BaseTimeEntity, RedisRepositoryConfig, S3Config, S3Service, Secret, UtilService 클래스를 추가한다.
⑤ AES128 클래스에 아래의 내용을 입력한다.
public class AES128 {
    private final String ips;
    private final Key keySpec;

    public AES128(String key) {
        byte[] keyBytes = new byte[16];
        byte[] b = key.getBytes(UTF_8);
        System.arraycopy(b, 0, keyBytes, 0, keyBytes.length);
        SecretKeySpec keySpec = new SecretKeySpec(keyBytes, "AES");
        this.ips = key.substring(0, 16);
        this.keySpec = keySpec;
    }

    //암호화 관련 함수
    public String encrypt(String value) throws NoSuchPaddingException, NoSuchAlgorithmException, BadPaddingException, IllegalBlockSizeException, InvalidAlgorithmParameterException, InvalidKeyException {
        Cipher cipher = Cipher.getInstance("AES/CBC/PKCS5Padding");
        cipher.init(Cipher.ENCRYPT_MODE, keySpec, new IvParameterSpec(ips.getBytes()));
        byte[] encrypted = cipher.doFinal(value.getBytes(UTF_8));
        return new String(Base64.getEncoder().encode(encrypted));
    }

    //복호화 관련함수
    public String decrypt(String value) throws NoSuchPaddingException, NoSuchAlgorithmException, BadPaddingException, IllegalBlockSizeException, InvalidAlgorithmParameterException, InvalidKeyException {
        Cipher cipher = Cipher.getInstance("AES/CBC/PKCS5Padding");
        cipher.init(Cipher.DECRYPT_MODE, keySpec, new IvParameterSpec(ips.getBytes(UTF_8)));
        byte[] decrypted = Base64.getDecoder().decode(value.getBytes());
        return new String(cipher.doFinal(decrypted), UTF_8);
    }
}
⑥ BaseTimeEntity에는 아래의 내용을 입력한다.
@Getter
@MappedSuperclass
@EntityListeners(AuditingEntityListener.class) // 생성일, 수정일, 생성자, 수정자 정보를 자동으로 관리해줌
public abstract class BaseTimeEntity {
    @CreatedDate
    private LocalDateTime createDate;
    @LastModifiedDate
    private LocalDateTime modifiedDate;
}
⑦ ChatApplication 파일에 @EnableJpaAuditing 어노테이션을 추가해야 JPA Auditing이 활성화된다.
@EnableJpaAuditing
@SpringBootApplication
public class ChatApplication {

	public static void main(String[] args) {
		SpringApplication.run(ChatApplication.class, args);
	}

}
⑧ build.gradle 파일의 dependencies에 아래의 의존성을 추가한다.
// jwt 의존성
implementation 'io.jsonwebtoken:jjwt-api:0.11.5'
implementation 'io.jsonwebtoken:jjwt-impl:0.11.5'
implementation 'io.jsonwebtoken:jjwt-jackson:0.11.5'

// S3 의존성
implementation 'org.springframework.cloud:spring-cloud-starter-aws:2.2.6.RELEASE'

//hibernate-spaitial 의존성
implementation("org.hibernate:hibernate-spatial:5.6.15.Final")

// redis 의존성
implementation 'org.springframework.boot:spring-boot-starter-data-redis'
⑨ RedisRepositoryConfig에는 아래의 내용을 입력한다.
@RequiredArgsConstructor
@Configuration
@EnableRedisRepositories
public class RedisRepositoryConfig {
    private final RedisProperties redisProperties;

    // RedisConectionFactory를 생성하는 메서드로, Lettuce 라이브러리를 사용하여 Redis 서버와의 연결을 설정
    @Bean
    public RedisConnectionFactory redisConnectionFactory() {
        // redisProperties 객체에서 호스트와 포트 정보를 가져와 LettuceConnectionFactory를 생성하여 반환
        return new LettuceConnectionFactory(redisProperties.getHost(), redisProperties.getPort());
    }

    // RedisTemplate을 생성하는 메서드
    // RedisTemplate은 Redis와 상호작용하는 유틸리티 클래스이다.
    @Bean
    public RedisTemplate<String, Object> redisTemplate() {
        RedisTemplate<String, Object> redisTemplate = new RedisTemplate<>();
        redisTemplate.setConnectionFactory(redisConnectionFactory());
        // key-value 직렬화를 위해 StringRedisSerializer() 사용
        redisTemplate.setKeySerializer(new StringRedisSerializer());
        redisTemplate.setValueSerializer(new StringRedisSerializer());
        return redisTemplate;
    }
}
⑩ S3Config에는 아래의 내용을 입력한다.
@Configuration
public class S3Config {
    @Value("${cloud.aws.credentials.access-key}")
    private String accessKey;

    @Value("${cloud.aws.credentials.secret-key}")
    private String secretKey;

    @Value("${cloud.aws.region.static}")
    private String region;

    @Bean
    @Primary
    public AmazonS3 amazonS3Client() {
        AWSCredentials credentials = new BasicAWSCredentials(accessKey, secretKey);

        return AmazonS3ClientBuilder
                .standard()
                .withCredentials(new AWSStaticCredentialsProvider(credentials))
                .withRegion(region)
                .build();
    }
}
⑪ S3Service에는 아래의 내용을 입력한다.
- GetS3Res는 아직 정의하지 않았기 때문에 import 에러가 나는 것이 정상이다.
@Service
@RequiredArgsConstructor
public class S3Service {
    private final AmazonS3 s3Client;

    @Value("${cloud.aws.s3.bucket}")
    private String bucket;

    @Value("${cloud.aws.region.static}")
    private String region;

    // 먼저 파일 업로드 시, 파일명을 난수화하기 위해 random으로 돌립니다.
    private String createFileName(String fileName) {
        return UUID.randomUUID().toString().concat(getFileExtension(fileName));
    }

    // file 형식이 잘못된 경우를 확인하기 위해 만들어진 로직이며, 파일 타입과 상관없이 업로드할 수 있게 하기 위해 .의 존재 유무만 판단하였습니다.
    private String getFileExtension(String fileName) {
        try {
            return fileName.substring(fileName.lastIndexOf("."));
        } catch (StringIndexOutOfBoundsException e) {
            throw new ResponseStatusException(HttpStatus.BAD_REQUEST, "잘못된 형식의 파일(" + fileName + ") 입니다.");
        }
    }

    public List<GetS3Res> uploadFile(List<MultipartFile> multipartFiles) {
        List<GetS3Res> fileList = new ArrayList<>();

        // forEach 구문을 통해 multipartFile로 넘어온 파일들 하나씩 fileList에 추가
        multipartFiles.forEach(file -> {
            String fileName = createFileName(file.getOriginalFilename());
            ObjectMetadata objectMetadata = new ObjectMetadata();
            objectMetadata.setContentLength(file.getSize());
            objectMetadata.setContentType(file.getContentType());

            try(InputStream inputStream = file.getInputStream()) {
                s3Client.putObject(new PutObjectRequest(bucket, fileName, inputStream, objectMetadata)
                        .withCannedAcl(CannedAccessControlList.PublicRead));
            } catch(IOException e) {
                throw new ResponseStatusException(HttpStatus.INTERNAL_SERVER_ERROR, "파일 업로드에 실패했습니다.");
            }
            fileList.add(new GetS3Res(s3Client.getUrl(bucket,fileName).toString(), fileName));
        });
        return fileList;
    }

    public GetS3Res uploadSingleFile(MultipartFile multipartFile) {
        String fileName = createFileName(multipartFile.getOriginalFilename());
        ObjectMetadata objectMetadata = new ObjectMetadata();
        objectMetadata.setContentLength(multipartFile.getSize());
        objectMetadata.setContentType(multipartFile.getContentType());

        try(InputStream inputStream = multipartFile.getInputStream()) {
            s3Client.putObject(new PutObjectRequest(bucket, fileName, inputStream, objectMetadata)
                    .withCannedAcl(CannedAccessControlList.PublicRead));
        } catch(IOException e) {
            throw new ResponseStatusException(HttpStatus.INTERNAL_SERVER_ERROR, "파일 업로드에 실패했습니다.");
        }
        GetS3Res getS3Res = new GetS3Res(s3Client.getUrl(bucket,fileName).toString(), fileName);
        return getS3Res;
    }

    public void deleteFile(String fileName) {
        s3Client.deleteObject(new DeleteObjectRequest(bucket, fileName));
    }
}
⑫ Secret에는 아래의 내용을 입력한다.
public class Secret {
    public static String JWT_SECRET_KEY = "135b8378904571a649516713c9b3bbffc14f3464a3131504aec324cde5327b4d";
    public static String USER_INFO_PASSWORD_KEY = "49e1b884c9469230ae83cd13ff41a03edcfba4288ba75be7ad336c6d8e88d249";
    public static String ROOM_PASSWORD_KEY = "4ff7e6d380cd64c20d7b3c5d60263f5c3a69e2b8457e496e551a93e5f81923df";
}
⑬ UtilService에는 아래의 내용을 입력한다.
@Service
@RequiredArgsConstructor
public class UtilService {

    private final UserRepository userRepository;
    private final TokenRepository tokenRepository;

    public User findByUserIdWithValidation(Long userId) throws BaseException {
        return userRepository.findUserById(userId)
                .orElseThrow(() -> new BaseException(NONE_EXIST_USER));
    }

    public User findByEmailWithValidation(String email) throws BaseException {
        return userRepository.findByEmail(email)
                .orElseThrow(() -> new BaseException(POST_USERS_NONE_EXISTS_EMAIL));
    }

    public Token findTokenByUserIdWithValidation(Long userId) throws BaseException {
        return tokenRepository.findTokenByUserId(userId)
                .orElseThrow(() -> new BaseException(INVALID_JWT));
    }
}
⑭ build.gradle의 plugin의 버전을 아래와 같이 설정한다.
plugins {
	id 'java'
	id 'org.springframework.boot' version '2.7.11'
	id 'io.spring.dependency-management' version '1.0.15.RELEASE'
}
참고로, 본인의 yml 파일에는 S3 및 RDS를 사용하기 위한 설정이 되어있어야 한다. S3 관련 설정에 대해서는 아래의 링크를 참고하라.
>> S3 관련 yml 설정
2) 응답 객체
① default 패키지 하위로 response 패키지를 생성하고, 이 패키지 하위로 BaseException, BaseResponse, BaseResponseStatus 클래스를 추가한다.

② BaseException에 아래의 내용을 입력한다.
@Getter
@Setter
@AllArgsConstructor
public class BaseException extends RuntimeException {
    private BaseResponseStatus status; //BaseResponseStatus 객체에 매핑
}
③ BaseResponse에 아래의 내용을 입력한다.
@Getter
@AllArgsConstructor
@JsonPropertyOrder({"isSuccess", "code", "message", "result"})
public class BaseResponse<T> { //BaseResponse 객체를 사용할때 성공, 실패 경우
    @JsonProperty("isSuccess")
    private final Boolean isSuccess;
    private final String message;
    private final int code;
    @JsonInclude(JsonInclude.Include.NON_NULL)
    private T result;

    // 요청에 성공한 경우
    public BaseResponse(T result) {
        this.isSuccess = BaseResponseStatus.SUCCESS.isSuccess();
        this.message = BaseResponseStatus.SUCCESS.getMessage();
        this.code = BaseResponseStatus.SUCCESS.getCode();
        this.result = result;
    }

    // 요청에 실패한 경우
    public BaseResponse(BaseResponseStatus status) {
        this.isSuccess = status.isSuccess();
        this.message = status.getMessage();
        this.code = status.getCode();
    }
}
④ BaseResponseStatus에는 아래의 내용을 입력한다.
- 나중에 처리해야 할 예외가 생기면, 여기에 추가하면 된다.
@Getter
public enum BaseResponseStatus {
    /**
     * 1000 : 요청 성공
     */
    SUCCESS(true, 1000, "요청에 성공하였습니다."),


    /**
     * 2000 : Request 오류
     */
    // Common
    REQUEST_ERROR(false, 2000, "입력값을 확인해주세요."),
    EMPTY_JWT(false, 2001, "JWT를 입력해주세요."),
    INVALID_JWT(false, 2002, "유효하지 않은 JWT입니다."),
    NONE_EXIST_USER(false, 2006, "존재하지 않는 사용자입니다."),
    NONE_EXIST_NICKNAME(false, 2007, "존재하지 않는 닉네임입니다."),
    // users
    PASSWORD_CANNOT_BE_NULL(false, 2011, "비밀번호를 입력해주세요."),
    // [POST] /users
    POST_USERS_EMPTY_EMAIL(false, 2015, "이메일을 입력해주세요."),
    POST_USERS_INVALID_EMAIL(false, 2016, "이메일 형식을 확인해주세요."),
    POST_USERS_EXISTS_EMAIL(false,2017,"중복된 이메일입니다."),
    POST_USERS_NONE_EXISTS_EMAIL(false,2018,"등록되지 않은 이메일입니다."),
    LOG_OUT_USER(false,2019,"이미 로그아웃된 유저입니다."),
    NICKNAME_CANNOT_BE_NULL(false, 2020, "닉네임을 입력해주세요"),
    ALREADY_LOGIN(false, 2021, "이미 로그인된 유저입니다."),
    AGREEMENT_MISMATCH(false, 2023, "동의 문구를 잘못 입력하셨습니다."),

    /**
     * 3000 : Response 오류
     */
    // Common
    RESPONSE_ERROR(false, 3000, "값을 불러오는데 실패하였습니다."),
    PASSWORD_NOT_MATCH(false,3014,"비밀번호가 틀렸습니다."),
    FAILED_TO_LOGOUT(false, 3015, "로그아웃에 실패하였습니다"),


    /**
     * 4000 : Database, Server 오류
     */
    DATABASE_ERROR(false, 4000, "데이터베이스 연결에 실패하였습니다."),
    SERVER_ERROR(false, 4001, "서버와의 연결에 실패하였습니다."),

    PASSWORD_ENCRYPTION_ERROR(false, 4011, "비밀번호 암호화에 실패하였습니다."),
    PASSWORD_DECRYPTION_ERROR(false, 4012, "비밀번호 복호화에 실패하였습니다."),
    PASSWORD_MISSMATCH(false, 4013, "비밀번호가 일치하지 않습니다."),
    EX_PASSWORD_MISSMATCH(false, 4014, "현재 비밀번호가 잘못되었습니다."),
    CANNOT_UPDATE_PASSWORD(false, 4016, "같은 비밀번호로 수정할 수 없습니다."),

    /**
     *   8000 : 토큰 관련 오류
     */
    EXPIRED_USER_JWT(false,8000,"만료된 JWT입니다."),
    REISSUE_TOKEN(false, 8001, "토큰이 만료되었습니다. 다시 로그인해주세요."),
    FAILED_TO_UPDATE(false, 8002, "토큰을 만료시키는 작업에 실패하였습니다."),
    FAILED_TO_REFRESH(false, 8003, "토큰 재발급에 실패하였습니다."),

    /**
     *   9000 : 채팅 관련 오류
     */
    CANNOT_CREATE_ROOM(false, 9000, "혼자만의 채팅방은 만들 수 없습니다."),
    ALREADY_EXIST_MEMBER(false, 9001, "이미 추가된 유저입니다."),
    FAILED_TO_ENTER(false, 9002, "채팅방 입장에 실패하였습니다."),
    NONE_EXIST_ROOM(false, 9003, "요청하신 채팅방은 존재하지 않습니다.");


    private final boolean isSuccess;
    private final int code;
    private final String message;

    private BaseResponseStatus(boolean isSuccess, int code, String message) { //BaseResponseStatus 에서 각 해당하는 코드를 생성자로 맵핑
        this.isSuccess = isSuccess;
        this.code = code;
        this.message = message;
    }
}
3) User Entity
① User 클래스를 아래와 같이 작성한다.
@Entity
@Builder
@Getter
@Setter
@AllArgsConstructor
@NoArgsConstructor
public class User extends BaseTimeEntity {
    @Column
    @Id
    @GeneratedValue(strategy = GenerationType.IDENTITY)
    private Long id; // 멤버의 식별자

    @Column(nullable = false)
    private String uid;

    @Column(nullable = false)
    private String nickName; // 유저의 닉네임

    @Column(nullable = false)
    private String email; // 이메일로 로그인

    @Column(nullable = false)
    private String password;

    @OneToOne(mappedBy = "user", cascade = CascadeType.ALL, orphanRemoval = true)
    private Token token; // jwt토큰과 일대일 매핑

    @OneToOne(mappedBy = "user", cascade = CascadeType.ALL, orphanRemoval = true)
    private Profile profile; // 프로필 사진과 일대일 매핑

    public User createUser(String nickName, String email, String password, String uid) {
        this.nickName= nickName;
        this.email = email;
        this.password = password;
        this.uid = uid;
        return this;
    }
}
② UserRepository에 아래의 내용을 입력한다.
public interface UserRepository extends JpaRepository<User, Long> {
    @Query("select u from User u where u.id = :id")
    Optional<User> findUserById(@Param("id") Long id);

    @Query("select count(u) from User u where u.email = :email")
    Integer findByEmailCount(@Param("email") String email);

    Optional<User> findByEmail(String email); // JPA 제공 메서드

    @Modifying
    @Query("delete from User u where u.id = :userId")
    void deleteUser(@Param("userId") Long userId);
}
4) Token Entity
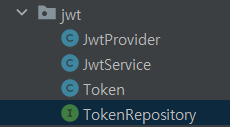
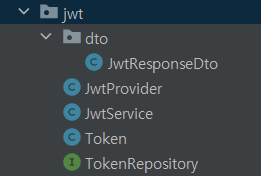
① jwt라는 이름의 패키지를 추가하고 이 패키지 하위로, dto 패키지 > JwtResponseDto, JwtProvider, JwtService, Token, TokenRepository(인터페이스)를 추가한다.
② JwtResponseDto에 아래의 내용을 입력한다.
public class JwtResponseDto {
    @Builder
    @Getter
    @AllArgsConstructor
    @NoArgsConstructor
    public static class TokenInfo {
        private String accessToken;
        private String refreshToken;
    }
}
③ Token에 아래의 내용을 입력한다.
@Entity
@Builder
@Getter
@AllArgsConstructor
@NoArgsConstructor
public class Token {
    @Column
    @Id
    @GeneratedValue(strategy = GenerationType.IDENTITY)
    private int tokenId; // 토큰의 식별자

    @Column(nullable = true)
    private String accessToken;

    @Column(nullable = true)
    private String refreshToken;

    @OneToOne(fetch = FetchType.LAZY)
    @JoinColumn(name = "user_id")
    private User user;

    public void updateAccessToken(String accessToken){
        this.accessToken = accessToken;
    }
    public void updateRefreshToken(String refreshToken){
        this.refreshToken = refreshToken;
    }

    public void updateUser(User user){
        this.user = user;
    }
}
④ TokenRepository에 아래의 내용을 입력한다.
public interface TokenRepository extends JpaRepository<Token, Long> {
    @Query("select u from User u JOIN Token t ON u.id = t.user.id WHERE t.accessToken= :accessToken")
    Optional<User> findUserByAccessToken(@Param("accessToken") String accessToken);

    @Query("select t from Token t JOIN User u ON u.id = t.user.id WHERE t.user.id= :userId")
    Optional<Token> findTokenByUserId(@Param("userId") Long userId);

    @Modifying
    @Query("delete from Token t where t.user.id = :userId")
    void deleteTokenByUserId(@Param("userId") Long userId);

    @Modifying
    @Query("delete from Token t where t.accessToken = :accessToken")
    void deleteTokenByAccessToken(@Param("accessToken") String accessToken);
}
⑤ JwtProvider에 아래의 내용을 입력한다.
@Slf4j
@Component
public class JwtProvider {
    private static final long REFRESH_TOKEN_EXPIRE_TIME = 3 * 24 * 60 * 60 * 1000L; //refreshToken 유효기간 3일
    private static final long ACCESS_TOKEN_EXPIRE_TIME = 12 * 60 * 60 * 1000L; //accessToken 유효기간 12시간

    private Key key = Keys.hmacShaKeyFor(Decoders.BASE64URL.decode(Secret.JWT_SECRET_KEY));

    //==토큰 생성 메소드==//
    public String createToken(Long userId) {
        Date now = new Date();
        Date expiration = new Date(now.getTime() + ACCESS_TOKEN_EXPIRE_TIME); // 만료기간 설정

        return Jwts.builder()
                .setHeaderParam(Header.TYPE, Header.JWT_TYPE) // (1)
                .claim("userId", userId)
                .setIssuer("test") // 토큰발급자(iss)
                .setIssuedAt(now) // 발급시간(iat)
                .setExpiration(expiration) // 만료시간(exp)
                .signWith(key, SignatureAlgorithm.HS256)
                .compact();
    }

    // 유저 정보를 가지고 AccessToken, RefreshToken 을 생성하는 메서드
    public JwtResponseDto.TokenInfo generateToken(Long userId) {
        long now = (new Date()).getTime();

        // Access Token 생성
        String accessToken = Jwts.builder()
                .setHeaderParam(Header.TYPE, Header.JWT_TYPE) // (1)
                .claim("userId", userId)
                .setExpiration(new Date(now + ACCESS_TOKEN_EXPIRE_TIME)) // 만료시간
                .signWith(key, SignatureAlgorithm.HS256)
                .compact();

        // Refresh Token 생성
        String refreshToken = Jwts.builder()
                .setHeaderParam(Header.TYPE, Header.JWT_TYPE) // (1)
                .claim("userId", userId)
                .setExpiration(new Date(now + REFRESH_TOKEN_EXPIRE_TIME))
                .signWith(key, SignatureAlgorithm.HS256)
                .compact();

        return JwtResponseDto.TokenInfo.builder()
                .accessToken(accessToken)
                .refreshToken(refreshToken)
                .build();
    }

    // 토큰 정보를 검증하는 메서드
    public boolean validateToken(String token) {
        try {
            Jwts.parserBuilder().setSigningKey(key).build().parseClaimsJws(token);
            return true;
        } catch (io.jsonwebtoken.security.SecurityException | MalformedJwtException e) {
            log.info("Invalid JWT Token", e);
        } catch (ExpiredJwtException e) {
            log.info("Expired JWT Token", e);
        } catch (UnsupportedJwtException e) {
            log.info("Unsupported JWT Token", e);
        } catch (IllegalArgumentException e) {
            log.info("JWT claims string is empty.", e);
        }
        return false;
    }

    public Long getExpiration(String accessToken) {
        // accessToken 남은 유효시간
        Date expiration = Jwts.parserBuilder()
                .setSigningKey(key)
                .build()
                .parseClaimsJws(accessToken)
                .getBody()
                .getExpiration();
        // 현재 시간
        Long now = System.currentTimeMillis();
        return (expiration.getTime() - now);
    }
}
⑥ JwtService에 아래의 내용을 입력한다.
@Service
@RequiredArgsConstructor
public class JwtService {
    private Key key = Keys.hmacShaKeyFor(Decoders.BASE64.decode(Secret.JWT_SECRET_KEY));
    private final JwtProvider jwtProvider;
    private final RedisTemplate redisTemplate;
    private final UtilService utilService;
    private final TokenRepository tokenRepository;

    public String getJwt() {
        HttpServletRequest request = ((ServletRequestAttributes) RequestContextHolder.currentRequestAttributes()).getRequest();
        return request.getHeader("Authorization");
    }

    /**
     * JWT에서 userId 추출
     */
    public Long getUserIdx() throws BaseException {
        // 1. JWT 추출
        String accessToken = getJwt();
        if (accessToken == null || accessToken.length() == 0) {
            throw new BaseException(BaseResponseStatus.EMPTY_JWT);
        }
        if (checkBlackToken(accessToken)) {
            throw new BaseException(BaseResponseStatus.LOG_OUT_USER);
        }
        try {
            // 2. JWT parsing
            Jws<Claims> claims = Jwts.parserBuilder()
                    .setSigningKey(key)
                    .build()
                    .parseClaimsJws(accessToken);
            // 3. userId 추출
            Long userId = claims.getBody().get("userId", Long.class);
            User user = utilService.findByUserIdWithValidation(userId);

            return userId;
        } catch (ExpiredJwtException e) {
            // access token이 만료된 경우
            User user = tokenRepository.findUserByAccessToken(accessToken).orElse(null);
            if (user == null) {
                throw new BaseException(BaseResponseStatus.INVALID_JWT);
            }
            // 4. Refresh Token을 사용하여 새로운 Access Token 발급
            Token token = tokenRepository.findTokenByUserId(user.getId()).orElse(null);
            String refreshToken = token.getRefreshToken();
            if (refreshToken != null) {
                String newAccessToken = refreshAccessToken(user, refreshToken);
                // 새로운 Access Token으로 업데이트된 JWT를 사용하여 userId 추출
                Jws<Claims> newClaims = Jwts.parserBuilder()
                        .setSigningKey(key)
                        .build()
                        .parseClaimsJws(newAccessToken);
                return newClaims.getBody().get("userId", Long.class);
            } else {
                throw new BaseException(BaseResponseStatus.EMPTY_JWT);
            }
        } catch (io.jsonwebtoken.security.SecurityException | MalformedJwtException e) {
            throw new BaseException(BaseResponseStatus.INVALID_JWT);
        } catch (Exception ignored) {
            throw new BaseException(BaseResponseStatus.INVALID_JWT);
        }
    }

    /**
	 * 로그아웃 전용 userId 추출 메서드
	 */
	// 로그아웃을 시도할 때는 accsee token과 refresh 토큰이 만료되었어도
	// 형식만 유효하다면 토큰 재발급 없이 로그아웃 할 수 있어야 함.
	public Long getLogoutUserIdx() throws BaseException {
	    // 1. JWT 추출
	    String accessToken = getJwt();
	    if (accessToken == null || accessToken.length() == 0) {
	        throw new BaseException(BaseResponseStatus.EMPTY_JWT);
	    }
	    if (checkBlackToken(accessToken)) {
        throw new 	BaseException(BaseResponseStatus.LOG_OUT_USER);
    	}
    	try {
        	// 2. JWT parsing
          Jws<Claims> claims = Jwts.parserBuilder()
                	.setSigningKey(key)
                	.build()
                	.parseClaimsJws(accessToken);
        	// 3. userId 추출
        	return claims.getBody().get("userId", Long.class);
    	} catch (ExpiredJwtException e) {
        	// access token이 만료된 경우
        	return 0L;
    	} catch (io.jsonwebtoken.security.SecurityException | MalformedJwtException e) {
        	throw new BaseException(BaseResponseStatus.INVALID_JWT);
    	} catch (Exception ignored) {
        	throw new BaseException(BaseResponseStatus.INVALID_JWT);
    	}
	}

    /**
     * 액세스 토큰 재발급
     */
    private String refreshAccessToken(User user, String refreshToken) throws BaseException {
        try {
            // 리프레시 토큰이 만료 등의 이유로 유효하지 않은 경우
            if (!jwtProvider.validateToken(refreshToken)) {
                throw new BaseException(BaseResponseStatus.INVALID_JWT);
            }
            else { // 리프레시 토큰이 유효한 경우
                Long userId = user.getId();
                String refreshedAccessToken = jwtProvider.createToken(userId);
                // 액세스 토큰 재발급에 성공한 경우
                if (refreshedAccessToken != null) {
                    Token token = utilService.findTokenByUserIdWithValidation(userId);
                    token.updateAccessToken(refreshedAccessToken);
                    tokenRepository.save(token);
                    return refreshedAccessToken;
                }
                throw new BaseException(BaseResponseStatus.FAILED_TO_REFRESH);
            }
        } catch (BaseException exception) {
            throw new BaseException(exception.getStatus());
        }
    }

    /**
     * Redis 블랙 리스트 등록 여부 확인
     */
    private boolean checkBlackToken(String accessToken) {
        // Redis에 있는 엑세스 토큰인 경우 로그아웃 처리된 엑세스 토큰이다.
        Object redisToken = redisTemplate.opsForValue().get(accessToken);
        if (redisToken != null) { // Redis에 저장된 토큰이면 블랙토큰
            return true;
        }
        return false;
    }
}
다음 포스팅에서는 Profile Entity를 만들어보고, API를 작성해보도록 하겠다.