이번 포스팅에서는 저번 포스팅에 이어서 회원가입 및 로그인 기능을 완성시켜보도록 하겠습니다.
5) Profile Entity
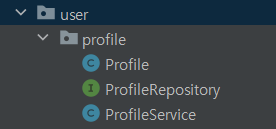
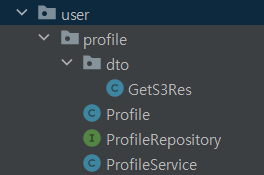
① user 패키지 하위로, profile 패키지를 생성하고 이 패키지 하위로, Profile, ProfileRepository, ProfileService과 dto > GetS3Res를 추가한다.
② Profile에 아래의 내용을 입력한다.
@Getter
@Builder
@AllArgsConstructor
@NoArgsConstructor
@Entity
public class Profile extends BaseTimeEntity {
    @Id
    @GeneratedValue(strategy = GenerationType.IDENTITY)
    private Long profileId;
    private String profileUrl; // 프로필 사진 URL
    private String profileFileName; // 프로필 사진명

    @OneToOne(fetch = FetchType.LAZY)
    @JoinColumn(name = "user_id")
    private User user;

    public void setUser(User user){
        this.user = user;
    }
}
③ ProfileRepository에는 아래의 내용을 입력한다.
public interface ProfileRepository extends JpaRepository<Profile, Long> {
    @Query("select p from Profile p where p.user.id = :userId")
    Optional<Profile> findProfileById(@Param("userId") Long userId);

    @Modifying
    @Query("delete from Profile p where p.user.id = :userId")
    void deleteProfileById(@Param("userId") Long userId);
}
④ ProfileService에는 아래의 내용을 입력한다.
@Service
@RequiredArgsConstructor
public class ProfileService {
    private final ProfileRepository profileRepository;
    private final S3Service s3Service;

    @Transactional
    public void saveProfile(GetS3Res getS3Res, User user){
        Profile profile;
        if(getS3Res.getImgUrl() != null) {
            profile = Profile.builder()
                    .profileUrl(getS3Res.getImgUrl())
                    .profileFileName(getS3Res.getFileName())
                    .user(user)
                    .build();
            profileRepository.save(profile);
        }
    }

    @Transactional
    public void deleteProfile(Profile profile) {
        s3Service.deleteFile(profile.getProfileFileName());
    }

    @Transactional
    public void deleteProfileById(Long memberId) {
        profileRepository.deleteProfileById(memberId);
    }
}
4. 회원가입 / 로그인 API 작성
1) DTO
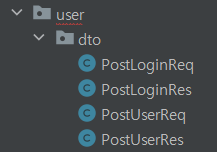
① user 패키지 하위로 dto 패키지를 추가하고, 그 안에 PostUserReq, PostUserRes, PostLoginReq, PostLoginRes를 추가한다.
② PostLoginReq에 아래의 내용을 입력한다.
@AllArgsConstructor
@NoArgsConstructor
@Getter
public class PostLoginReq {
    private String uid;
    private String email;
    private String password;
}
③ PostLoginRes에 아래의 내용을 입력한다.
@Getter
@Setter
@AllArgsConstructor
@NoArgsConstructor
public class PostLoginRes {
    private Long userId;
    private String accessToken;
    private String refreshToken;

    public PostLoginRes(User user, Token token) {
        this.userId = user.getId();
        this.accessToken = token.getAccessToken();
        this.refreshToken = token.getRefreshToken();
    }
}
④ PostUserReq에 아래의 내용을 입력한다.
- auth.currentUser는 해당 디바이스에서 가장 최근에 로그인한 유저를 의미하므로, 하나의 디바이스에서 여러 계정을 사용해야 하는 경우 회원가입 DTO에서 uid를 받으면 안 된다.
- 그러므로 로그인 DTO에서 uid를 받는게 더 안전하다.
@Getter
@NoArgsConstructor
@AllArgsConstructor
public class PostUserReq {
    private String nickName;
    private String email;
    private String password;
    private String passwordChk; // 비밀번호 확인
}
⑤ PostUserRes에는 아래의 내용을 입력한다.
@AllArgsConstructor
@NoArgsConstructor
@Getter
public class PostUserRes {
    private Long userId;
    private String nickName;

    public PostUserRes(User user){
        this.userId = user.getId();
        this.nickName = user.getNickName();
    }
}
2) UserController
UserController에 아래의 내용을 입력한다.
@RequiredArgsConstructor
@RestController
@RequestMapping("/users")
public class UserController {

    private final UserService userService;
    private final JwtService jwtService;

    /**
     * 회원 가입
     */
    @PostMapping("")
    public BaseResponse<PostUserRes> createUser(@RequestBody PostUserReq postUserReq) {
        try {
            return new BaseResponse<>(userService.createUser(postUserReq));
        } catch (BaseException exception) {
            return new BaseResponse<>((exception.getStatus()));
        }
    }

    /**
     * 로그인
     */
    @PostMapping("/log-in")
    public BaseResponse<PostLoginRes> loginUser(@RequestBody PostLoginReq postLoginReq) {
        try {
            return new BaseResponse<>(userService.login(postLoginReq));
        } catch (BaseException exception) {
            return new BaseResponse<>(exception.getStatus());
        }
    }
}
3) UserService
@EnableTransactionManagement
@RequiredArgsConstructor
@Service
public class UserService {

    private final UserRepository userRepository;
    private final UtilService utilService;
    private final TokenRepository tokenRepository;
    private final JwtProvider jwtProvider;
    private final JwtService jwtService;
    private final RedisTemplate redisTemplate;

    /**
     * 유저 생성 후 DB에 저장(회원 가입) with JWT
     */
    @Transactional
    public PostUserRes createUser(PostUserReq postUserReq) throws BaseException {
        if(userRepository.findByEmailCount(postUserReq.getEmail()) >= 1) {
            throw new BaseException(BaseResponseStatus.POST_USERS_EXISTS_EMAIL);
        }
        if(postUserReq.getPassword().isEmpty()){
            throw new BaseException(BaseResponseStatus.PASSWORD_CANNOT_BE_NULL);
        }
        if(!postUserReq.getPassword().equals(postUserReq.getPasswordChk())) {
            throw new BaseException(BaseResponseStatus.PASSWORD_MISSMATCH);
        }

        if(postUserReq.getNickName() == null || postUserReq.getNickName().isEmpty()) {
            throw new BaseException(BaseResponseStatus.NICKNAME_CANNOT_BE_NULL);
        }

        String pwd;
        try{
            pwd = new AES128(Secret.USER_INFO_PASSWORD_KEY).encrypt(postUserReq.getPassword()); // 암호화 코드
        }
        catch (Exception ignored) { // 암호화가 실패하였을 경우 에러 발생
            throw new BaseException(BaseResponseStatus.PASSWORD_ENCRYPTION_ERROR);
        }
        User user = new User();
        user.createUser(postUserReq.getNickName(),postUserReq.getEmail(), pwd, null);
        userRepository.save(user);

        return new PostUserRes(user);
    }

    /**
     * 유저 로그인 with JWT
     */
        public PostLoginRes login(PostLoginReq postLoginReq) throws BaseException {
        User user = utilService.findByEmailWithValidation(postLoginReq.getEmail());
        user.setUid(postLoginReq.getUid());

        String password;
        try {
            password = new AES128(Secret.USER_INFO_PASSWORD_KEY).decrypt(user.getPassword());
        } catch (Exception ignored) {
            throw new BaseException(BaseResponseStatus.PASSWORD_DECRYPTION_ERROR);
        }

        if (postLoginReq.getPassword().equals(password)) {
            Token token = tokenRepository.findTokenByUserId(user.getId()).orElse(null);

            if (token == null) {
                JwtResponseDto.TokenInfo tokenInfo = jwtProvider.generateToken(user.getId());
                token = Token.builder()
                        .accessToken(tokenInfo.getAccessToken())
                        .refreshToken(tokenInfo.getRefreshToken())
                        .user(user)
                        .build();
                tokenRepository.save(token);
            }

            return new PostLoginRes(user, token);
        } else {
            throw new BaseException(BaseResponseStatus.PASSWORD_NOT_MATCH);
        }
    }
}
5. API 연결
① Module 수준의 build.gradle 파일의 dependencies에 Retrofit을 사용하기 위한 의존성을 추가한다.
implementation("com.squareup.retrofit2:retrofit:2.9.0")
implementation("com.squareup.retrofit2:converter-gson:2.9.0")
implementation ("org.jetbrains.kotlinx:kotlinx-coroutines-android:1.5.2")
② Manifest 파일에 아래의 내용을 추가한다.
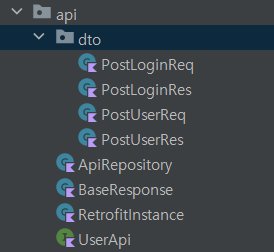
<uses-permission android:name="android.permission.INTERNET"/>③ default 패키지 하위로 api 패키지를 생성한 후, 그 안에 UserApi 인터페이스, ApiRepository, RetrofitInstance, BaseResponse, dto > PostLoginReq, PostLoginRes, PostUserReq, PostUserRes를 추가한다.
④ PostLoginReq에 아래의 내용을 입력한다.
data class PostLoginReq (
    @SerializedName("uid")
    val uid : String,

    @SerializedName("email")
    val email : String,

    @SerializedName("password")
    val password : String
)
⑤ PostLoginRes에는 아래의 내용을 입력한다.
data class PostLoginRes (
    @SerializedName("userId")
    val userId : Long,

    @SerializedName("accessToken")
    val accessToken : String,

    @SerializedName("refreshToken")
    val refreshToken : String
)
⑥ PostUserReq에는 아래의 내용을 입력한다.
data class PostUserReq (
    @SerializedName("nickName")
    val nickName : String,

    @SerializedName("email")
    val email : String,

    @SerializedName("password")
    val password : String,

    @SerializedName("passwordChk")
    val passwordChk : String
)
⑦ PostUserRes에는 아래의 내용을 입력한다.
data class PostUserRes (
    @SerializedName("userId")
    val userId : Long,

    @SerializedName("nickName")
    val nickName : String
)
⑧ ApiRepository에는 아래의 내용을 입력한다.
- 에뮬레이터에서 API를 테스트하기 때문에 localhost가 아닌 서버가 돌아가는 IPv4주소를 넣어야 한다.
- 서버의 주소는 IntelliJ의 터미널에 ipconfig를 입력했을 때 Wireless LAN adapter Wi-Fi:에 나오는 IPv4 주소이다. 192.168.XX.XXX일 것이다.
- 이 주소는 자주 바뀌기 때문에 API가 동작하지 않을 경우 IPv4 주소가 바뀌었는지 확인해야 한다.
class ApiRepository {
    companion object {
        const val BASE_URL = "http://192.168.XX.XXX:8080"
        const val CONTENT_TYPE = "application/json"
    }
}
⑨ BaseResponse에는 아래의 내용을 입력한다.
data class BaseResponse<T> (
    val isSuccess: Boolean,
    val code: Int,
    val message: String,
    val result: T?
)
⑩ RetrofitInstance에는 아래의 내용을 입력한다.
class RetrofitInstance {
    companion object {
        private val retrofit by lazy {
            Retrofit.Builder()
                .baseUrl(ApiRepository.BASE_URL)
                .addConverterFactory(GsonConverterFactory.create())
                .build()
        }
        val userApi = retrofit.create(UserApi::class.java)
    }
}
⑪ UserApi에는 아래의 내용을 입력한다.
interface UserApi {
    @POST("/users")
    suspend fun createUser(@Body postUserReq: PostUserReq): BaseResponse<PostUserRes>

    @POST("/users/log-in")
    suspend fun loginUser(@Body postLoginReq: PostLoginReq): BaseResponse<PostLoginRes>
}
⑫ JoinActivity를 아래와 같이 수정한다.
class JoinActivity : AppCompatActivity() {

    private lateinit var auth: FirebaseAuth

    override fun onCreate(savedInstanceState: Bundle?) {
        super.onCreate(savedInstanceState)
        setContentView(R.layout.activity_join)

        auth = Firebase.auth

        val joinBtn = findViewById<Button>(R.id.joinBtn)
        joinBtn.setOnClickListener {
            val nickname = findViewById<TextInputEditText>(R.id.nickname)
            val email = findViewById<TextInputEditText>(R.id.joinEmail)
            val password = findViewById<TextInputEditText>(R.id.joinPassword)
            val passwordChk = findViewById<TextInputEditText>(R.id.passwordChk)

            val postUserReq = PostUserReq(nickname.text.toString(), email.text.toString(),
                password.text.toString(), passwordChk.text.toString())

            auth.createUserWithEmailAndPassword(email.text.toString(), password.text.toString())
                .addOnCompleteListener(this) { task ->
                    if (task.isSuccessful) {
                        createUser(postUserReq)
                        Toast.makeText(this, "가입을 환영합니다!", Toast.LENGTH_SHORT).show()
                        val intent = Intent(this, LoginActivity::class.java)
                        startActivity(intent)
                    } else {
                        Log.d("JoinActivity", "회원가입 실패")
                    }
                }
        }
    }

    private fun createUser(postUserReq: PostUserReq) = CoroutineScope(Dispatchers.IO).launch {
        RetrofitInstance.userApi.createUser(postUserReq)
    }
}
⑬ LoginActivity를 아래와 같이 수정한다.
class LoginActivity : AppCompatActivity() {

    private lateinit var auth: FirebaseAuth

    override fun onCreate(savedInstanceState: Bundle?) {
        super.onCreate(savedInstanceState)
        setContentView(R.layout.activity_login)

        auth = Firebase.auth

        val loginBtn = findViewById<Button>(R.id.loginBtn)

        loginBtn.setOnClickListener {
            val email = findViewById<TextInputEditText>(R.id.email)
            val password = findViewById<TextInputEditText>(R.id.password)
            val uid = FirebaseAuthUtils.getUid()
			val postLoginReq = PostLoginReq(uid, email.text.toString(), password.text.toString())

            auth.signInWithEmailAndPassword(email.text.toString(), password.text.toString())
                .addOnCompleteListener(this) { task ->
                    if (task.isSuccessful) {
                        CoroutineScope(Dispatchers.IO).launch {
                            val response = loginUser(postLoginReq)
                            Log.d("LoginActivity", response.toString())
                            if (response.isSuccess) {
                                Log.d("LoginActivity", "로그인 완료")
                                val intent = Intent(this@LoginActivity, MainActivity::class.java)
                                startActivity(intent)
                            } else {
                                // 로그인 실패 처리
                                Log.d("LoginActivity", "로그인 실패")
                            }
                        }
                    } else {
                        Log.d("LoginActivity", "로그인 실패")
                    }
                }
        }
    }

    private suspend fun loginUser(postLoginReq: PostLoginReq): BaseResponse<PostLoginRes> {
        return RetrofitInstance.userApi.loginUser(postLoginReq)
    }
}
⑭ 안드로이드 스튜디오에서 API를 호출할 때 HTTP로 호출하면 에러가 발생한다. 그러므로 Manifest 파일의 application 컨테이너의 속성에 아래의 내용을 추가한다.
<manifest
	<application
    	...
        android:usesCleartextTraffic="true"
코드를 실행시켜보면 회원가입 및 로그인한 유저의 정보가 파이어베이스의 Authentication > Users와 AWS RDS에 잘 저장될 것이다.