db와 API를 세팅했다면 이제는 Vue.js를 사용해 간단한 front end 개발을 할 것이다. 그다음에 Dokcerize를 진행할 것이다.
우선 프로젝트 폴더에 이동후 vue create ui 를 사용해 vue app을 생성한다.
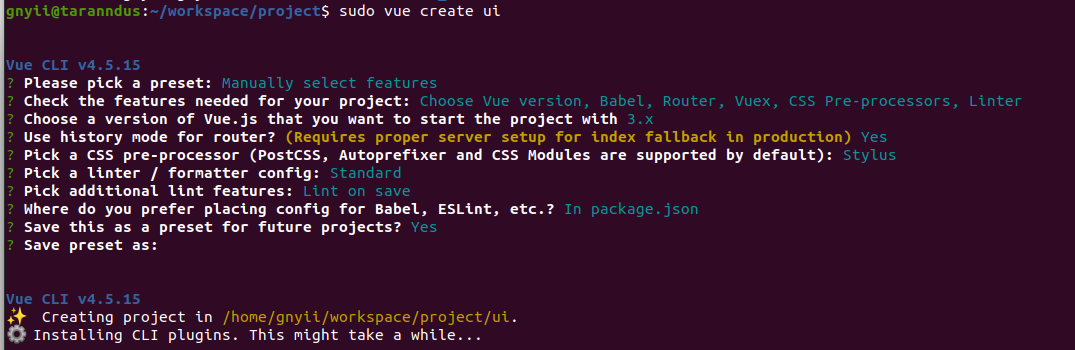
sudo vue create ui로 실행하여 Manualy select features를 선택하여 Babel,Router,Vuex,CSS Pre-processors,Linter를 설치하였다.
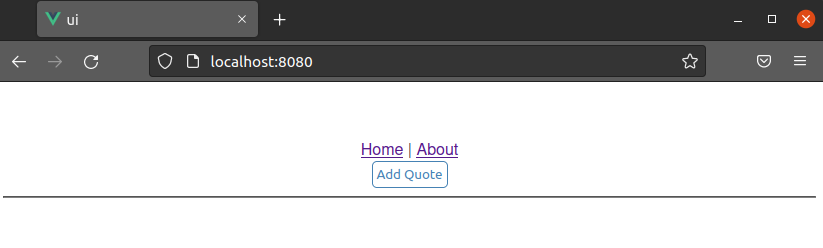
이제는 화면에 게시글을 보여주기 위해 Home.vue를 수정해보겠다.
<template>
<div class="home">
<button @click="$router.push('/new')">Add Quote</button>
<hr />
<div class="container">
<div class="quote" v-for="quote in quotes" :key="quote.id" :quote="quote">
<p>
<em>"{{quote.quote}}"</em>
by {{quote.quote_by}}
</p>
<span class="added-by">added by {{quote.added_by}}</span>
</div>
</div>
</div>
</template>
<script>
export default {
name: 'home',
data: () => ({
quotes: []
}),
created () {
fetch('http://localhost:5000')
.then(res => res.json())
.then(response => {
this.quotes = response.quotes
})
.catch(e => {
console.error(e.message)
})
}
}
</script>
<style scoped>
.home {
width: 100%;
}
button {
cursor: pointer;
border: 1px solid steelblue;
border-radius: 5px;
background: white;
color: steelblue;
height: 2em;
}
button:hover {
background: steelblue;
color: white;
}
.container {
display: flex;
flex-direction: row;
flex-wrap: wrap;
}
.quote {
width: 29%;
padding: 0.5rem;
margin: 1%;
border-radius: 10px;
border: 1px solid steelblue;
color: black;
}
.quote span.by {
text-decoration: underline;
}
.quote .added-by {
color: rgba(0, 0, 0, 0.6);
margin-top: 3em;
}
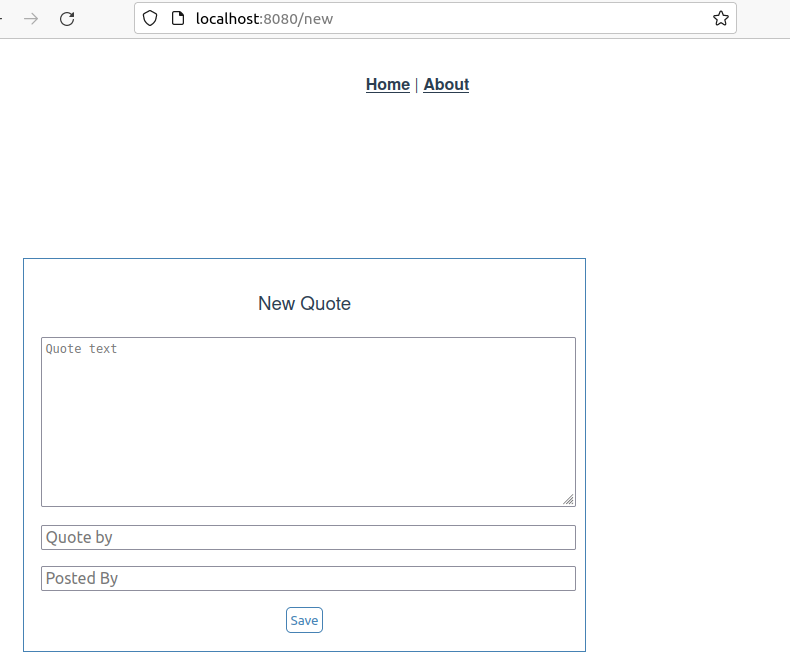
</style>이제 새로운 게시글을 추가하는 페이지를 만들어보자. /src/views/NewQuote.vue를 추가한다.
<template>
  <div class="body">
    <div class="container">
      <div v-if="loading">Loading...</div>
      <div v-else>
        <h3>New Quote</h3>

        <form @submit.prevent="submitQuote">
          <div>
            <textarea placeholder="Quote text" rows="10" v-model="quote.quote" required />
          </div>

          <div>
            <input type="text" placeholder="Quote by" v-model="quote.quote_by" required />
          </div>

          <div>
            <input type="text" placeholder="Posted By" v-model="quote.added_by" required />
          </div>

          <div>
            <button type="submit">Save</button>
          </div>
        </form>
      </div>
    </div>
  </div>
</template>

<script>
export default {
  data: () => ({
    loading: false,
    quote: {}
  }),
  methods: {
    submitQuote () {
      this.loading = false
      fetch('http://localhost:5000', {
        method: 'POST',
        headers: {
          'Content-type': 'application/json'
        },
        body: JSON.stringify(this.quote)
      })
        .then(res => res.json())
        .then(response => {
          if (response) {
            alert('Quote added successfully')
            this.$router.push('/')
          } else {
            alert('Oops! We could not add your quote')
          }
        })
        .catch(e => {
          console.error(e.message)
        })
    }
  }
}
</script>
<style scoped >
.body {
  width: 100%;
}
h3 {
  font-weight: 300;
}
button {
  cursor: pointer;
  border: 1px solid steelblue;
  border-radius: 5px;
  background: white;
  color: steelblue;
  height: 2em;
}
button:hover {
  background: steelblue;
  color: white;
}
.container {
  width: 60%;
  margin: 15% 20% 20% 5%;
  border: 1px solid steelblue;
  padding: 2%;
}
form div {
  margin-top: 1em;
}
textarea,
input {
  width: 100%;
  font-size: 1em;
}
</style>
또한 src/router.js를 수정한다.
import Vue from 'vue'
import Router from 'vue-router'
import Home from './views/Home.vue'
import NewQuote from './views/NewQuote.vue'

Vue.use(Router)

export default new Router({
  mode: 'history',
  base: process.env.BASE_URL,
  routes: [{
    path: '/',
    name: 'home',
    component: Home
  },
  {
    path: '/new',
    name: 'new-quote',
    component: NewQuote
  }]
})
이제 sudo npm run serve 를 실행하고 localhost:8080으로 접속해보자.

✏️세상의 모든 기록 ✏️