[The Killer Website Project] Section 5. The Killer Website Project 학습내용정리
#49 - 50 Building the customer testimonials section
#49 Building the customer testimonials section - Part 1
<blockquote>태그와 <cite>태그 사용하기
blockquote : 태그 안쪽의 텍스트가 긴 인용문임을 나타낸다.
cite : 저작물의 출처를 표기할 때 사용하며, 제목(텍스트 안쪽 내용)을 반드시 포함해야 한다.
[ HTML ]
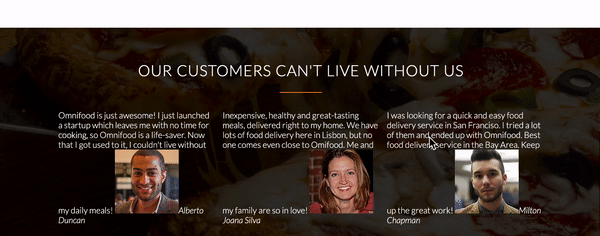
<blockquote> <cite> </cite> </blockquote>//Ex. /*html*/ <blockquote> Omnifood is just awesome! I just launched a startup which leaves me with no time for cooking, so Omnifood is a life-saver. Now that I got used to it, I couldn't live without my daily meals! <cite><img src="Resources/images/customer-1.jpg"/>Alberto Duncan</cite> </blockquote>
output ⬇️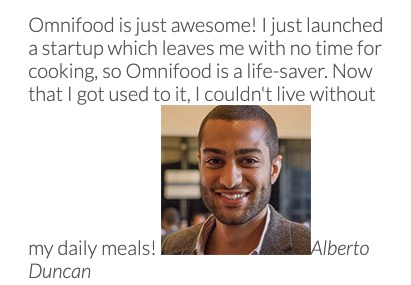
#50 Building the customer testimonials section - Part 2
배경이미지 설정하기
Background 이미지를 설정하는 방법은 다음과 같다!
[ CSS ]
.클래스명 {
background-image: url(이미지 경로);
background-size: cover;
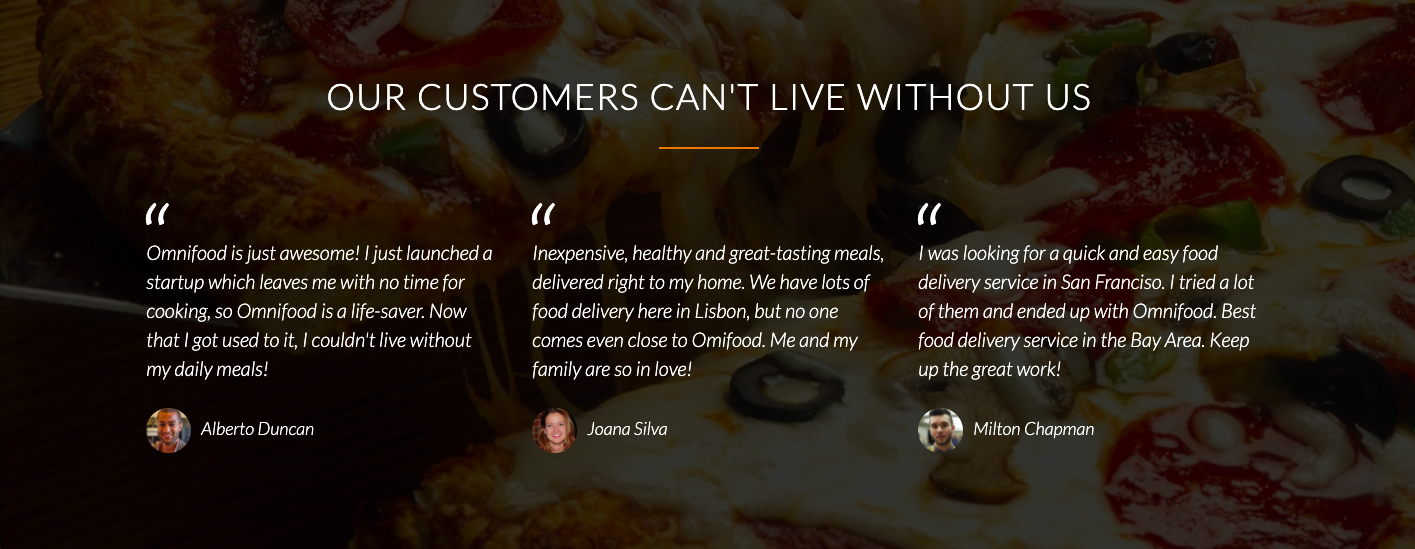
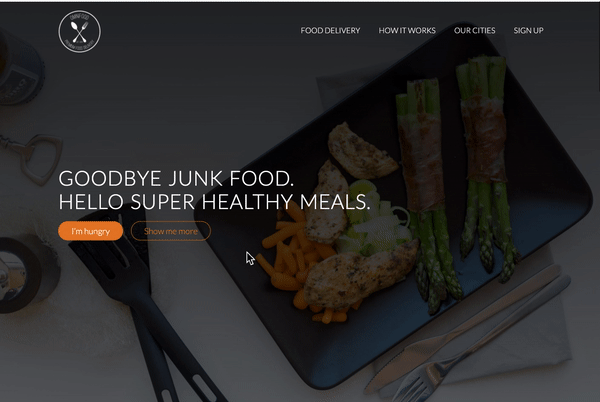
}//Ex. /*html*/ <section class="section-testimonials"> ⭐️⭐️⭐️ <div class="row"> <h2>Our customers can't live without us</h2> </div> <div class="row"> <div class="col span-1-of-3"> . . . //내용생략 . . . </section> /*css*/ .section-testimonials { background-image: url(images/back-customers.jpg); ⭐️⭐️⭐️ background-size: cover; ⭐️⭐️⭐️ }
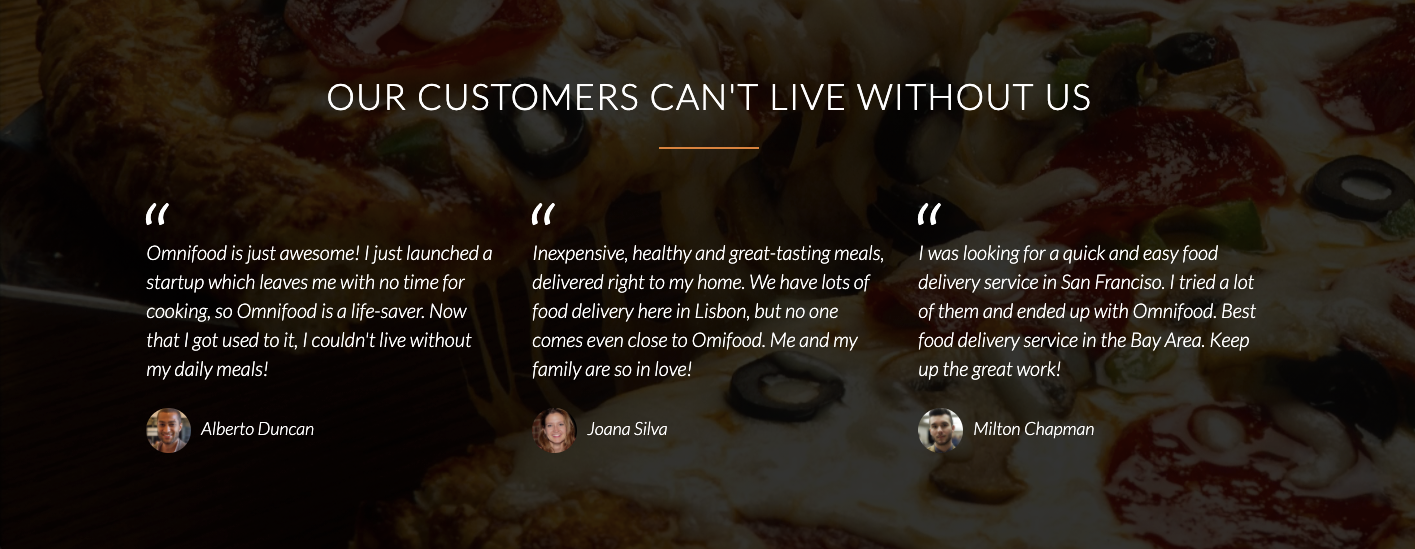
설정 전 ⬇️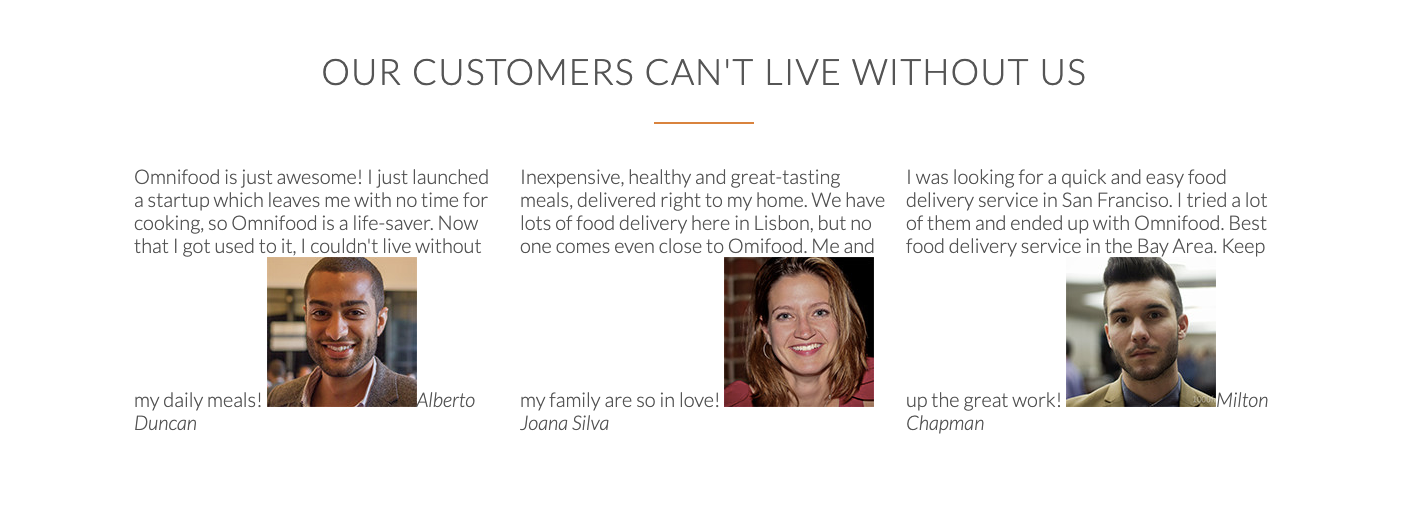
설정 후 ⬇️
배경이미지 고정시키기(background-attachment: fixed)
CSS의 멋진 점 중 하나는 스크롤을 올리거나 내리더라도 백그라운드 이미지가 고정되도록 할 수가 있다는 것이다!
[ CSS ]
background-attachment: fixed;//Ex. /*css*/ .section-testimonials { background-image: linear-gradient(rgba(0, 0, 0, 0.8), rgba(0, 0, 0, 0.8)), url(images/back-customers.jpg); /*백그라운드 검정으로 깔기*/ background-size: cover; color: #fff; /*font 컬러*/ background-attachment: fixed; ⭐️⭐️⭐️/*백그라운드 이미지 고정하기-스크롤해도 상관없이!*/ }
한 줄의 코드로 이런 효과를 누릴 수 있다니..이건 정말 너무 쿨(🤭🤭🤭)한 기능이 아닐 수 없다❗️
멋진 건 한번 더👌
Italic font 적용하기
구글 폰트에서 italic 폰트를 골라 이미 HTML 상단에 링크를 추가한 상태라면, 단순히 CSS에 한 줄의 코드를 추가해 CSS선택자로 원하는 요소에 italic체를 적용할 수 있다.
[ CSS ]
font-style: italic;//Ex. /*html*/ //구글 폰트에서 원하는 폰트 선택 후 링크를 복사해서 가져오기 <link href="https://fonts.googleapis.com/css2?family=Lato:ital,wght@0,100;0,300;0,400;1,300&display=swap" rel="stylesheet"/> /*css*/ blockquote { padding: 2%; font-style: italic; ⭐️⭐️⭐️/*html webfont(구글폰트링크)에 italic을 이미 추가해두었기 때문에 이렇게 쓸 수 있음 */ line-height: 145%; }
적용 후 ⬇️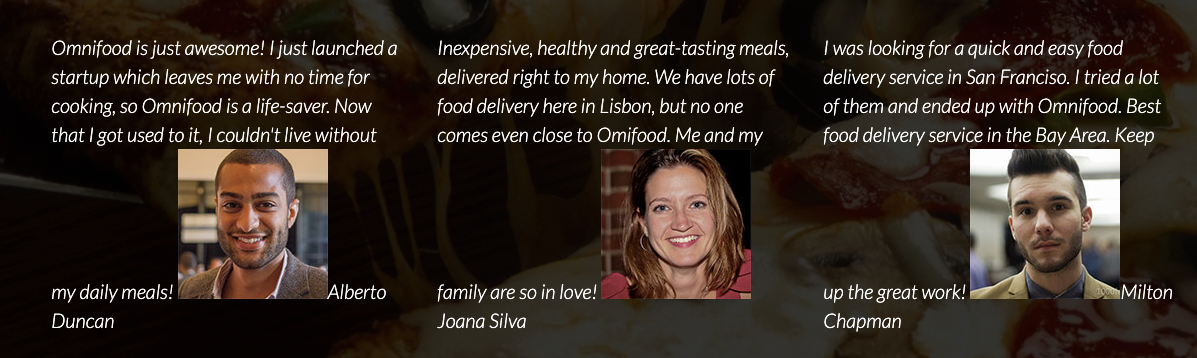
세로로 가운데 정렬하기(vertical-align: middle)
[ CSS ]
vertical-align: middle;//Ex. /*html*/ <cite> <img src="Resources/images/customer-1.jpg" />Alberto Duncan </cite> /*css*/ cite img { height: 50px; border-radius: 50%; margin-right: 10px; vertical-align: middle; ⭐️⭐️⭐️/*사진을 이름의 좌측, 중간 높이에 위치하도록 정렬한다.*/ }❗️여기서 주의할 점은, 이름이 아닌 이미지를 선택해 세로 가운데 정렬로 설정한 것❗️
설정 전 ⬇️
설정 후 ⬇️ 
CSS만으로 Text 추가하기
[ CSS ]
태그명(혹은 클래스명):before(혹은 after) {
content: "텍스트";
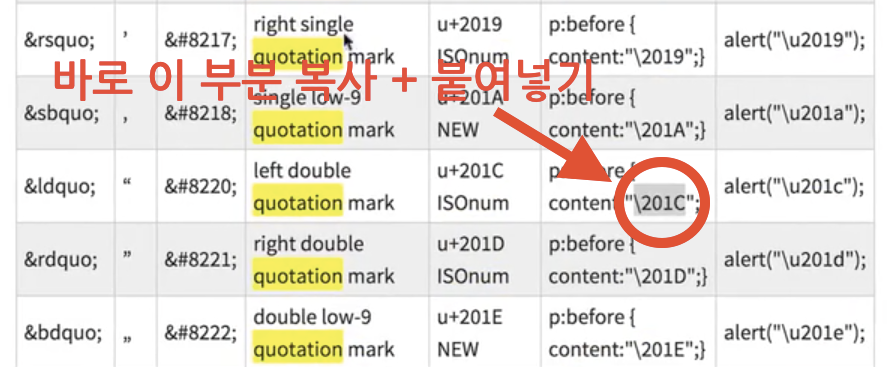
}//Ex. /*css*/ blockquote:before { /*css만을 이용해서 text 추가하기*/ content: "\201C"; ⭐️⭐️⭐️ font-size: 400%; }
🤓 CSS tricks code 입력하는 방법 🤓
- 먼저 ISO Special Characters CSS-tricks에 접속해 원하는 특수문자를 고른다.
- 그리고 해당 특수문자의 ISO 코드를 아래와 같이 복사한다.
- 복사된 코드를 형식에 맞게 CSS에 입력하면 특수문자 텍스트를 추가할 수 있다.

결과 ⬇️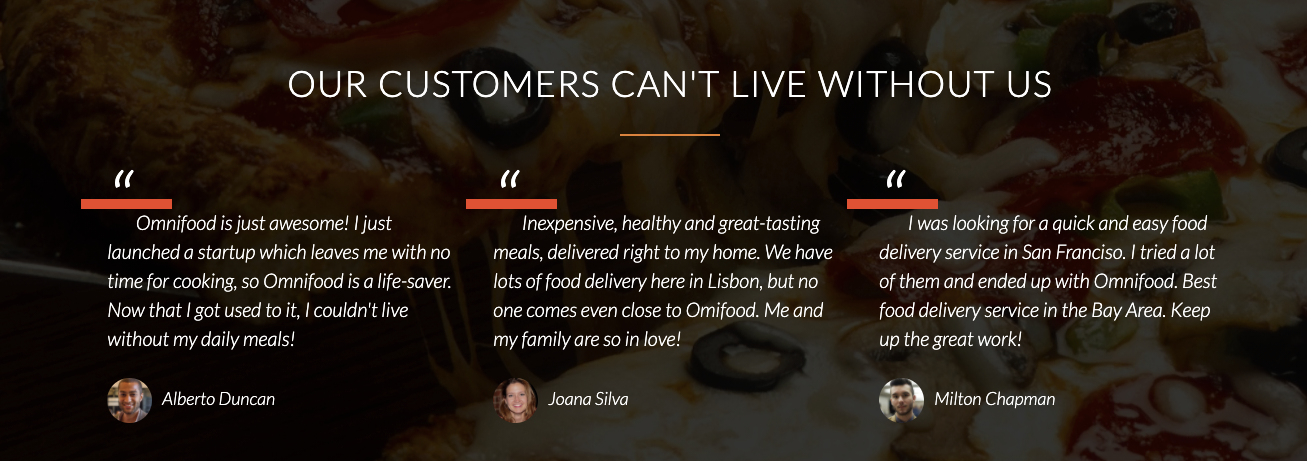
Customer Testimonials Section 완성
Reference
*본 게시물은 Udemy의 'Build Responsive Real World Websites with HTML5 and CSS3'강좌 내용을 포함하고 있습니다.
https://www.udemy.com/course/design-and-develop-a-killer-website-with-html5-and-css3/
https://developer.mozilla.org/ko/docs/Web/HTML/Element/blockquote
https://developer.mozilla.org/ko/docs/Web/HTML/Element/cite
https://fonts.google.com/
https://css-tricks.com/snippets/html/glyphs/
