OpenAPI 를 활용해서 영화진흥위원회에서 제공하는 영화 순위를 활용할 예정이에요.- 다음 내용은 이전 블로그 내용에 의존하고 있어요.
- 이전 내용 실습을 완료한 후 다음 내용을 진행할 수 있어요.
JSON 파싱 후 앱에 나타내기
무비 데이터를 파싱하기 위해 JSON 내용을 기반으로 구조체 정의
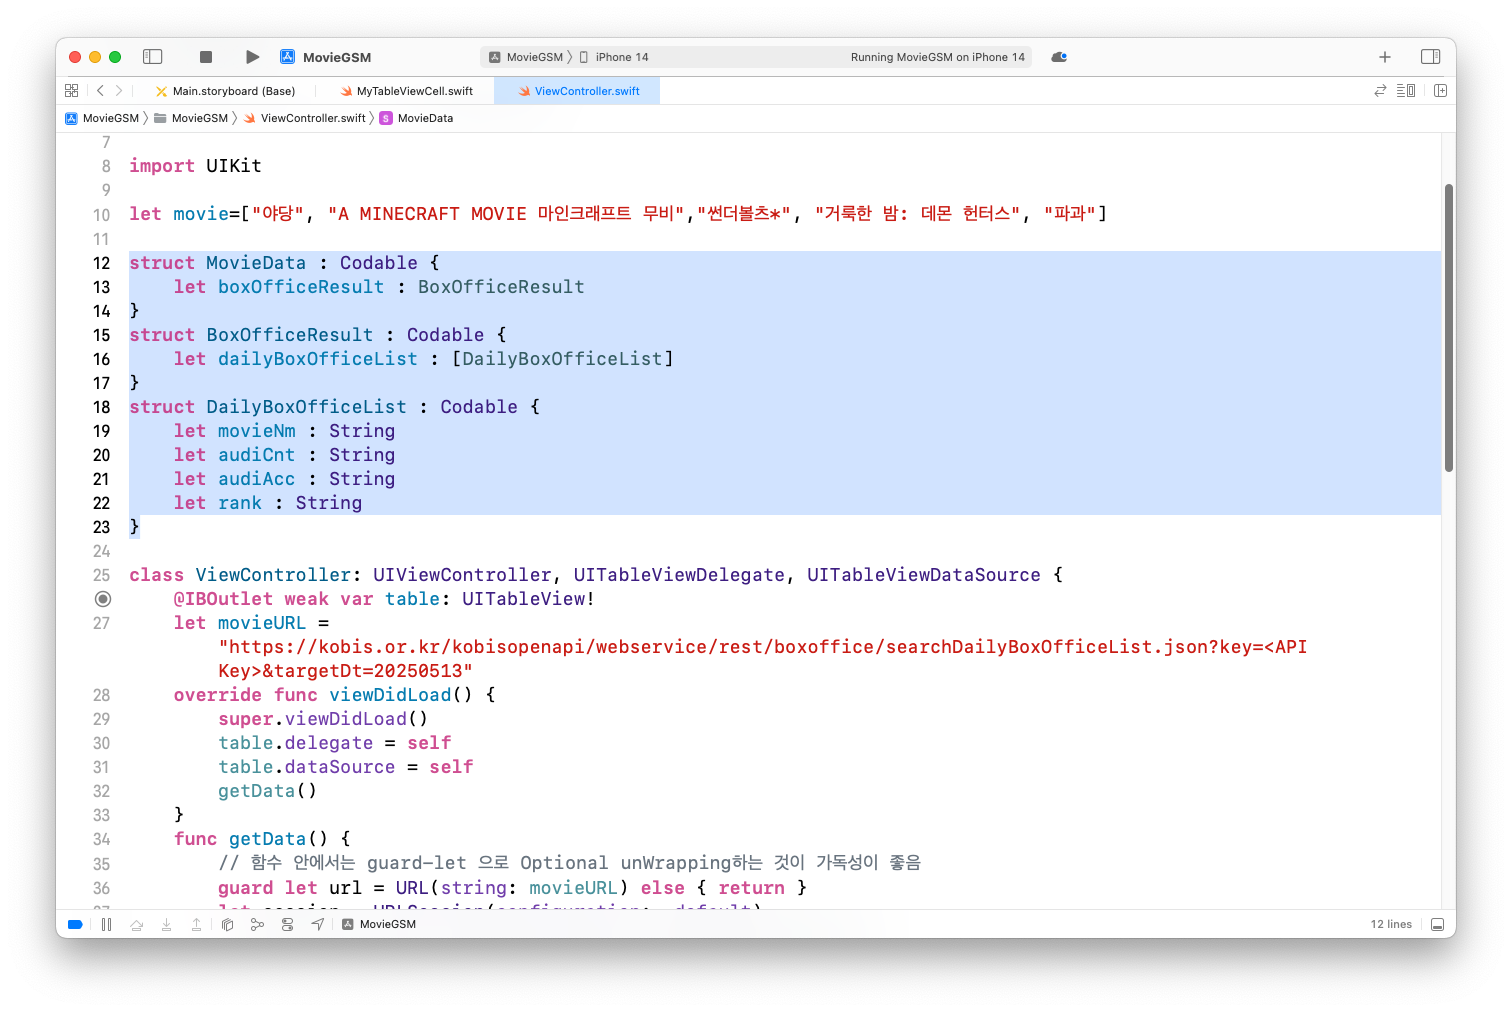
구조체를 통해 파싱한 데이터를 추출하여 출력
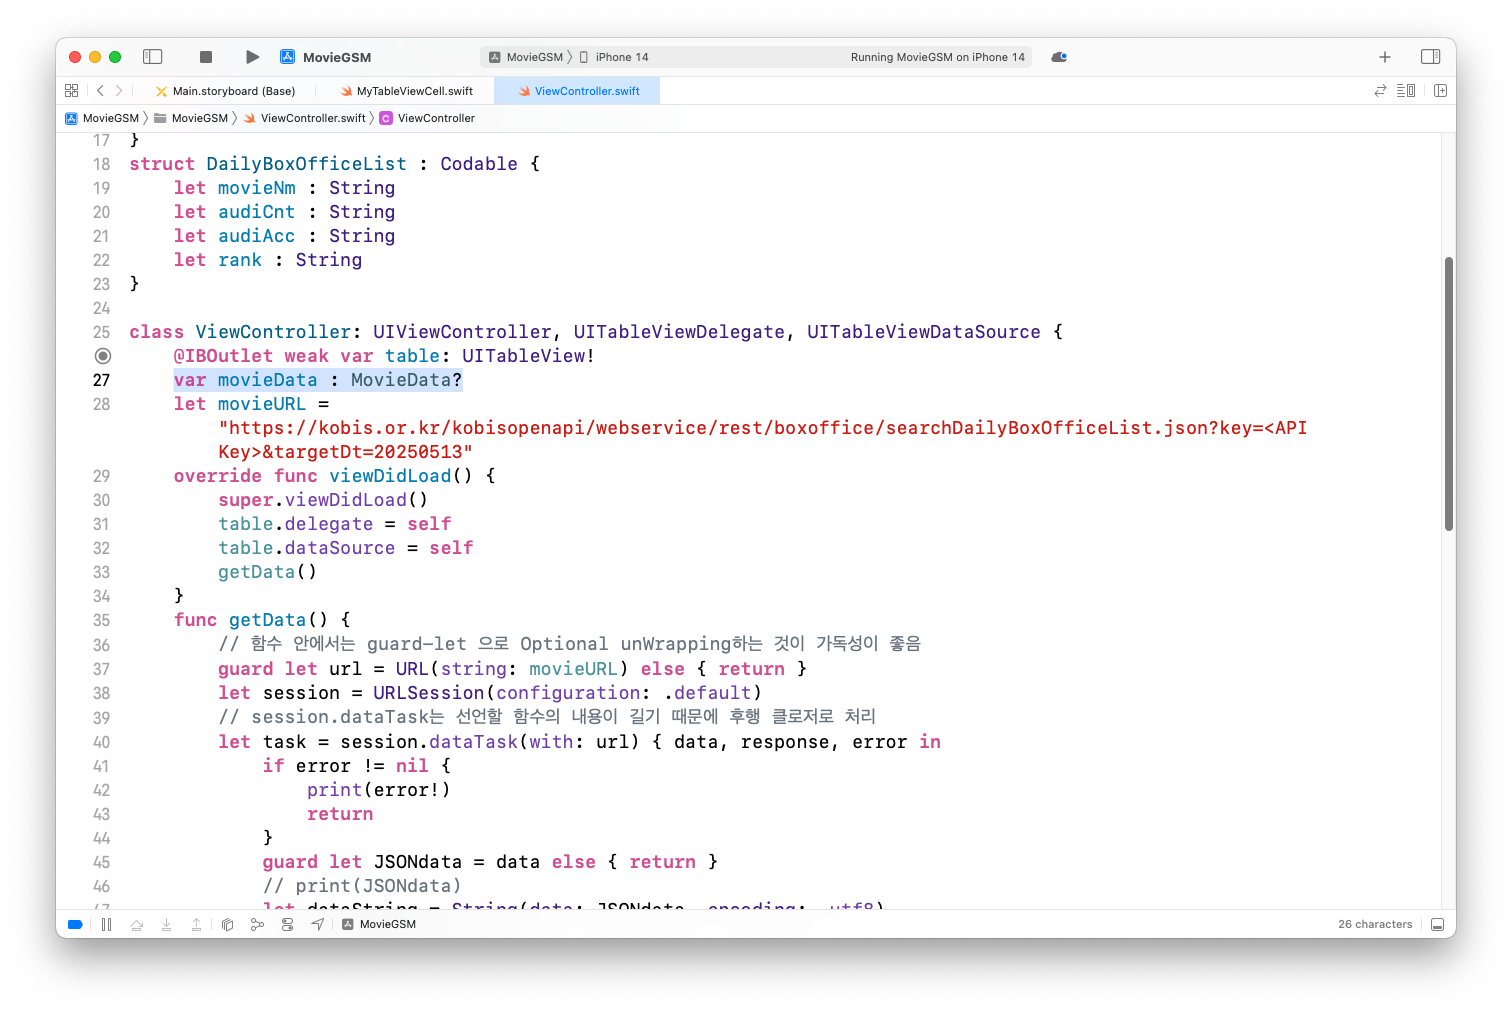
데이터를 앱에 보여주기 위해 옵셔널 MovieData 형으로 정의
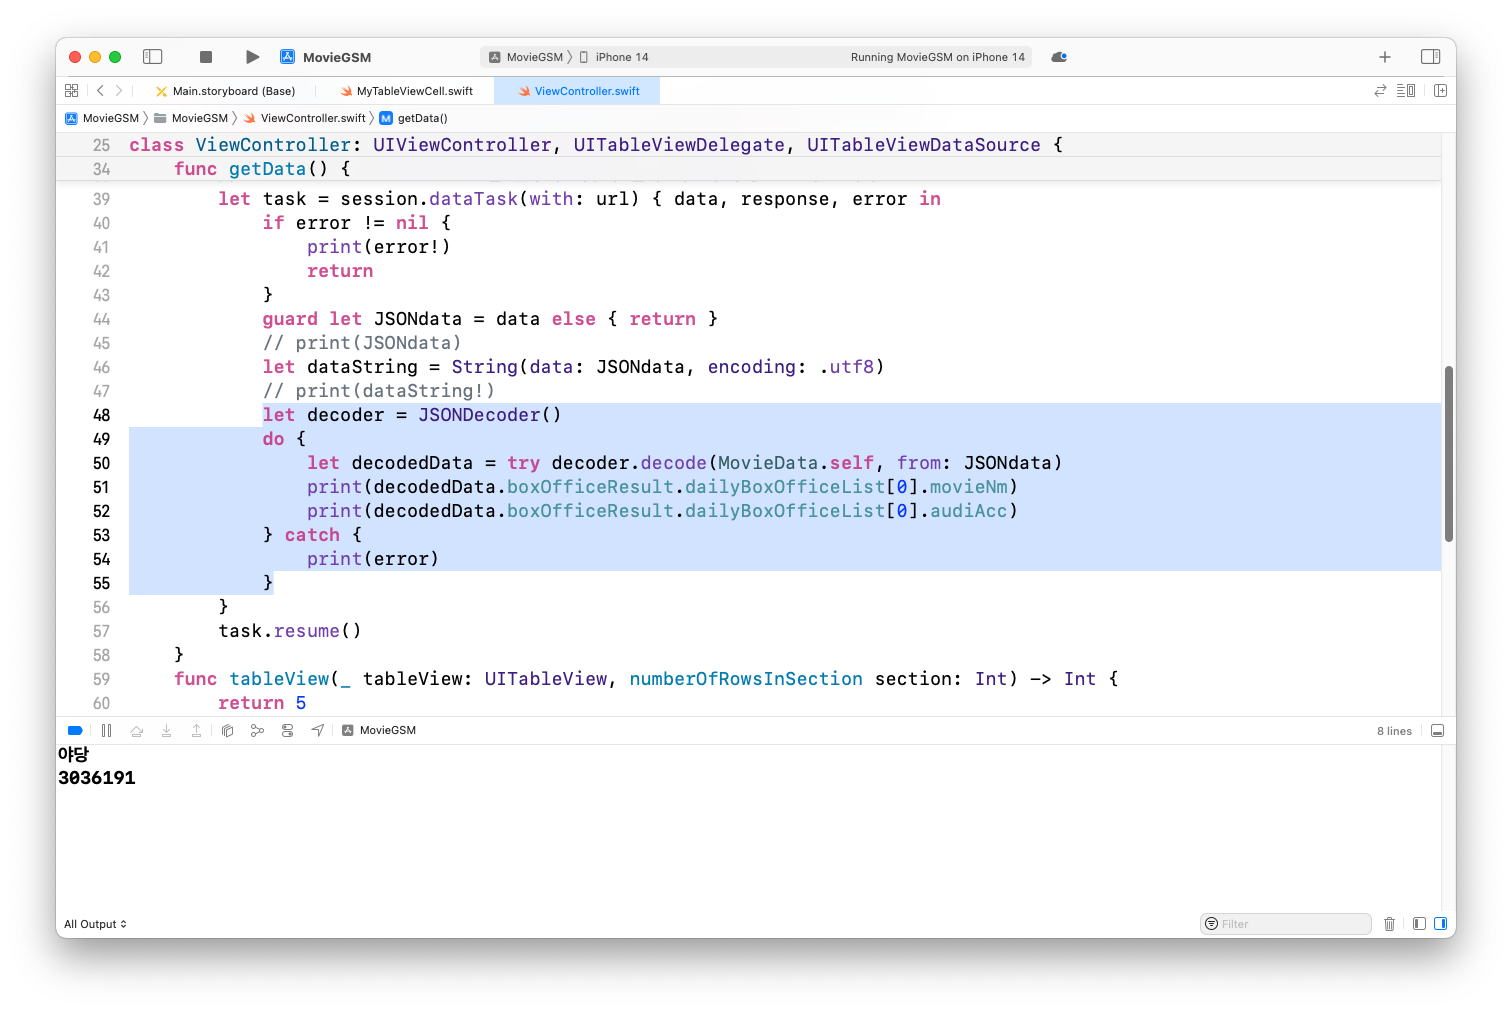
JSON의 내용을 정의한 변수에 넣기
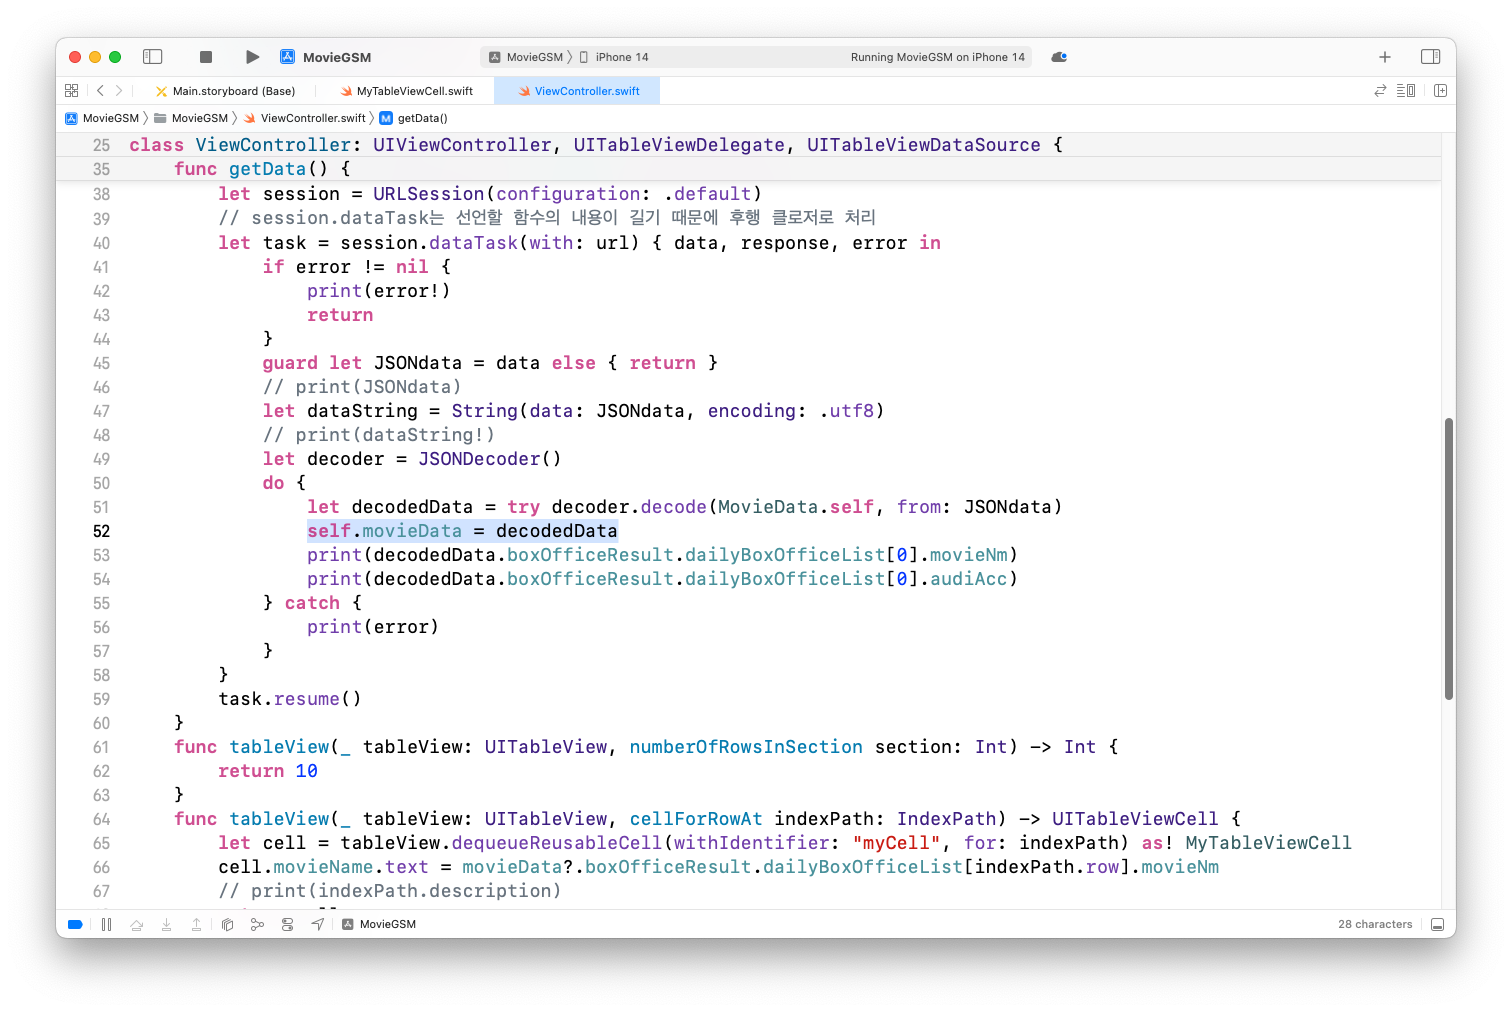
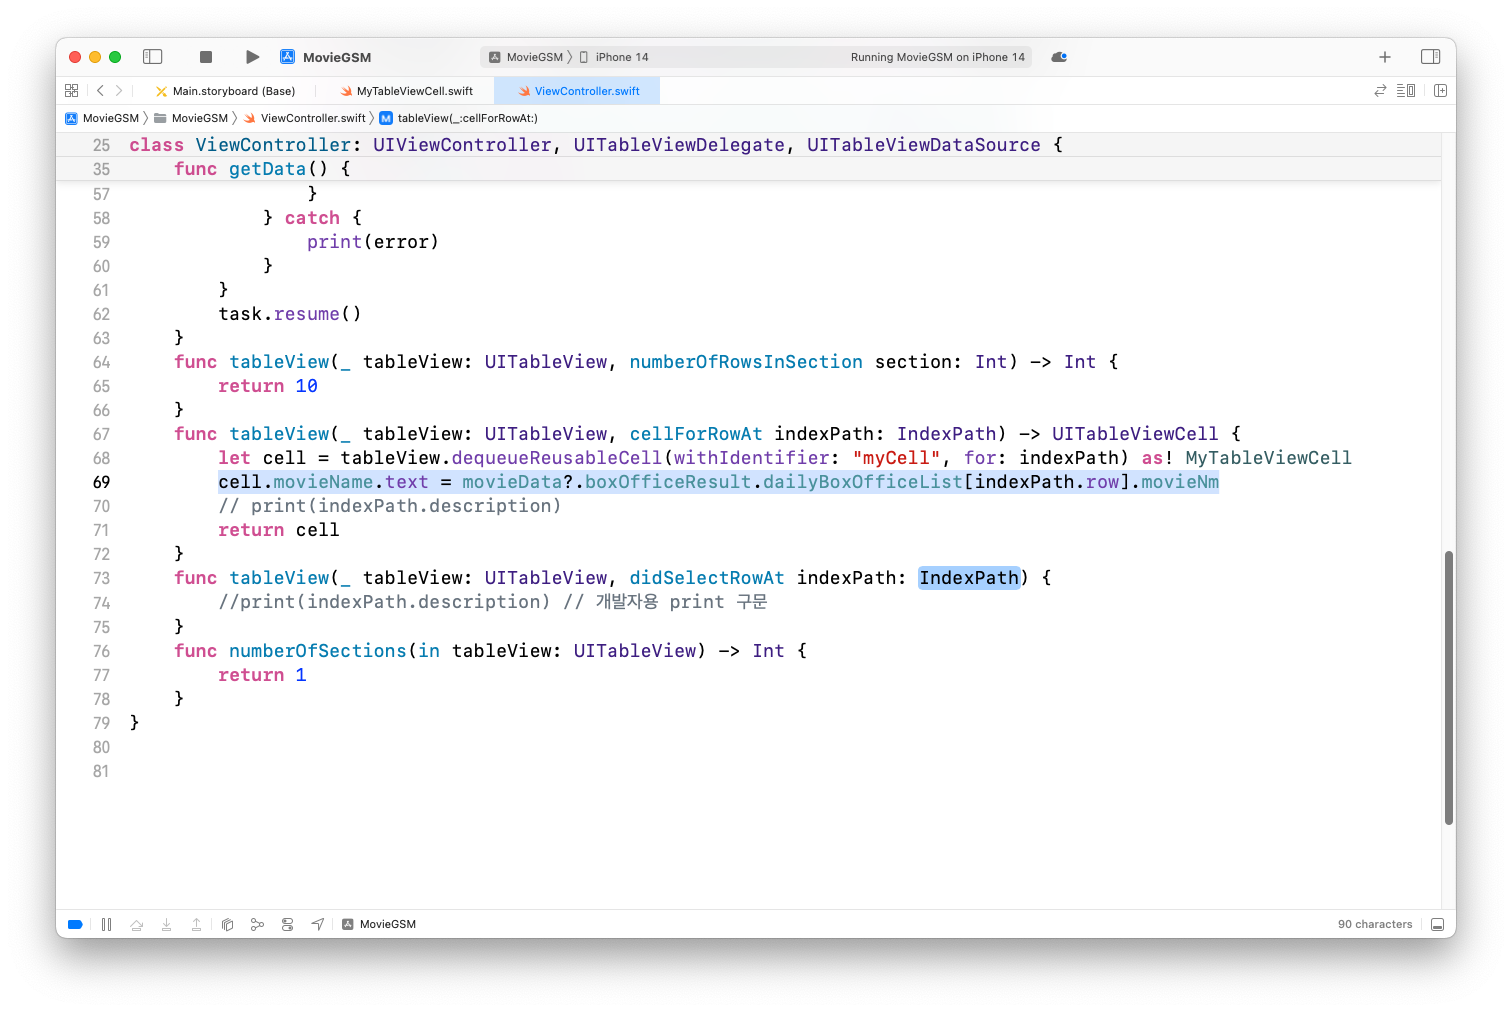
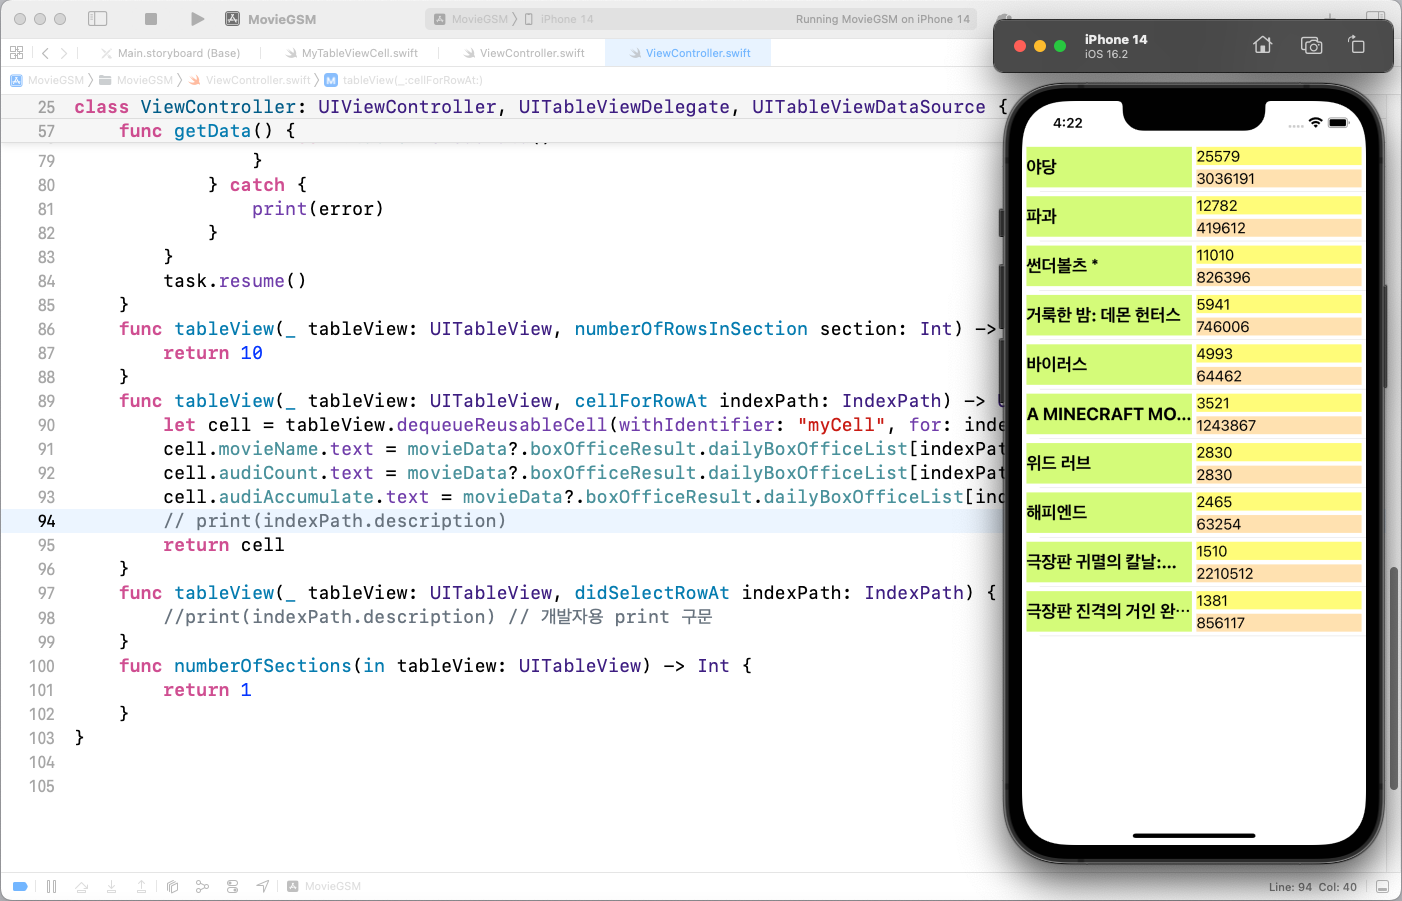
indexPath.row를 통해 해당 인덱스를 추출하여 영화 순위 출력
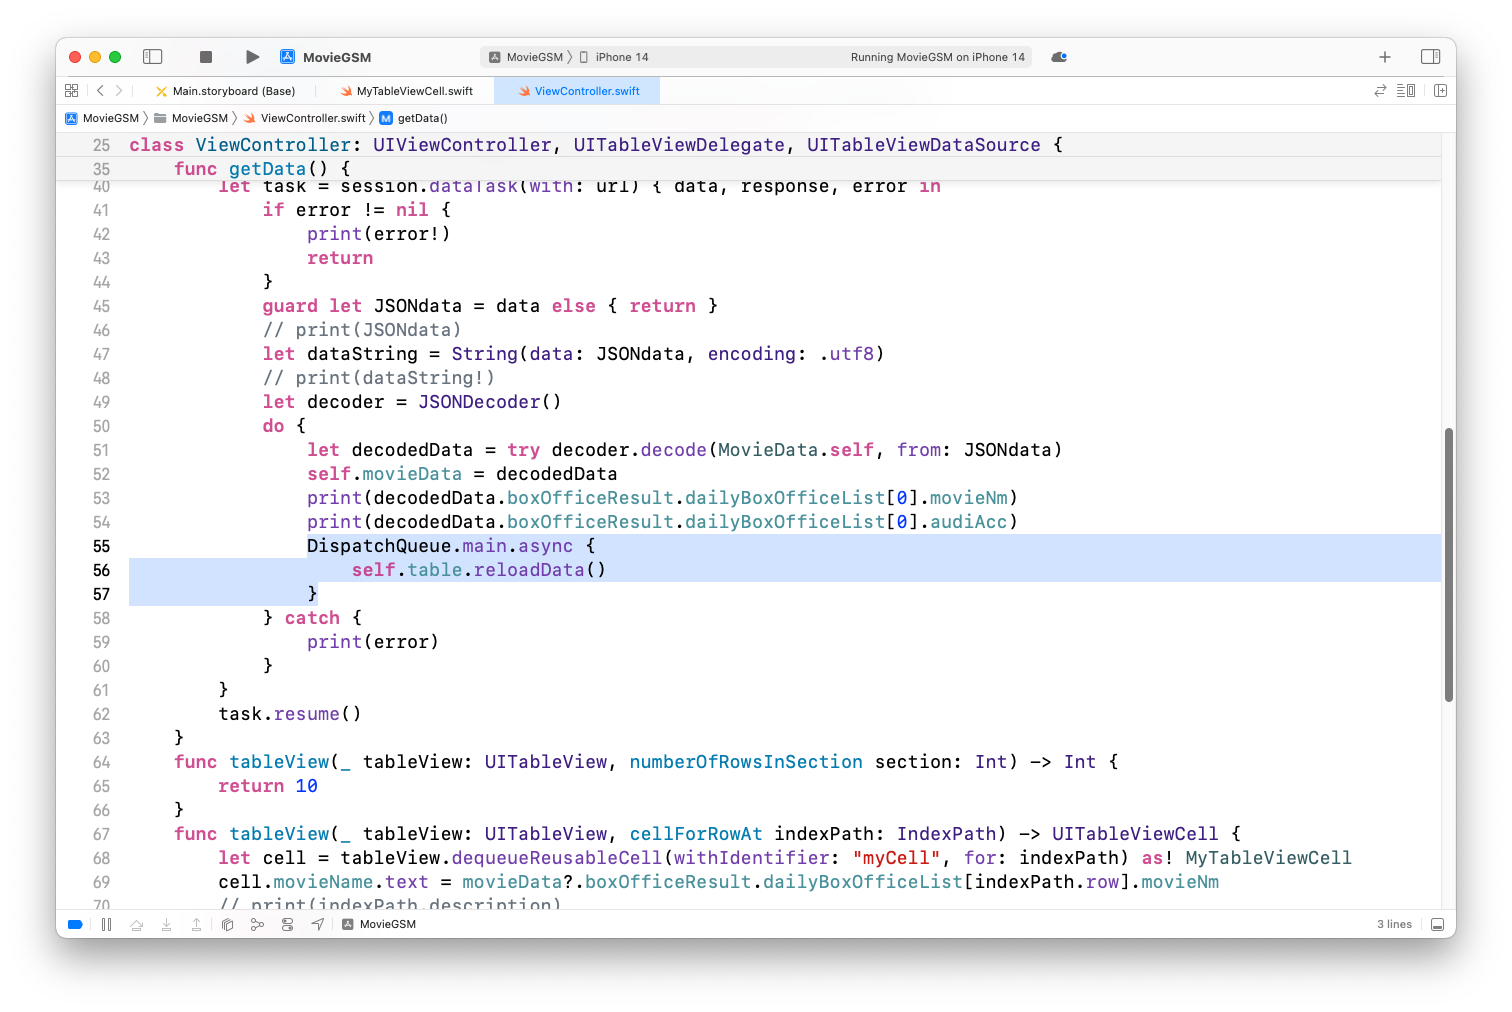
실행속도 개선을 위해서 메인 쓰레드에서 처리되도록 비동기 처리
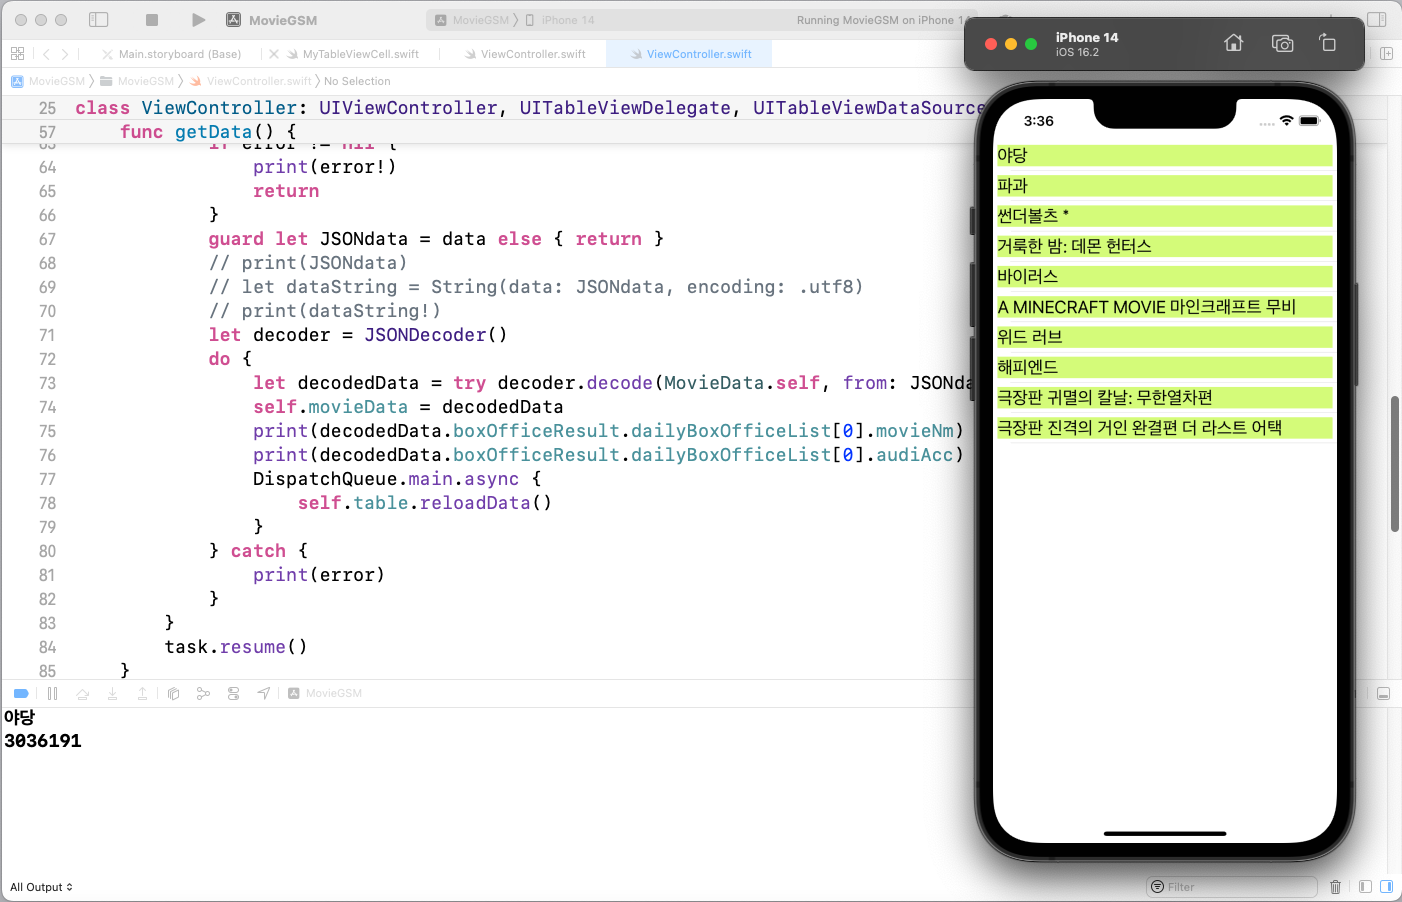
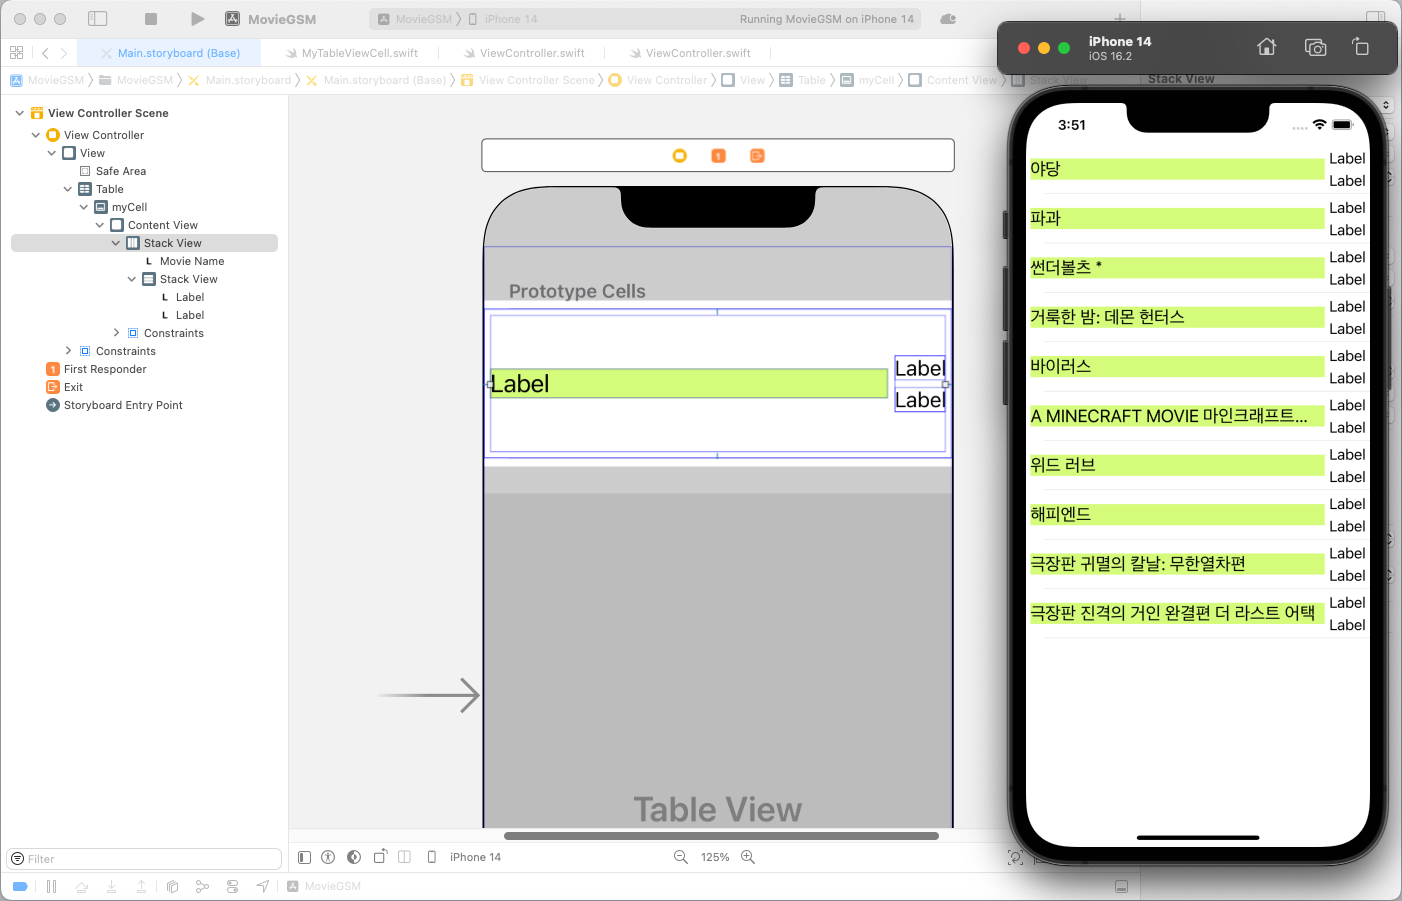
실행결과
파싱된 날짜를 실행기준으로 변경하기
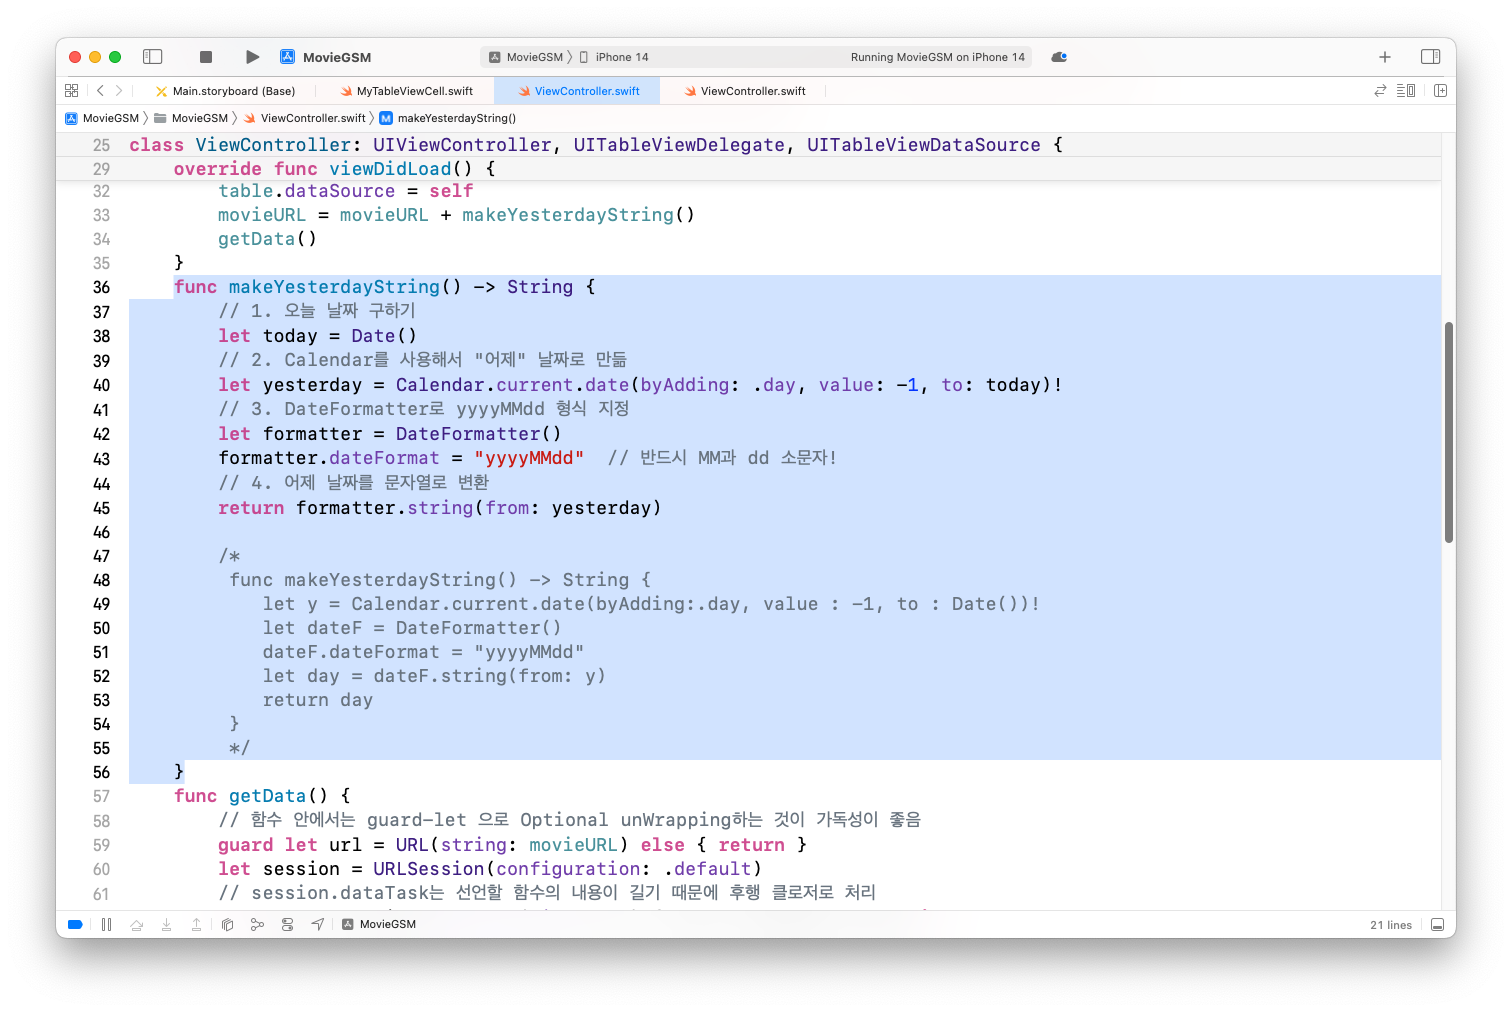
어제 날짜를 구하는 함수 정의
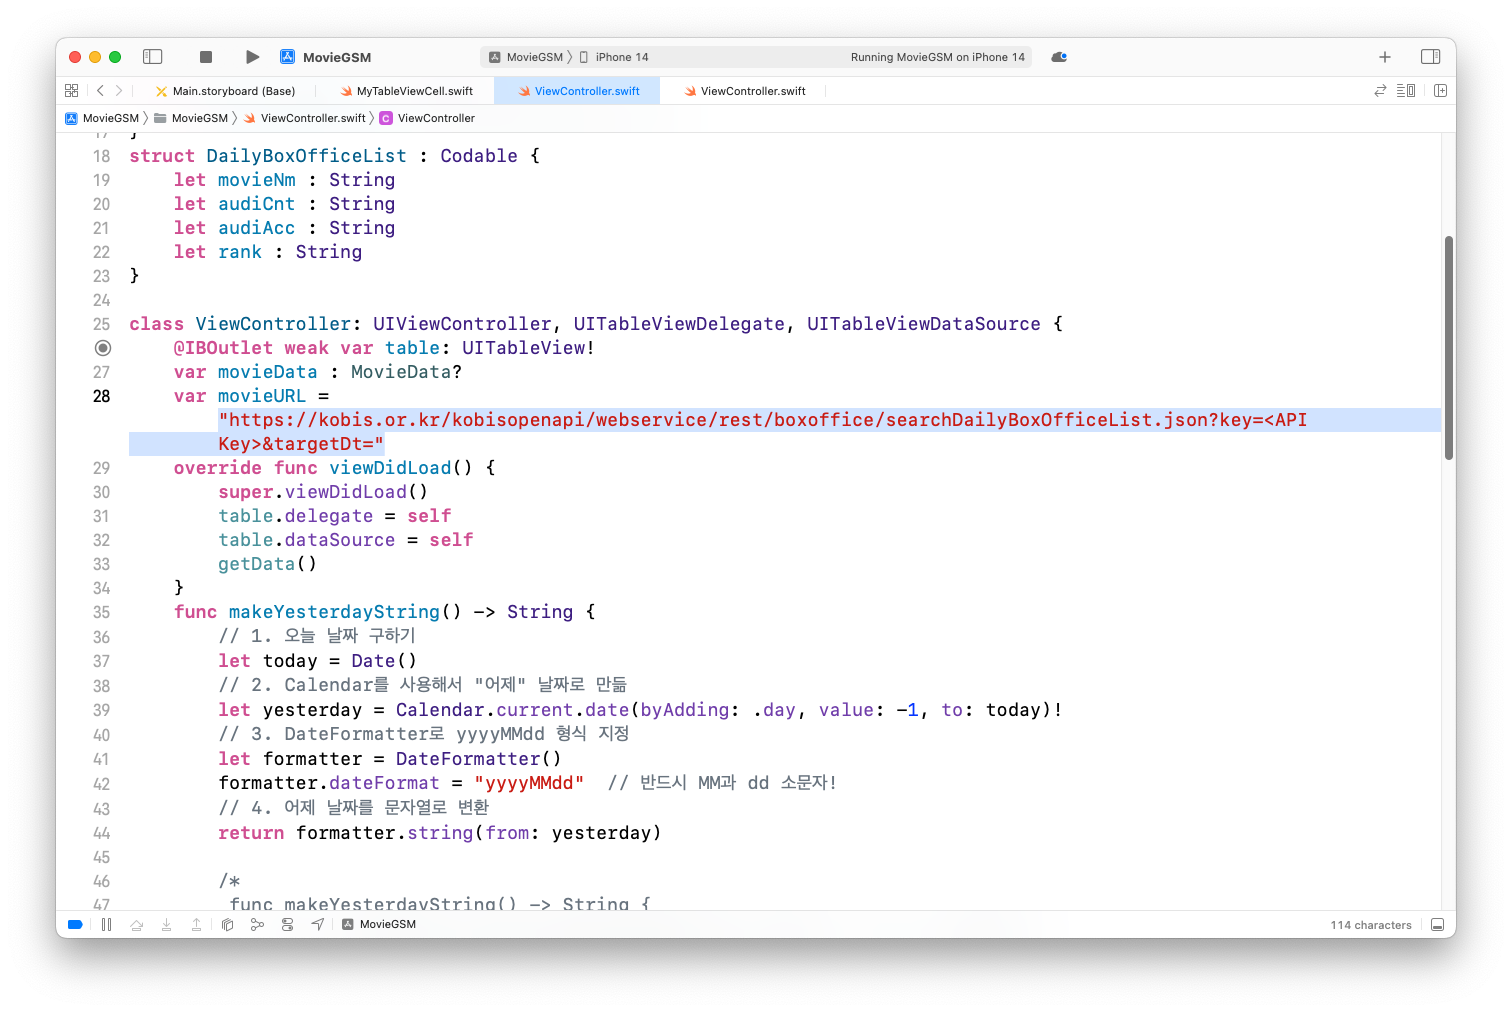
movieURL을 var로 변경하고 뒷부분 날짜 지우기
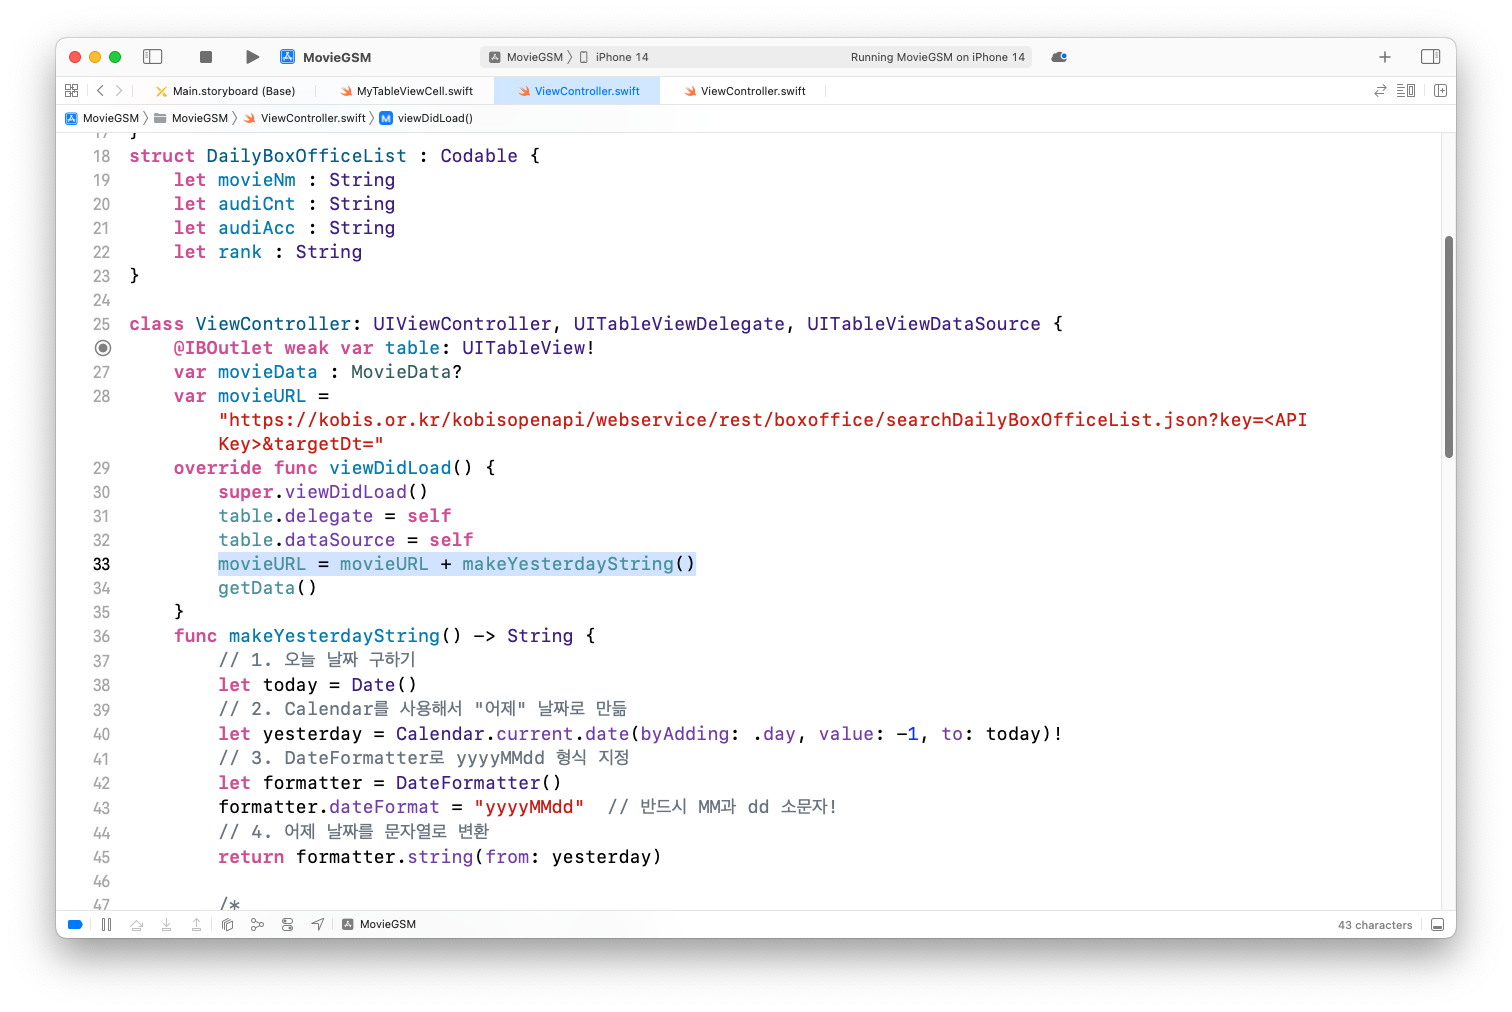
movieURL과 함수 결과를 합치기
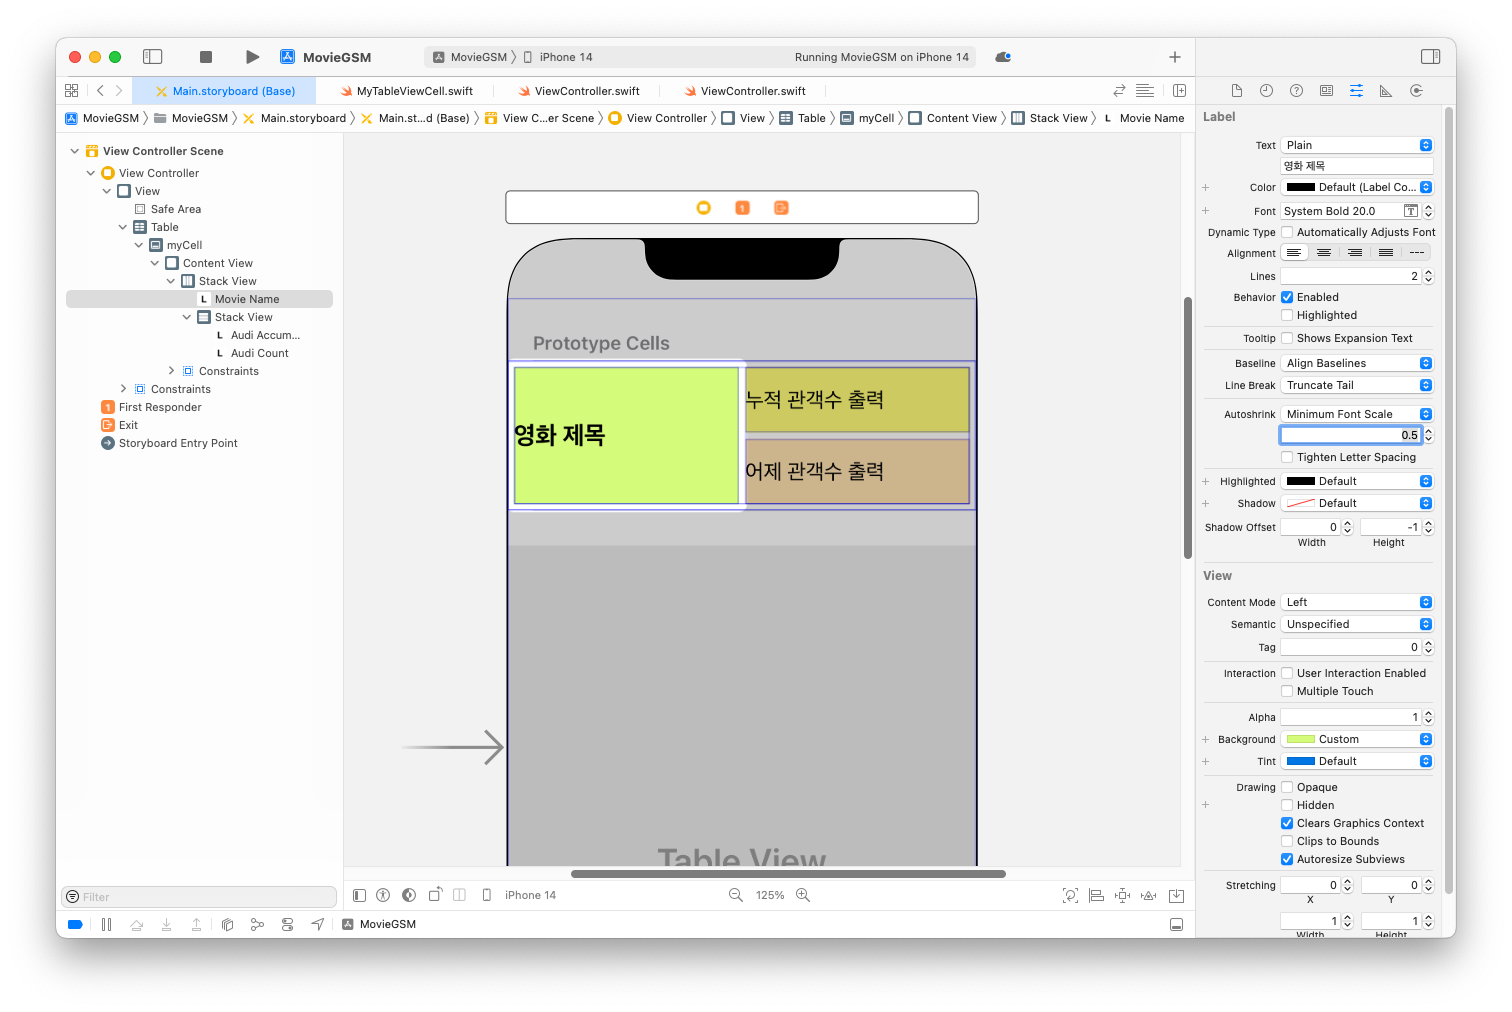
UI 변경하여 여러 정보 나타내기
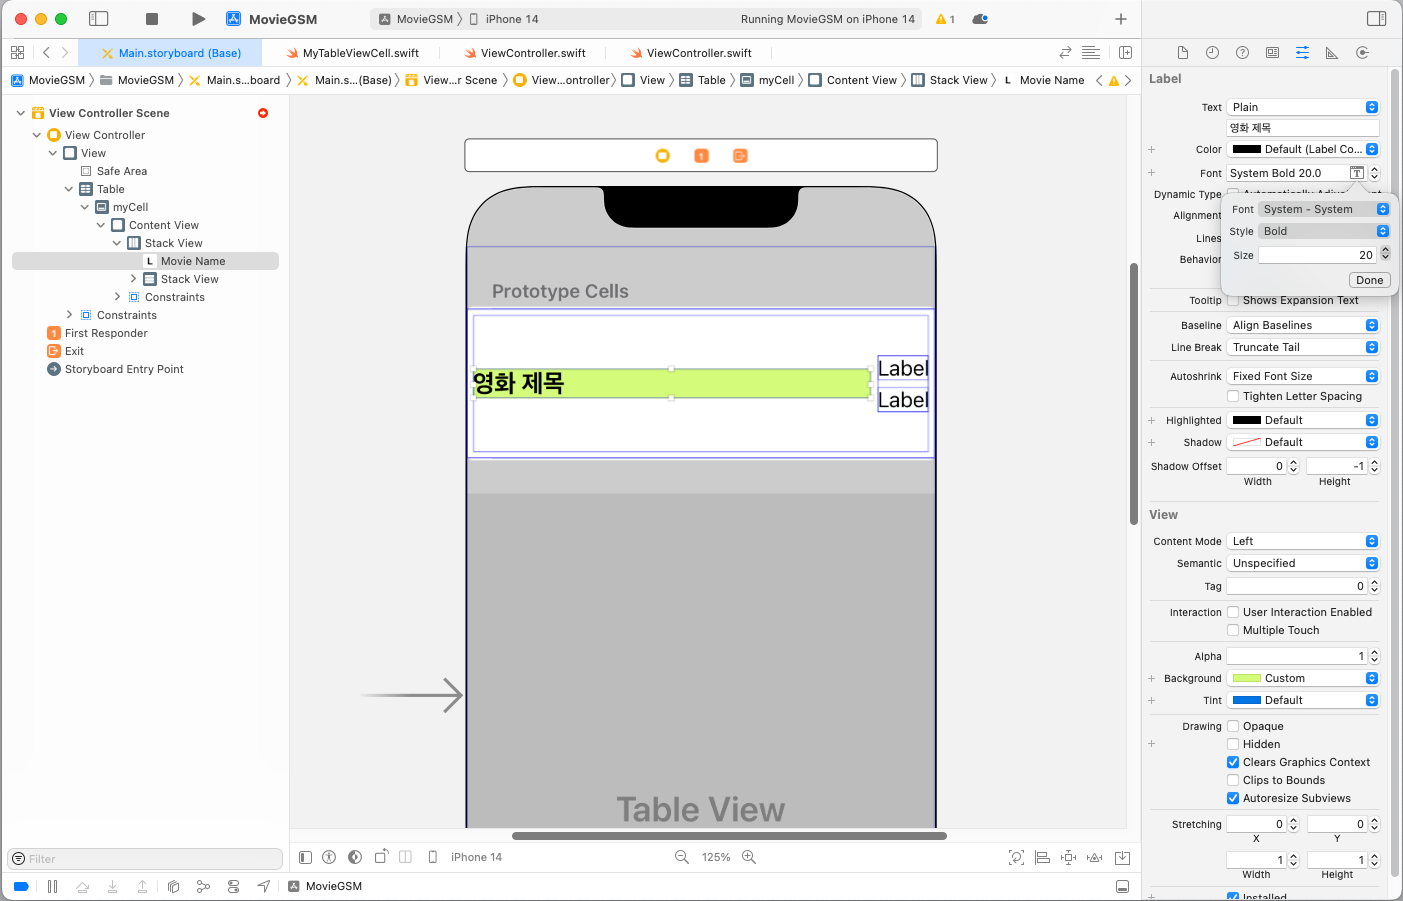
영화 제목이 나오는 부분 크기 축소하기
제약 조건 삭제하기
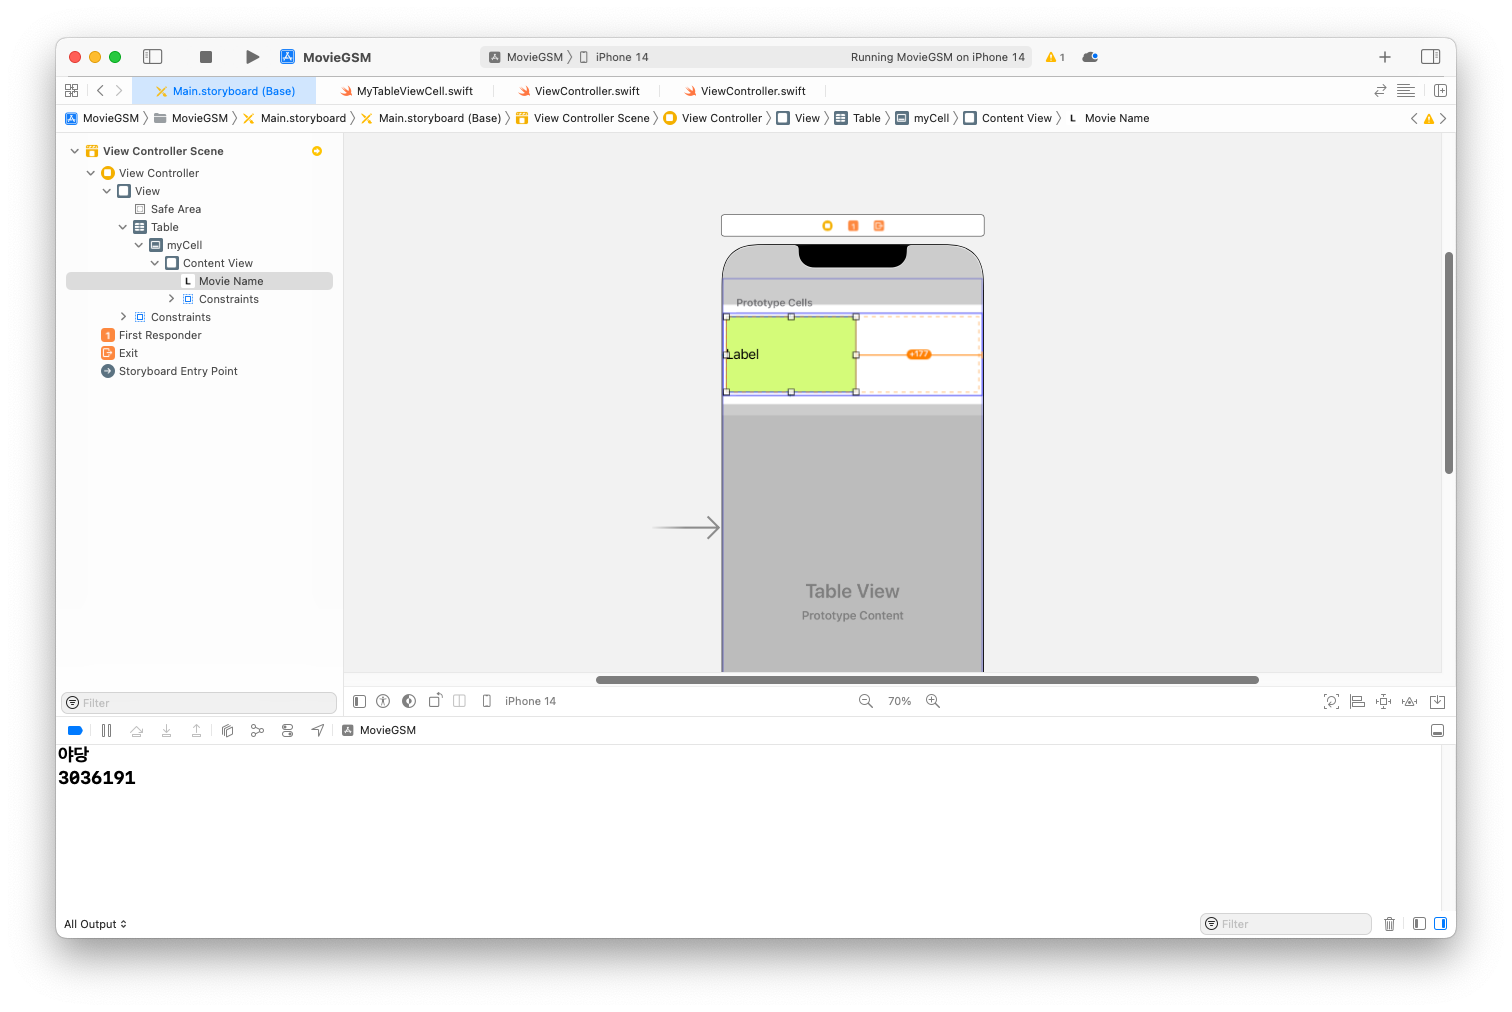
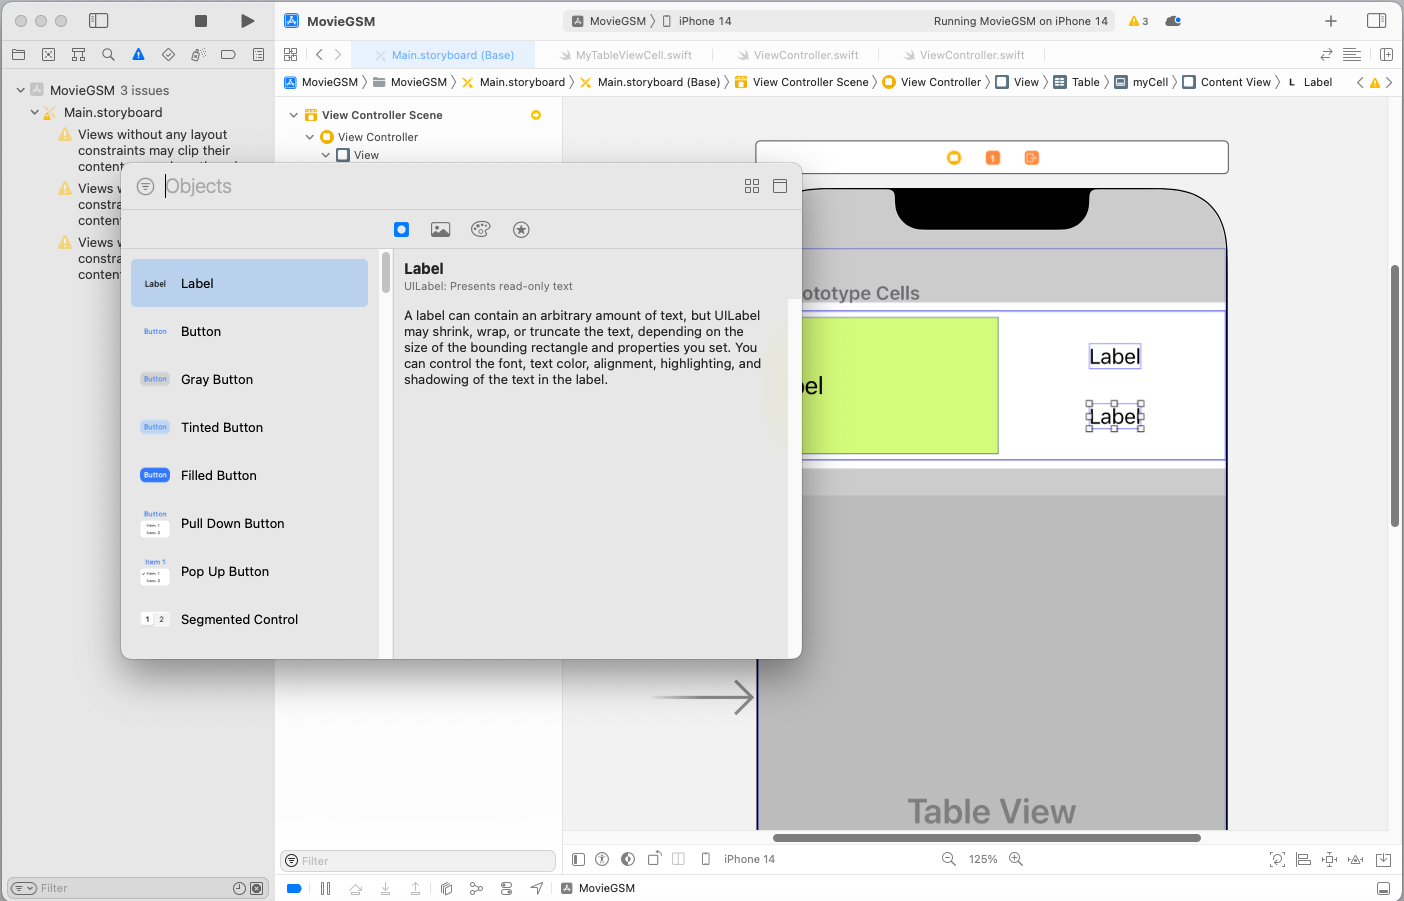
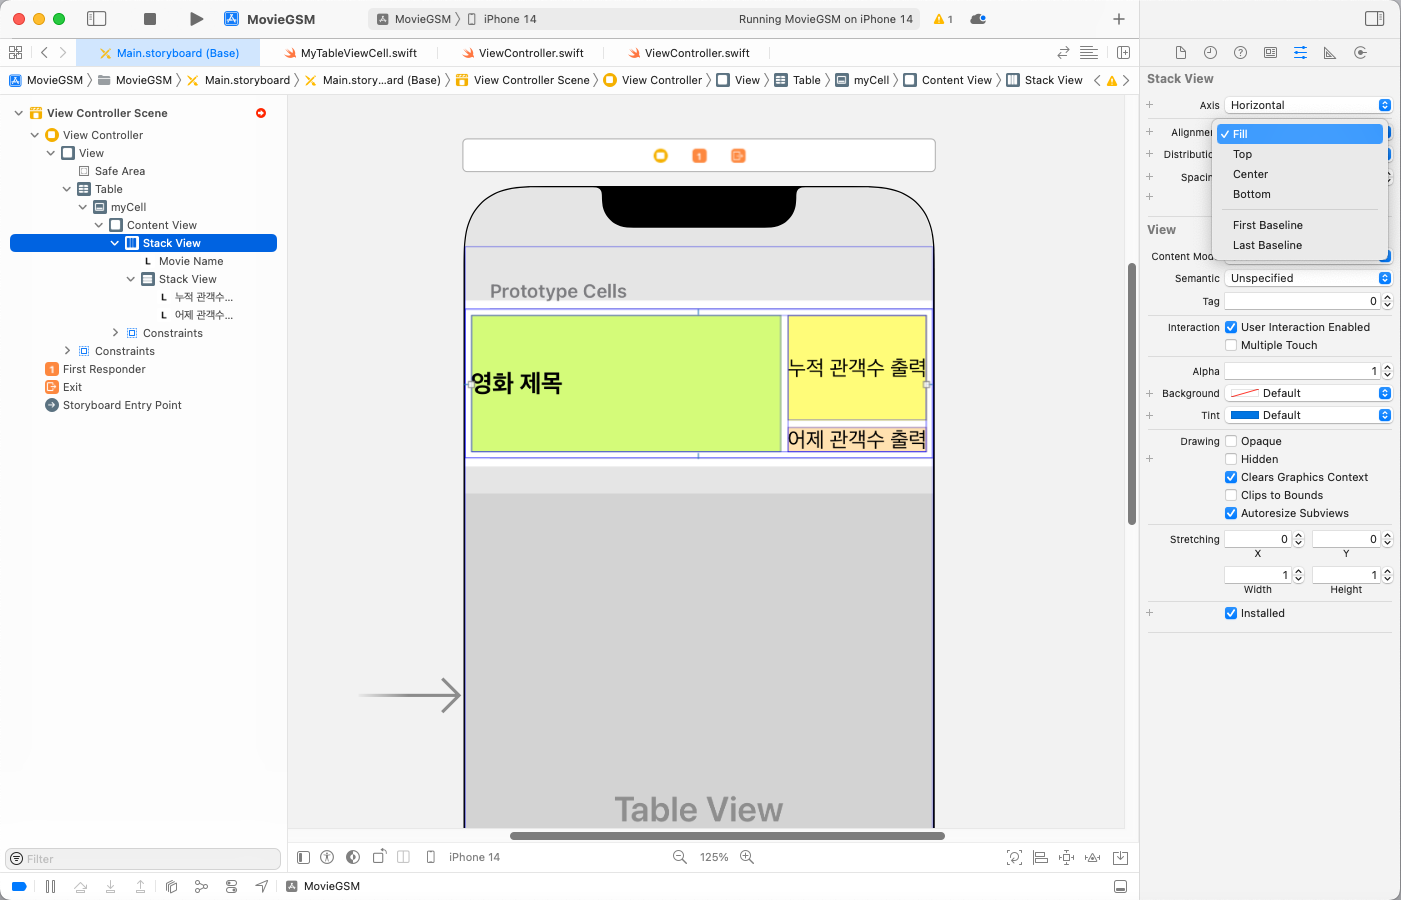
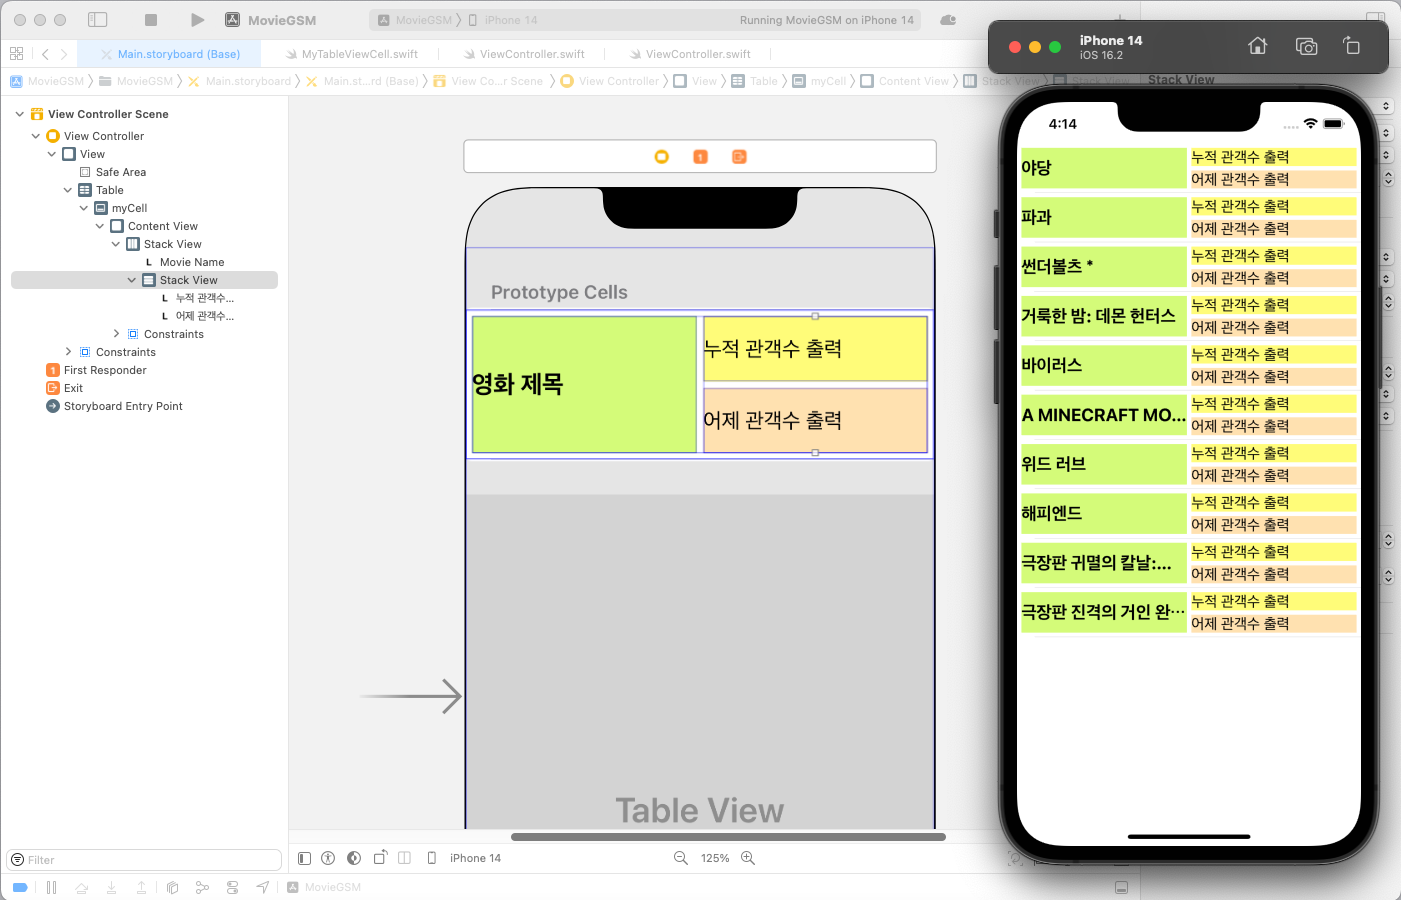
빈 곳에 Label 2개 추가하기
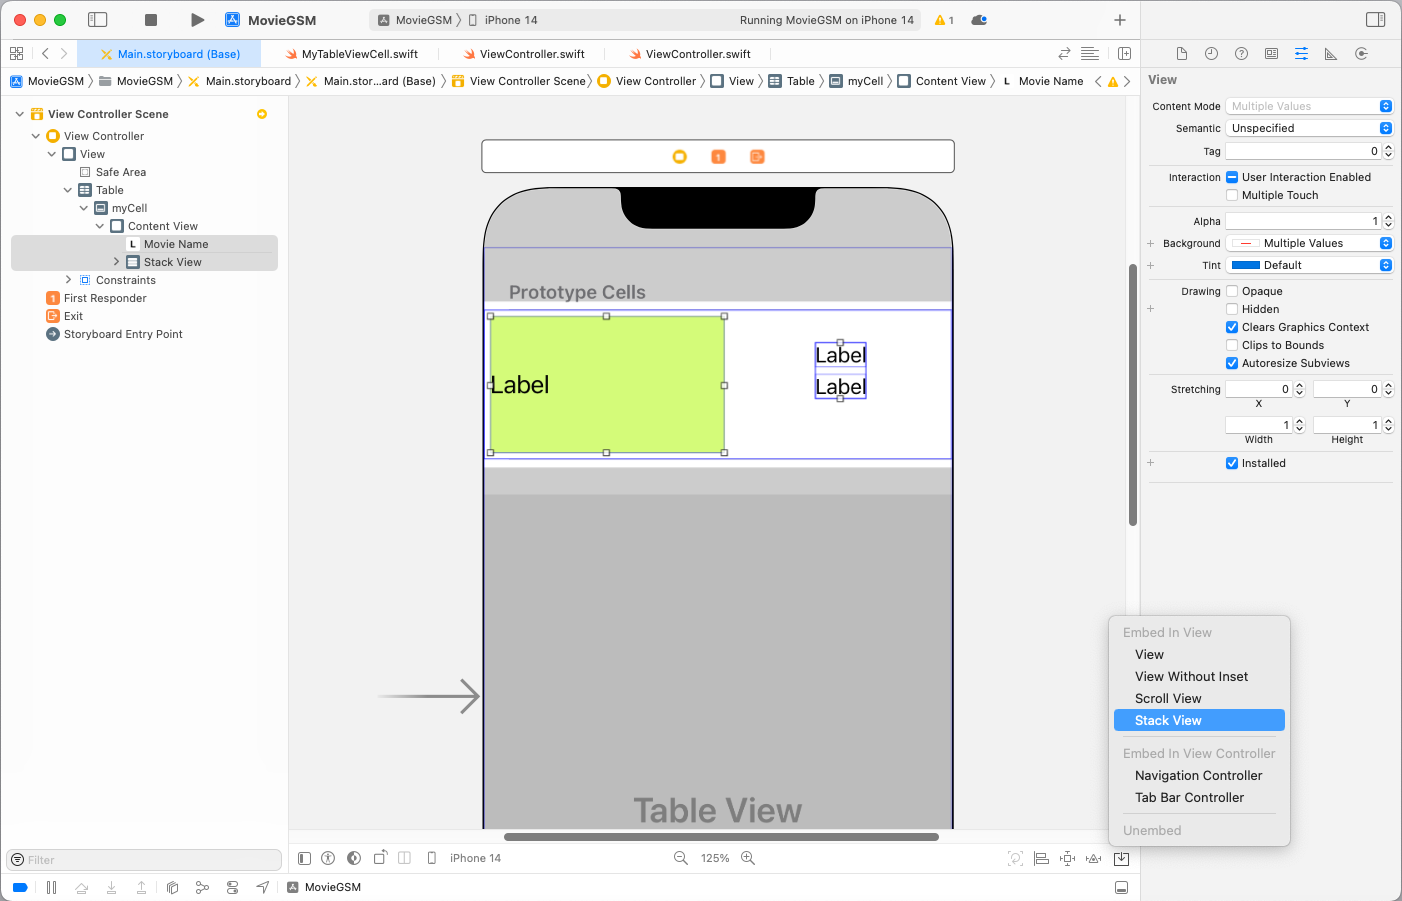
Label 2개 모두 선택 후 Stack View에 넣기

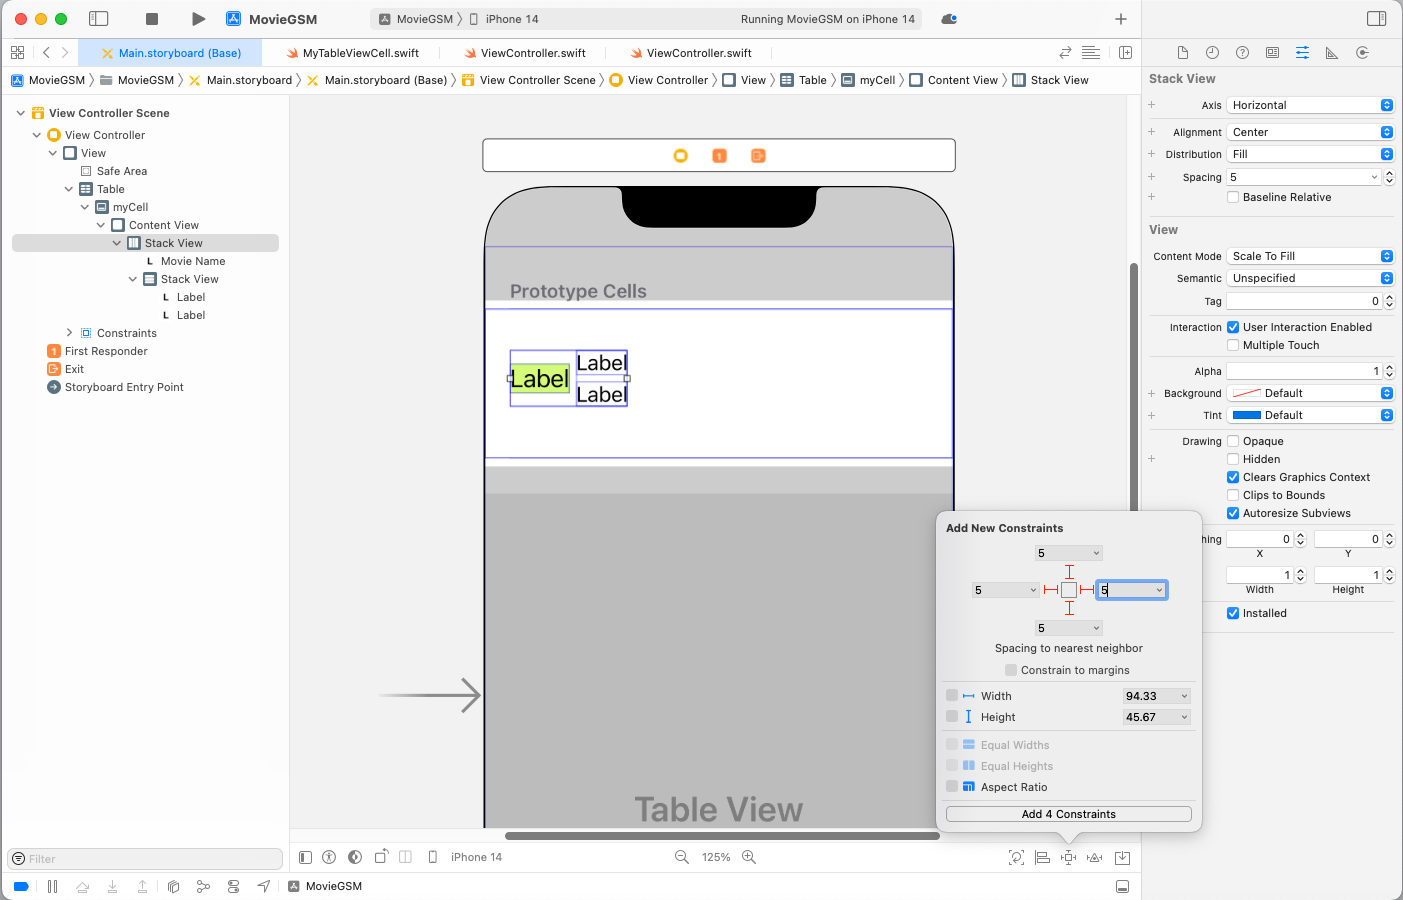
합쳐진 Stack View와 또다른 Label 선택 후 Stack View에 넣기
우측 하단에 Constraints로 값을 5씩 줘서 제약조건 추가
실행결과
라벨명 변경 및 폰트를 Bold로 변경
우측 2개 Label도 다음과 같이 변경

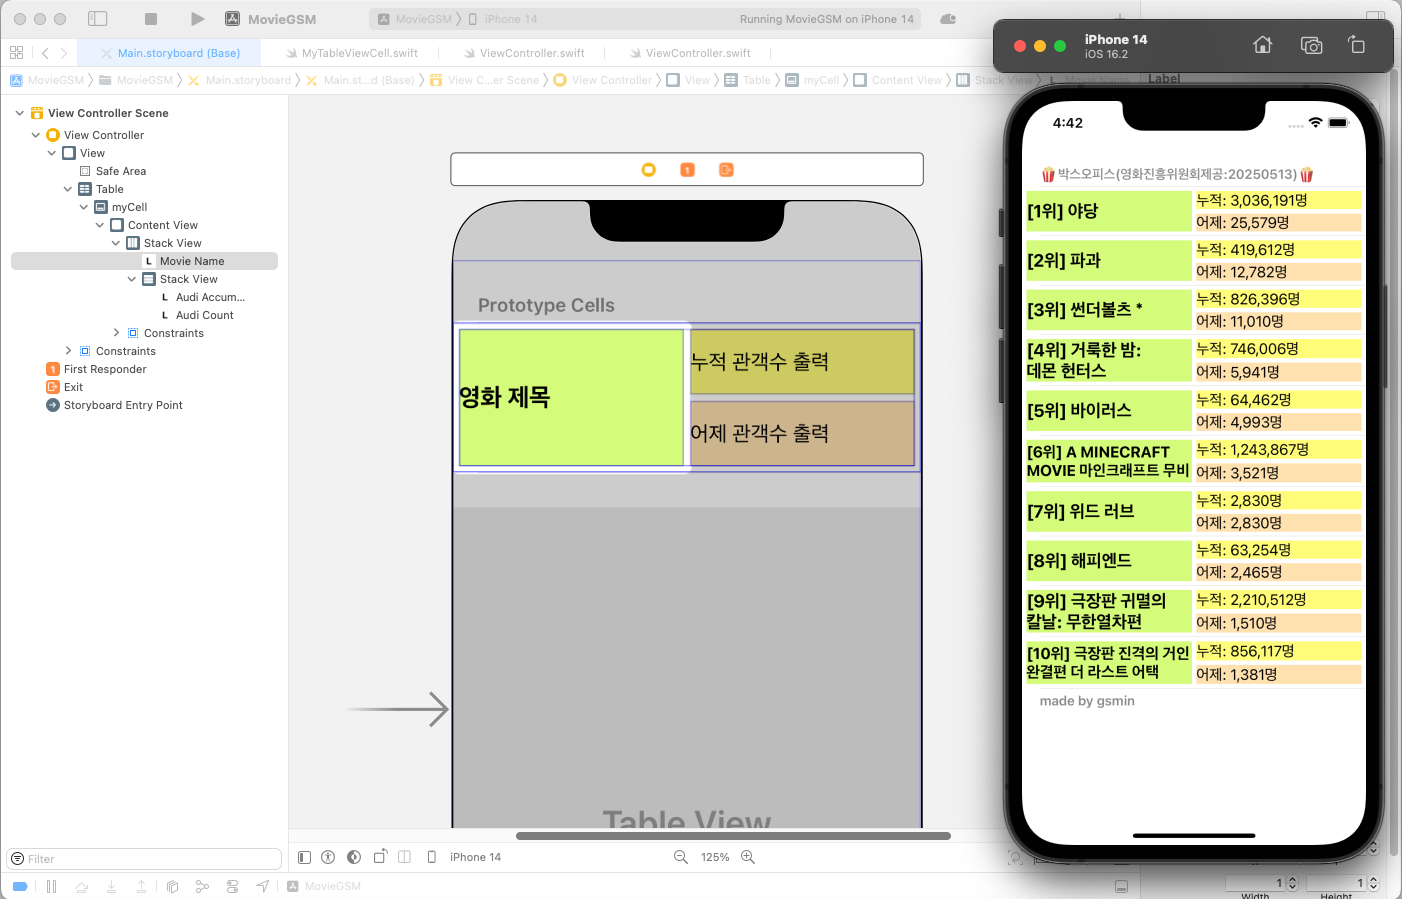
최상위 Stack View 선택 후 Alignment를 Fill로 변경
2개의 Stack View 모두 Distribution을 Fill Equally로 변경
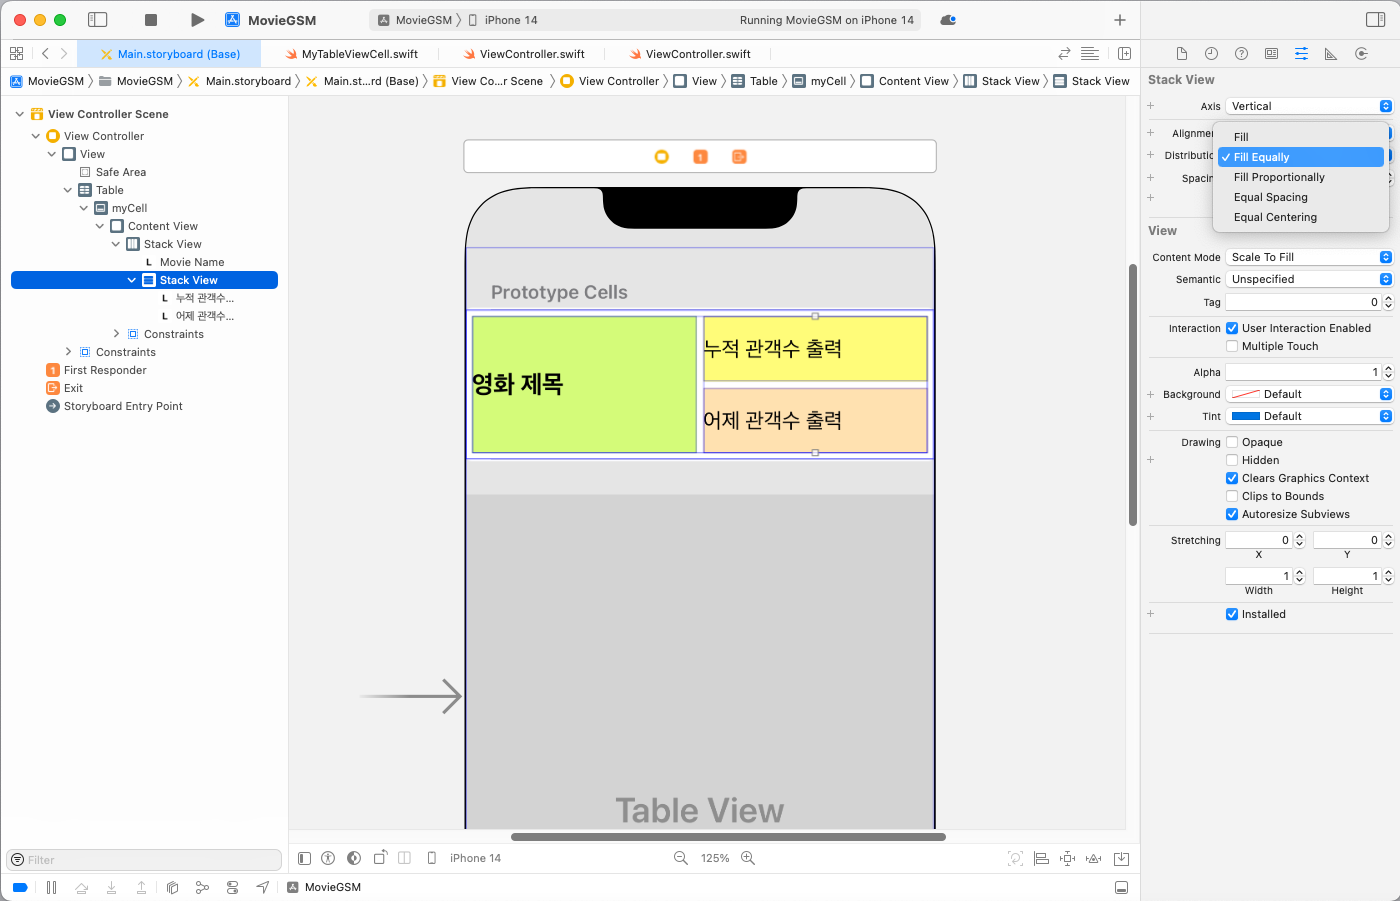
실행 결과
실행 결과 - 가로 화면

관객수 출력 연동하기
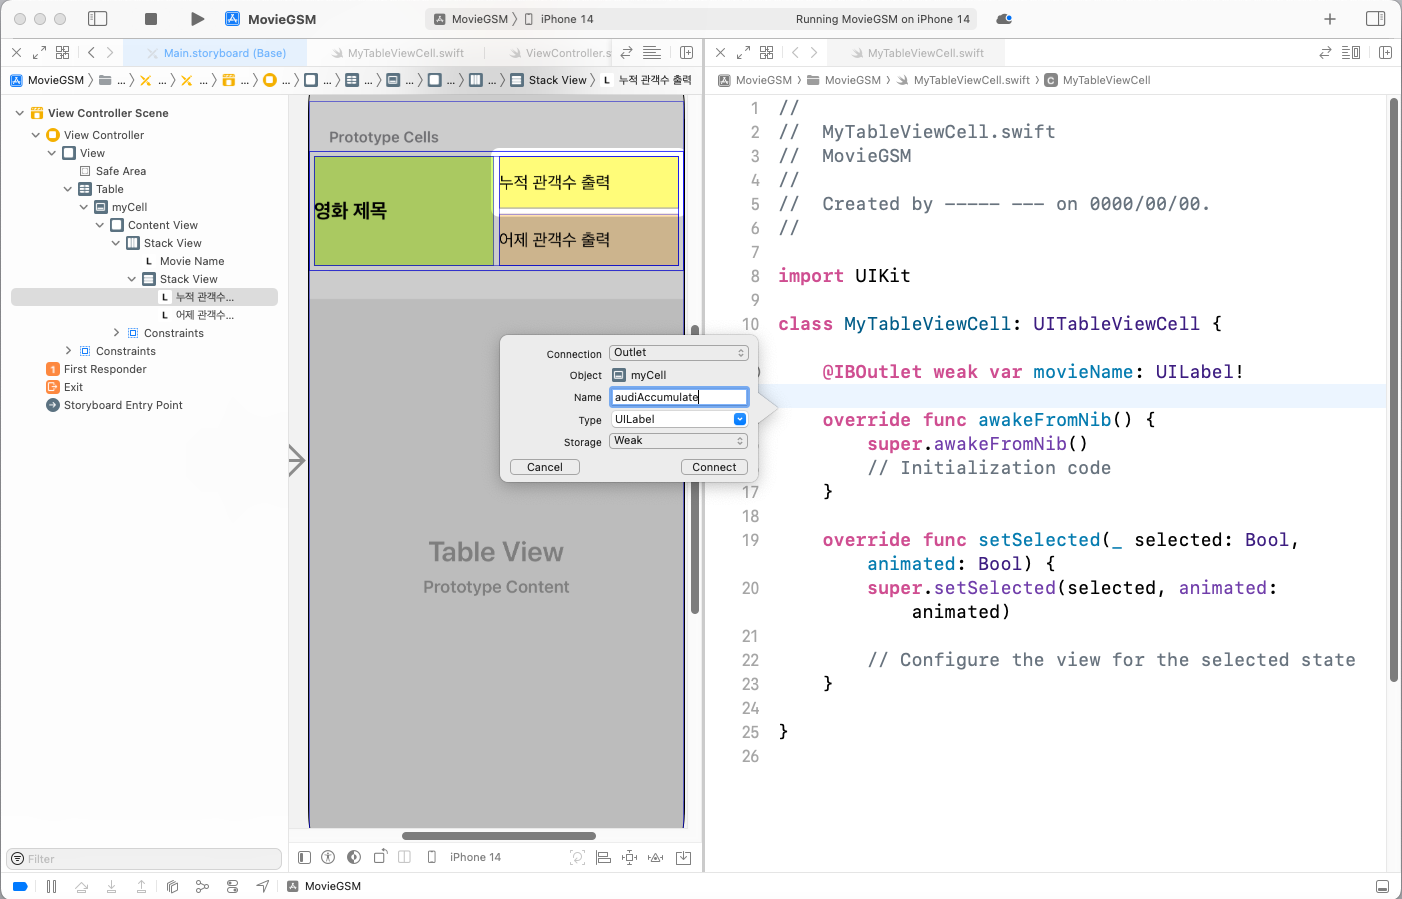
Assistant를 통해 2개의 Label 연동 - audiAccumulate
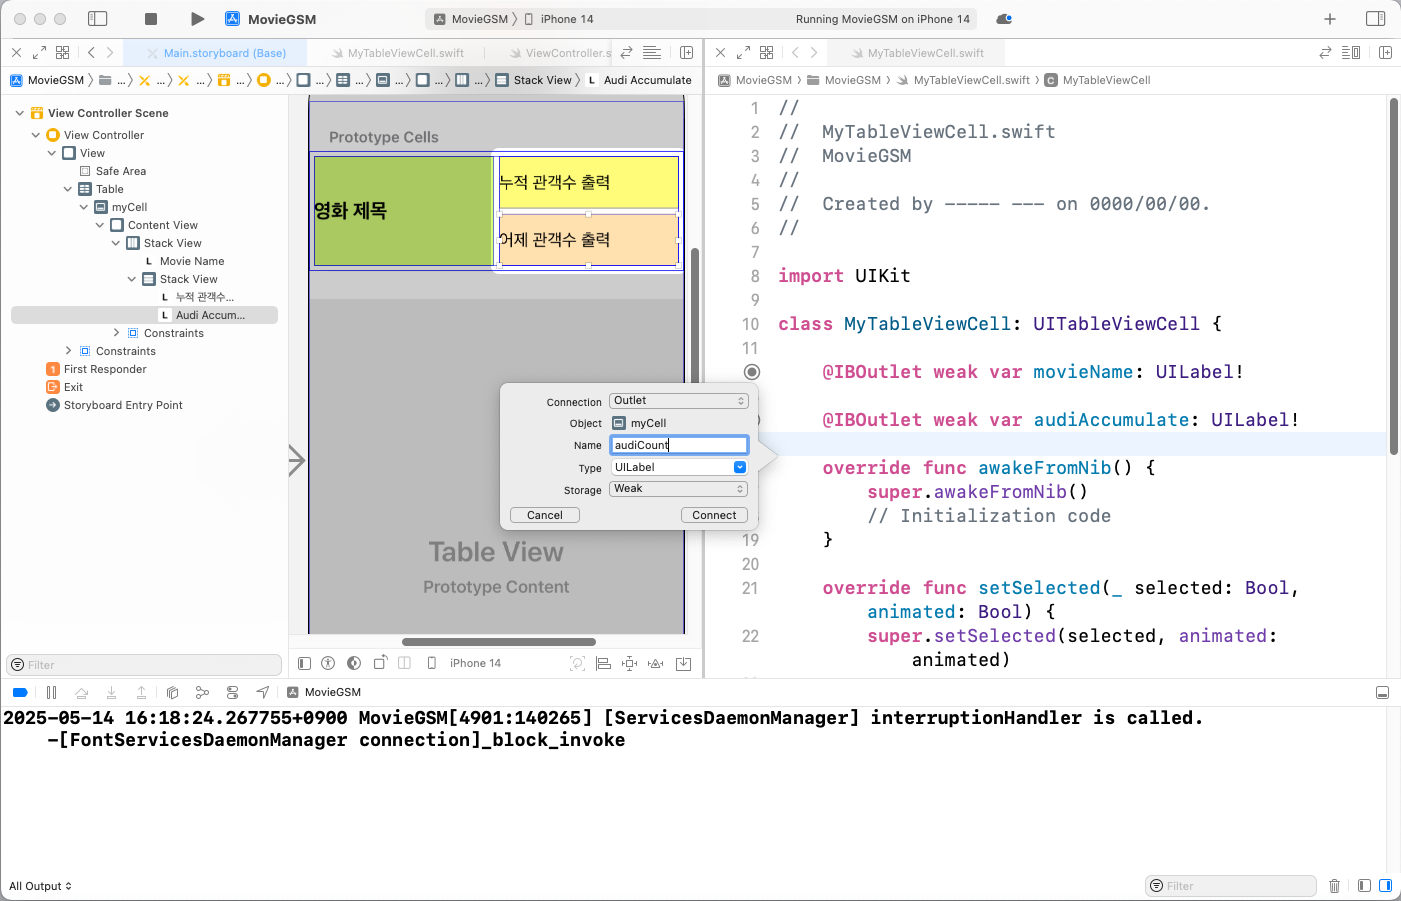
Assistant를 통해 2개의 Label 연동 - audiCount
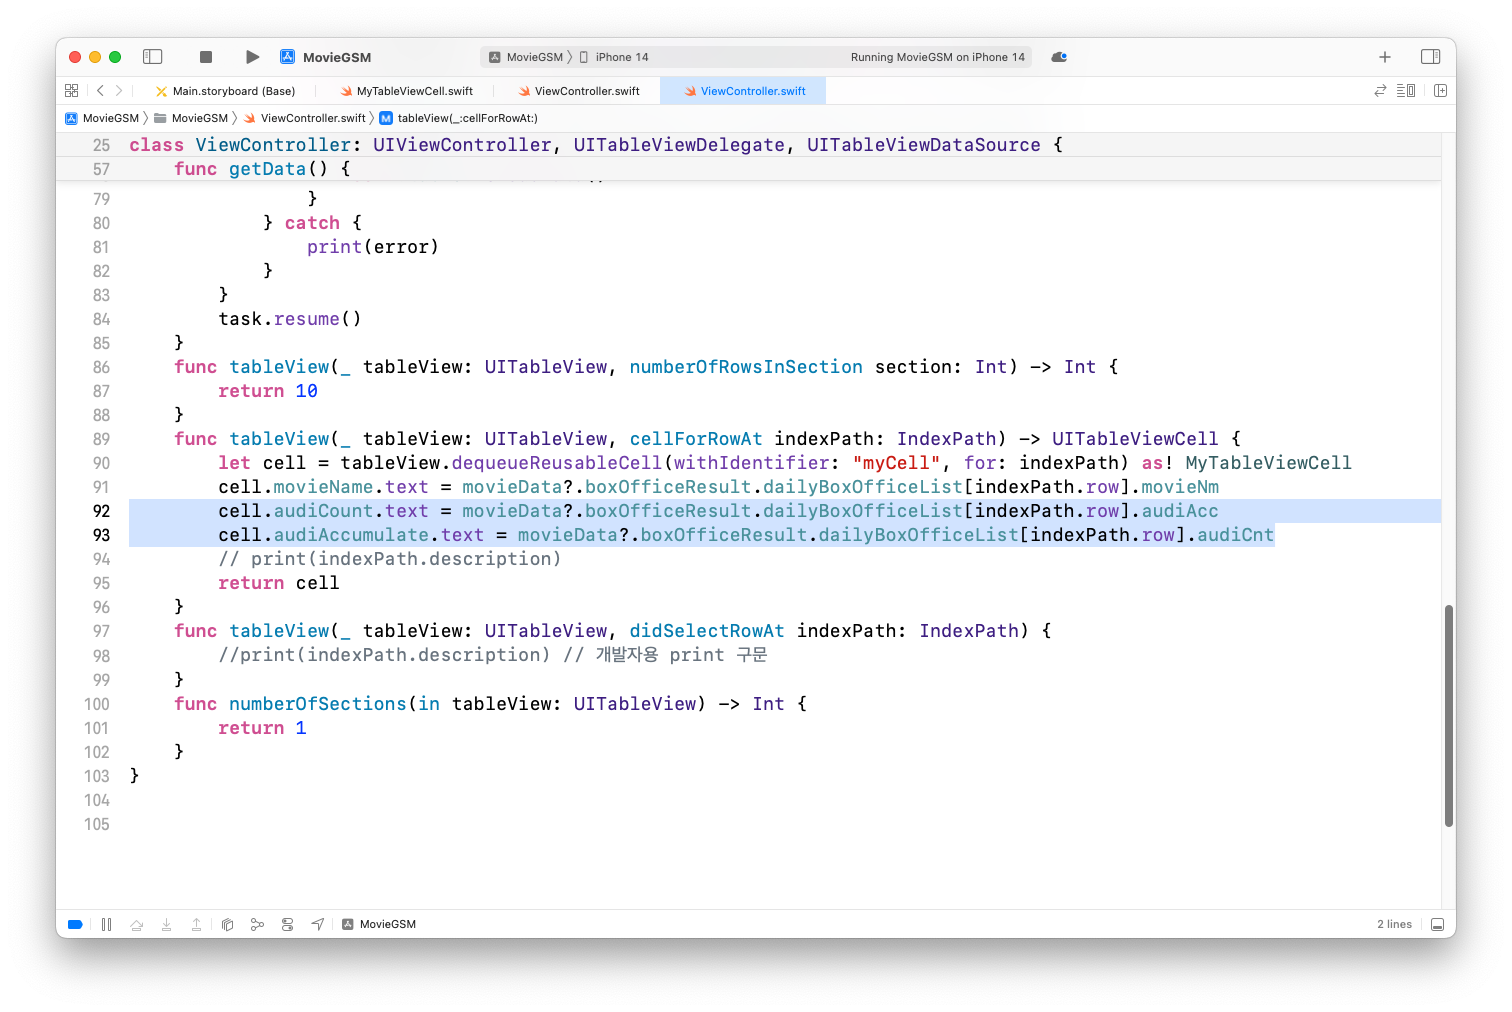
Assistant 종료 후 ViewController 수정
실행 결과
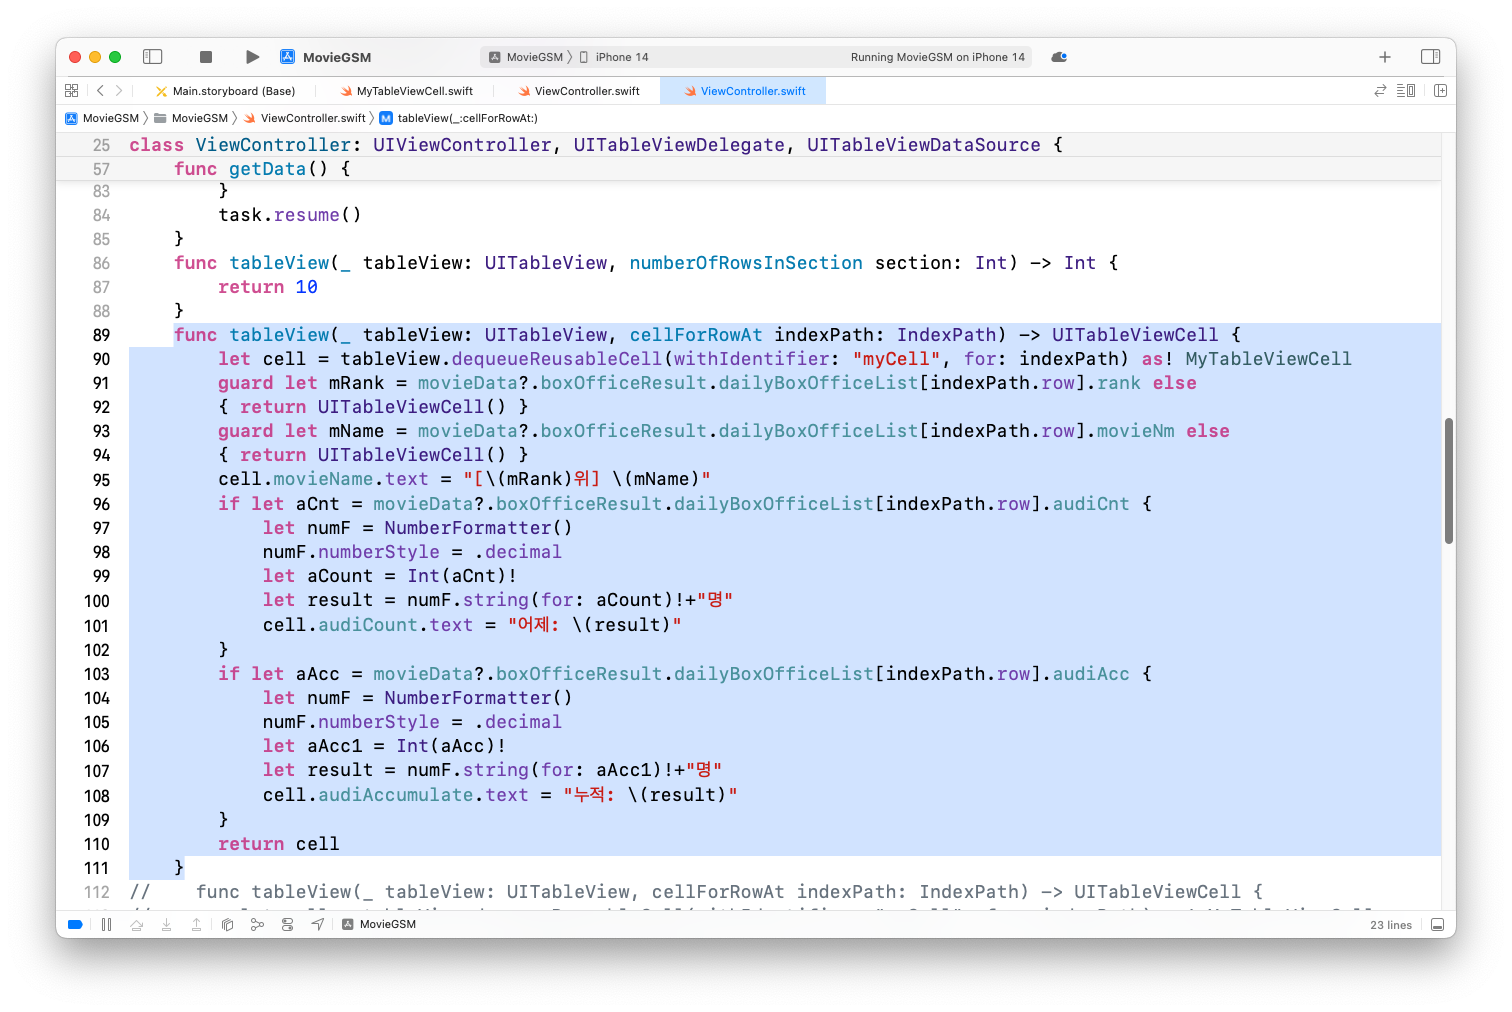
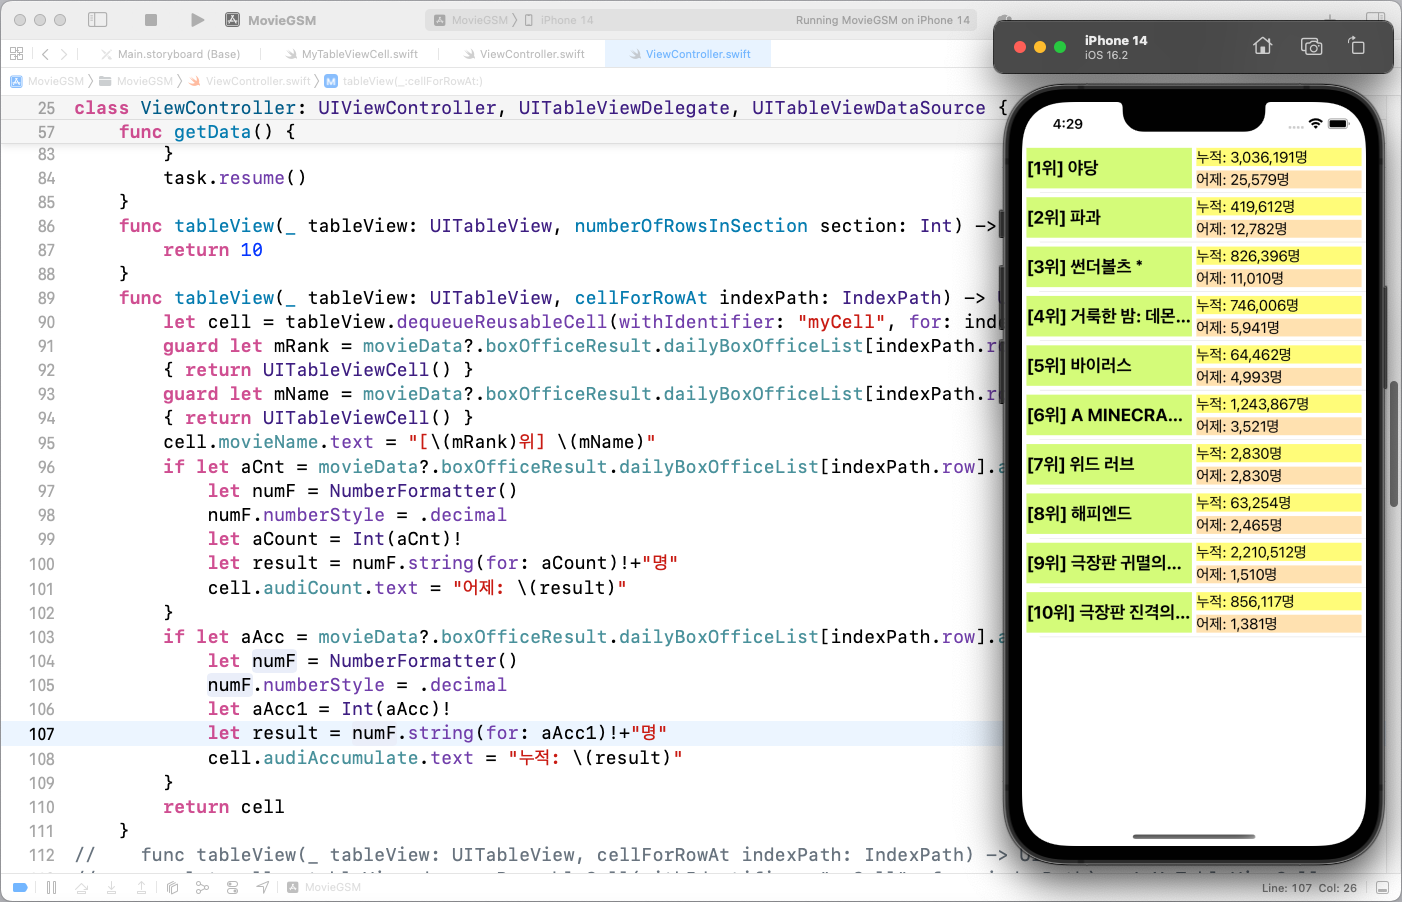
영화 순위 출력과 천(3자리)단위 출력 형식 변경
tableView(_: cellForRowAt:) 함수 내용을 다음과 같이 변경
실행결과
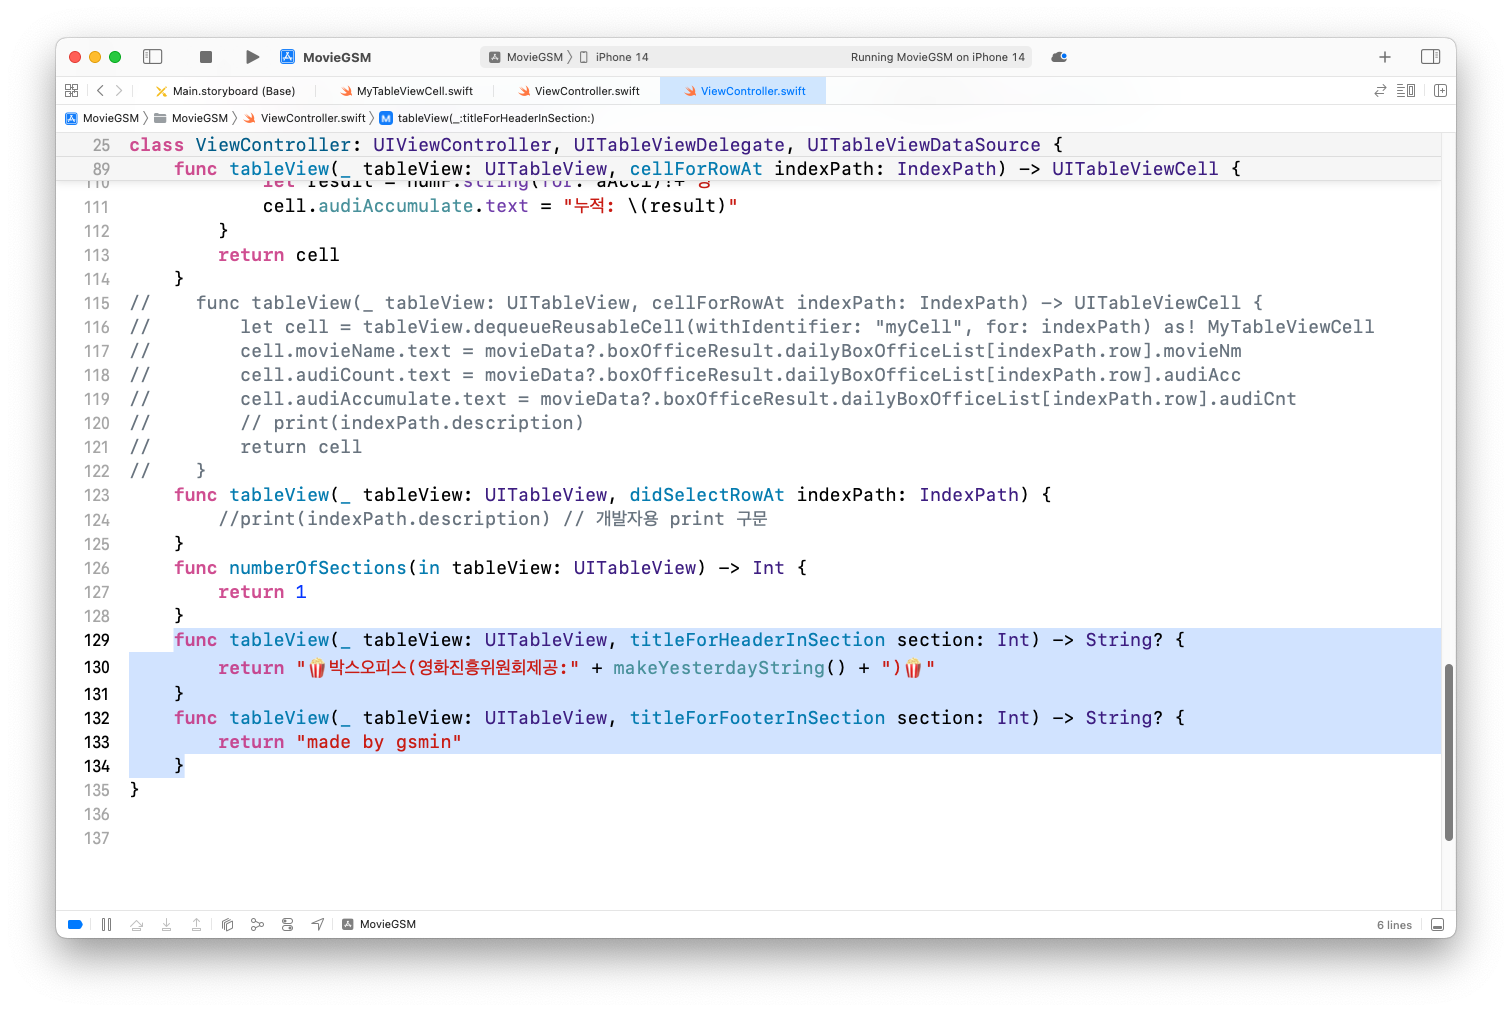
헤더 정보 출력과 잘린 문자열 처리
헤더 정보를 출력하기 위해 코드 수정
실행결과
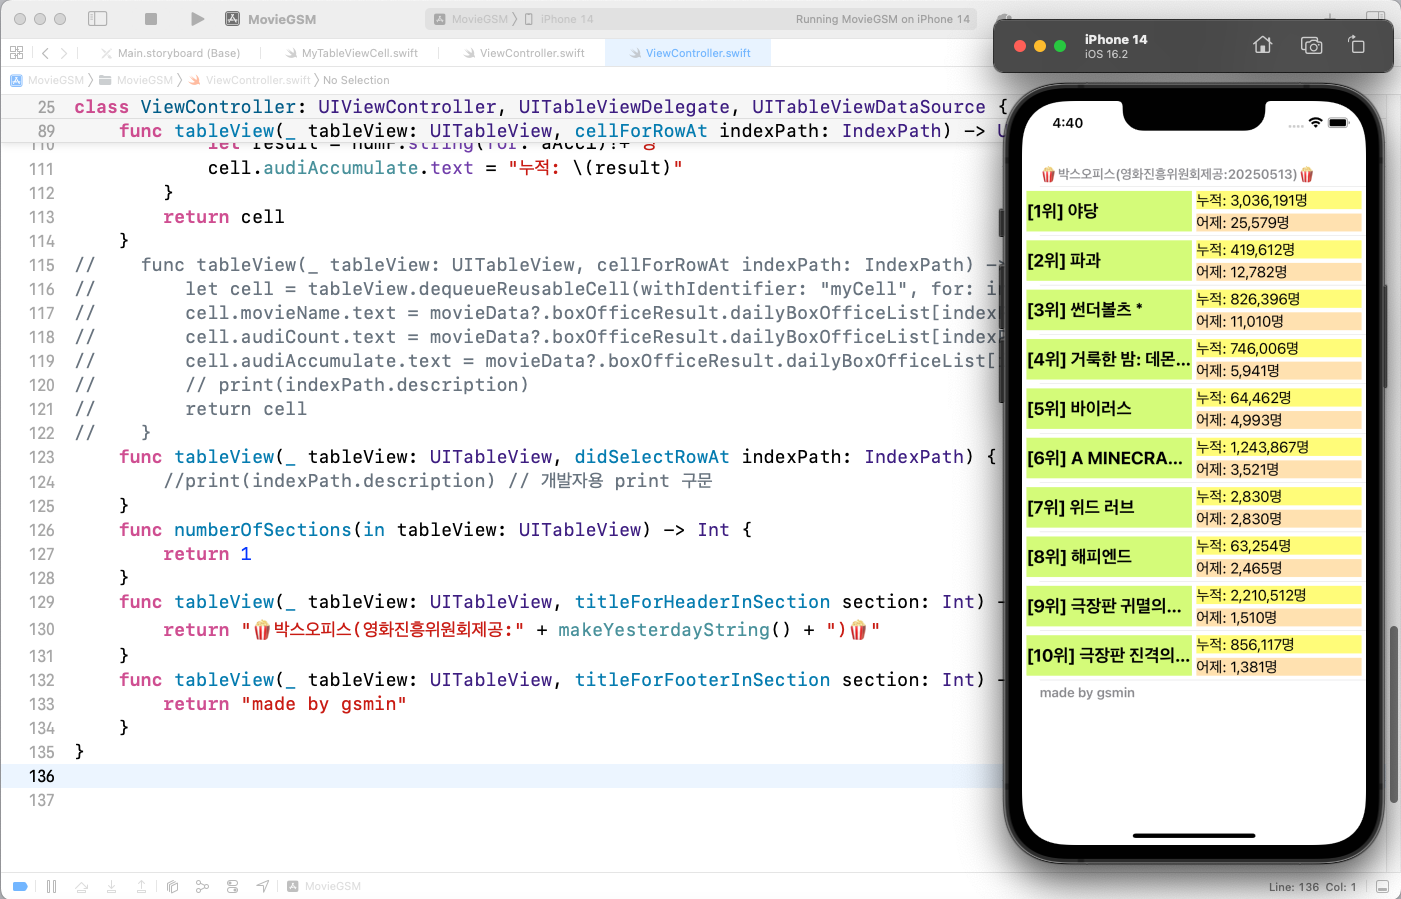
잘린 문자열 처리를 위한 Lines를 2로 변경 후 AutoShrink를 다음과 같이 설정
실행 결과
전체 코드
import UIKit
let movie=["야당", "A MINECRAFT MOVIE 마인크래프트 무비","썬더볼츠*", "거룩한 밤: 데몬 헌터스", "파과"]
struct MovieData : Codable {
let boxOfficeResult : BoxOfficeResult
}
struct BoxOfficeResult : Codable {
let dailyBoxOfficeList : [DailyBoxOfficeList]
}
struct DailyBoxOfficeList : Codable {
let movieNm : String
let audiCnt : String
let audiAcc : String
let rank : String
}
class ViewController: UIViewController, UITableViewDelegate, UITableViewDataSource {
@IBOutlet weak var table: UITableView!
var movieData : MovieData?
var movieURL = "https://kobis.or.kr/kobisopenapi/webservice/rest/boxoffice/searchDailyBoxOfficeList.json?key=<API Key>&targetDt="
override func viewDidLoad() {
super.viewDidLoad()
table.delegate = self
table.dataSource = self
movieURL = movieURL + makeYesterdayString()
getData()
}
func makeYesterdayString() -> String {
let today = Date()
let yesterday = Calendar.current.date(byAdding: .day, value: -1, to: today)!
let formatter = DateFormatter()
formatter.dateFormat = "yyyyMMdd"
return formatter.string(from: yesterday)
}
func getData() {
guard let url = URL(string: movieURL) else { return }
let session = URLSession(configuration: .default)
let task = session.dataTask(with: url) { data, response, error in
if error != nil {
print(error!)
return
}
guard let JSONdata = data else { return }
let decoder = JSONDecoder()
do {
let decodedData = try decoder.decode(MovieData.self, from: JSONdata)
self.movieData = decodedData
DispatchQueue.main.async {
self.table.reloadData()
}
} catch {
print(error)
}
}
task.resume()
}
func tableView(_ tableView: UITableView, numberOfRowsInSection section: Int) -> Int {
return 10
}
func tableView(_ tableView: UITableView, cellForRowAt indexPath: IndexPath) -> UITableViewCell {
let cell = tableView.dequeueReusableCell(withIdentifier: "myCell", for: indexPath) as! MyTableViewCell
guard let mRank = movieData?.boxOfficeResult.dailyBoxOfficeList[indexPath.row].rank else
{ return UITableViewCell() }
guard let mName = movieData?.boxOfficeResult.dailyBoxOfficeList[indexPath.row].movieNm else
{ return UITableViewCell() }
cell.movieName.text = "[\(mRank)위] \(mName)"
if let aCnt = movieData?.boxOfficeResult.dailyBoxOfficeList[indexPath.row].audiCnt {
let numF = NumberFormatter()
numF.numberStyle = .decimal
let aCount = Int(aCnt)!
let result = numF.string(for: aCount)!+"명"
cell.audiCount.text = "어제: \(result)"
}
if let aAcc = movieData?.boxOfficeResult.dailyBoxOfficeList[indexPath.row].audiAcc {
let numF = NumberFormatter()
numF.numberStyle = .decimal
let aAcc1 = Int(aAcc)!
let result = numF.string(for: aAcc1)!+"명"
cell.audiAccumulate.text = "누적: \(result)"
}
return cell
}
func tableView(_ tableView: UITableView, didSelectRowAt indexPath: IndexPath) {
}
func numberOfSections(in tableView: UITableView) -> Int {
return 1
}
func tableView(_ tableView: UITableView, titleForHeaderInSection section: Int) -> String? {
return "🍿박스오피스(영화진흥위원회제공:" + makeYesterdayString() + ")🍿"
}
func tableView(_ tableView: UITableView, titleForFooterInSection section: Int) -> String? {
return "made by gsmin"
}
}
정리
- 받아온 영화 순위를 앱에 보여주는 기능을 구현했어요.
- 추가적인 정보를 나타내고 긴 내용에 대해 처리하는 부분까지 구현했어요.
출처 : Smile Han - iOS 프로그래밍 기초