Anaconda 설치
-
터미널을 연다(
Ctrl+Alt+T).

-
다음의 명령어를 순서대로 친다.
$ cd ~/Downloads
$ wget https://repo.anaconda.com/archive/Anaconda3-2020.02-Linux-x86_64.sh
$ bash Anaconda3-2020.02-Linux-x86_64.sh
$ exit
아래와 같은 방법으로 aiffel이라는 가상환경을 생성하자. 가상환경을 생성하면서 나머지 필요한 모든 설치 및 환경설정을 한번에 진행할 것이다.
NVIDIA GPU 드라이버 설치
먼저 Ubuntu 18.04를 사용하고 있음을 알린다.
1) NVIDIA GPU가 장착되지 않은 경우(tensorflow 설치)
다음의 명령어를 순서대로 친다.
$ conda create -n aiffel python=3.7 -y
$ conda activate (가상환경 이름: aiffel)
$ conda install anaconda notebook
$ conda install matplotlib
$ conda install tensorflow-gpu
$ conda install pandas
$ conda install seaborn
$ conda install cmake -y
$ python -m ipykernel install --user --name aiffel --display-name "aiffel" && echo "export TF_FORCE_GPU_ALLOW_GROWTH=true" >> ~/.bashrc && exit
만약 설치 도중에 커서가 돌아가면서 멈추는 경우에는 ctrl + c를 친 후, 다신 설치해 본다. 아래의 명령어를 통해 어떤 패키지가 설치되었는지 알 수 있다.
$ pip list
2) NVIDIA GPU가 장착된 경우(tensorflow-gpu 설치)
다음을 확인해 본다.
$ nvidia-smi
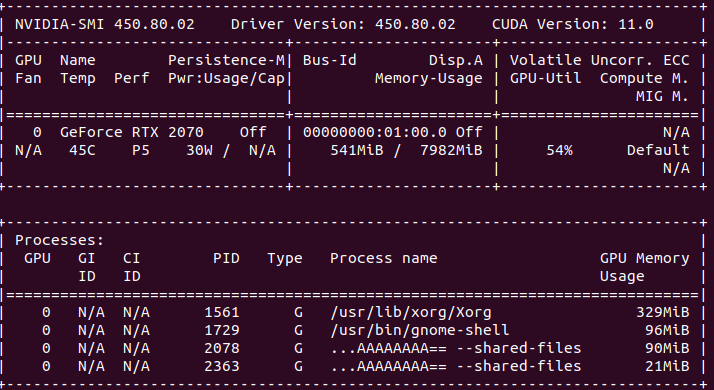
위의 화면이 나오면 준비가 된 것이므로 다음의 명령어를 친다.
$ conda create -n aiffel python=3.7 -y && conda activate aiffel && conda install -c conda-forge anaconda notebook matplotlib tensorflow-gpu pandas seaborn cmake -y && python -m ipykernel install --user --name aiffel --display-name "aiffel" && echo "export TF_FORCE_GPU_ALLOW_GROWTH=true" >> ~/.bashrc && exit
만약 위의 화면이 나오지 않는다면 GPU가 있는지 확인해 본다.
$ lspci -k | grep VGA | grep NVIDIA

위의 화면이 나오지 않는다면 1)을 다시 실행한다.
3) NVIDIA GPU 드라이버 설치
다음의 명령어를 친다. 주의: 시스템이 재부팅되므로 저장할 것들은 미리 저장해 놓자!
$ sudo add-apt-repository ppa:graphics-drivers/ppa
$ sudo apt-get update -y && sudo apt-get install nvidia-driver-440 -y && sudo reboot
리부팅 후 $ nvidia-smi의 결과가 정상적으로 보이면 제대로 설치된 것이다.
이제 $ conda create (가상환경 이름)을 실행해 본다.
정상적으로 진행되지 않는다면 가상환경을 삭제 후 다시 실행해본다.
$ conda env remove -n (만든 가상환경 이름)