페이지 반복 사용하기 - 템플릿 생성
Part 6: Create Pages Programmatically
우리가 블로그를 만들 때 페이지 디자인이 같아야 하는 경우가 있다. 나에게서는 누나 전용 페이지와 내 전용 페이지의 디자인이 같아야 하고 모든 Post 디자인이 같아야 한다. 앞서 배운 요소들만 이용해서도 반복적으로 페이지를 사용할 수 있으나 Gatsby는 Filesystem Route API로 좀 더 역동적으로 페이지를 생성할 수 있게 했다.
Gatsby's File System Route API
Gatsby는 자동적으로 src/pages 경로 안에 있는 폴더와 파일들을 인식을 하는데 nodes의 집합을 생성하고 파악하는 것도 File System Route API라 할 수 있다. 예를 들어, 우리가 Product 라는 node를 각각 생성할 때 src/pages 안에 {nodeType.field}.js 형식으로 src/pages/{Product.name}.js를 하면 URL이 자동으로 생성이 된다. 우리는 이번에 gatsby-plugin-mdx를 사용하는데 이 플러그인은 자동으로 MDX node에 slug 필드를 넣어준다.
{
  allMdx {
    nodes {
      slug
    }
  }
}
Create blog post page template
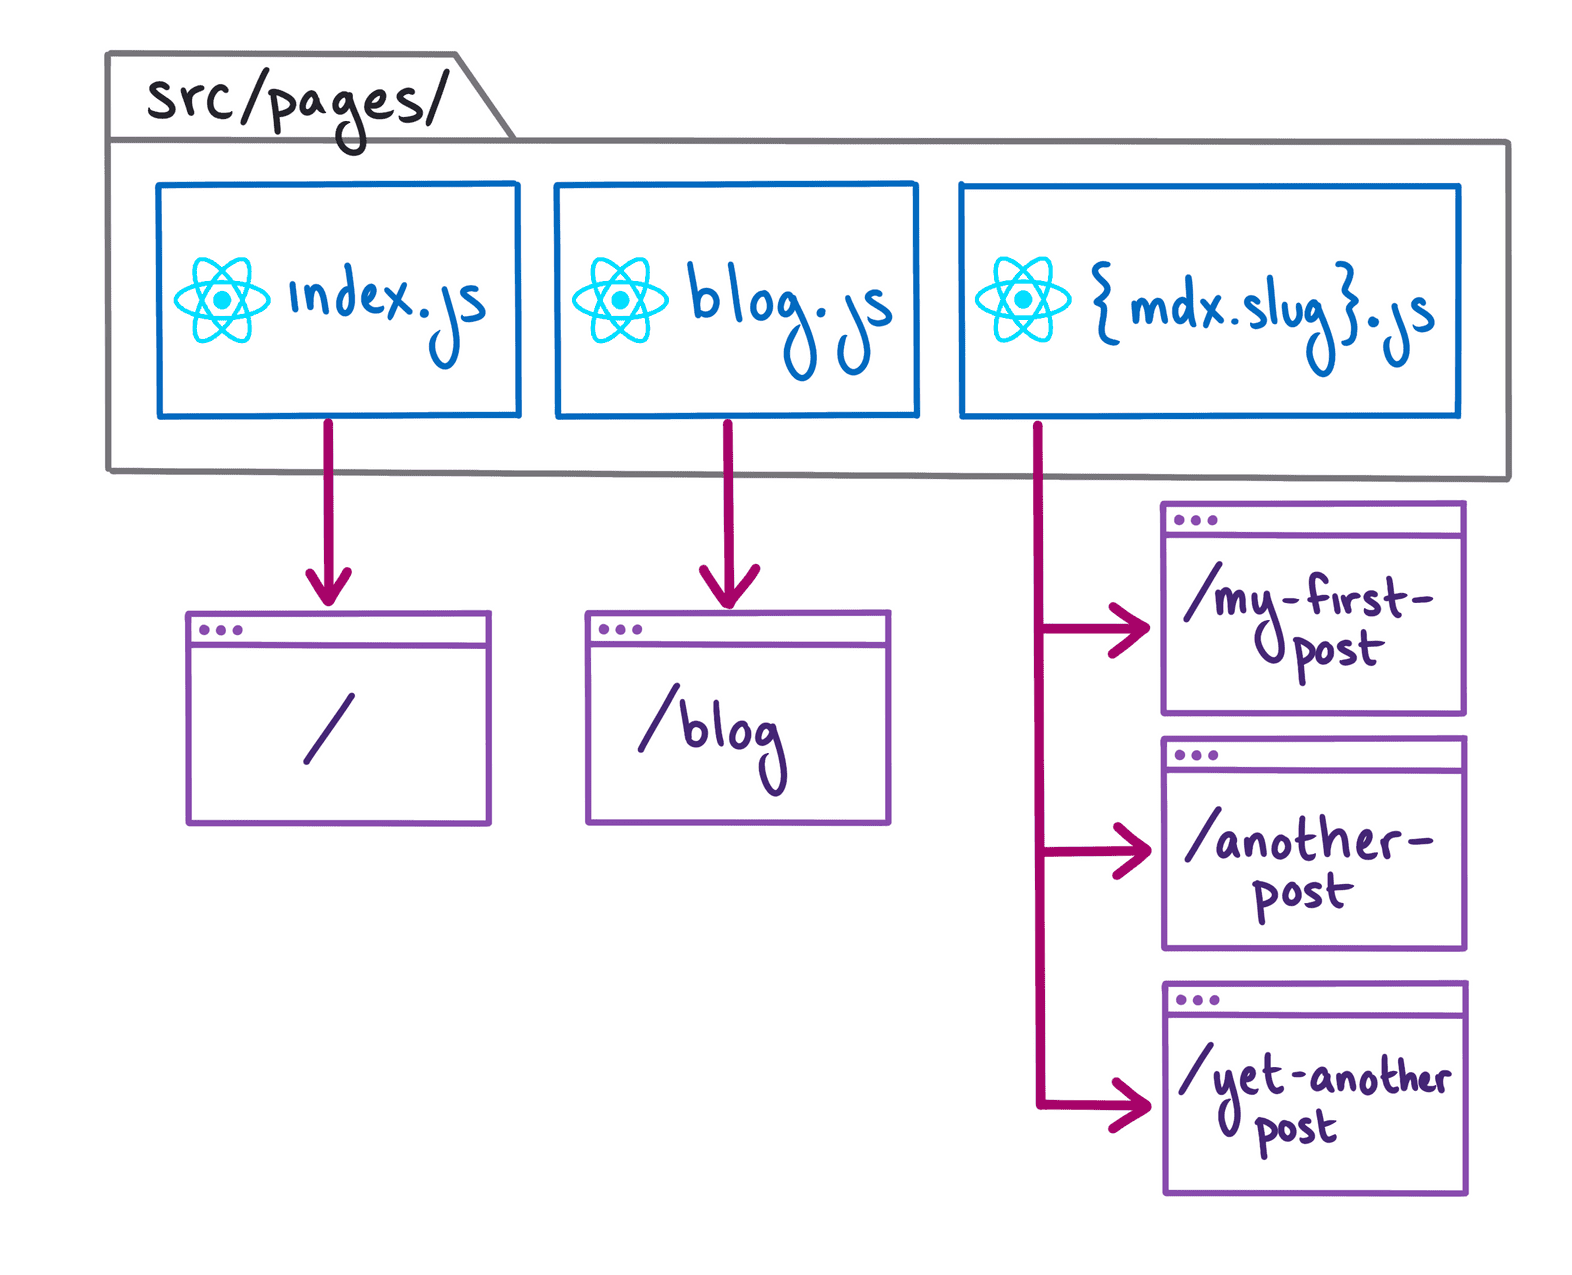
- 먼저, src/pages 경로안에 기본 템플릿이 될 {mdx.slug}.js를 생성한다.
- {mdx.slug}.js의 기본 component를 아래와 같이 구성한다.
import * as React from 'react'
import Layout from '../components/layout'

const BlogPost = () => {
  return (
    <Layout pageTitle="Super Cool Blog Posts">
      <p>My blog post contents will go here (eventually).</p>
    </Layout>
  )
}

export default BlogPost
Update route to include a /blog path parameter
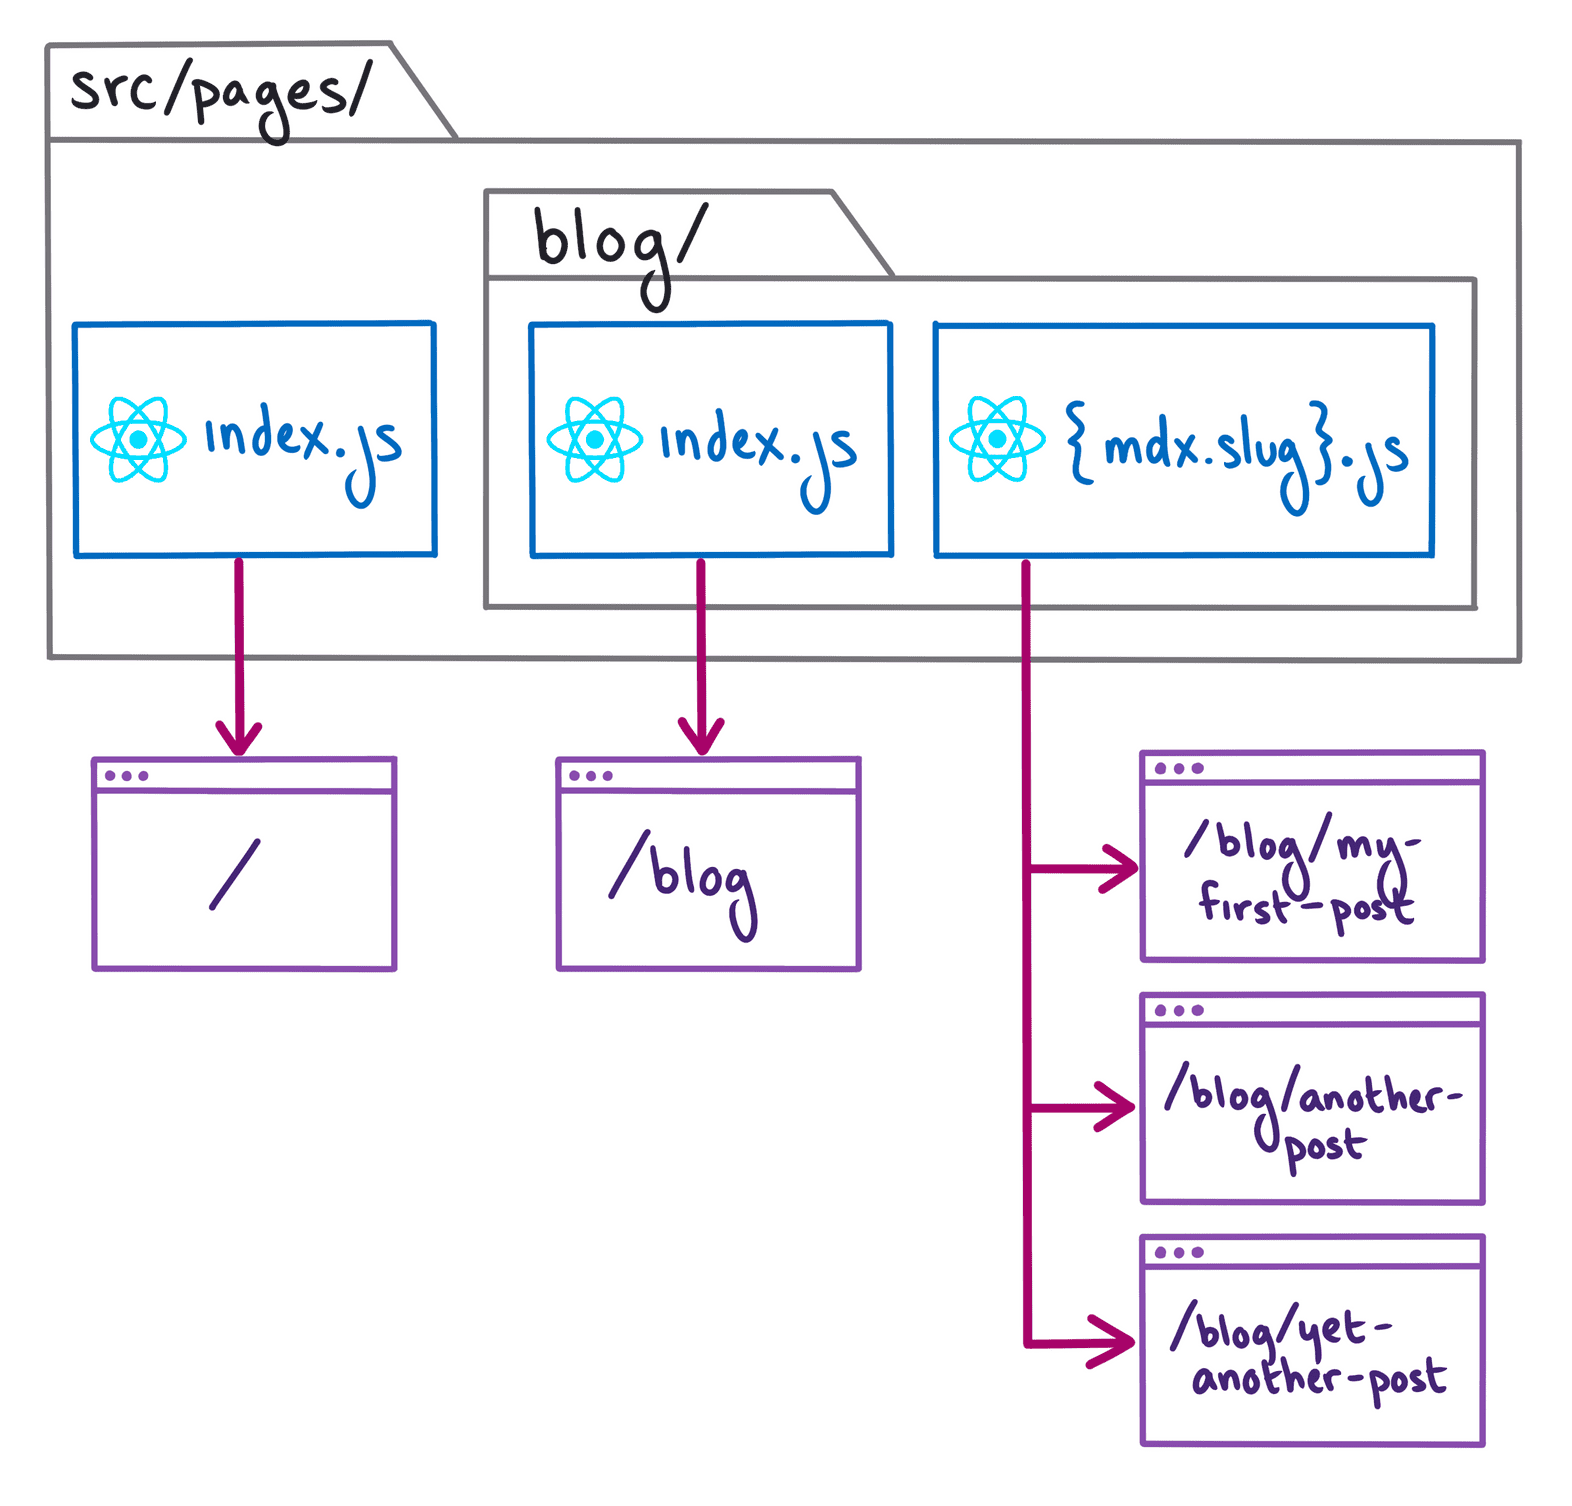
템플릿을 만들었는데 각각의 url이 다르면 이상하기 때문에 localhost:8000/blog/ 의 형식으로 통일성 있는 구조로 만들어야 한다. 이렇게 구성하는 것은 매우 간단하다.
blog라는 폴더를 만들어라! 그럼 끝!
Render contents in page template
반복되는 템플릿에 맞는 컨텐츠를 제공해줘야 한다. 이런 경우 GraphQL의 Query Variables를 이용하면 된다. Gatsby의 File System Route API 같은 경우 자동으로 각 노드마다 id와 slug를 제공한다.
- $를 사용하여 반복되는 고유 변수를 불러서 데이터를 가져옴
- 그 다음, graphql과 MDXRenderer를 이용해 각 템플릿에 맞는 데이터를 제공해줌
query MyQuery($id: String) {
  mdx(id: {eq: $id}) {
    frontmatter {
      title
      date(formatString: "MMMM D, YYYY")
    }
    body
  }
}
역동적인 이미지 생성하기 - GatsbyImage
Part 7: Add Dynamic Images from Data
앞서 우리는 gatsby-plugin-image를 사용해 StaticImage를 적용해봤다. StaticImage도 반응형으로 움직이는데 GatsbyImage가 왜 필요한지 의문을 가질 수 있다. 아래의 사진을 보면서 비교해보자.
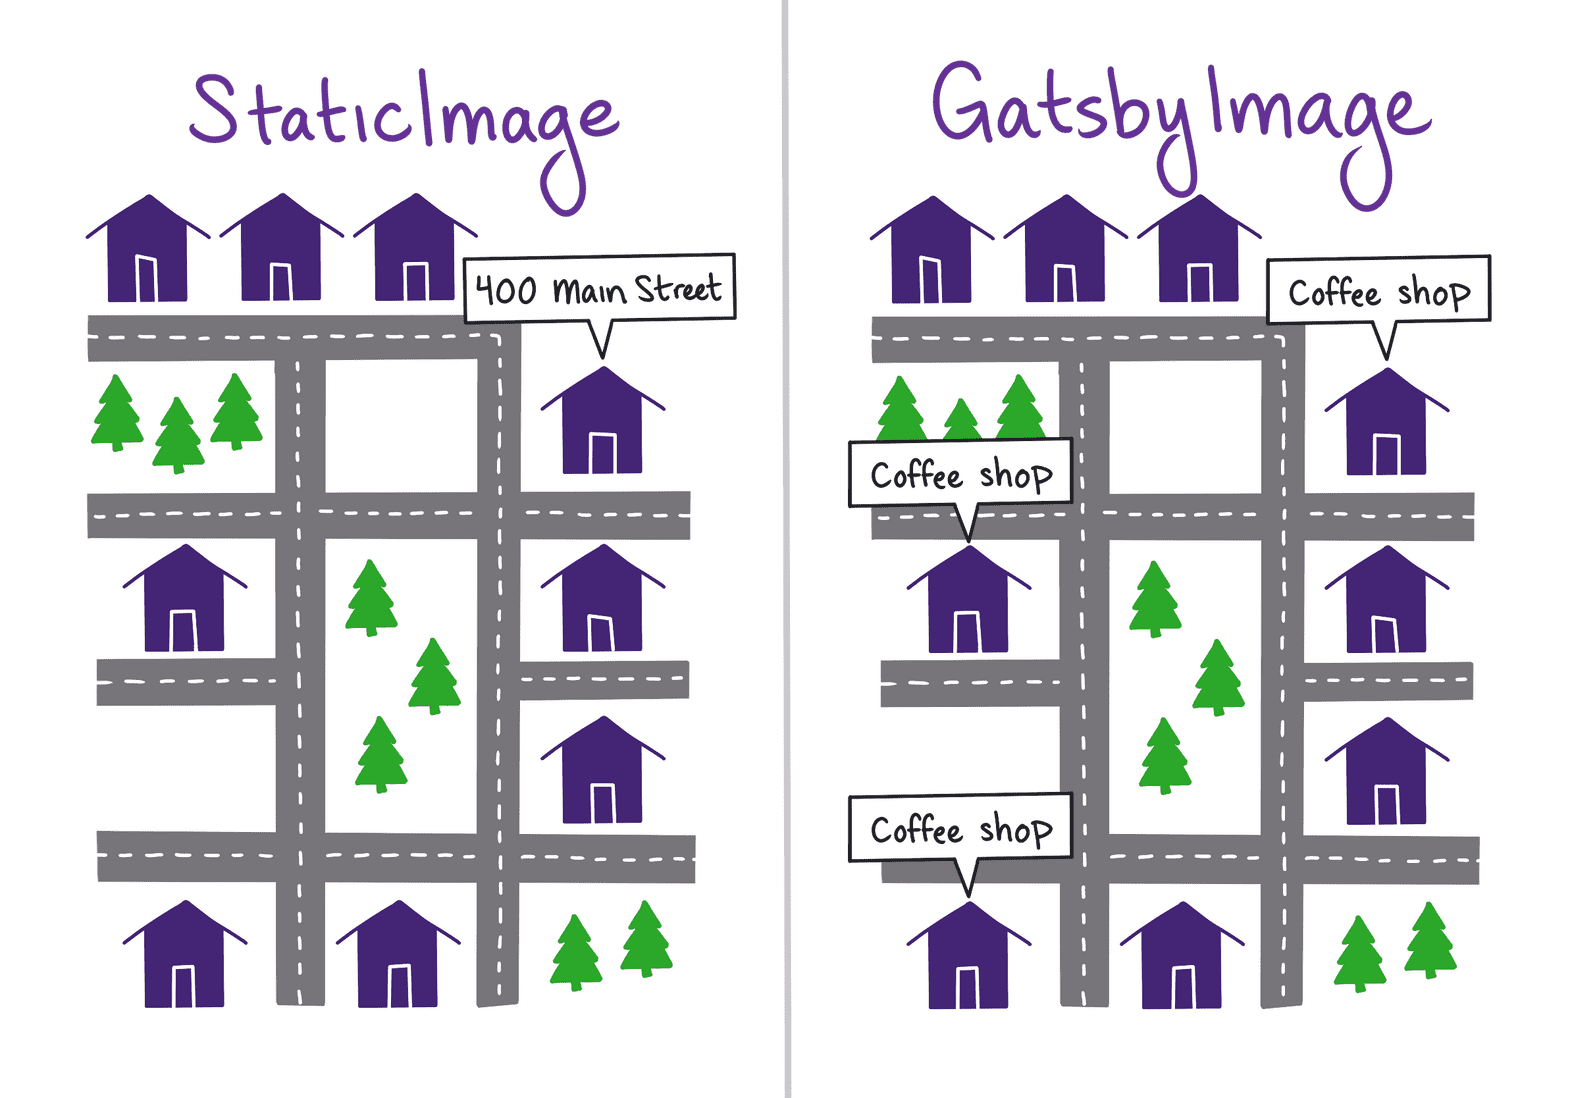
- StaticImage는 마치 우리가 길을 물어볼 때 거리 속 건물의 개성보다는 건물들을 포함하는 거리의 명칭만 알려주는 것으로 매번 같은 URL/파일 경로로 처리가 됨
- GatsbyImage는 더 세세한 지리 및 커피숍의 위치까지 알 수 있도록 하는 것처럼 이미지 출처를 prop으로 넘겨 받아 사용됨
Add hero images to blog post frontmatter
여기서 hero images란? 사이트에 들어갔을 때 이목을 끄는 이미지라고 보면 될거 같다. 마치 Youtube Thumbnail 같은 것이다. 우리가 화면을 만들때 post 마다 좋은 이미지가 있어야 하기 때문에 폴더 구조를 바꿔야 한다.
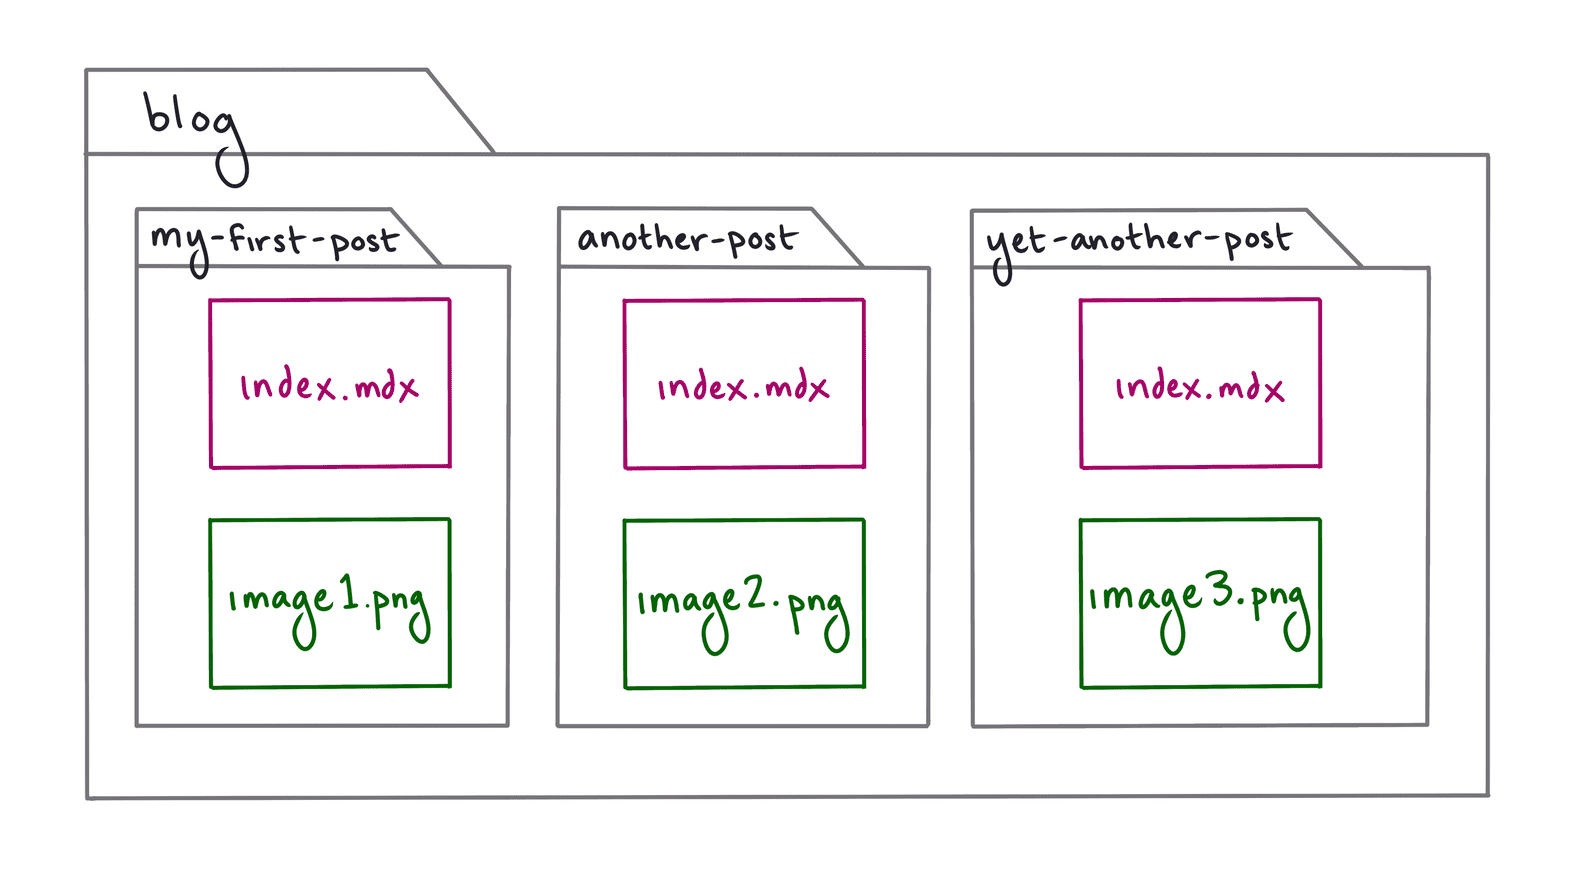
그런 다음 mdx에다가 이미지에 대한 정보를 넣을 수 있다.
- hero_image : 포스트 파일과 이미지 파일의 상대경로
- hero_image_alt : 이미지에 대한 짧은 설명
- hero_image_credit_text : 이미지를 준 사진가에 대한 설명
- hero_image_credit_link : 다운받은 이미지 출처
Install and configure gatsby-transformer-sharp
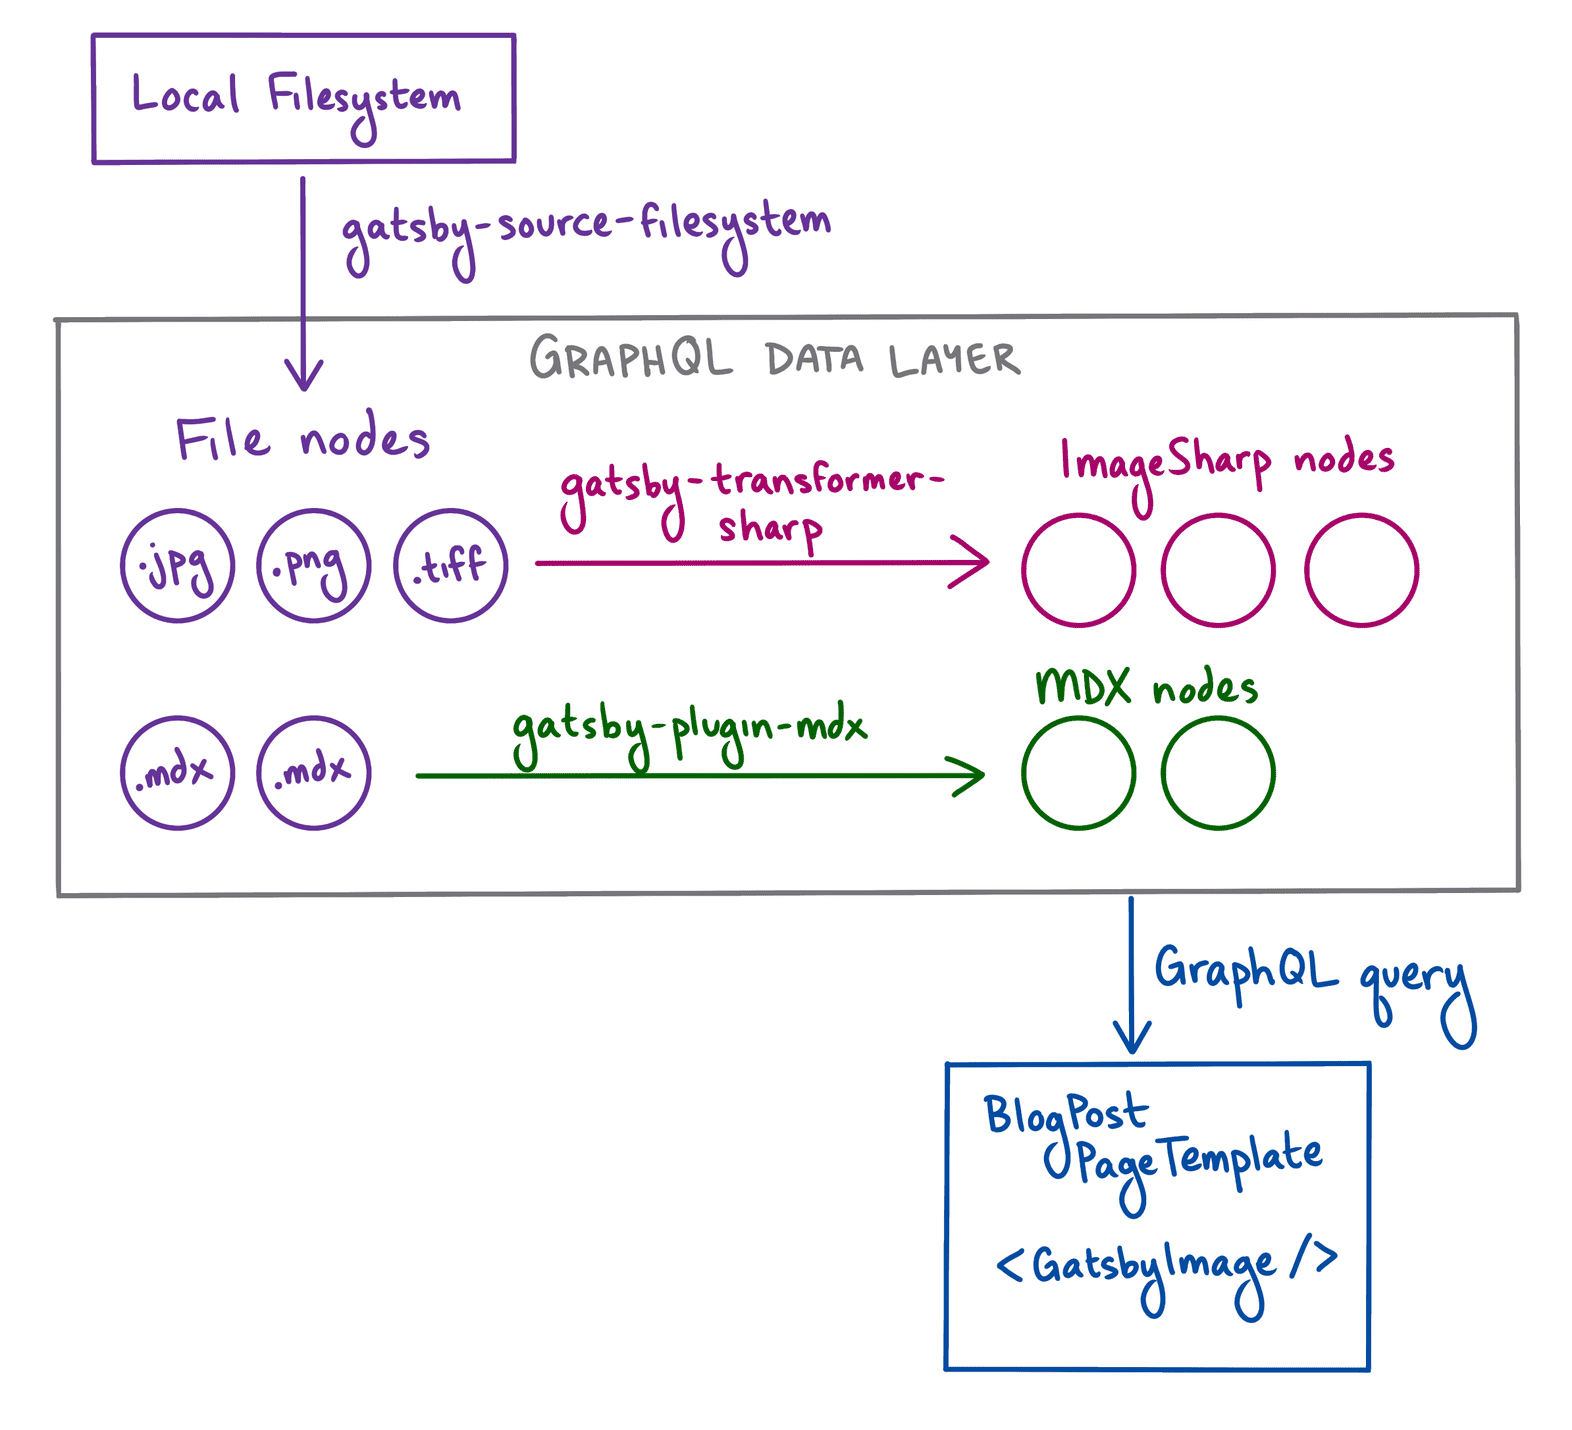
GatsbyImage component를 사용하기 위해서는 gatsby-transformer-sharp가 필요하다.
1. gatsby-transformer-sharp 설치
npm install gatsby-transformer-sharp2. gatsby-config.js 파일에 plugin 추가
module.exports = {
  siteMetadata: {
    title: "My First Gatsby Site",
  },
  plugins: [
    // ...existing plugins
    "gatsby-transformer-sharp",
  ],
}
3. GraphQL 쿼리문에 이미지 요소 추가 및 수정
GRAPHQL
query ($id: String) {
  mdx(id: {eq: $id}) {
    frontmatter {
      title
      date(formatString: "MMMM D, YYYY")
      hero_image_alt
      hero_image_credit_link
      hero_image_credit_text
      hero_image {
        childImageSharp {
          gatsbyImageData
        }
      }
    }
    body
  }
}
JSON
{
"data": {
"mdx": {
"frontmatter": {
"title": "My First Post",
"date": "July 23, 2021",
"hero_image_alt": "A gray pitbull relaxing on the sidewalk with its tongue hanging out",
"hero_image_credit_link": "https://unsplash.com/photos/ocZ-_Y7-Ptg",
"hero_image_credit_text": "Christopher Ayme"
"hero_image": {
"childImageSharp": [
{
"gatsbyImageData": {
"layout": "constrained",
"backgroundColor": "#282828",
"images": {
"fallback": {
"src": "/static/402ec135e08c3b799c16c08a82ae2dd8/68193/christopher-ayme-ocZ-_Y7-Ptg-unsplash.jpg",
"srcSet": "/static/402ec135e08c3b799c16c08a82ae2dd8/86d57/christopher-ayme-ocZ-_Y7-Ptg-unsplash.jpg 919w,\n/static/402ec135e08c3b799c16c08a82ae2dd8/075d8/christopher-ayme-ocZ-_Y7-Ptg-unsplash.jpg 1839w,\n/static/402ec135e08c3b799c16c08a82ae2dd8/68193/christopher-ayme-ocZ-_Y7-Ptg-unsplash.jpg 3677w",
"sizes": "(min-width: 3677px) 3677px, 100vw"
},
"sources": [
{
"srcSet": "/static/402ec135e08c3b799c16c08a82ae2dd8/6b4aa/christopher-ayme-ocZ-_Y7-Ptg-unsplash.webp 919w,\n/static/402ec135e08c3b799c16c08a82ae2dd8/0fe0b/christopher-ayme-ocZ-_Y7-Ptg-unsplash.webp 1839w,\n/static/402ec135e08c3b799c16c08a82ae2dd8/5d6d7/christopher-ayme-ocZ-_Y7-Ptg-unsplash.webp 3677w",
"type": "image/webp",
"sizes": "(min-width: 3677px) 3677px, 100vw"
}
]
},
"width": 3677,
"height": 2456
}
}
]
}
},
"body": "..."
}
},
"extensions": {}
}필요한 요소마다 알아서 쿼리문을 집어넣으면 될 것 같다. React-Gatsby에 대해서 한번 다 훑어봤으니까 완전히 내껄로 만들기 위한 개발을 시작해보겠다.
