
TodayWhatILeared를 운영하며 처음 선정한 주제인 Spring Boot를 이번 기회에 제대로 공부하여 익숙해지려한다. 가능한지는 모르겠지만 최선을 다하다보면 되지 않을까 싶다.
0. MVC의 작동 과정
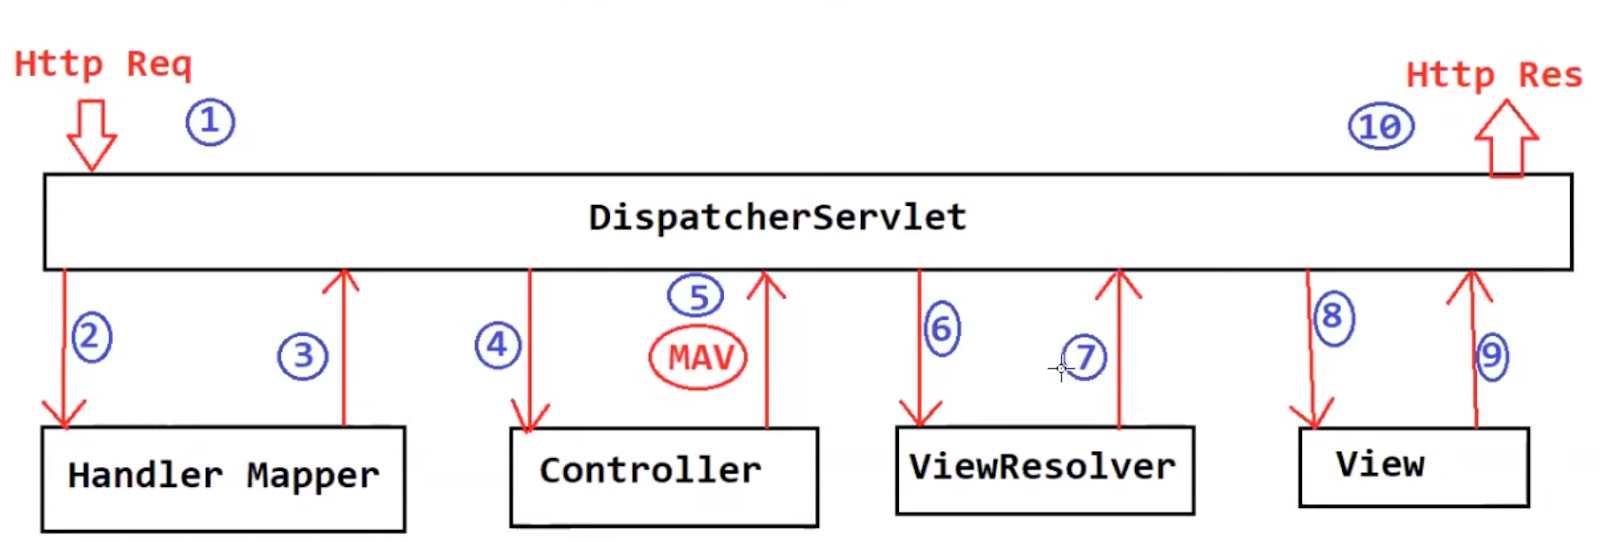
1) 사용자가 URL을 통해 HTTP 요청을 보내면 DispatcherServlet이 요청을 받게 된다.
2) DispatcherServlet은 HandlerMapper에게 이 요청이 어떤 Controller에게 할당되어야 하는지 맡긴다.
3) HandlerMapper는 Controller를 선택하고 이를 DispatcherServlet에게 넘긴다.
4) DispatcherServlet은 어떤 Controller가 해야하는지 알기에 요청 처리를 넘긴다.
5) Controller는 요청을 처리하거나 확인하고 모델 데이터를 생성한다. 마지막으로, DispatcherServlet에게 View, Model의 이름을 반환한다.
6) DispatcherServlet은 ViewResolver에게 어플리케이션 내 어떤 View가 있는지 요청한다.
7) ViewResolver는 실제 View를 찾아 다시 반환하게 된다.
8) 따라서, View Component에 View와 Model을 보낸다.
9) View Component는 HTML에다가 View, Model을 결합해 내보내게 된다.
10) 최종적으로, Browser 환경에 HTML 결과물을 보내게 된다.
1. Maven Web Application 생성하기
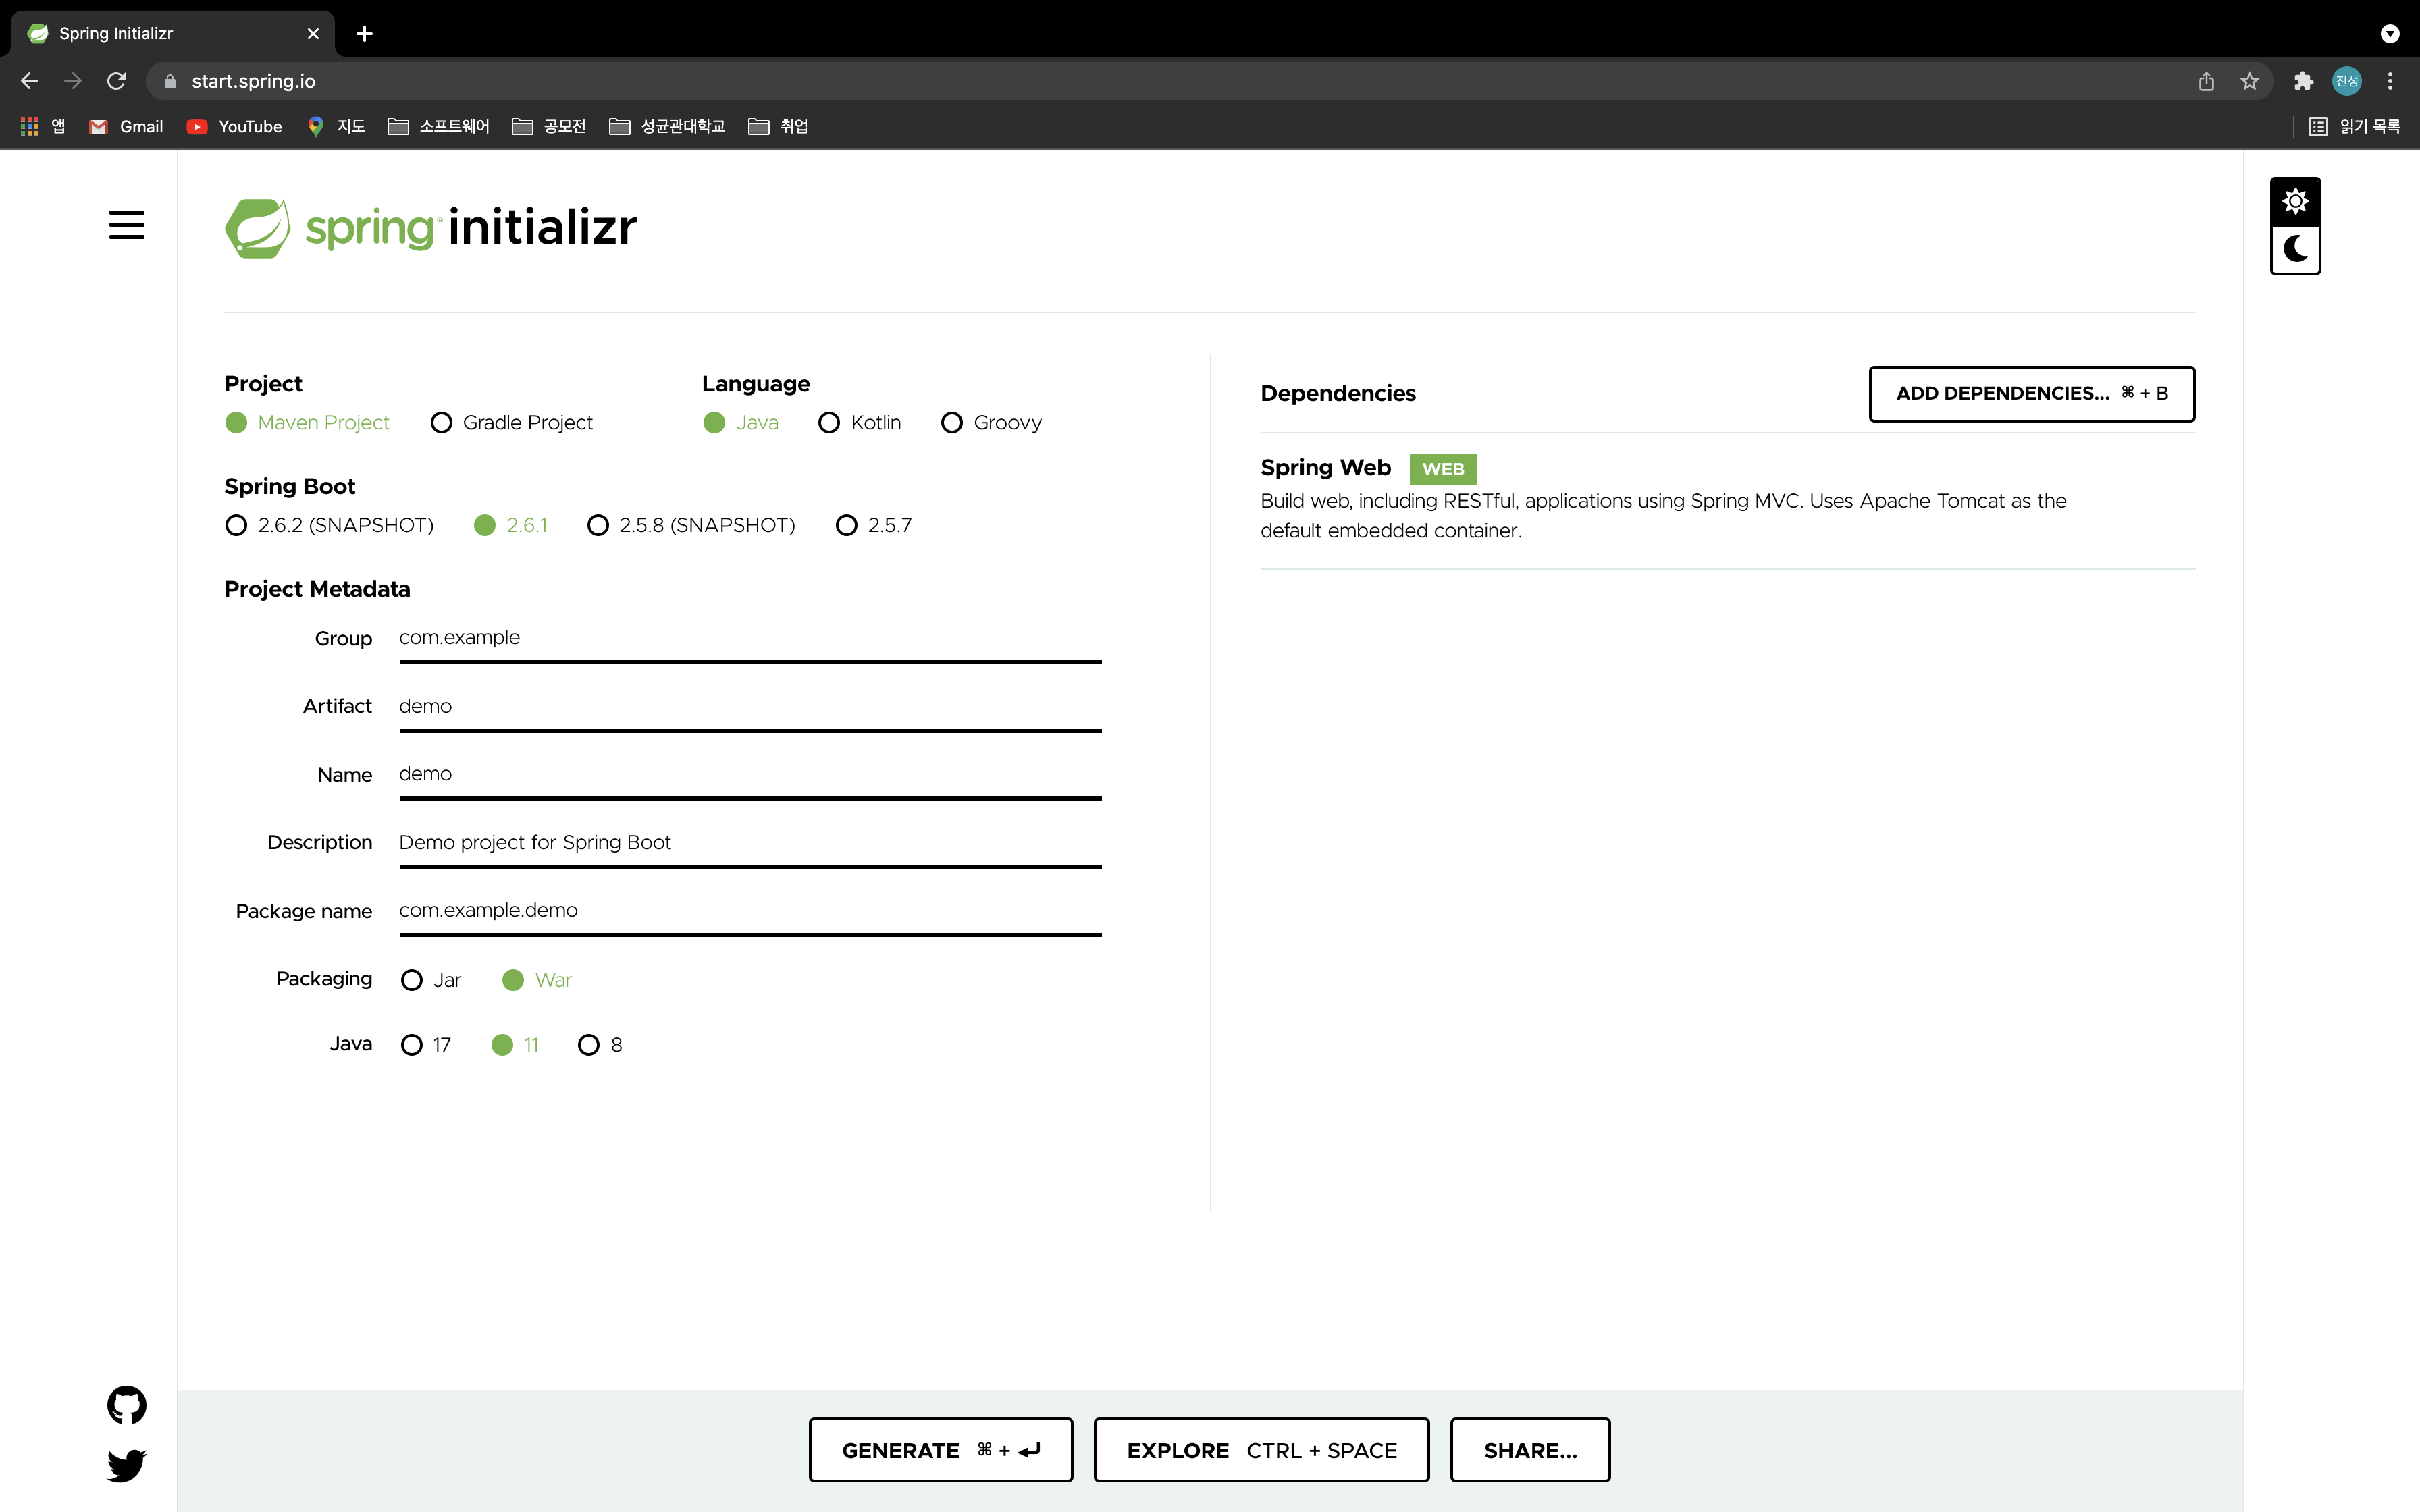
- 먼저, Maven Web Application을 생성하기 위해 spring initializer를 사용해 환경 설정을 해준다.
- Generate 버튼을 누른 후 받은 파일로 Visual Studio Code를 사용해 실행시켜준다.
2. pom.xml File 의존성 추가하기
    <dependency>
        <groupId>org.apache.tomcat.embed</groupId>
        <artifactId>tomcat-embed-jasper</artifactId>
        <scope>provided</scope>
    </dependency>
    <dependency>
        <groupId>javax.servlet</groupId>
        <artifactId>jstl</artifactId>
</dependency>- 위 패키지는 우리가 웹을 실행시켰을 때 Spring MVC가 잘 동작하도록 서버를 관리해주는 패키지로 추가하여야 한다.
3. AppConfig.java 생성
package com.example.springmvchelloworld.config;

import org.springframework.context.annotation.Bean;
import org.springframework.context.annotation.ComponentScan;
import org.springframework.context.annotation.Configuration;
import org.springframework.web.servlet.config.annotation.EnableWebMvc;
import org.springframework.web.servlet.view.InternalResourceViewResolver;
import org.springframework.web.servlet.view.JstlView;

@Configuration
@EnableWebMvc
@ComponentScan(basePackages = {
    "com.example.springmvchelloworld"
})

public class AppConfig {
    @Bean
    public InternalResourceViewResolver resolver() {
        InternalResourceViewResolver resolver = new InternalResourceViewResolver();
        resolver.setViewClass(JstlView.class);
        resolver.setPrefix("/WEB-INF/views/");
        resolver.setSuffix(".jsp");
        return resolver;
    }
}- java/package이름 아래에 config라는 폴더를 생성해 AppConfig.java를 작성한다.
- @Configuration은 class-level annotaion으로 Bean을 정의하는데 사용한다.
- @EnableWebMvc는 XML 기반 실행과정에서 mvc:annotation-driven/과 같은 기능을 하도록 한다.
- @ComponentScan은 여러 @Controller나 @Service와 같은 패키지를 내포해준다.
그러나 위 3개의 Annotation을 다 포함한 것이 @SpringBootApplication이라 안써도 괜찮다.
4. HelloWorld.java 작성
package com.example.springmvchelloworld.model;

public class HelloWorld {
    private String message;
    private String dateTime;
    public String getMessage() {
        return message;
    }
    public void setMessage(String message) {
        this.message = message;
    }
    public String getDateTime() {
        return dateTime;
    }
    public void setDateTime(String dateTime) {
        this.dateTime = dateTime;
    }
}- 기본적으로 Spring MVC를 건드리기 위해서는 기본적인 Model Class가 필요하다.
- 이것도 config 폴더와 같은 위치에 model이라는 폴더를 생성해서 작성하면 된다.
5. HelloWorldController.java 작성
package com.example.springmvchelloworld.controller;

import java.time.LocalDateTime;
import com.example.springmvchelloworld.model.HelloWorld;
import org.springframework.stereotype.Controller;
import org.springframework.ui.Model;
import org.springframework.web.bind.annotation.RequestMapping;
import org.springframework.web.bind.annotation.RequestMethod;

@Controller
public class HelloWorldController {

    @RequestMapping(value = "/", method = RequestMethod.GET)
    public String handler(Model model) {
        HelloWorld helloWorld = new HelloWorld();
        helloWorld.setMessage("Hello World Example Using Spring MVC 5!!!");
        helloWorld.setDateTime(LocalDateTime.now().toString());
        model.addAttribute("helloWorld", helloWorld);
        return "helloworld";
    }
}- model 폴더와 마찬가지로 controller 폴더를 생성해 작성하면 된다.
- 요새는 @GetMapping, @PostMapping을 써서 명시적으로 요청이 들어왔을 때 구분을 할 수도 있지만 예전에는 @RequestMapping 을 활용해 명시할 수도 있다.
- model.addAttribute("내용", 변수)를 하면 jsp에서 변수를 불러와 내용을 화면에 띄울 수 있다.
- return 값은 우리가 적용하고자 하는 View의 이름 즉, jsp의 이름을 넣으면 된다.
6. helloworld.jsp 작성
<%@ page language="java" contentType="text/html; charset=ISO-8859-1"
 pageEncoding="ISO-8859-1"%>
<%@ taglib uri="http://java.sun.com/jsp/jstl/core" prefix="c"%>
<!DOCTYPE html>
<html>
<head><%@ page isELIgnored="false" %>
<meta charset="ISO-8859-1">
<title>Spring 5 MVC - Hello World Example | javaguides.net</title>
</head>
   <body>
      <h2>${helloWorld.message}</h2>
      <h4>Server date time is : ${helloWorld.dateTime}</h4>
   </body>
</html>- src/main/ 아래에 webapp/WEB-INF/views 폴더를 생성하고 그 아래 helloworld.jsp를 작성하면 된다.
7. 최종 실행 화면
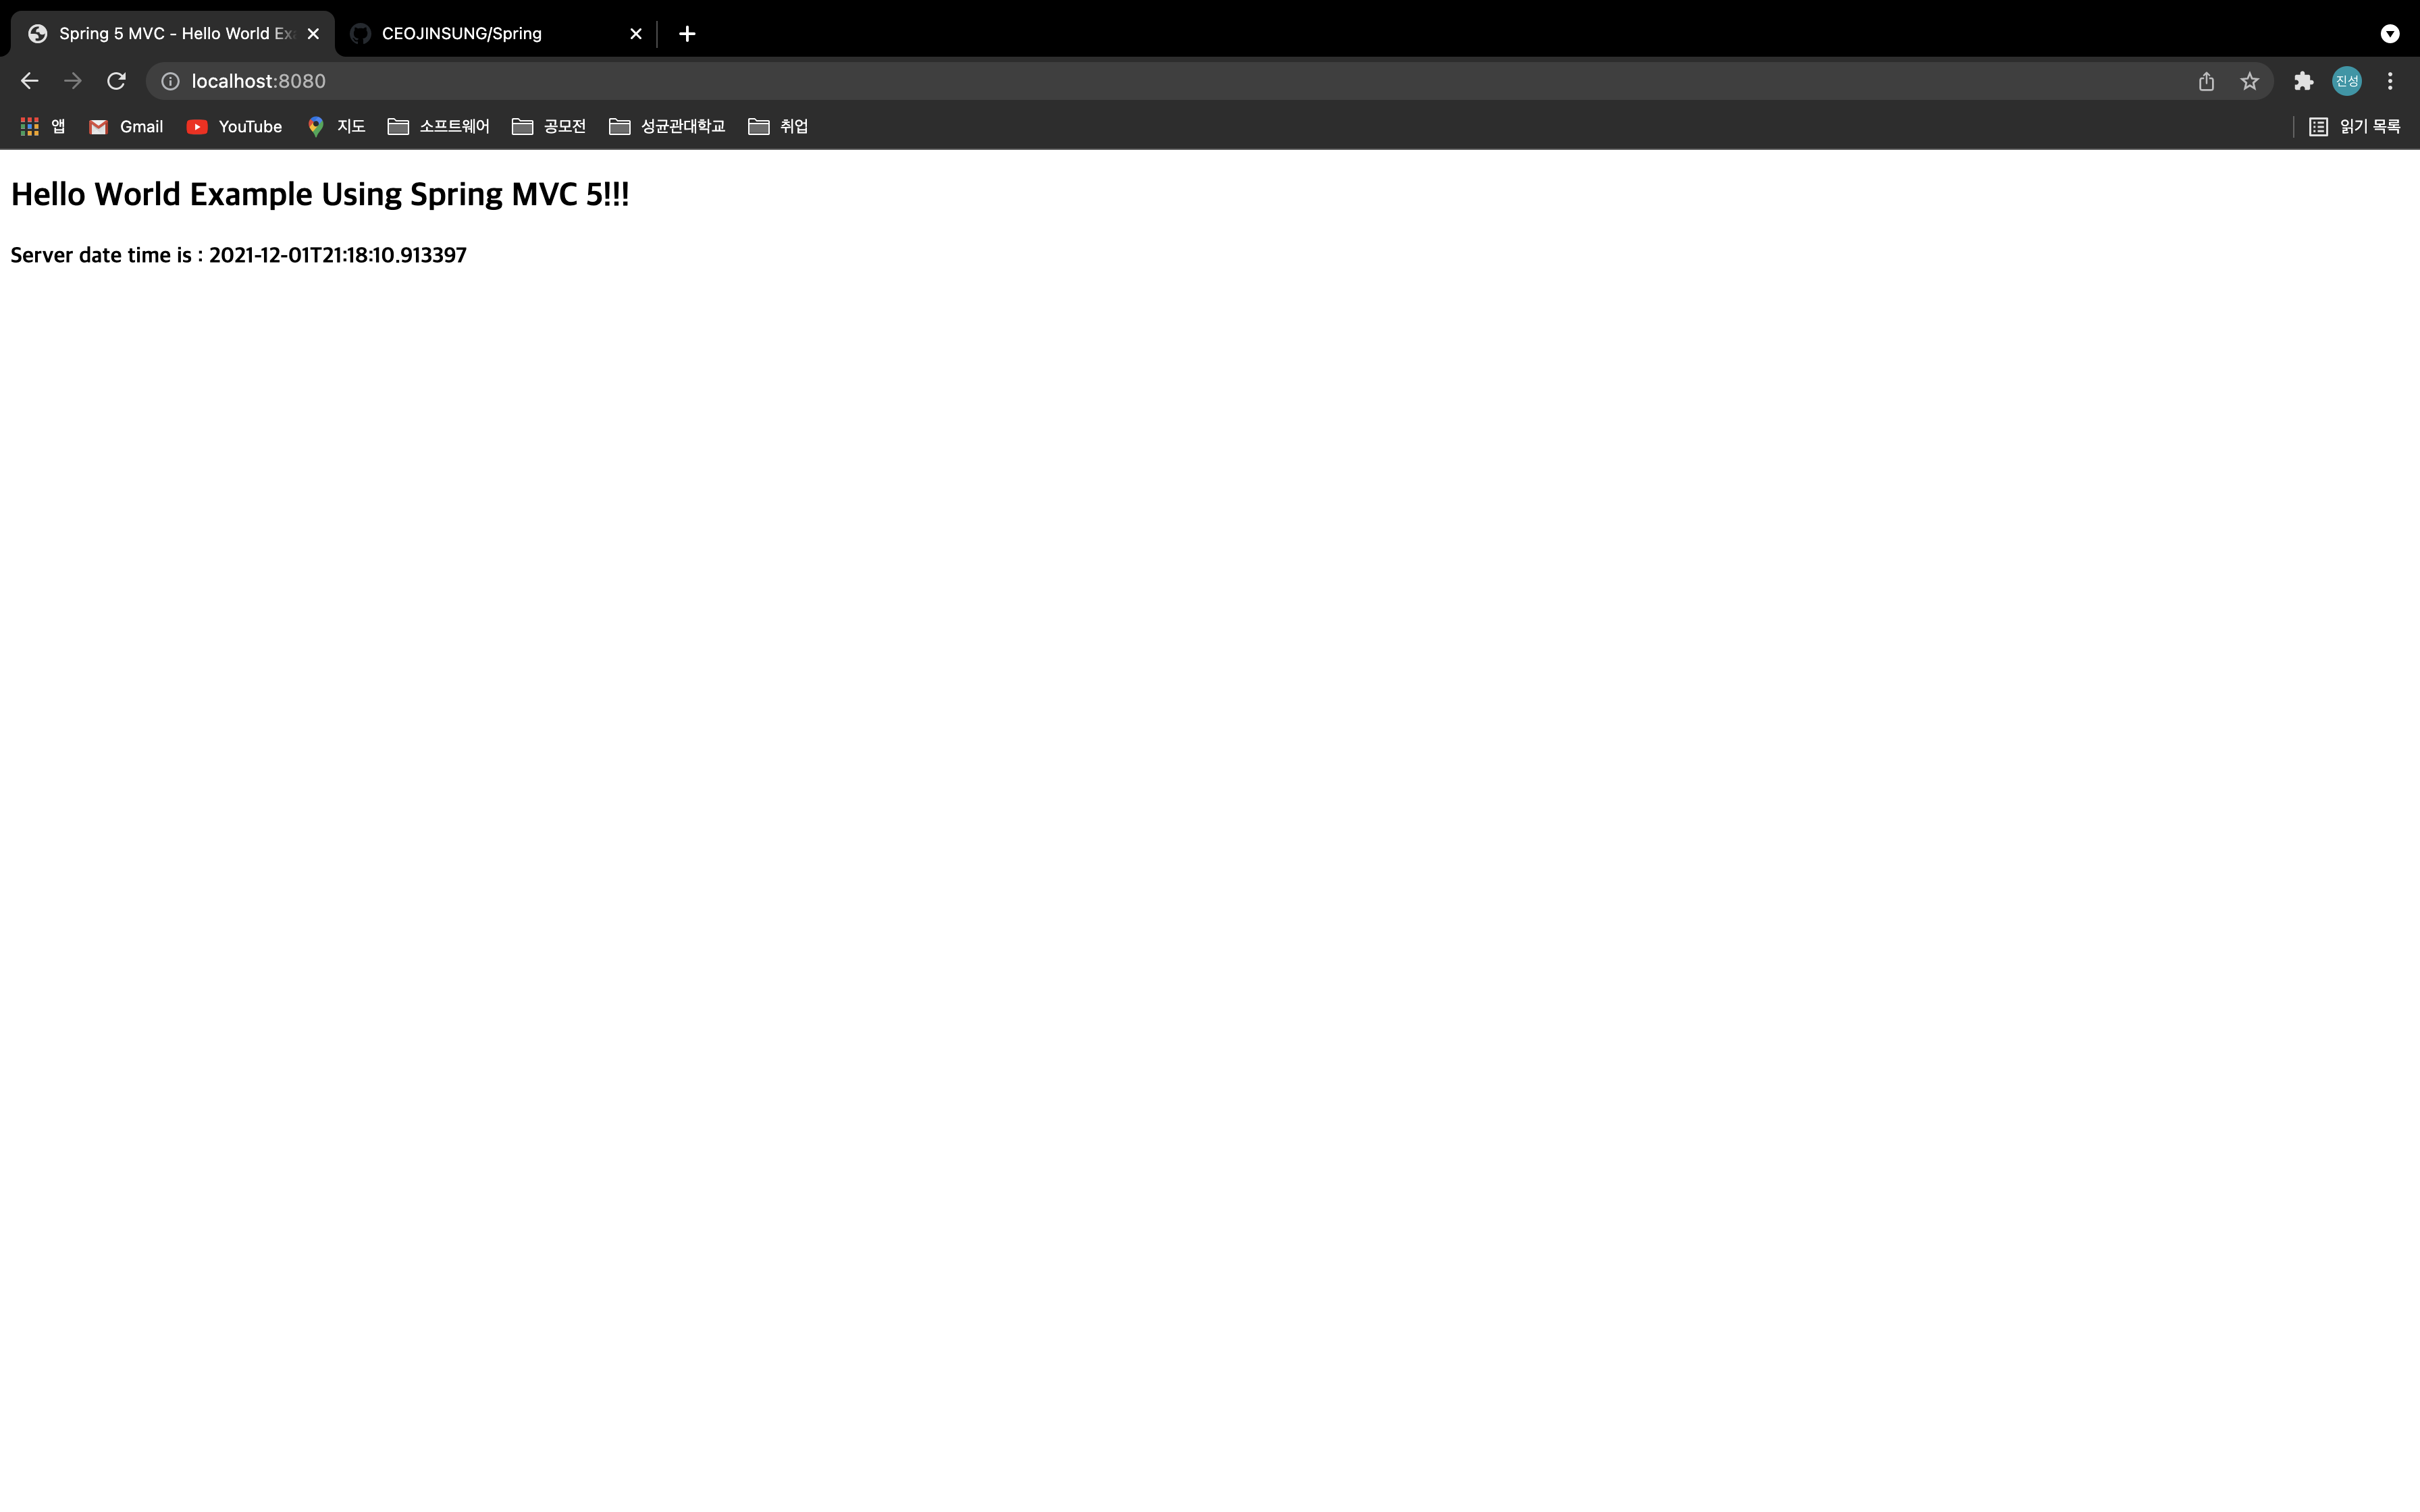
- 최종적으로 실행을 하면 http://localhost:8080/ 에 화면이 나타나고 우리가 설정한 변수의 이름이 써진 것을 알 수 있다.
추가 설정 : 만약 화면이 나오지 않았을 경우
spring.mvc.view.prefix=/WEB-INF/jsp/
spring.mvc.view.suffix=.jsp

# JSP 수정시 서버 재시작 없이 바로 적용될 수 있게 설정
server.servlet.jsp.init-parameters.development = true- application.properties에다가 위 코드를 집어 넣으면 된다.