0. 환경 설정
저번에 작성했던 MVC 환경 설정을 따라하면 된다.
1. MVCConfig.java 생성
package com.example.springmvcform.config;

import org.springframework.context.annotation.Bean;
import org.springframework.context.annotation.ComponentScan;
import org.springframework.context.annotation.Configuration;
import org.springframework.web.servlet.config.annotation.EnableWebMvc;
import org.springframework.web.servlet.config.annotation.ResourceHandlerRegistry;
import org.springframework.web.servlet.config.annotation.WebMvcConfigurer;
import org.springframework.web.servlet.view.InternalResourceViewResolver;
import org.springframework.web.servlet.view.JstlView;

@Configuration
@EnableWebMvc
@ComponentScan(basePackages = {
    "com.example.springmvcform"
})
public class MVCConfig implements WebMvcConfigurer {
    @Bean
    public InternalResourceViewResolver resolver() {
        InternalResourceViewResolver resolver = new InternalResourceViewResolver();
        resolver.setViewClass(JstlView.class);
        resolver.setPrefix("/WEB-INF/views/");
        resolver.setSuffix(".jsp");
        return resolver;
    }

    @Override
    public void addResourceHandlers(ResourceHandlerRegistry registry) {
        registry
            .addResourceHandler("/resources/**")
            .addResourceLocations("/resources/");
    }
}- config 폴더를 생성해 그 안에서 작성하면 된다.
- 근데 여기서
addResourceHandlers가 왜 나오는 걸까? 우리가 HTML을 꾸미는 과정에서 필요한 css, js 요소를 가져오기 위하여 사용하게 되는 것이다.
2. SignUpForm.java 작성
package com.example.springmvcform.model;

public class SignUpForm {
    private String firstName;
    private String lastName;
    private String email;
    private String userName;
    private String password;
    public String getFirstName() {
        return firstName;
    }
    public void setFirstName(String firstName) {
        this.firstName = firstName;
    }
    public String getLastName() {
        return lastName;
    }
    public void setLastName(String lastName) {
        this.lastName = lastName;
    }
    public String getEmail() {
        return email;
    }
    public void setEmail(String email) {
        this.email = email;
    }
    public String getUserName() {
        return userName;
    }
    public void setUserName(String userName) {
        this.userName = userName;
    }
    public String getPassword() {
        return password;
    }
    public void setPassword(String password) {
        this.password = password;
    }
}- model 폴더 안에 이 모델 파일을 작성하면 된다.
- 우리가 받고 싶은 요소를 집어넣고 private으로 할 경우 Getter, Setter를 정의해주면 된다. 물론, 초반에는 그냥 수기로 작성하겠지만 나중에 Lombok이라는 것을 배우면 가능하다.
3. SignUpController.java 작성
package com.example.springmvcform.controller;

import com.example.springmvcform.model.SignUpForm;

import org.springframework.stereotype.Controller;
import org.springframework.ui.Model;
import org.springframework.web.bind.annotation.GetMapping;
import org.springframework.web.bind.annotation.ModelAttribute;
import org.springframework.web.bind.annotation.PostMapping;

@Controller
public class SignUpController {
    @ModelAttribute("signUpForm")
    public SignUpForm setSignUpForm() {
        return new SignUpForm();
    }

    @GetMapping("/showSignUpForm")
    public String showForm() {
        return "signup-form";
    }

    @PostMapping("/saveSignUpForm")
    public String saveUser(@ModelAttribute("signUpForm") SignUpForm signUpForm, Model model) {
        System.out.println("FirstName : " + signUpForm.getFirstName());
        System.out.println("LastName : " + signUpForm.getLastName());
        System.out.println("Username : " + signUpForm.getUserName());
        System.out.println("Password : " + signUpForm.getPassword());
        System.out.println("Email : " + signUpForm.getEmail());

        model.addAttribute("message", "User SignUp successfully.");
        model.addAttribute("user", signUpForm);

        return "signup-success";
    }
}
여기서 우리가 알아야 할점
@Controller와 @RestController를 구분해야 한다. 왜냐하면 @Controller는 흔히 jsp를 Return해주는 요소로 사용되고 @RestController는 Return 값이 json이기에 여기서 @RestController를 사용하게 되면 화면이 나오지 않고 string 값이 화면에 나오게 된다.
오류 1 : Controller가 @SpringBootApplication와 같은 위치 일 경우
this application has no explicit mapping for /error, so you are seeing this as a fallback.

- 이 경우 우리가 Spring을 다룰 때 @SpringBootApplication보다 Controller가 밑에 있지 않으면 발생하는 오류이다.
- 만약 위치가 잘 되어있는데 이 오류가 나타나면 이는 Spring이 Controller를 찾지 못하고 있는 것으로 껐다가 다시 실행하거나 ComponentScan으로 위치를 알려주면 된다.
최종 화면

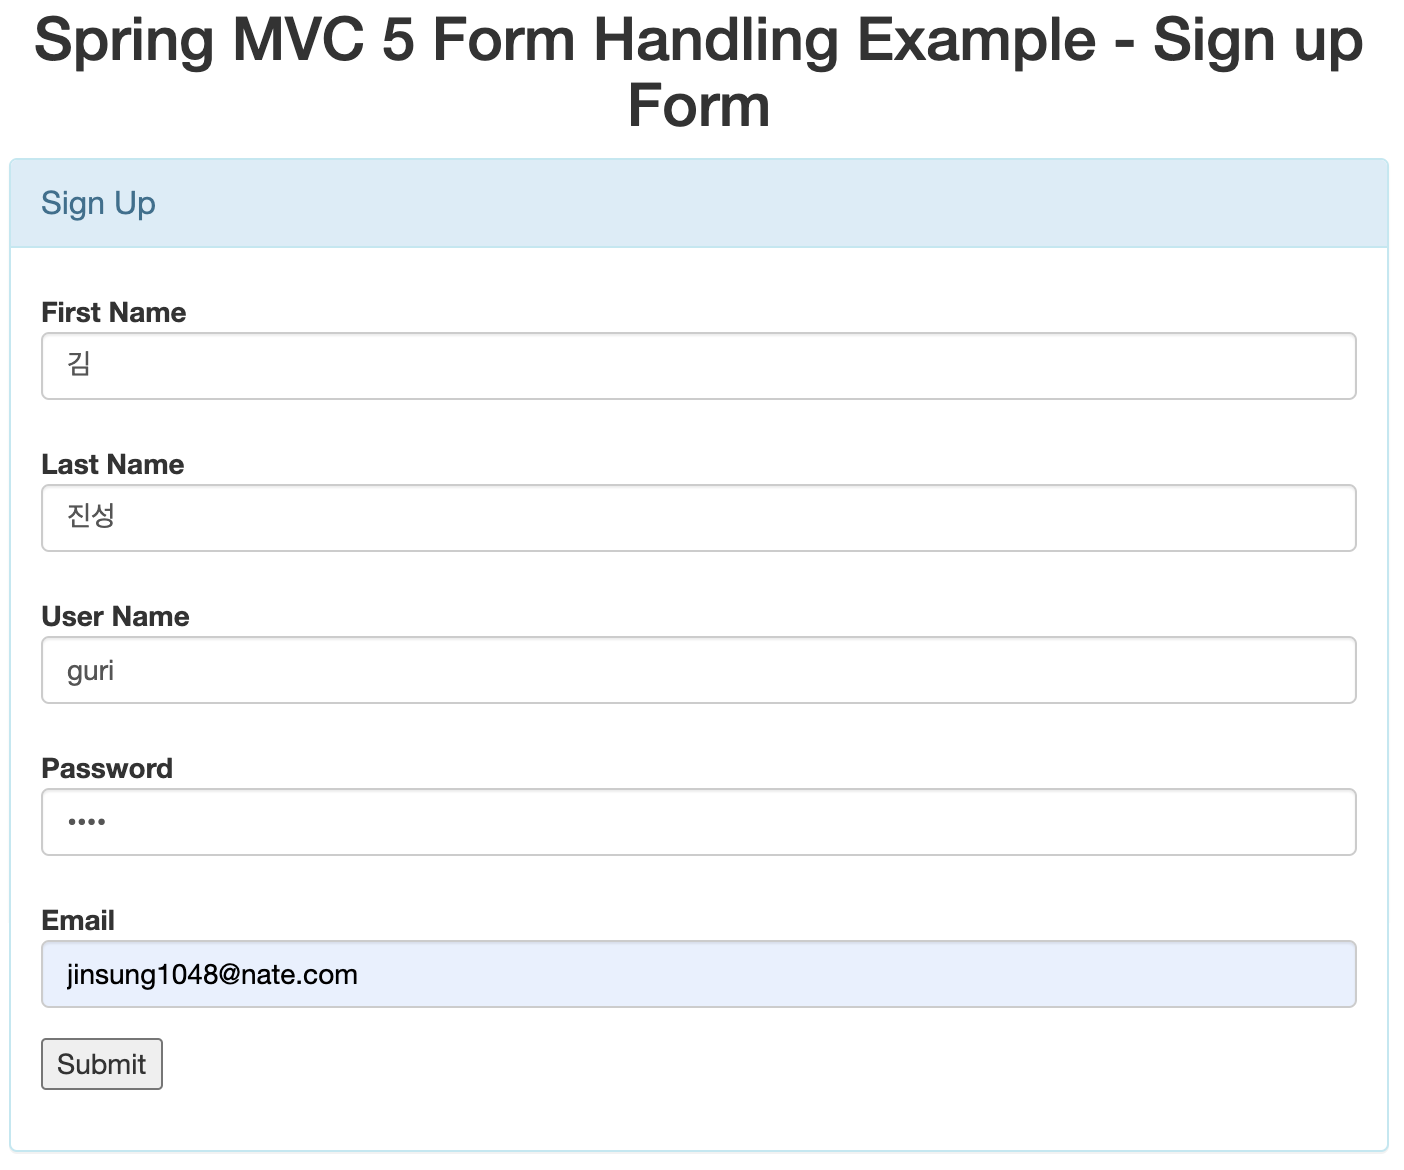
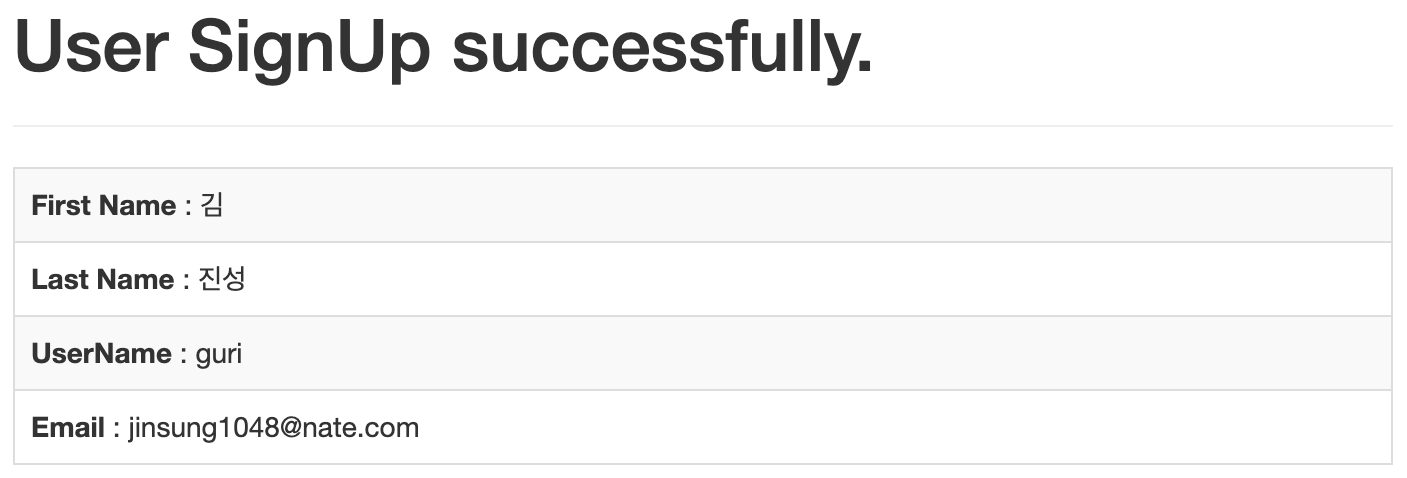
- 이렇게 SignupForm을 작성하고 Submit을 진행하면 아래와 같은 최종 화면이 나온다.

- 물론, DB와 연결되어 있지 않기에 정보는 저장되지 않지만 MVC Form의 예시로 좋은 것 같다.
최종 코드 : spring-mvc-form
