[Swagger] JavaScript에서 Swagger를 사용해보자
근데 왜 이름이 Swagger지? API 자동화 - 간@지 죽이긴해;;
문제점
개발자에게 커뮤니케이션은 굉장히 중요한 것 같다.
특히 개발을 위한 API 문서는 타인이 보더라도 직관적으로 이루어져 있어야 할 것 같다.
그래서 저는 노션 API 문서를 활용했는데.. 맨날 노션 열어서 문서를 수정하는게 귀찮았기에...
노션 리소스도 많이 먹는 이 자식
참고 : API를 설계해보자.
어쨌든 새로운 프로젝트를 시작하고 API 문서를 다시 만들려고 했는데.. 어랏
👥 : "Swagger 쓰면 편한데.. 웅성웅성"
나 : 그..게 뭐죠..?
Swagger
- Rest API 설계 할 때, 문서화를 도와주는 SoftWare Framework
- 페이지 내에서 바로 테스트도 가능 (postman이 필요없어짐)
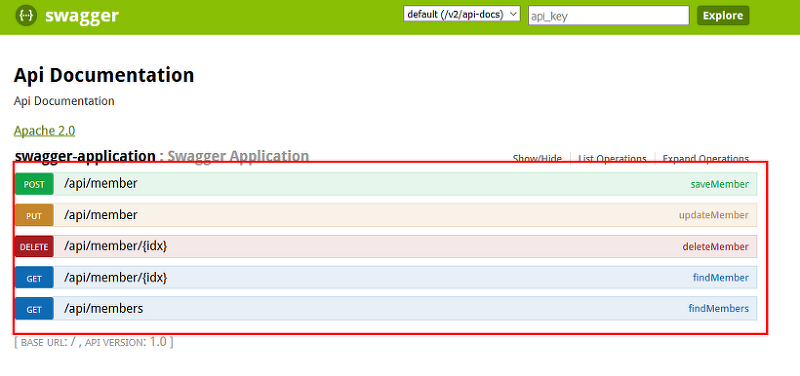
잘 설계를 하면 페이지 내에서도 테스트가 가능하다! 아래는 테스트 하는 모습
JavaScript에서 패키지 설치
npm install swagger-jsdoc swagger-ui-express --save-dev- jsdoc 주석으로 Swagger API 사용
- swagger-ui와 express를 연결
swagger.js
const swaggerUi = require("swagger-ui-express");
const swaggereJsdoc = require("swagger-jsdoc");

const options = {
    swaggerDefinition: {
        openapi: '3.0.0',
        info: {
            title: "Taste Tour",
            version: "1.0.0",
            description: "2023 현장프로젝트 교과 맛탐험 정왕동 API 문서입니다.",
        },
        servers: [
            {
                url: "http://localhost:3000/",
            },
        ],
    },
    apis: ["./src/*.js", "./src/swagger/*"], //패키지 절대경로로 지정
};

const specs = swaggereJsdoc(options);

module.exports = { swaggerUi, specs };
나는 JWT 토큰을 이용하여 사용하고 있다. JWT 토큰을 사용하실 분들은 아래를 사용하시면 되겠다.
const swaggerUi = require("swagger-ui-express");
const swaggereJsdoc = require("swagger-jsdoc");

const options = {
    swaggerDefinition: {
        openapi: '3.0.0',
        info: {
            title: "Taste Tour",
            version: "1.0.0",
            description: "2023 현장프로젝트 교과 맛탐험 정왕동 API 문서입니다.",
        },
        components: {
            securitySchemes: {
                Authorization: {
                    type: "apiKey",
                    in: "header",
                    name: "Authorization",
                    scheme: "bearer",
                    bearerFormat: "JWT"
                },
            },
        },
        security: [
            {
                Authorization: [], // 전역적으로 토큰이 필요한 경우
            },
        ],
        servers: [
            {
                url: "http://localhost:3000/",
            },
        ],
    },
    apis: ["./src/*.js", "./src/swagger/*"], //패키지 절대경로로 지정
};

const specs = swaggereJsdoc(options);

module.exports = { swaggerUi, specs };
Swagger UI 접속
npm start로 서버를 열고 http://localhost:3000/api-docs/에 접속해보자.
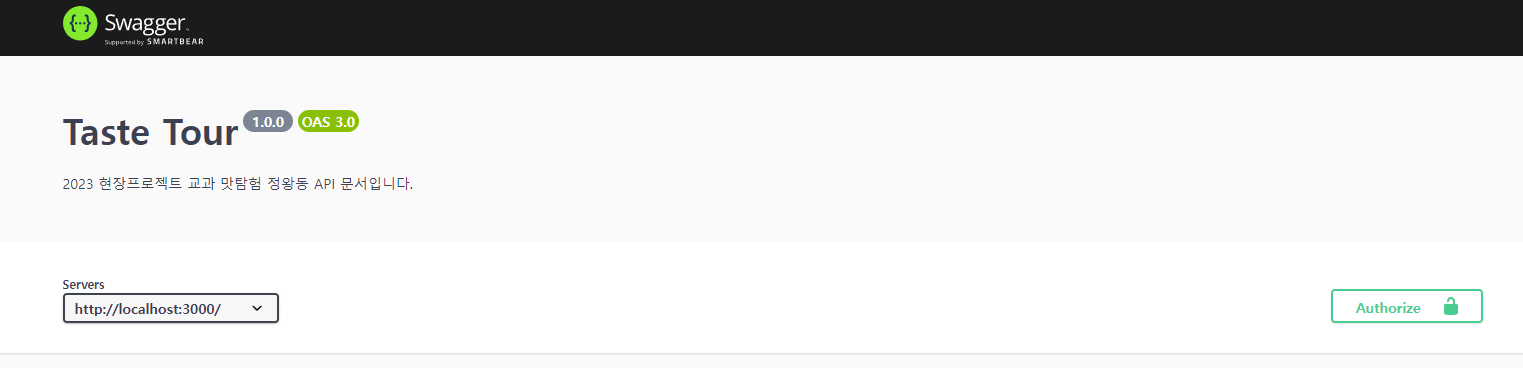
뭐 이런 페이지가 나올것이다!
📂 router.js
그럼 이제 API 매핑한 router 위에 주석으로 달아두면 된다.
Swagger를 쓸 때 중요한 점은 들여쓰기를 아주 잘 해야한다는 점이다.
띄어쓰기 한 칸이라도 어긋나면 잘 출력이 안될 수 있다.
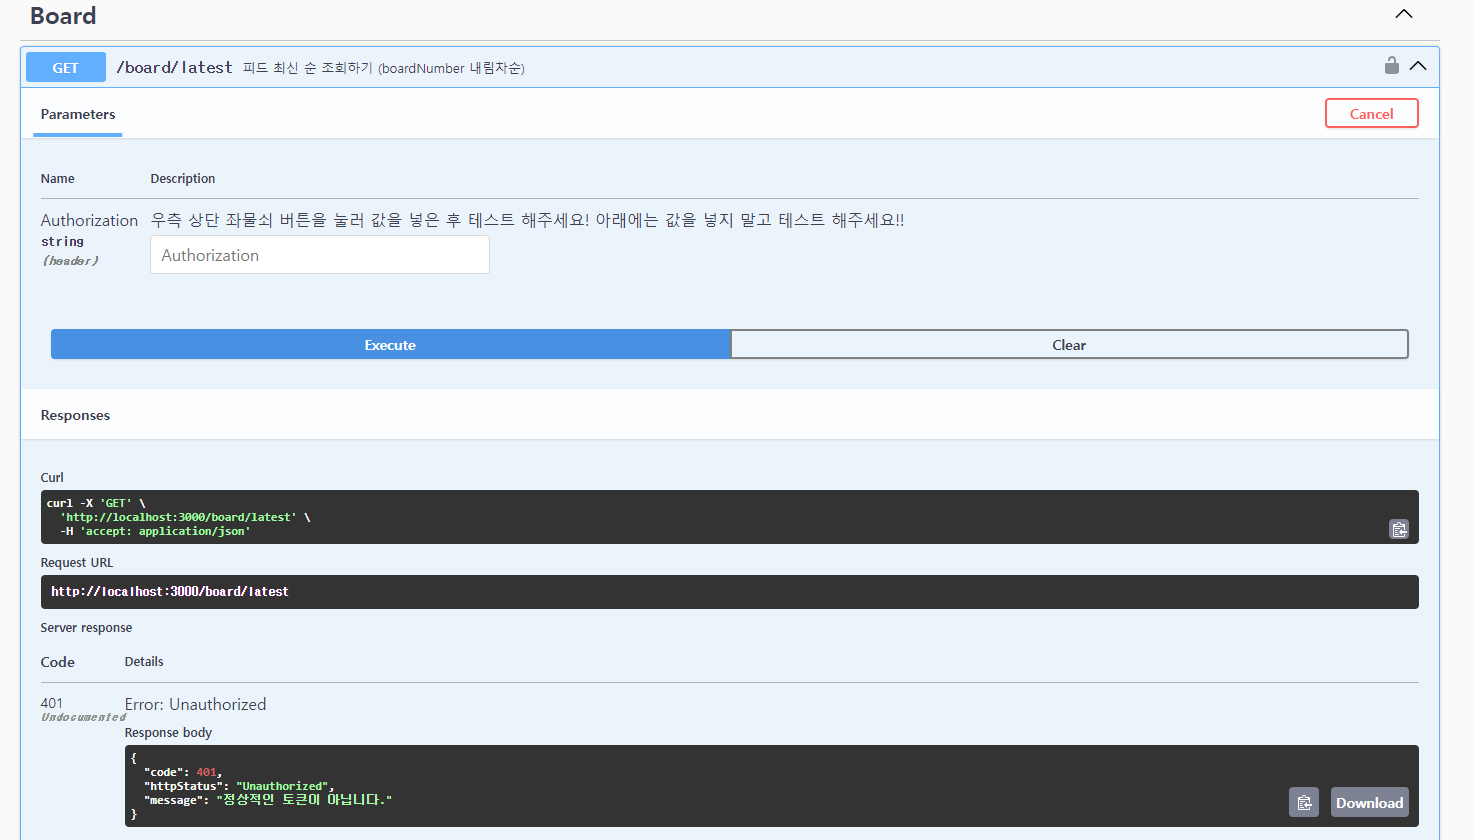
GET 방식
/**
 * @swagger
 *  /board/latest:
 *      get:
 *          summary: 피드 최신 순 조회하기 (boardNumber 내림차순)
 *          security:
 *              - Authorization: []
 *          tags:
 *              - Board
 *          parameters:            ➜ parameter 부분
 *            - in: header
 *              name: Authorization
 *              schema:
 *                  type: string
 *              description: 우측 상단 좌물쇠 버튼을 눌러 값을 넣은 후 테스트 해주세요! 아래에는 값을 넣지 말고 테스트 해주세요!!
 *
 *          responses:
 *              200:                       ➜ HTTP Status가 200일 때
 *                  description: 조회 성공
 *                  content:
 *                      application/json:
 *                          schema:
 *                              $ref: '#/components/schemas/HttpResponse'
 *                          example:
 *                              code: 200
 *                              httpStatus: OK
 *                              message: 피드 조회 되었습니다.
 *                              data: [
 *                                     {
 *                                          boardNumber: 2,
 *                                      },
 *                                      {
 *                                          boardNumber: 1,                                								}
 *                                  ]
 *              500:                       ➜ HTTP Status가 500일 때
 *                  description: 최신 순 조회 실패
 *                  content:
 *                      application/json:
 *                          schema:
 *                              $ref: '#/components/schemas/HttpResponse'
 *                          example:
 *                              code: 500
 *                              httpStatus: Internal Server Error
 *                              message: 글 최신 순 조회 중에 오류가 발생했습니다
 */
router.get('/board/latest', verify, apiBoardController.readLatestBoards);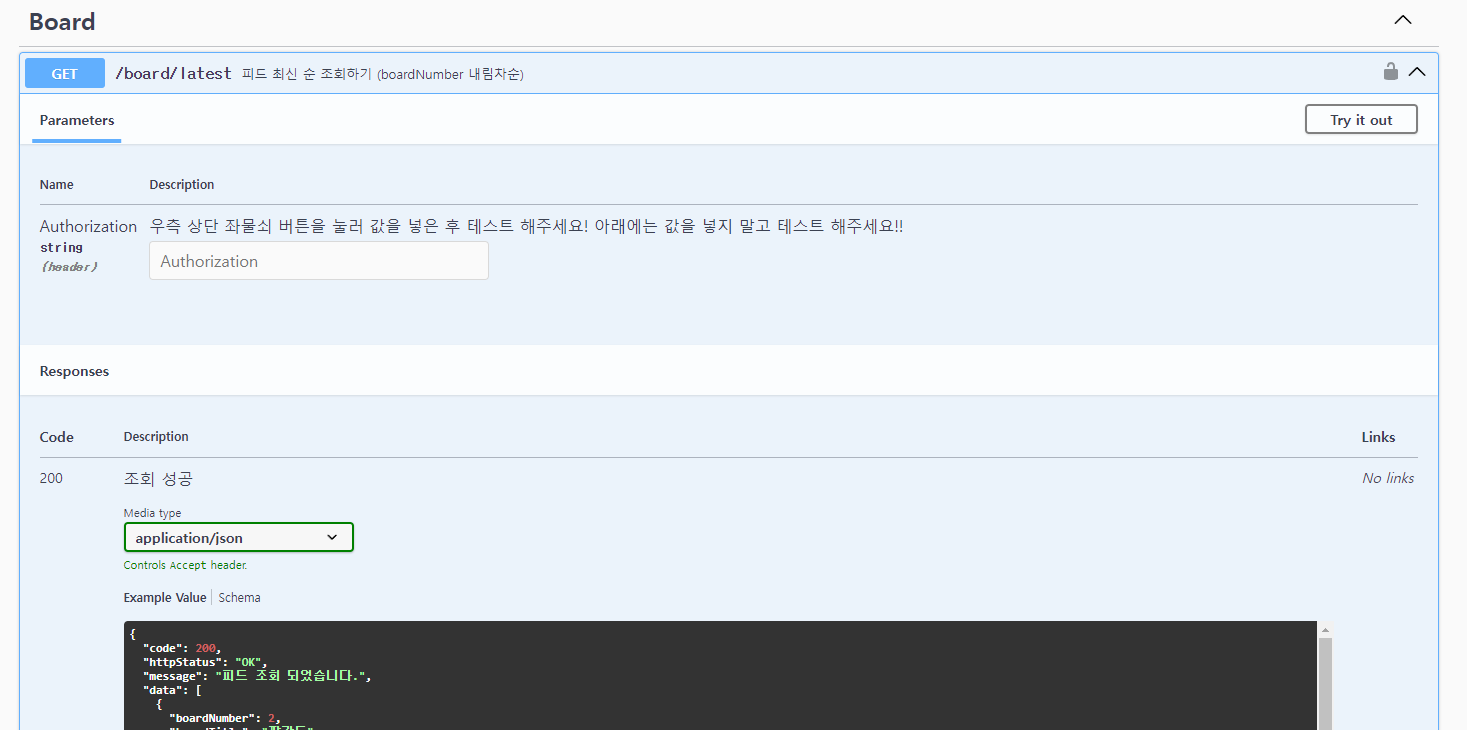
POST 방식
/**
* @swagger
* /user/register: ➜ url
* post: ➜ HTTP method
* summary: 회원가입 ➜ 간단한 설명
* tags: ➜ Swagger-ui에 그룹화 할 태그 지정
* - User
* requestBody: ➜ requestBody 부분
* required: true
* content:
* application/json:
* schema:
* type: object
* $ref: '#/components/schemas/UserRegister'
* example:
* memberName: 전현준
* memberEmail: abc@tukorea.ac.kr
* memberPhone: "01012345688"
* memberPassword: password
*
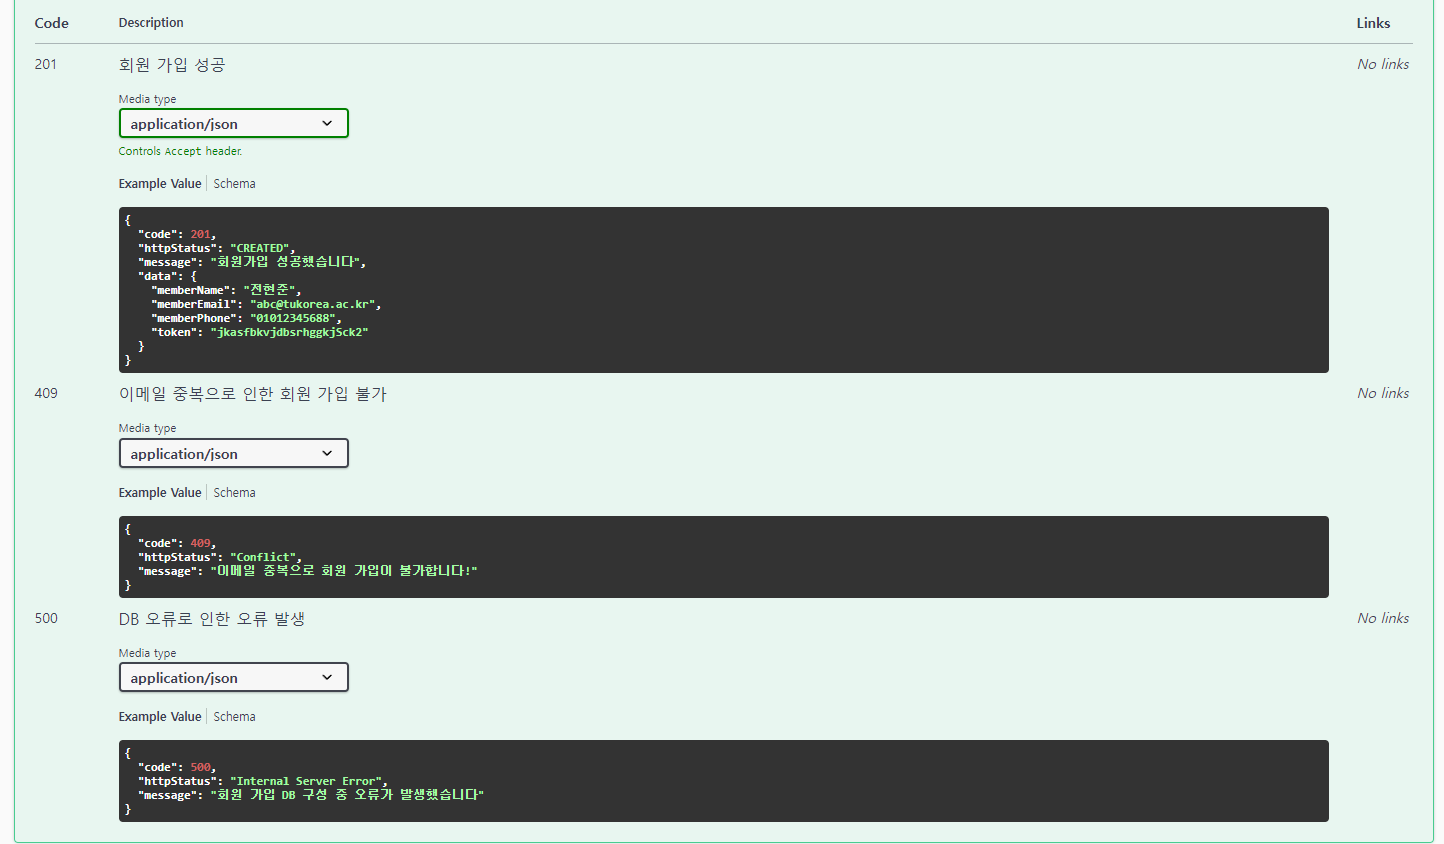
* responses:
* 201:
* description: 회원 가입 성공
* content:
* application/json:
* schema:
* $ref: '#/components/schemas/HttpResponse'
* example:
* code: 201
* httpStatus: CREATED
* message: 회원가입 성공했습니다
* data: {
* memberName: 전현준,
* memberEmail: "abc@tukorea.ac.kr",
* memberPhone: "01013345688",
* token : "jkasfbsfkajfhkvjdbsrhggkjSck2"
* }
* 409:
* description: 이메일 중복으로 인한 회원 가입 불가
* content:
* application/json:
* schema:
* $ref: '#/components/schemas/HttpResponse'
* example:
* code: 409
* httpStatus: Conflict
* message: 이메일 중복으로 회원 가입이 불가합니다!
* 500:
* description: DB 오류로 인한 오류 발생
* content:
* application/json:
* schema:
* $ref: '#/components/schemas/HttpResponse'
* example:
* code: 500
* httpStatus: Internal Server Error
* message: 회원 가입 DB 구성 중 오류가 발생했습니다
*/
router.post('/user/register', apiUserController.register);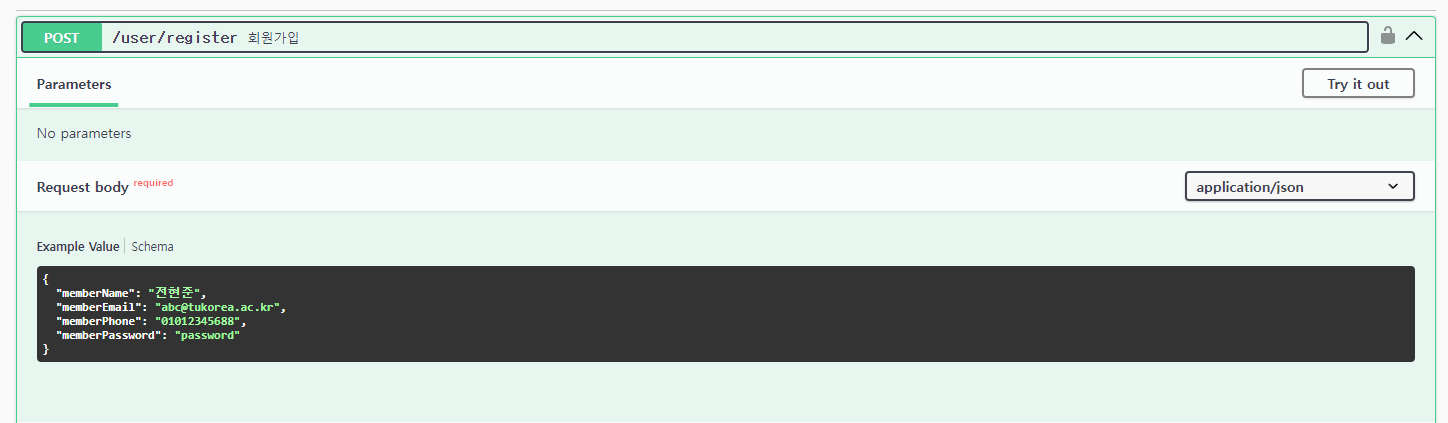
나는 API 문서를 만들 때 다른 개발자도 보고 이해하는게 가장 중요하니,
상황에 대한 예시를 구체적으로 만들어둔다. 처음 보면 어려워보이지만, 차근차근 만들어가면 좋겠다.
📂 yml 파일로 외부로 스키마 관리하기
중간중간 schema에 $ref: '#/components/schemas/HttpResponse'로 적혀있는게 보일 것이다.
그건 외부에 .yml 파일로 선언 해 줄 수 있다!
body에 담아서 보낼 내용들을 schema > properties로 넣어도 되고, 아래와 같이 외부로 작성해도 된다.
components:
  schemas:
    UserRegister:
      properties:
        memberName:
          type: string
          description: 전현준
        memberEmail:
          type: string
          description: abc@tukorea.ac.kr
        memberPhone:
          type: string
          description: 01013345688
        memberPassword:
          type: string
          description: password
외부의 .yml 파일로 관리하지 않고 싶다면, JS 주석에 바로 아래와 같이 사용하면 된다.
           requestBody:                  ➜ requestBody 부분
               required: true
               content:
                   application/json:
                       schema:
                           type: object
                           properties:
                              memberName:
                                type: string
                                description: 전현준
                              memberEmail:
                                type: string
                                description: abc@tukorea.ac.kr
                              memberPhone:
                                type: string
                                description: 01013345688
                              memberPassword:
                                type: string
                                description: password
💡 만약 잘 적용이 되지 않는다면 swagger.js 파일에서 apis : [] 경로를 잘 설정해주자!
나는 ./src/swagger/*이 .yml파일이 있는 곳이다.
근데 스프링에서는 Swagger 더 쉽다며? 이젠 Swagger 애용합니다..^^
