
Stack Navigator
Install
// react native navigation를 쉽게 만들 수 있는 라이브러리
npm install @react-navigation/native

// 제스처, 애니메이션, 노치 바 등
expo install react-native-gesture-handler
react-native-reanimated react-native-screens
react-native-safe-area-context
@react-native-community/masked-view

// stack navigator
npm install @react-navigation/stack
Stack Navigator
스택 네비게이터는 화면을 넘어가는 것이 아닌 새 화면이 스택의 제일 위에 쌓이는 방식으로 구현된다. React.js에서 router를 만드는 것과 비슷하다.
// App.tsx
...
// Navigator는 NavigatorContainer로 감싸야함
return (
	<NavigationContainer>
      <LoggedOutNav />
   </NavigationContainer>
)
...

// LoggedOutNav.tsx
...
const Stack = createStackNavigator();
function LoggedOutNav() {
  return (
    ...
    <Stack.Navigator screenOptions={{ title: "hello" }}>
      <Stack.Screen name="Welcome" component={Welcome} />
      <Stack.Screen name="LogIn" component={LogIn} />
      <Stack.Screen name="CreateAccount" component={CreateAccount} />
    </Stack.Navigator>
  );
}
...
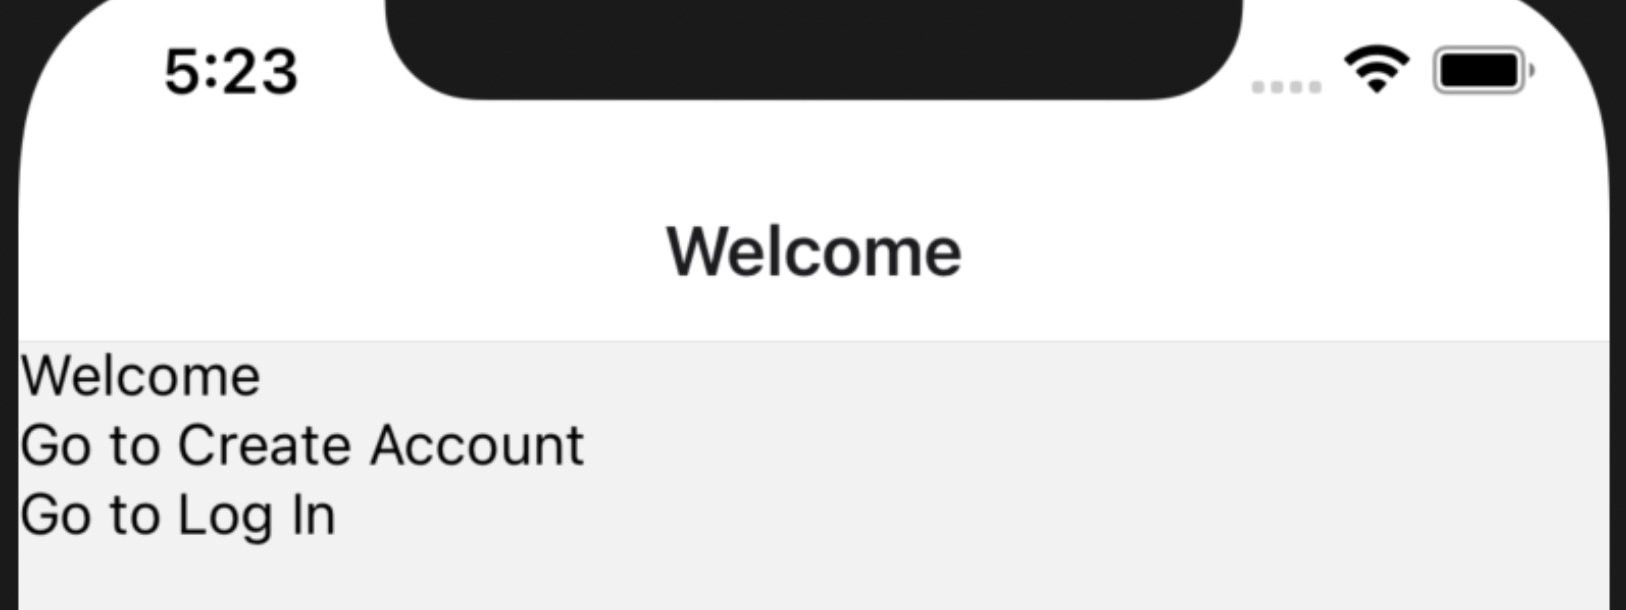
스크린 간 이동하기
Navigator가 아닌 Screen에서 다른 Screen으로 이동 가능하다. React Native의 모든 컴포넌트는 navigation과 route라는 props를 갖는다. 그 중 navigation의 navigate 메서드를 사용하면, Screen에서 다른 Screen으로 이동할 수 있다.
// Welcome.tsx
...

/*
React Native 컴포넌트
View : div
Text : span
TouchableOpacity : 터치하면 opacity가 변함
*/

// navigation.navigate([이동할 라우트의 이름])
// ** Stack은 유저가 이동하는게 아닌 화면이 올라오는 것
function Welcome({ navigation }: Props) {
  return (
    <View>
      <Text>Welcome</Text>
      <TouchableOpacity onPress={() => navigation.navigate("CreateAccount")}>
        <View>
          <Text>Go to Create Account</Text>
        </View>
      </TouchableOpacity>
      ...
  );
}
...
Stack Navigator Props
Stack 컴포넌트는 각각 Stack.Navigator (네비게이터)와 Stack.Screen (스크린)로 나뉜다. 몇 가지 유용한 props를 가지는데 props에 줄 수 있는 옵션들이 굉장히 다양하다. 모든 옵션들은 공식문서에서 확인해볼 수 있다.
Stack.Navigator 에 주어진 props는 안에 있는 Stack.Screen 전체에 영향을 준다. 네비게이션 시 애니메이션을 변경할 수 있고, screenOptions props를 내려주면 같은 옵션을 모든 스크린에 적용할 수 있다. 만약, Screen에 있는 props 옵션과 중복되면 Screen이 우선적으로 적용된다. 기본적인 props들은 다음과 같다.
- Navigator Props
- initialRouteName : 스크린의 순서를 컴포넌트가 나열된 순이 아닌 지정하여 바꿀 수 있다.
- mode : (default) card - 옆에서 밀려서 넘어가는 효과 / modal - 밑에서 올라오는 효과
- headerMode : (default) float - 헤더는 페이드 아웃으로 카드는 밀려나는 효과 / screen - 헤더와 카드가 둘 다 똑같이 밀려나는 효과
- screenOptions :
Screen의 option을 전체에 일괄 적용
- Screen Props ( options )
- title : 헤더 제목
- headerShown : 헤더 숨기기 or 보이기
- headerBackTitleVisible : 뒤로가기 버튼 옆 제목 숨기기 or 보이기
- headerTintColor : 헤더 색상
TypeScript in Stack Navigator
공식문서에서 네비게이터의 Type Check에 대해 자세히 알아볼 수 있다.
Stack Navigator로 Props의 타입을 지정해주려면 StackScreenProps와 <파라미터 목록, 라우트 이름> 을 명시해야한다. 파라미터 목록 자체가 또 다른 타입이고 그 안의 각 라우트에 전달해주고자 하는 Props의 타입을 입력해주면 된다.
// Welcome.tsx
...
type RootStackParamList = {
  Welcome: undefined; // 전달하는 Props가 아직 없음
  LogIn: undefined;
  CreateAccount: undefined;
};

type Props = StackScreenProps<RootStackParamList, "Welcome">;

function Welcome({ navigation }: Props) {
  return (
  ...
  );
}
...
// Appearance는 AppearnceProvider로 감싸야됨
const light = Appearance.getColorScheme() === "light";
return (
<AppearanceProvider>
<ThemeProvider theme={light ? lightTheme : darkTheme}>
<NavigationContainer>
<LoggedOutNav />
</NavigationContainer>
</ThemeProvider>
</AppearanceProvider>
);
}Dark Mode
React Native Appearance와 Styled-Components를 이용하면 다크 모드를 쉽게 구현할 수 있다. 방법은 두 가지가 있다.
-
Appearance.getColorScheme/useColorScheme시스템 테마의 모드 ("light" or "dark")를 가져오는 메서드다. 현재 시스템 테마가 무엇인지에 따라, Styled-Components의
ThemeProvider의 테마를 변경하여 앱의 테마를 시스템과 동일하게 바꿔줄 수 있다.// App.tsx ... const light = Appearance.getColorScheme() === "light"; // const light = useColorScheme() === "light"; return ( <AppearanceProvider> <ThemeProvider theme={light ? lightTheme : darkTheme}> <NavigationContainer> <LoggedOutNav /> </NavigationContainer> </ThemeProvider> </AppearanceProvider> ); } -
Appearance.addChangeListener시스템 테마 모드를 subscribe하여 listen (실시간으로 감지) 할 수 있다.
addChangeListener의colorScheme을 상태로 두어 상태 변화가 있을 때, 테마를 변경하게 하면 앱의 테마를 시스템과 동일하게 적용시킬 수 있다.// App.tsx ... const [theme, setTheme] = useState("light"); const subscription = Appearance.addChangeListener(({ colorScheme }) => { setTheme(colorScheme); // "light" or "dark" }); return ( <AppearanceProvider> <ThemeProvider theme={theme === "light" ? lightTheme : darkTheme}> <NavigationContainer> <LoggedOutNav /> </NavigationContainer> </ThemeProvider> </AppearanceProvider> ); }
Welcome Screen
Creating Welcome Screen
Overall
// LoggedOutNav.tsx
...
<Stack.Screen
     name="Welcome"
     options={{ headerShown: false }}
     component={Welcome}
 />
...
Native CSS
- flex의 flex-direction 기본 값이 column이다.
- 부모 컴포넌트 font-size 속성이 자식 컴포넌트에 전달되지 않는다.
Layout in React Native
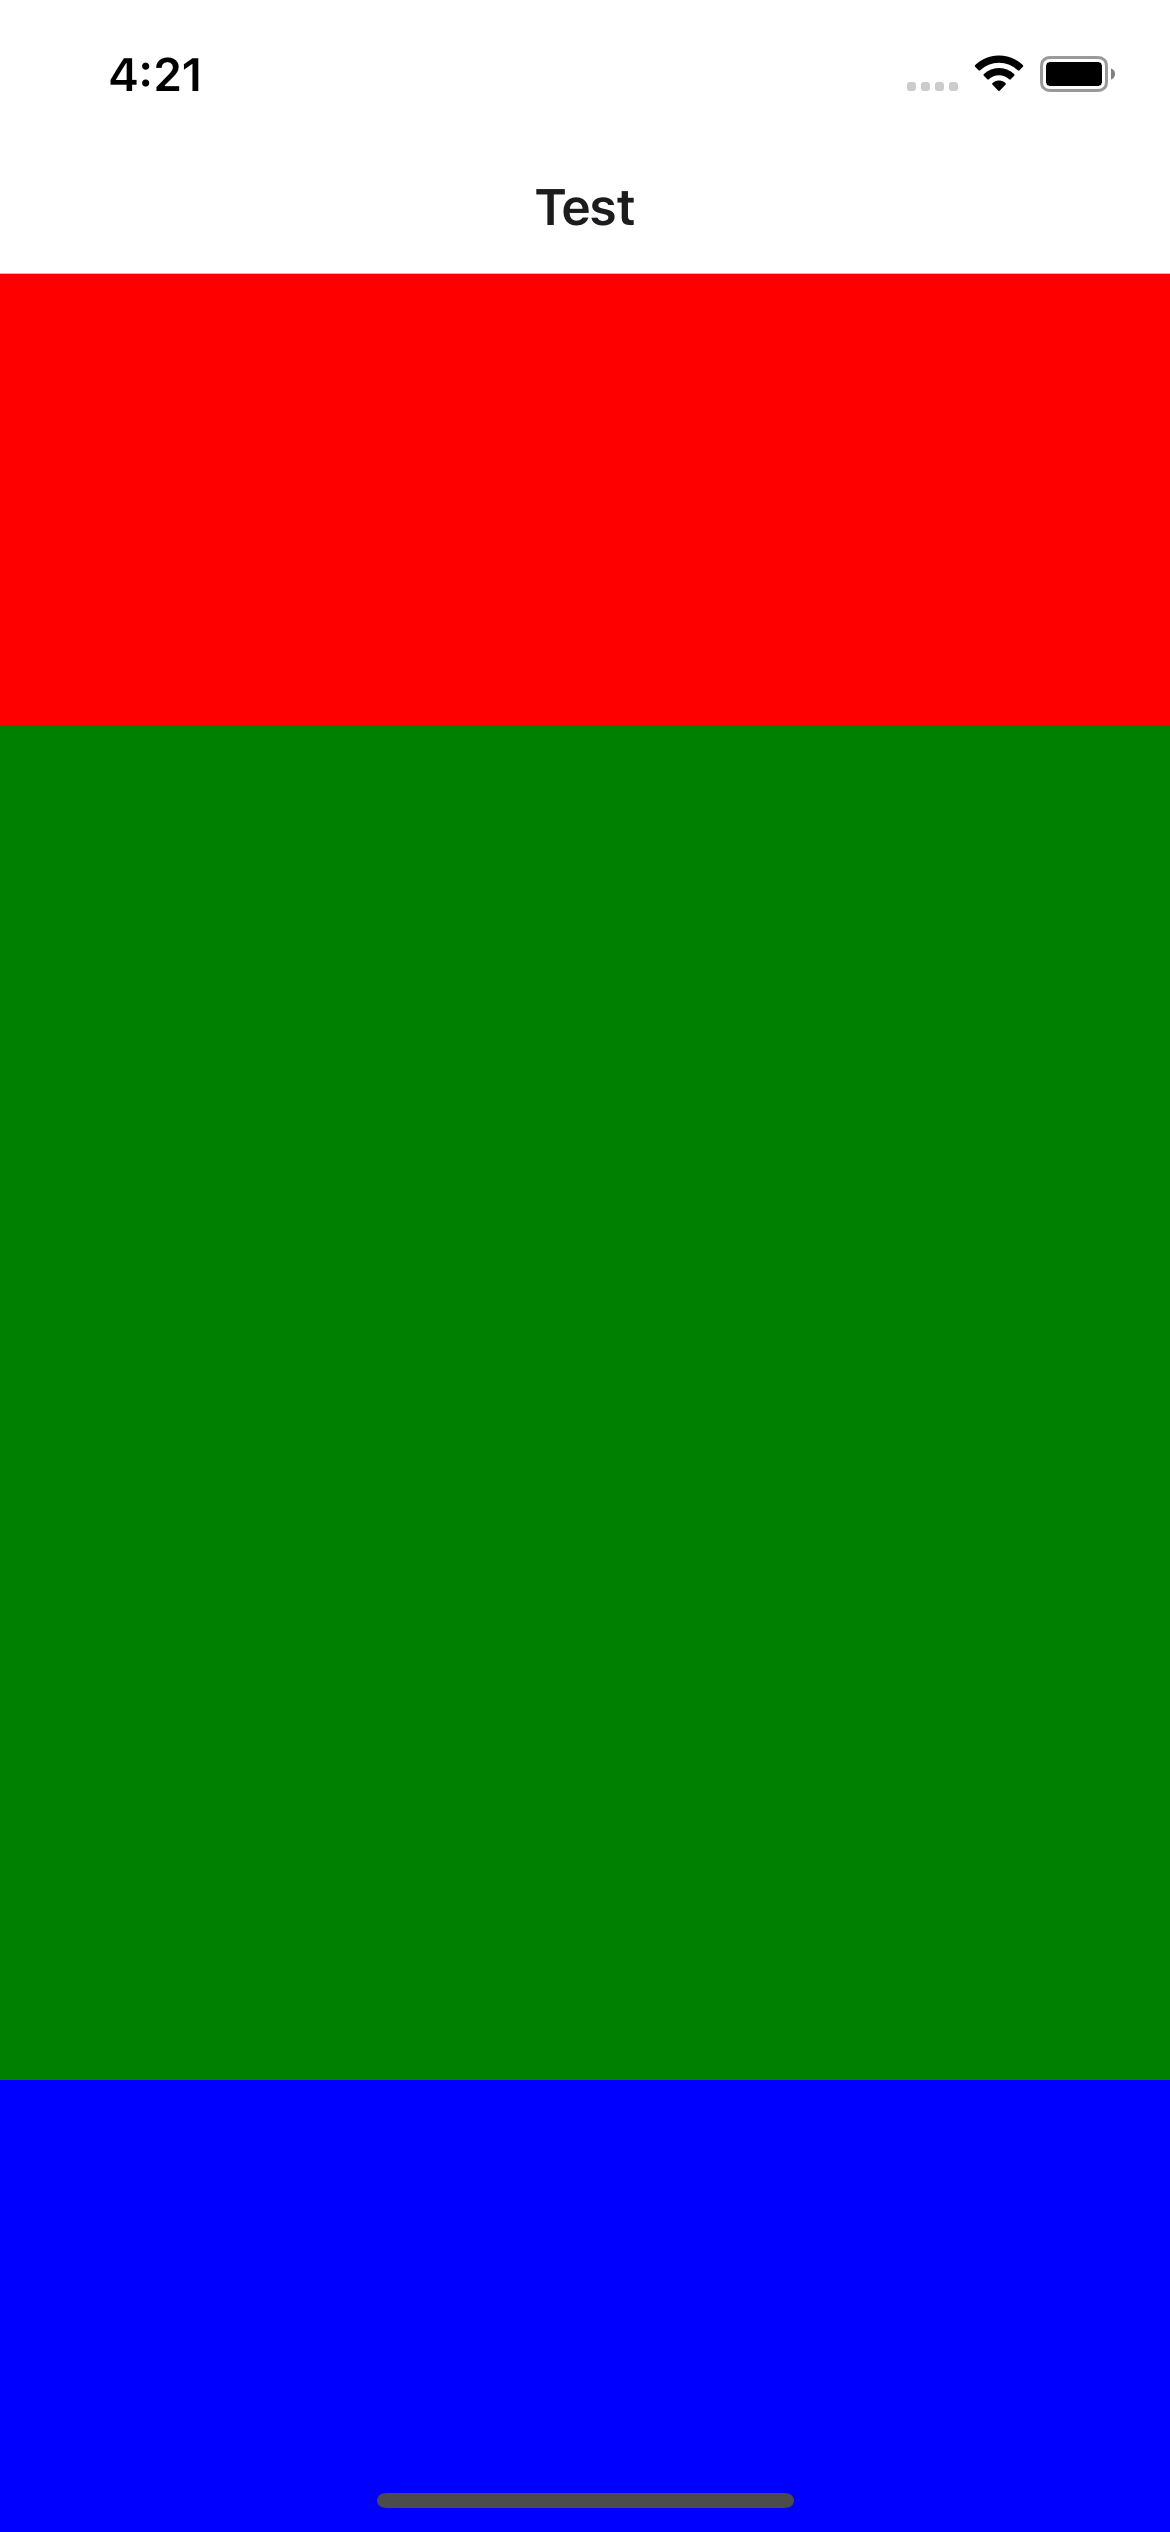
Flex : React Native에서 Flex는 부모 컴포넌트에서 내려주는 것이 아니다. 형제 컴포넌트에서 flex를 주면, 부모 컴포넌트의 크기를 각각 형제가 그 비율로 나눠 가지게 된다.
const Container = styled.View`
  flex: 1;
  background-color: white;
`;

const Box1 = styled.View`
  flex: 1;
  background-color: red;
`;

const Box2 = styled.View`
  flex: 3;
  background-color: green;
`;

const Box3 = styled.View`
  flex: 1;
  background-color: blue;
`;

...
return (
	<Container>
		<Box1/>
		<Box2/>
		<Box3/>
	</Container>
)
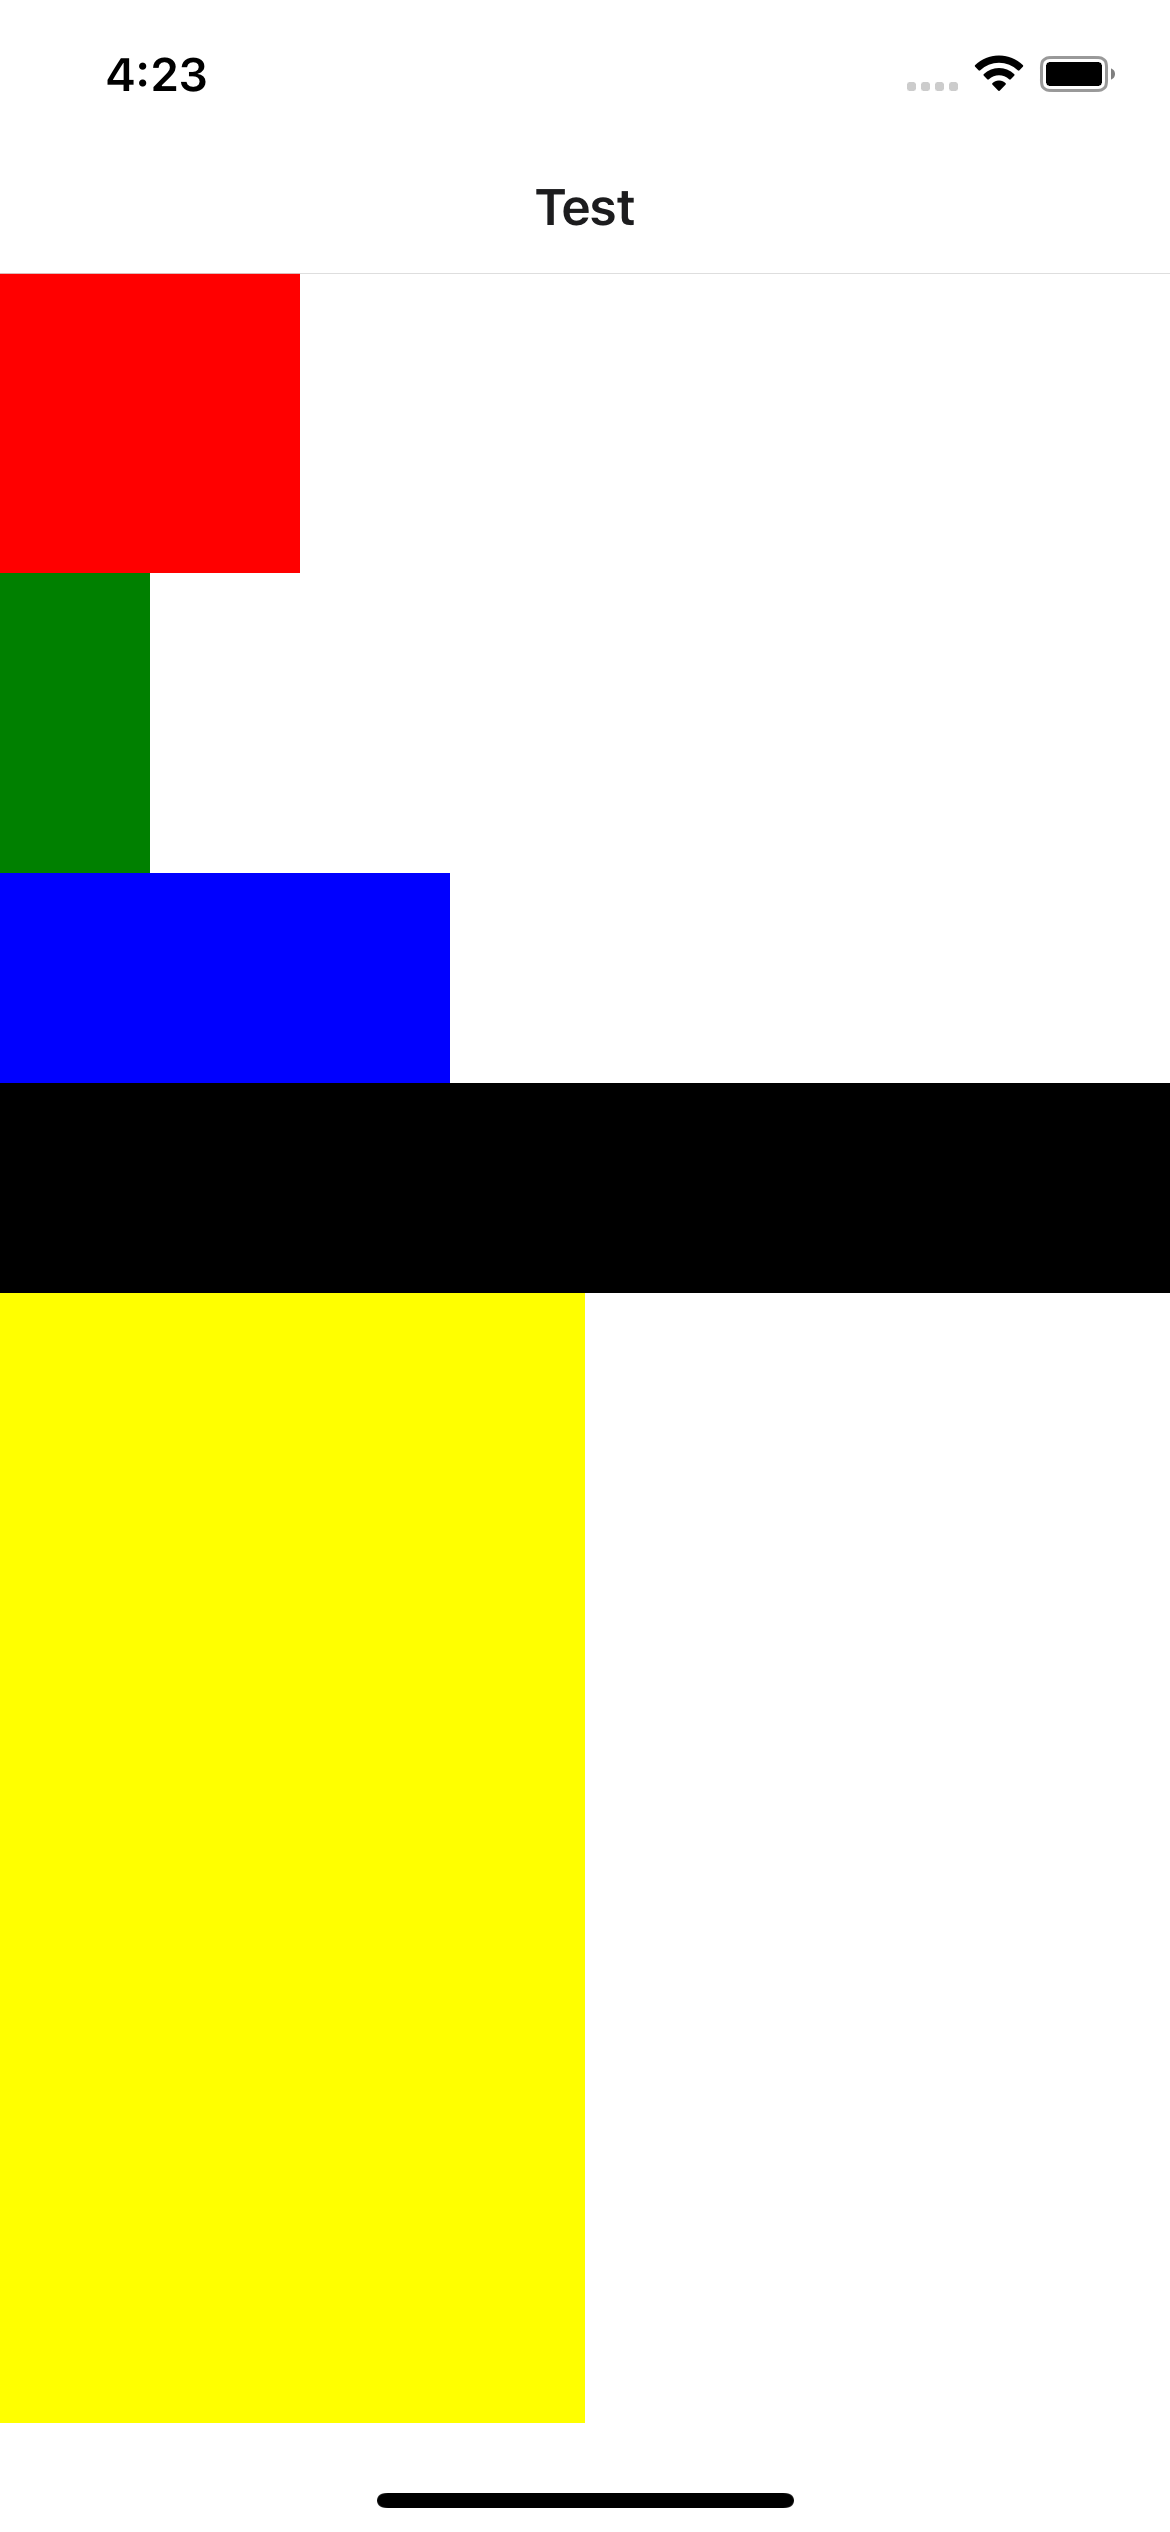
Width / Height : px같은 수치로 고정 크기를 지정할 수 있다. 퍼센트를 지정하면 부모 컴포넌트에 해당하는 퍼센트만큼 할당하게 된다.
...
const Container = styled.View`
  flex: 1;
  background-color: white;
`;

const Box1 = styled.View`
  width: 100px;
  height: 100px;
  background-color: red;
`;

const Box2 = styled.View`
  width: 50px;
  height: 100px;
  background-color: green;
`;

const Box3 = styled.View`
  width: 150px;
  height: 70px;
  background-color: blue;
`;

const Box4 = styled.View`
  width: 100%;
  height: 70px;
  background-color: black;
`;

const Box5 = styled.View`
  width: 50%;
  height: 50%;
  background-color: yellow;
`;
...
return (
    <Container>
      <Box1 />
      <Box2 />
      <Box3 />
      <Box4 />
      <Box5 />
    </Container>
  );
참고 자료 : 5.React Native 레이아웃 디자인 - 1부 flex와 width, height
Create Account
Composition
LogIn과 CreateAccount 화면의 구성은 비슷하다. web에서와 마찬가지로 재사용 가능한 component를 만든다. Logo가 중간에 있고 밑에 나머지 컴포넌트가 있는 화면 ⇒ AuthLayout 그리고 파란 색의 버튼 ⇒ AuthButton을 만들어준다.
// AuthLayout.tsx
...
type Props = {
  children: React.ReactNode;
};

export deafult function AuthLayout({ children }: Props) {
  return (
    <Container>
      <Logo resizeMode="contain" source={require("../../assets/logo.png")} />
      {children}
    </Container>
  );
}

// AuthButton.tsx
...

// ** TouchableOpacity가 View와 같은 역할을 한다.
// 재사용을 위해 margin 값은 주지 않는다.
// disabled props로 버튼의 opacity를 변경한다.
const Button = styled.TouchableOpacity`
	...
  opacity: ${(props) => (props.disabled ? "0.5" : "1")};
`;

interface Props {
  disabled: boolean;
  onPress: () => void;
  text: string;
}

export default function AuthButton({ disabled, onPress, text }: Props) {
  return (
    <Button disabled={disabled} onPress={onPress}>
      <ButtonText>{text}</ButtonText>
    </Button>
  );
}
재사용 가능한 컴포넌트로 인해서 코드가 훨씬 깔끔해진 것을 확인할 수 있다.
// Welcome.tsx
...
export default function Welcome({ navigation }: Props) {
  const goToCreateAccount = () => navigation.navigate("CreateAccount");
  const goToLogIn = () => navigation.navigate("LogIn");
  return (
    <AuthLayout>
      <AuthButton
        text="Create New Account"
        disabled={false}
        onPress={goToCreateAccount}
      />
      <TouchableOpacity onPress={goToLogIn}>
        <LoginLink>Log in</LoginLink>
      </TouchableOpacity>
    </AuthLayout>
  );
}
Natural Forms
Create Forms
회원가입을 위한 Form을 만든다. UseRef 를 이용하여 TextInput (= Input)을 타겟으로 함수를 작성할 수 있도록 한다. 타입스크립트에서는 기본적으로 useRef에 null이 할당되어야 한다.
// CreateAccout.tsx
...
const firstNameRef = useReft<TextInput>(null);
...
return(
...
	<TextInput
	...
	ref={firstNameRef}
	/>
Props on TextInput
Reat Native의 TextInput은 굉장히 다양한 props가 들어간다. props의 옵션에 따라, Input 창에 많은 설정들을 줄 수 있다. OS에 따라 지원하는 옵션이 다르다. 그 중 몇 가지만 보자면...
- keyboardType : 키보드 배열이 input에 맞게 바뀜
- secureTextEntry : 비밀번호가 화면에 안보이게 하기
- returnKeyType : 리턴 키에 다른 동작을 넣기
- autoFocus : 화면이 처음 렌더링 됐을 때, Input 창이 focus 됨
- onSubmitEditing : Input 창 수정이 끝나고 focus가 사라지면 실행되는 함수
더 많은 props들을 다음 공식문서에서 찾아볼 수 있다.
onNext Function
Input 창에 정보를 입력한 후 리턴을 눌렀을 때, 다음 항목을 입력할 수 있게 focus가 이동되는 것이 유저 입장에서 편리할 것이다.
구현하기 위해, onSubmitEditing에 focus를 다음 Input의 ref로 이동시키는 함수를 넣어준다. 이런 방식으로 모든 Input에 대해 함수를 따로 만들어주지 않아도 된다.
// CreateAccount.tsx
const onNext = (nextOne: React.RefObject<TextInput>) => {
    nextOne?.current?.focus();
  };

return (
      ...
      <TextInput
        autoFocus
        ref={firstNameRef}
	...
        onSubmitEditing={() => onNext(lastNameRef)}
      />
      <TextInput
	ref={lastNameRef}
	...
      />
      ...
  );
}
KeyboardAvoidingView
가상 키보드가 Input 창을 가리지 않도록 해주는 컴포넌트다. 설정해주는 법은 여러가지인데, OS에 따라 적용되는 설정이 다르다. iOS와 Android 둘 다 작동하는 설정은 behavior="padding" 이다. Form에 padding을 더해주는 방식이다.
하지만, 세부적인 설정은 또 다르게 해주어야 한다. Plaform이라는 API로 OS에 따라 다른 설정을 적용할 수 있다. keyboardVerticalOffset 으로 키보드와 벌어지는 수직 높이를 조절한다.
// CreateAccount.tsx
...
return (
    <AuthLayout>
      <KeyboardAvoidingView
        style={{
          width: "100%",
        }}
        behavior="padding"
        keyboardVerticalOffset={Platform.OS === "ios" ? 30 : 0}
      >
        <TextInput
          ref={firstNameRef}
          ...
        />
        ...
      </KeyboardAvoidingView>
    </AuthLayout>
  );
dissMissKeyboard Function
입력 중에 가상 키보드를 없애고 싶을 때, 화면 바깥을 눌러 키보드를 내리는 기능을 구현하기 위해 React Native keboard API를 사용한다.
우선, 화면 바깥 터치를 감지하기 위해서 TouchableWithoutFeedback 이라는 컴포넌트를 전체 화면에 렌더시킨다. onPress 이벤트에 keyboard.dismiss 함수를 실행시키면 키보드가 내려가는 것을 확인할 수 있다.
// AuthLayout.tsx
...
function AuthLayout({ children }: Props) {
  const dissmissKeyboard = () => {
    Keyboard.dismiss();
  };
  return (
    <TouchableWithoutFeedback
      style={{ height: "100%" }}
      onPress={() => dissmissKeyboard()}
    >
      <Container>
        <Logo ... />
        {children}
      </Container>
    </TouchableWithoutFeedback>
  );
}
Error : Touchable 안에서 Touchable이 작동 안될 때
"react-native"에서 import 해온 Touchable 혹은 styled-component의 Touchable은 "react-native-gesture"의 Touchable 안에서 터치가 안되는 것 같다. "react-native-gesture"가 아닌 "react-native"로 통일하자.
Login Screen
Refactoring AuthLayout
로그인과 회원가입 화면 모두 KeyboardAvoidingView와 dissMissKeyboard 기능이 필요하기 때문에 AuthLayout으로 옮겨준다.
// AuthLayout.tsx
...
return (
    <TouchableWithoutFeedback
      style={{ height: "100%" }}
      onPress={() => dissmissKeyboard()}
    >
      <Container>
        <KeyboardAvoidingView
          style={{
            width: "100%",
          }}
          behavior="padding"
          keyboardVerticalOffset={Platform.OS === "ios" ? 50 : 0}
        >
          <Logo .../>
          {children}
        </KeyboardAvoidingView>
      </Container>
    </TouchableWithoutFeedback>
  );
...
Error : web에서 키보드 입력이 안되는 현상
TouchableWithoutFeedback때문에 web에서 input을 눌러도 키 입력이 안되는 현상이 나타난다. 마찬가지로 Platform API로 OS가 web일 때, 비활성화 시키면 된다.
// AuthLayout.tsx
...
return (
    <TouchableWithoutFeedback
	  ...
      disabled={Platform.OS === "web"}
    >
...
React Hook Form on Native
React Hook Form on Native
React Native에서 React Hook Form은 Web에서만큼 편하진 않다. 그래도, 여러 state를 만들어주지 않아도 된다는 점에서 훨씬 편하다. Native에서는 Form이 없기 때문에, 컴포넌트가 마운트 될 때 useEffect로 직접 register 해주어야 한다. 여기에서 required, pattern 등의 옵션을 줄 수 있다.
// Login.tsx
...
const { register, handleSubmit, setValue } = useForm<LoginForm>();
const onValid: SubmitHandler<LoginForm> = (data) => {
    // Do something with input data...
};

useEffect(() => {
    register("username", { required: true });
    register("password", { required: true });
  }, [register]);
...
그리고, 각 TextInput의 onChangeText (= onChange)에서 입력된 text를 받아 setValue로 useForm의 값을 업데이트 시켜준다.
// Login.tsx
...
return (
      ...
      <InputText
        ...
        onSubmitEditing={handleSubmit(onValid)}
        onChangeText={(text) => setValue("password", text)}
      />
      <AuthButton
	...
        onPress={handleSubmit(onValid)}
      />
      ...
공식문서에 Control 등 다른 API를 제공하지만, register을 직접 등록해주어야 하는건 똑같다. 이 방식이 코드가 더 장황해지기 때문에, 개인적으로 위 방법이 더 나은 것같다.
ActivityIndicator
로딩 상태일 때, 화면에 로딩 상태를 표시해주는 컴포넌트다. loading을 Props로 받아 로딩 일 때, ActivityIndicator를 렌더한다.
// AuthButton.tsx
...
function AuthButton({ ..., loading }: Props) {
  return (
    <Button disabled={disabled} onPress={onPress}>
      {loading ? (
        <ActivityIndicator color="white" />
      ) : (
        <ButtonText>{text}</ButtonText>
      )}
    </Button>
  );
...
Apollo Client
Set Up
Web에서와 같이 Apollo Client를 서버와 연결시킨다.
Apollo Client - Set Up [LOGIN AND SIGNUP]
IP주소 공유
Native를 핸드폰에서 테스트할 경우, 로컬 환경이 아니기 때문에 백엔드 서버를 외부로 노출시킨 다음 연결해야한다. 방법은 IP주소를 찾아서 사용하는 법과 이를 위한 서비스를 이용하는 법이다. 두 가지 서비스가 있다.
ngrok
다운로드 링크 :
사용법
- 압축 파일을 압축해제 한다.
- 해당 위치에서
./ngrok http 4000을 터미널에 입력 - uri가 제공된다. 뒤에
/graphql을 붙여 ApolloClient uri에 입력한다.
localtunnel
사용법
- 터미널에서
npx localtunnel —port 4000입력 - uri가 제공된다. 뒤에
/graphql을 붙여 ApolloClient uri에 입력한다.
Login Mutation
Reactive Variables
Web에서와 같이 Reactive Variables로 전역에서 접근할 수 있는 로그인 상태를 만든다.
Reactive Variables [SETUP]
Tab Navigator
로그인 시, 피드를 볼 수 있는 Tab Navigator 컴포넌트를 만든다. Tab Navigator를 만드는 법은 Stack Navigator와 거의 동일하다.
// LoggedInNav.tsx
...
const Tabs = createBottomTabNavigator();

function LoggedInNav() {
  return (
    <Tabs.Navigator>
      <Tabs.Screen name="Feed" component={Feed} />
    </Tabs.Navigator>
  );
}
...
로그인 시, Tab Navigator가 있는 컴포넌트로 이동하게 한다.
...
export default function App() {
  const isLoggedIn = useReactiveVar(isLoggedInVar);
  ...
  if (loading) {
    return (
      <AppLoading
        startAsync={preload}
        onError={console.warn}
        onFinish={onFinish}
      />
    );
  }

  return (
    <ApolloProvider client={client}>
      <NavigationContainer>
        {isLoggedIn ? <LoggedInNav /> : <LoggedOutNav />}
      </NavigationContainer>
    </ApolloProvider>
  );
}
Error : Rendered more hooks than during the previous render.
hooks는 모든 렌더링에서 똑같이 선언되어야 하기 때문에, 처음부터 hook 먼저 모두 렌더시켜야 한다. 어떻게 렌더링 되는지에 따라, hook이 다르게 렌더되기 때문에 생기는 에러.
...
export default function App() {
  ...
  if (loading) {
    return (
      <AppLoading
       ...
      />
    );
  }

   // Error! loading에 따라 Hook이 만들어질 수도 만들어지지 않을 수도 있음...
  const isLoggedIn = useReactiveVar(isLoggedInVar);

  return (
    ...
  );
}
Login Mutation
Login Mutation [LOGIN AND SIGNUP]
로그인에 성공하면, onCompleted 함수에 Reactive Variable 로그인 상태를 true 로 변경하여 Feed 페이지를 렌더시킨다.
서버 API 타입 만들기
Apollo Client의 codegen을 사용하여, Native에서 작성된 GraphQL 요청의 타입을 받아온다.
Disable Button
로그인 시, username이나 password를 입력하지 않으면 버튼을 비활성화한다. Web에서는 formState 사용했지만, Native에는 Native에서도 있지만, Native는 register를 직접 모든 TextInput에 작성하기 때문에 위 방법대로 작성하면 코드가 깔끔하지 않다.onChange, onSubmit, onBlur같은 formState를 일으키는 이벤트가 없다.
watch를 사용하면, TextInput의 입력 값을 실시간으로 확인할 수 있다. watch 로 둘 중 하나라도 입력하지 않으면, 버튼을 비활성화 시킨다.
// Login.tsx
...
return(
	...
	<AuthButton
        text="Log In"
	...
        disabled={!watch("username") || !watch("password")}
        />
	...
Create Account Mutation
컴포넌트 간 데이터 전달하기 (navigation.navigate)
Create Account Mutation을 작성한 후, useMutation의 onCompleted 함수에 로그인 컴포넌트으로 돌아가는 코드를 작성한다. 여기서, navigation.navigate 의 두 번째 인자로 이동할 컴포넌트에 데이터를 전달할 수 있다.
// CreateAccount.tsx
...
const onCompleted = (data: createAccount) => {
    const {
      createAccount: { ok },
    } = data;
    const { username, password } = getValues();
    if (ok) {
      // 로그인 페이지에 username과 password 전달한 후 이동
      navigation.navigate("LogIn", { username, password });
    }
  };
데이터 전달 받기 (route.params)
전달한 데이터에 route.params 로 접근할 수 있다. username과 password를 register의 defaultValue로 설정해준다. 이 값은 분명 register의 defaultValue로 설정되었지만, Native에서는 직접 TextInput에 넣어주어야 적용된다.
...
function LogIn({ route: { params } }: LogInProps) {
  const { ..., register, watch } = useForm<LoginForm>({
    defaultValues: {
      username: params?.username,
      password: params?.password,
    },
  });
...
return (
    <AuthLayout>
      <InputText
	...
        value={watch("username")}
      />
      <InputText
        ...
        value={watch("password")}
      />
      <AuthButton ... />
    </AuthLayout>
  );
...
AsyncStorage
AsyncStorage
token과 로그인 상태를 저장하기 위해서 AsyncStorage 를 사용한다. AsyncStorage는 localStorage와 거의 비슷하지만, Promise 기반 API이기 때문에 즉시 저장되거나 불러오지 않는다. 여러 값들을 한번에 저장시키거나 불러오는 등 (multiSet, multiRemove ...) 여러 기능을 지원한다.
logUserIn Function
전역에서 사용 가능한 로그인 함수를 만든다. token을 받아 AsyncStorage로 저장 → 로그인 상태 true로 변경 → token을 Reactive Variable로 저장한다. token을 Reactive Variable로 저장하는 이유는, 모든 요청에 token을 담아야하는데 그 때마다 AsyncStorage에서 꺼내오는 것보다 Reactive Variable을 불러오는게 더 빠르기 때문이다.
// apollo.ts
...
// 초기 앱 상태
export const isLoggedInVar = makeVar(false);
export const tokenVar = makeVar("");

export const logUserIn = async (token: string) => {
  await AsyncStorage.setItem("token", token);
  isLoggedInVar(true);
  tokenVar(token);
};
...
로그인 함수로 Login Mutation 실행 시 로그인한다.
// LogIn.tsx
function LogIn(...) {
  ...
  const onCompleted = async (data: login) => {
    const {
      login: { ok, token },
    } = data;
    if (ok) {
      await logUserIn(token!);
    }
  };
  ...
로그인 유지
const isLoggedInVar = makeVar(false)이기 때문에 항상 로그인이 되지 않은 상태로 앱이 로딩된다.
AppLoading 을 이용하여, Apollo가 시작 전에 AsyncStorage에 저장된 token을 가져온다. 만약, token이 있으면 로그인 상태이기 때문에 로그인과 token 상태를 변경해주고 유저를 로그인 시킨다.
preload 는 Promise를 리턴해야하기 때문에, asset을 불러오는 preload와 분리(preloadAssets)하여 preloadAsset을 리턴한다.
// App.tsx
 ...
export default function App() {
  ...
  const preloadAssets = async () => {
  ...
  };

  const preload = async () => {
    const token = await AsyncStorage.getItem("token");
    if (token) {
      isLoggedInVar(true);
      tokenVar(token);
    }
    return preloadAssets();
  };

  if (loading) {
    return (
      <AppLoading
        startAsync={preload}
        onError={console.warn}
        onFinish={onFinish}
      />
    );
  }

  return (
    <ApolloProvider client={client}>
      <NavigationContainer>
        {isLoggedIn ? <LoggedInNav /> : <LoggedOutNav />}
      </NavigationContainer>
    </ApolloProvider>
  );
}