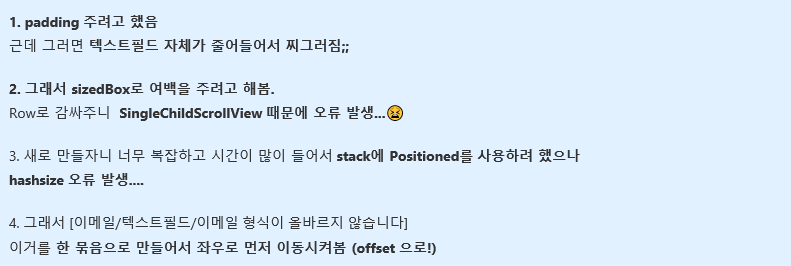
요즘 핫한 앱인 toss의 UIUX를 참고해 거기에 적용된 인터렉션을 따라해보고 있다.
👉 그렇게 역량 강화를 위해 팀원과 디자이너와 함께 진행한 두 번째 애니메이션 효과는 회원가입, 로그인, 인증번호 입력 등 무언가 잘 못 입력했을 때 text field가 흔들리면서 진동이 느껴지는 것으로 진행하기로 했다.
✔ 디자인
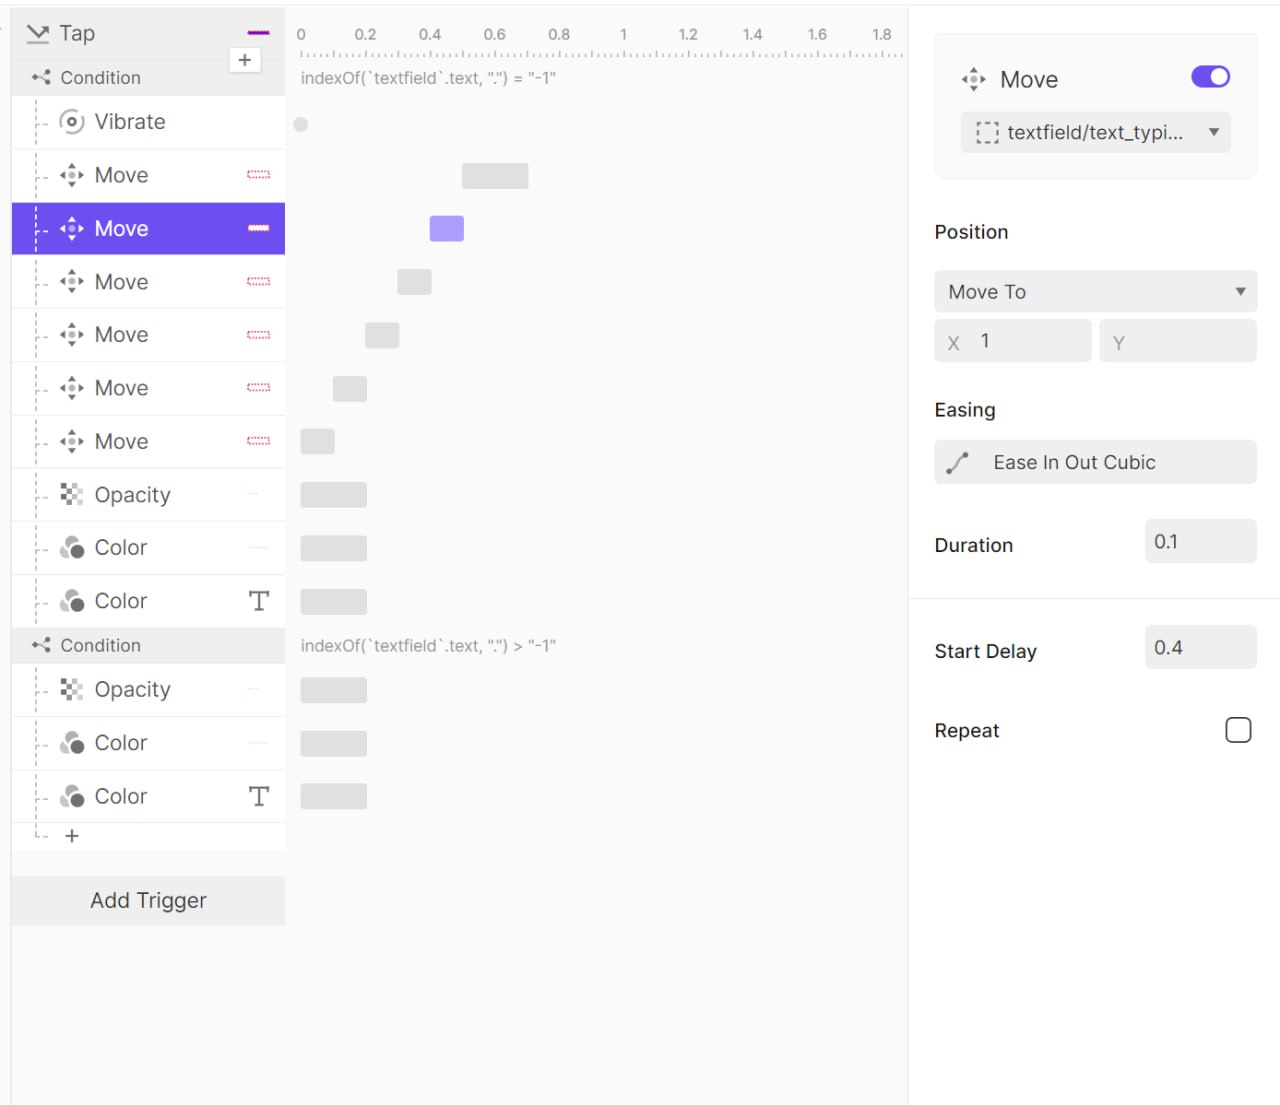
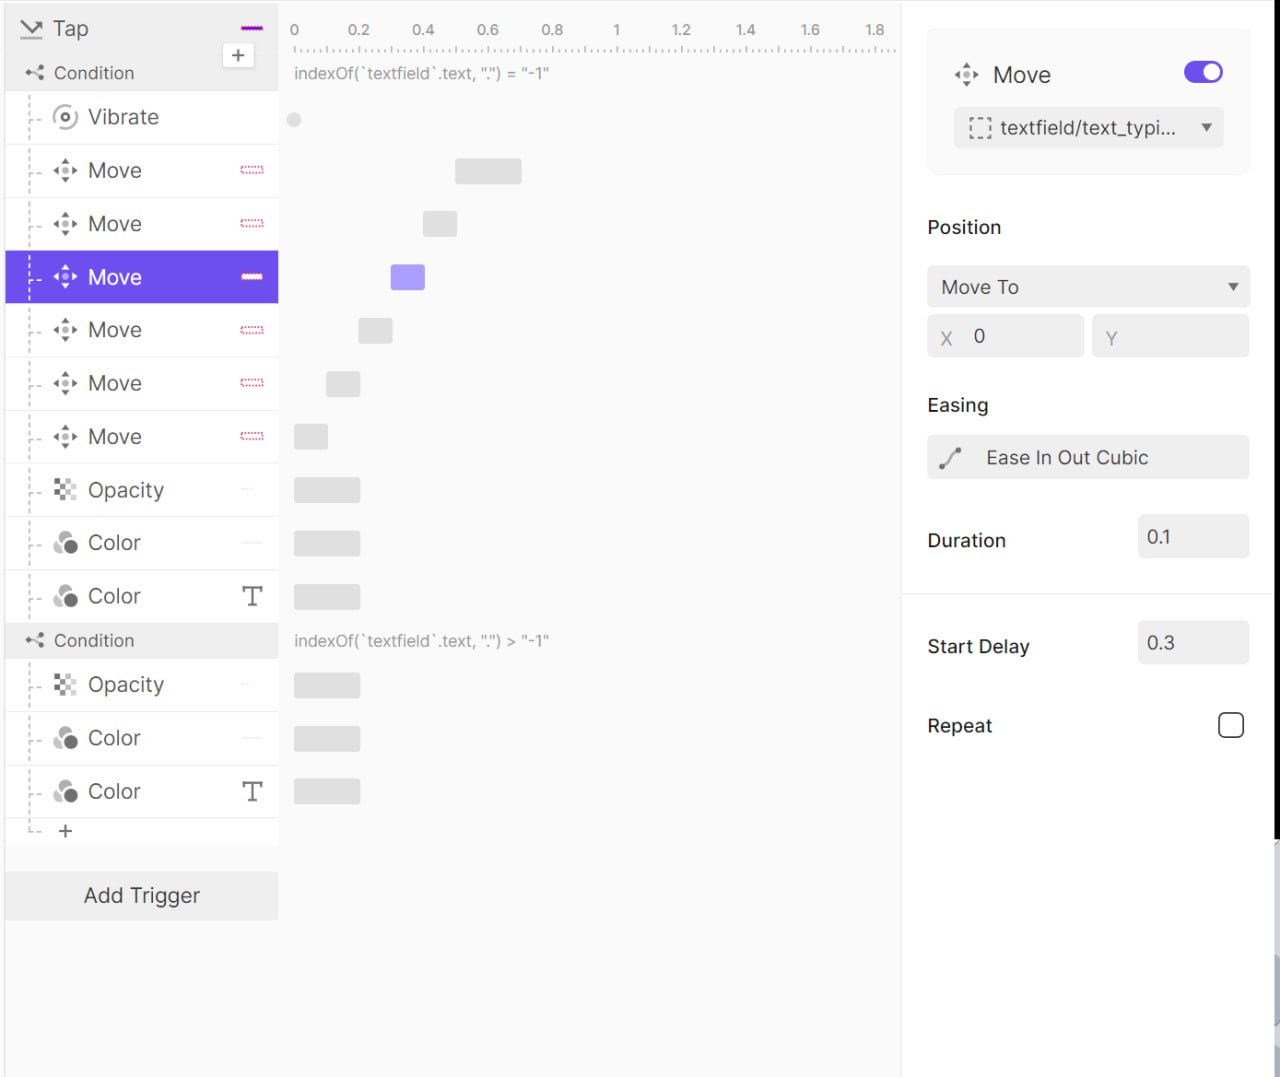
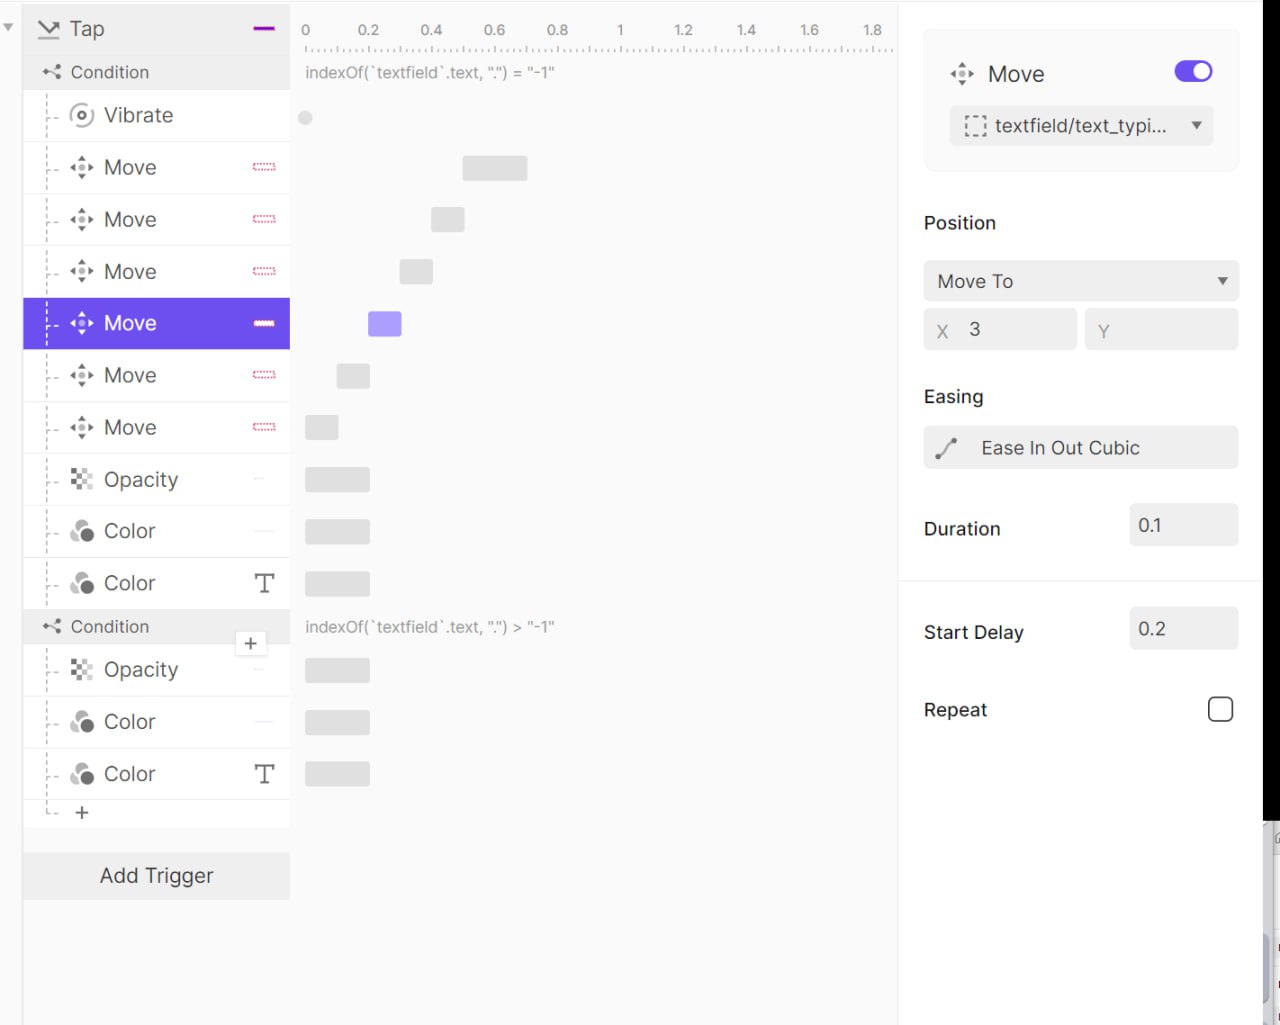
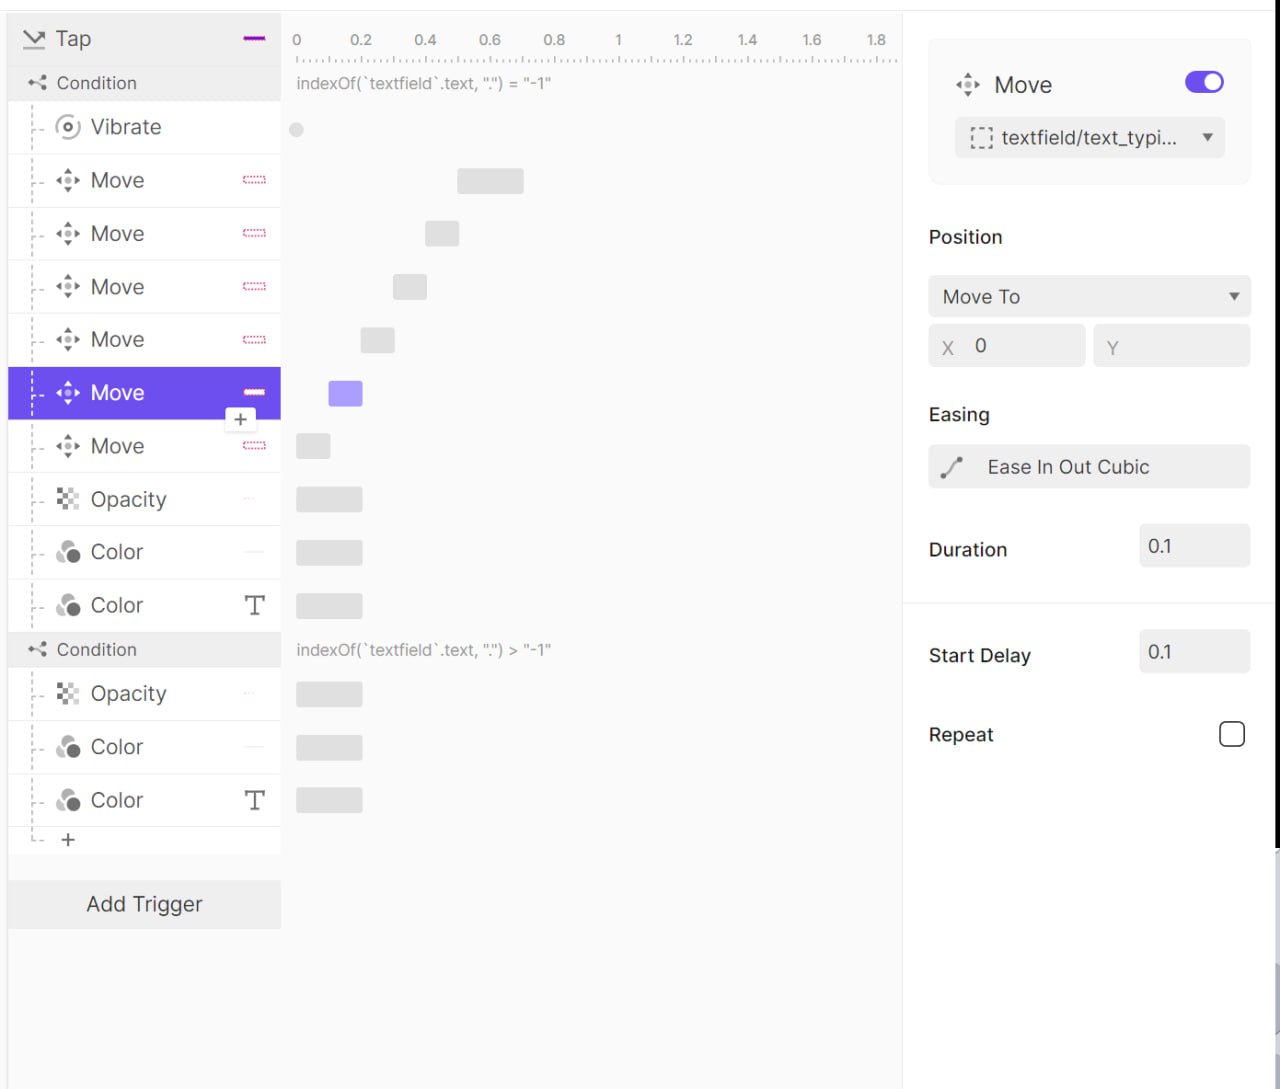
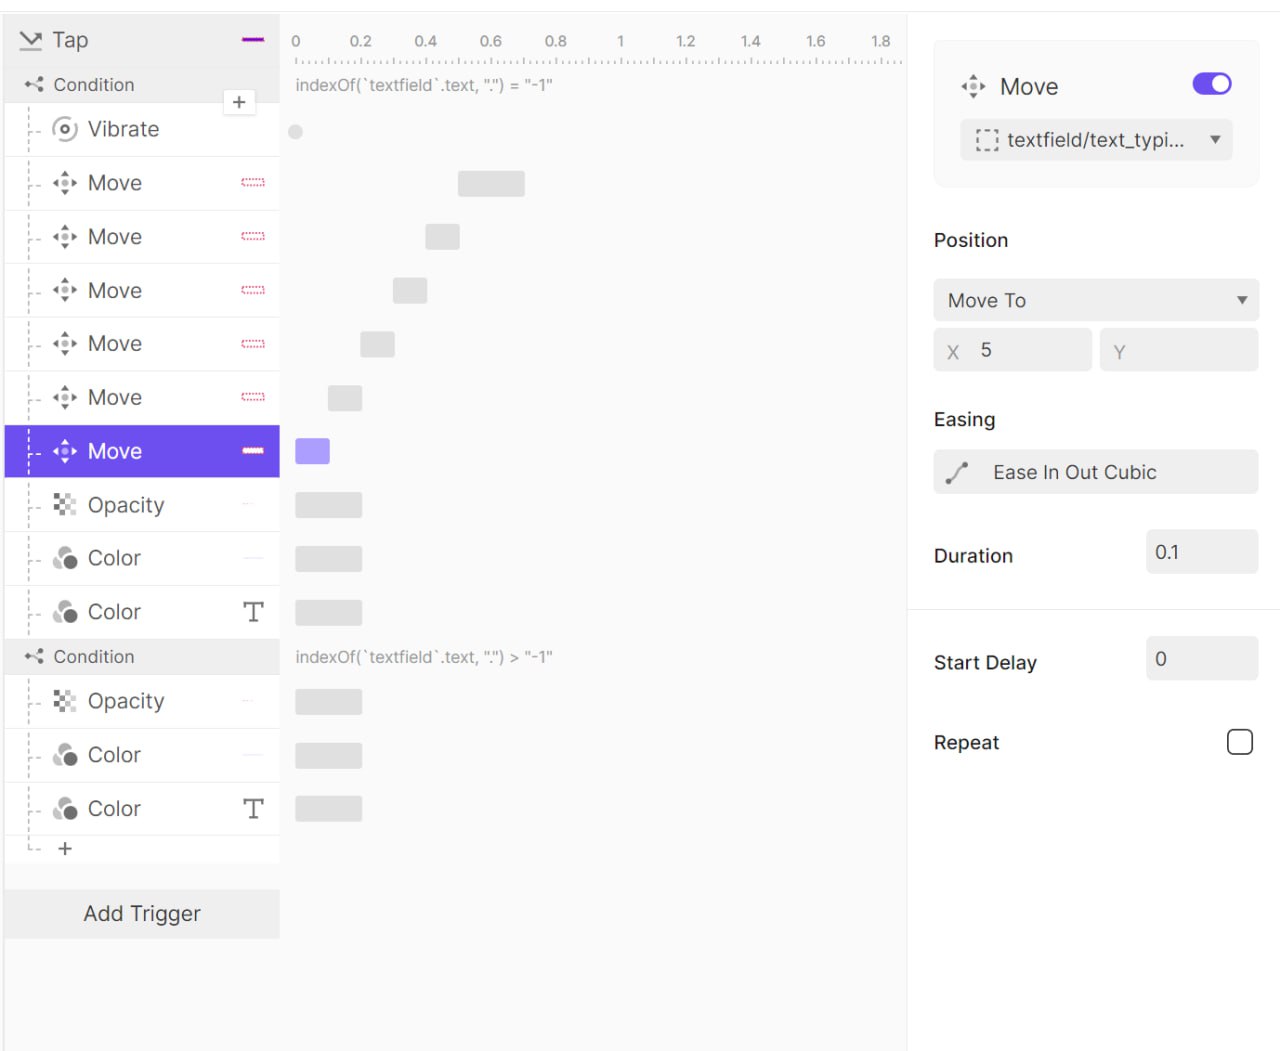
피그마에서는 인터렉션 효과를 주기에는 제한이 있다고 해서 디자이너가 프로토파이를 이용해 작업을 진행해주었다.
📍 충격적이게도(?) 위에서 아래가 아닌 아래서 위로 올라가는 역순서로 봐야된다고 한다...(왤까?)
→ 알고보니 그냥 디자이너가 뒤로 만들어서 그런거였다고 한다!


✔ 코드
- ① 햅틱(진동) 효과
좌우로 움직이는 애니메이션보다 진동을 구현하는 게 좀 더 쉬울 것 같아 먼저 시도해보기로 했다. 내가 찾아본 방법은 아래와 같이 2가지가 있었다.
- vibration 라이브러리
- Haptic Feedback ⇒ 최종 pick!
⇒ vibration 라이브러리 적용 시도
vibration 라이브러리 적용은 간단했다.
설치해주고 import하고, 아래와 같이 진동 상세 옵션을 설정해주면 된다.
// 진동 1초
Vibration.vibrate(duration: 1000);
// 진동 1초, 진폭 128
Vibration.vibrate(duration: 1000, amplitude: 128);
// 0.5초 대기, 1초 진동, 0.5초 대기, 2초 진동
Vibration.vibrate(pattern: [500, 1000, 500, 2000]);
// 진동 취소
Vibration.cancel();
☠️ 그런데, 여기서 문제!!!
설치도 하고 flutter clean, flutter pub get도 다시 해보고 했지만, 왜인지는 모르겠는데 import가 되지 않아서 vibration 라이브러리를 사용할 수가 없었다...
(+) 팀원도 시도해봤는데 안 되다가 갑자기 됨;; 근데 나는 계속 안 됨...
그래서... 아직 저런 상세한 요청은 받지 못했기 때문에 Haptic Feedback으로 적용해보기로 했다.
⇒ Haptic Feedback 적용
- 종속성 추가
flutter pub add haptic_feedback- Haptic Feedback 사용하기
HapticFeedback.lightImpact();     // 가벼운 진동 효과
HapticFeedback.mediumImpact();    // 중간 강도의 진동 효과
HapticFeedback.heavyImpact();     // 강한 진동 효과
HapticFeedback.selectionClick();  // 선택 클릭 효과
HapticFeedback.vibrate();         // 기본 진동 효과
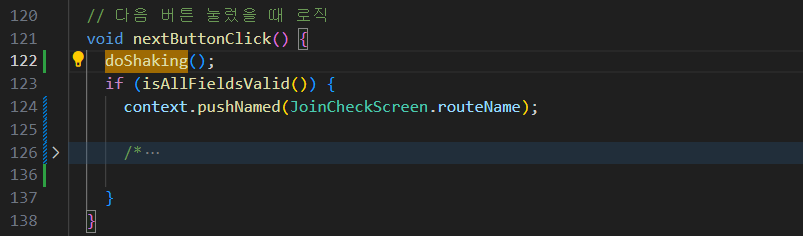
①-1 햅틱과 좌우 흔들림 애니메이션을 호출하는 함수를 만들어줌!
doShaking( )을 호출하면 HapticFeedback.heavyImpact( ); 진동이 발생되게 함.
(+) 햅틱부터 적용해보기로 한거니까 사진 상에 보이는 shakingAnimationController1.forward( );는 일단 무시하기!

①-2 다음 버튼을 누르면 doShaking( )이 호출됨!

- ② text field가 좌우로 흔들리는 애니메이션
마지막 4번을 실행해본 결과 아래와 같이 오류 없이 좌우로 통채로 이동되는 것을 확인할 수 있었다.
②-1 작업이 필요한 text field 쪽에 AnimatedBuilder 기본 구조를 작성해준다.
- AnimatedBuilder 기본 구조
Widget build(BuildContext context) { return Scaffold( appBar: AppBar(title: Text("Animation Example")), body: Center( child: AnimatedBuilder( animation: _animation, // 애니메이션에 연결된 객체 builder: (context, child) { return Container( width: _animation.value, // 애니메이션에 따라 width 변경 height: 50, color: Colors.blue, ); }, ), ), ); } }
(+) 내 코드에는 animation: Listenable.merge([ ])이렇게 되어있는데, 이건 여러 개의 Listenable 객체를 하나로 합쳐주는 메소드임!

그리고 애니메이션 사용을 위해서는 애니메이션을 위한 Ticker를 제공하는 믹스인 TickerProviderStateMixin을 with와 함께 작성해준다.
(왜 쓰는지 궁금하면 팀원의 벨로그를 확인해보시라! 나도 참고해야쥐~😙)
그리고 ,(컴마)를 찍고 흔들기 애니메이션의 구체적인 로직이 담긴 ShakingAnimation을 이어 작성한다.
class _JoinEmailScreenState extends ConsumerState<JoinEmailScreen>
    with TickerProviderStateMixin, ShakingAnimation {

  late final TextEditingController nameController;
  late final TextEditingController emailController;
  late final FocusNode emailFocusNode;
  late final FocusNode nameFocusNode;
②-2 좌우로 흔들리는 애니메이션을 만들어준다.
import 'package:flutter/material.dart';
import 'package:flutter/services.dart';
mixin ShakingAnimation<T extends StatefulWidget>
on State<T>, TickerProviderStateMixin<T> {
// 애니메이션 정의
late AnimationController shakingAnimationController1;
late AnimationController shakingAnimationController2;
late AnimationController shakingAnimationController3;
late AnimationController shakingAnimationController4;
late AnimationController shakingAnimationController5;
late Animation<double> shakingAnimation1;
late Animation<double> shakingAnimation2;
late Animation<double> shakingAnimation3;
late Animation<double> shakingAnimation4;
late Animation<double> shakingAnimation5;
void initState() {
super.initState();
shakingAnimationController1 = AnimationController(
vsync: this,
duration: const Duration(milliseconds: 100),
);
shakingAnimationController2 = AnimationController(
vsync: this,
duration: const Duration(milliseconds: 100),
);
shakingAnimationController3 = AnimationController(
vsync: this,
duration: const Duration(milliseconds: 100),
);
shakingAnimationController4 = AnimationController(
vsync: this,
duration: const Duration(milliseconds: 100),
);
shakingAnimationController5 = AnimationController(
vsync: this,
duration: const Duration(milliseconds: 100),
);
shakingAnimation1 = Tween<double>(begin: 0, end: 5).animate(
CurvedAnimation(
parent: shakingAnimationController1,
curve: const Cubic(0.65, 0, 0.35, 1),
),
);
shakingAnimation2 = Tween<double>(begin: 0, end: -5).animate(
CurvedAnimation(
parent: shakingAnimationController2,
curve: const Cubic(0.65, 0, 0.35, 1),
),
);
shakingAnimation3 = Tween<double>(begin: 0, end: 3).animate(
CurvedAnimation(
parent: shakingAnimationController3,
curve: const Cubic(0.65, 0, 0.35, 1),
),
);
shakingAnimation4 = Tween<double>(begin: 0, end: -3).animate(
CurvedAnimation(
parent: shakingAnimationController4,
curve: const Cubic(0.65, 0, 0.35, 1),
),
);
shakingAnimation5 = Tween<double>(begin: 0, end: 1).animate(
CurvedAnimation(
parent: shakingAnimationController5,
curve: const Cubic(0.65, 0, 0.35, 1),
),
);
// 애니메이션을 감시하는 리스너
// (위에는 애니메이션 컨트롤러 정의고, 여기가 실제 동작이랄까?)
// forward(); => 애니메이션 실행
// reverse(); => 애니메이션을 "뒤로" 실행
shakingAnimationController1.addStatusListener((status) async {
if (status == AnimationStatus.completed) {
shakingAnimationController2.forward();
}
});
shakingAnimationController2.addStatusListener((status) async {
if (status == AnimationStatus.completed) {
shakingAnimationController3.forward();
}
});
shakingAnimationController3.addStatusListener((status) async {
if (status == AnimationStatus.completed) {
shakingAnimationController4.forward();
}
});
shakingAnimationController4.addStatusListener((status) async {
if (status == AnimationStatus.completed) {
shakingAnimationController5.forward();
}
});
shakingAnimationController5.addStatusListener((status) async {
if (status == AnimationStatus.completed) {
// shakingAnimationController5.reverse();는 0 → 1로 진행된 애니메이션을
// 다시 1 → 0으로 되돌리는 역할을 하기 때문에 reset();이 굳이 필요 없음.
// reset() => 애니메이션을 0으로 초기화하는 역할
shakingAnimationController5.reverse();
shakingAnimationController1.reset();
shakingAnimationController2.reset();
shakingAnimationController3.reset();
shakingAnimationController4.reset();
// shakingAnimationController5.reset();
}
});
}
void dispose() {
shakingAnimationController1.dispose();
shakingAnimationController2.dispose();
shakingAnimationController3.dispose();
shakingAnimationController4.dispose();
shakingAnimationController5.dispose();
super.dispose();
}
void doShaking() {
HapticFeedback.heavyImpact();
shakingAnimationController1.forward();
}
}
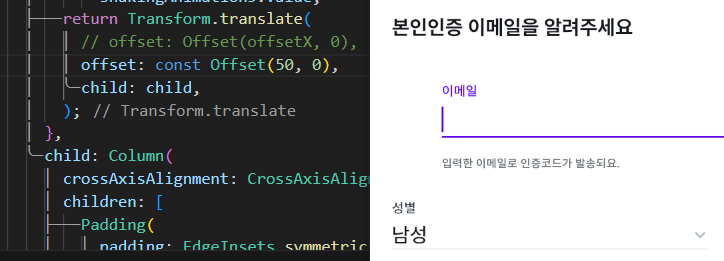
②-3 AnimatedBuilder 기본 구조를 작성한 부분(②-1)으로 돌아가서
                // 이메일 입력칸
                Expanded(
                  child: SingleChildScrollView(
                    physics: const AlwaysScrollableScrollPhysics(),
                    child: Column(
                      children: [
                        // ⓐ
                        AnimatedBuilder(
                          animation: Listenable.merge([
                            shakingAnimation1,
                            shakingAnimation2,
                            shakingAnimation3,
                            shakingAnimation4,
                            shakingAnimation5,
                          ]),
                          builder: (context, child) {
                            // ⓑ
                            final offsetX = shakingAnimation1.value +
                                shakingAnimation2.value +
                                shakingAnimation3.value +
                                shakingAnimation4.value +
                                shakingAnimation5.value;
                            // ⓒ
                            return Transform.translate(
                              offset: Offset(offsetX, 0),
                              child: child,
                            );
                          },

// 생략-
ⓐ Listenable.merge( )
- 여러 개의 Listenable 객체를 하나로 합쳐주는 메소드
-
ⓑ 각 애니메이션의 값을 value로 가져와서 더함!
-
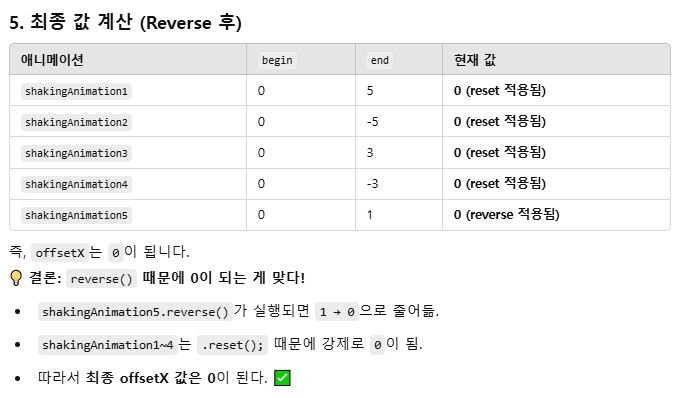
shakingAnimation1.value는 5, shakingAnimation2.value는 -5, shakingAnimation3.value는 3, shakingAnimation4.value는 -3, shakingAnimation5.value 1임.
5 + -5 = 0 👉 0 + 3 + -3 👉 0 + 1 = 1

-
-
ⓒ 그 값들(ⓑ)을 합산해 총합 offsetX를 구함.
-
ⓒ 주어진 offset 값만큼 이동시킴.
- Transform.translate는 위젯을 주어진 offset 값만큼 이동시키는 위젯임!
📍 그리고 shakingAnimationController5.addStatusListener()에서 reverse( )가 호출되면, 각 애니메이션이 반대 방향(end → begin)으로 실행됨.
1 👉 0으로 되돌아감.
📍 shakingAnimationController1~4)는 .reset( );이 호출되어 0으로 초기화됨!
(+) 코드를 더 짧게 만들어보자!!!!
- join_email_screen.dart
    AnimatedBuilder(
                          animation: Listenable.merge([
                            shakingAnimation1,
                            shakingAnimation3,
                            shakingAnimation5,
                          ]),
                          builder: (context, child) {
                            final offsetX = shakingAnimation1.value +
                                shakingAnimation3.value +
                                shakingAnimation5.value;
                            return Transform.translate(
                              offset: Offset(offsetX, 0),
                              child: child,
                            );
},- shaking_animation.dart
import 'package:flutter/material.dart';
import 'package:flutter/services.dart';
mixin ShakingAnimation<T extends StatefulWidget>
on State<T>, TickerProviderStateMixin<T> {
// 애니메이션 정의
late AnimationController shakingAnimationController1;
late AnimationController shakingAnimationController3;
late AnimationController shakingAnimationController5;
late Animation<double> shakingAnimation1;
late Animation<double> shakingAnimation3;
late Animation<double> shakingAnimation5;
bool isAnimation = false; // 애니메이션이 실행되지 않은 상태
void initState() {
super.initState();
shakingAnimationController1 = AnimationController(
vsync: this,
duration: const Duration(milliseconds: 100),
);
shakingAnimationController3 = AnimationController(
vsync: this,
duration: const Duration(milliseconds: 100),
);
shakingAnimationController5 = AnimationController(
vsync: this,
duration: const Duration(milliseconds: 100),
);
shakingAnimation1 = Tween<double>(begin: 0, end: 5).animate(
CurvedAnimation(
parent: shakingAnimationController1,
curve: const Cubic(0.65, 0, 0.35, 1),
),
);
shakingAnimation3 = Tween<double>(begin: 0, end: 3).animate(
CurvedAnimation(
parent: shakingAnimationController3,
curve: const Cubic(0.65, 0, 0.35, 1),
),
);
shakingAnimation5 = Tween<double>(begin: 0, end: 1).animate(
CurvedAnimation(
parent: shakingAnimationController5,
curve: const Cubic(0.65, 0, 0.35, 1),
),
);
// 애니메이션을 감시하는 리스너
// (위에는 애니메이션 컨트롤러 정의고, 여기가 실제 동작이랄까?)
shakingAnimationController1.addStatusListener((status) async {
if (status == AnimationStatus.completed) {
//shakingAnimationController2.forward();
shakingAnimationController1.reverse();
await Future.delayed(const Duration(milliseconds: 100));
shakingAnimationController3.forward();
}
});
shakingAnimationController3.addStatusListener((status) async {
if (status == AnimationStatus.completed) {
//shakingAnimationController4.forward();
shakingAnimationController3.reverse();
await Future.delayed(const Duration(milliseconds: 100));
shakingAnimationController5.forward();
}
});
shakingAnimationController5.addStatusListener((status) async {
if (status == AnimationStatus.completed) {
shakingAnimationController5.reverse();
// shakingAnimationController5가 애니메이션을 완료하면
// isAnimation = false;로 설정 → 새로운 애니메이션 실행이 가능해짐
isAnimation = false;
}
});
}
void dispose() {
shakingAnimationController1.dispose();
shakingAnimationController3.dispose();
shakingAnimationController5.dispose();
super.dispose();
}
void doShaking() {
// isAnimation이 true면 이미 애니메이션이 진행 중이므로 return해서 종료
if (isAnimation) return;
HapticFeedback.heavyImpact();
isAnimation = true; // 애니메이션 시작 전 실행 중 상태로 변경
shakingAnimationController1.forward();
}
}
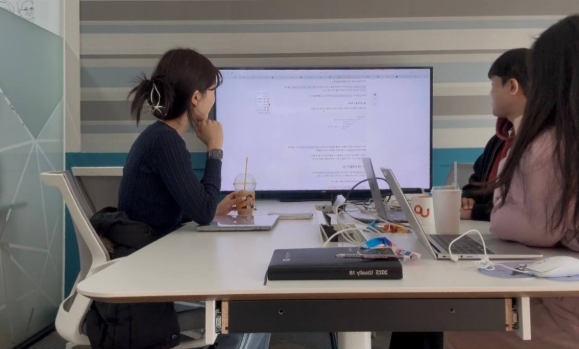
간단하게 발표하고 질의 응답하는 시간도 갖고 있다.
다음엔 뭘 할지에 대한 고민도~!!!
