MSA에서는 서버간 통신이 자주 일어난다.
서버간 http 통신을 할 때 보통 RestTemplate, WebClient를 사용한다.
ex) RestTemplate 사용
HttpHeaders headers = new HttpHeaders();
headers.setContentType(MediaType.APPLICATION_JSON);

JSONObject jsonObject = new JSONObject();
jsonObject.put("data", "data");

HttpEntity<String> request = new HttpEntity<>(jsonObject.toJSONString(), headers);
Object response = restTemplate.postForEntity("/url", request, Object.class);
요청에 대한 모듈을 만든다 하더라도 헤더 값, body 또는 쿼리스트링 값 세팅을 해주어야 하고 귀찮다.
그럴때 OpenFeign을 사용하면 매우 간단하게 통신이 가능하다.
- 컨트롤러 api 작성 하듯 http요청을 할 수 있다.
@FeignClient(name = "test", url = "http://localhost:8080")
public interface AuthWithUrlFeignClient {

    @GetMapping("/test")
    String ok();
}
🔍 시작하기
의존성 추가
implementation 'org.springframework.cloud:spring-cloud-starter-openfeign'** 주의 : spring cloud project 이므로 dependencyManagement 추가 해주어야 한다
ext {
    set('springCloudVersion', "2021.0.4")
}
dependencyManagement {
    imports {
        mavenBom "org.springframework.cloud:spring-cloud-dependencies:${springCloudVersion}"
    }
}
Open Feign 활성화
@EnableFeignClients어노테이션을 붙이면 세팅 끝!
@EnableDiscoveryClient
@EnableFeignClients
@SpringBootApplication
public class ApiApplication {

    public static void main(String[] args) {
        SpringApplication.run(ApiApplication.class, args);
    }

}
🔌 사용하기
- 기본 SpringMVC 어노테이션들을 사용하여 작성할 수 있다.
기본적인 요청
- 다음 코드는
GET http://localhost:9000/auth/test/success를 요청한다.
@FeignClient(name = "gateway", url = "${gateway.url}")
public interface AuthWithUrlFeignClient {

    @GetMapping("/auth/test/success")
    String ok();
}
| 옵션 | 설명 |
|---|---|
| url | http://localhost:9000 이렇게 직접 적어도 되고 설정 파일에서 불러와 사용할 수 있다. (${property}) |
application.yml
gateway.url: http://localhost:9000🧨 유레카에 등록되어있는 서비스간 통신을 할 경우에는 url없이 application name만으로 통신이 가능하다.
@FeignClient(name = "auth-service")
public interface AuthFeignClient {
	...
}
application.ymlspring: application: name: auth-service
Query String 포함하여 요청
public class TestDto {

    private String username;
    private String password;
}- 다음 코드는
GET http://<auth-service>/test/success/param?username=user&password=1234를 요청한다.
@FeignClient(name = "auth-service")
public interface AuthFeignClient {

    @GetMapping("/test/success/param")
    String withQueryString(@RequestParam TestDto request);
}
Path Variable 포함하여 요청
- 다음 코드는
GET http://<auth-service>/test/success/{value}를 요청한다.
@FeignClient(name = "auth-service")
public interface AuthFeignClient {

    @GetMapping("/test/success/{value}")
    String withPathVariable(@PathVariable String value);
}
Header값 추가하여 요청
- 다음 코드는
GET http://<auth-service>/test/success/header를 요청한다.
@FeignClient(name = "auth-service")
public interface AuthFeignClient {

    @GetMapping("/test/success/header")
    String withHeader(@RequestHeader String token);
}
Body데이터 추가하여 요청
- 다음 코드는
POST http://<auth-service>/test/success를 요청한다.
@FeignClient(name = "auth-service")
public interface AuthFeignClient {

    @PostMapping("/test/success")
    String withBody(@RequestBody TestDto dto);
}
🔦 커스텀 설정 추가하기
- 요청을 보내기 전 공통적인 작업을 수행해야 할 때 사용한다.
ex) 헤더에 토큰 값을 필수로 추가하여 요청해야 할 때
Config 객체 생성
RequestInterceptor를 빈으로 등록해 주면 요청하기 전 해당 작업을 추가한다.
public class CustomConfig {

    @Bean
    public RequestInterceptor requestInterceptor(@Value("${token}") String token) {
        return requestTemplate -> requestTemplate.header("token", token);
    }
}
설정 추가
- 다음 코드는
GET http://<auth-service>/test/success/header를 요청한다. - 해당 인터페이스 안에 있는 요청을 할 때는
CustomConfig의 인터셉터가 동작한다.
@FeignClient(name = "auth-service", configuration = CustomConfig.class)
public interface AuthWithConfigFeignClient {

    @GetMapping("/test/success/header")
    String withHeader();
}
🧨 주의!
CustomConfig객체에를 빈으로 등록할 경우에는 모든 FeignClient 인터페이스에서 요청하는 모든 api요청에 해당 설정이 추가된다.@Configuration public class CustomConfig { @Bean public RequestInterceptor requestInterceptor(@Value("${token}") String token) { return requestTemplate -> requestTemplate.header("token", token); } }
⚙️ 예외처리
- feign client api 요청에서 에러가 발생한 경우 후처리를 할 수 있다.
ErrorDecoder를 상속받아 구현한다.
@Slf4j
@Configuration
public class FeignErrorDecoder implements ErrorDecoder {

    @Override
    public Exception decode(String methodKey, Response response) {
        log.info("methodKey => {}", methodKey);
        log.info("response => {}", response);

        // http status code에 따른 처리
        switch (response.status()) {
            case 400:
            case 404:
                break;
            default:
                throw new RuntimeException("custom exception");
        }
        return null;
    }
}
🔩 응답처리
Logging
- logging level 을 debug로 맞춰준다.
application.yml
logging:
  level:
com.example.api.feign: DEBUG- Feign Logging level 설정
@Configuration
public class GlobalCustomConfig {

    @Bean
    Logger.Level feignLoggerLevel() {
        return Logger.Level.BASIC;
    }
}
| 레벨 | 설명 |
|---|---|
| NONE | 로깅 X(기본값) |
| BASIC | 요청의 메소드 및 url, 응답의 응답코드 및 실행시간 |
| HEADERS | 요청과 응답의 헤더와 기본정보 |
| FULL | 요청과 응답의 헤더, 바디, 메타데이터 |
Timeout
- 기본 응답 대기시간이 60초 인데 이는 사용자가 기다리기에 꽤 긴 시간이다.
- 응답이 지연될 경우 빠르게 에러 처리하여 사용자 경험을 증가 할 수있다.
| 설정 | 설명 | 기본값 |
|---|---|---|
| connectTimeout | 커넥션 연결 대기시간 | 1000 |
| readTimeout | 응답 대기 시간 | 60000 |
application.yml
- 다음 설정을 통해 기본값을 오버라이딩 한다.
feign:
  client:
    config:
      default:
        connectTimeout: 1000
        readTimeout: 3000
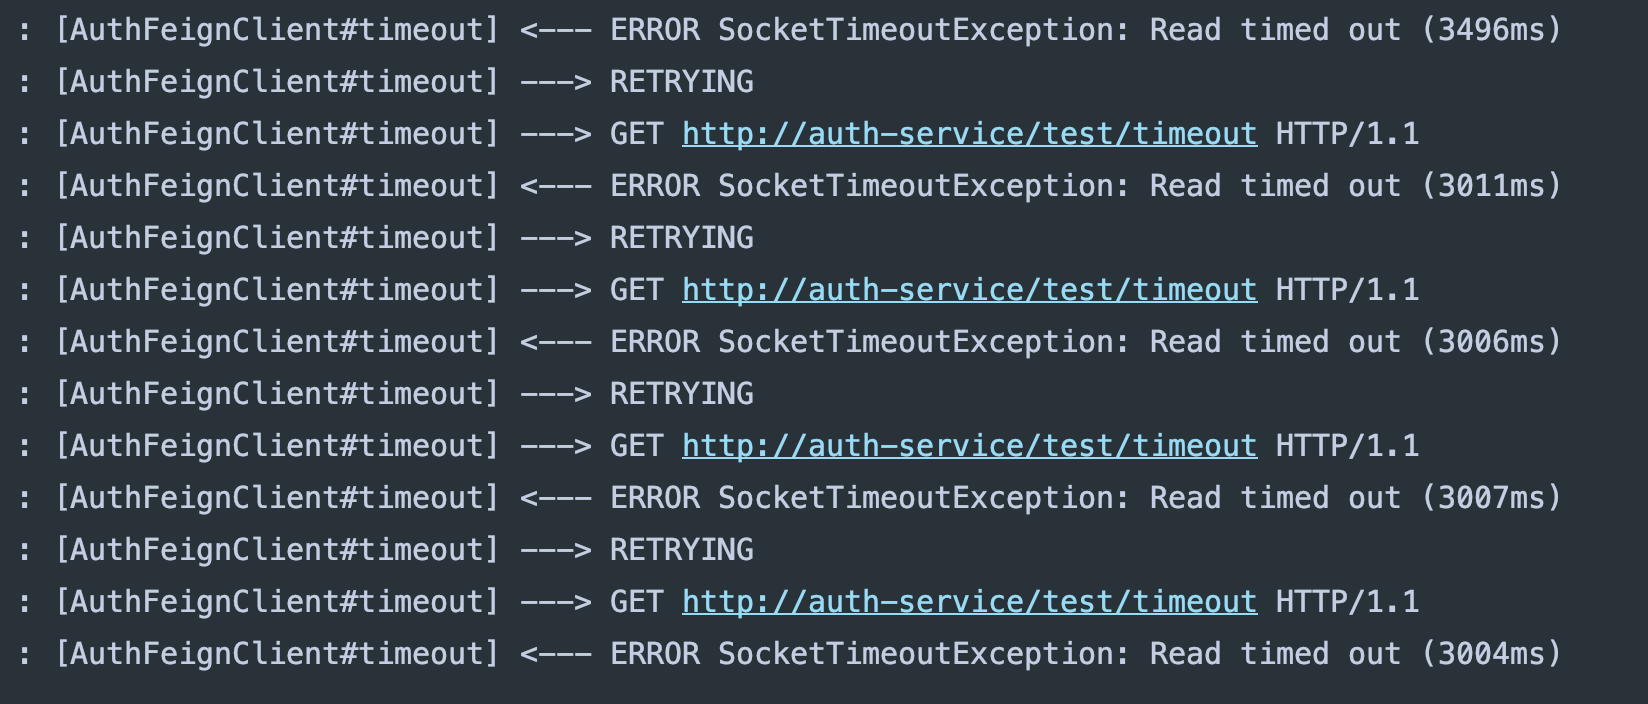
재시도
@Configuration
public class GlobalCustomConfig {
    @Bean
    public Retryer retryer(){
        // 기본값 : 0.1초 간격으로 1초에 한번씩 최대 5번 시도
        return new Retryer.Default(100L, SECONDS.toMillis(1L), 5);
    }
}
코드

물흐르듯 개발하다 대박나기