02. 이벤트 생성 API 개발
이벤트 API 테스트 클래스 생성
먼저 TTD 삼아 EventControllerTests.java 클래스를 생성해 보자.
테스트 클래스를 생성하면 @runwith 어노테이션을 먼저 붙여야 한다.
import org.junit.runner.RunWith;

@RunWith(SpringRunner.class)
public class EventControllerTests {

}
슬라이스 테스트를 위해 @WebMvcTest 어노테이션을 붙이면, 웹과 관련된 빈들이 모두 등록되어 테스트에서 MockMvc를 주입받아서 손쉽게 사용할 수 있다.
이때 MockMvc 란 스프링 MVC 테스트의 핵심 클래스로, 목킹 되어있는 DispatcherServlet 을 상대로 가짜 요청을 보내고 응답을 확인할 수 있다.
웹 서버를 띄우지 않고도 스프링 MVC (DispatcherServlet)가 요청을 처리하는 과정을 확인할 수 있기 때문에 컨트롤러 테스트용으로 자주 쓰인다.
그러나, 웹 서버를 띄우지 않아서 빠르긴 하지만 DispatcherServlet 까지 만들어야 되기 때문에 단위 테스트보다는 빠르진 않다.
MockMvc 를 사용하여 createEvent() 테스트 코드를 작성해 보자.
// import 생략

@RunWith(SpringRunner.class)
@WebMvcTest // 슬라이싱 테스트용
public class EventControllerTests {

    @Autowired
    MockMvc mockMvc;

    @Test
    public void createEvent() throws Exception {
        mockMvc.perform(post("/api/events/") // HTTP POST 요청 보내면
                        .contentType(MediaType.APPLICATION_JSON_UTF8) // 요청의 본문에 JSON을 담아서 보내고 있음
                        .accept(MediaTypes.HAL_JSON) // 원하는 응답
                )
                .andExpect(status().isCreated()); // isCreated(201) 응답

    }
}
먼저, perform() 안에 HTTP 요청을 보낼 수 있는데, contentType() 를 사용해서 요청의 본문에 들어가는 형식과 accept() 를 사용해서 원하는 응답 형식을 지정할 수 있다.
그리고 andExpect() 로 응답을 받아올 수 있다.
isCreated() 상태는 201 응답을 의미한다.
앞으로 기능을 구현하며 테스트해야 되는 리스트는 다음과 같다.
-
입력값들을 전달하면 JSON 응답으로
201이 나오는지 확인
• Location 헤더에 생성된 이벤트를 조회할 수 있는URI가 담겨 있는지 확인
•id는 DB에 들어갈 때 자동생성된 값으로 나오는지 확인 -
입력값으로 누가
id나eventStatus,offline,free와 같은 데이터까지 같이 주면 어떻게 되는지?
• Bad_Request로 응답 vs 받기로 한 값 이외는 무시하기 -
입력 데이터가 이상한 경우
Bad_Request로 응답
• 입력값이 이상한 경우는 에러
• 비즈니스 로직으로 검사할 수 있는 에러
• 에러 응답 메시지에 에러에 대한 정보가 있어야 함 -
비즈니스 로직이 적용 되었는지 응답 메시지 확인
•offline과free값 확인 -
응답에
HATEOAS와profile관련 링크가 있는지 확인
• self (view)
• update (만든 사람은 수정할 수 있음)
• events (목록으로 가는 링크) -
API 문서 만들기
• 요청 문서화
• 응답 문서화
• 링크 문서화
• profile 링크 추가
201 응답 받기
위에서 작성한 테스트 코드는 EventController 가 없기 때문에 실행되지 않았을 것이다.
EventController.java 클래스를 생성한 후 요청에 대한 응답을 제공하는 컨트롤러를 만들어 보자.
import org.springframework.hateoas.MediaTypes;
import org.springframework.http.ResponseEntity;
import org.springframework.stereotype.Controller;
import org.springframework.web.bind.annotation.PostMapping;
import org.springframework.web.bind.annotation.RequestBody;
import org.springframework.web.bind.annotation.RequestMapping;

import java.net.URI;

import static org.springframework.hateoas.server.mvc.WebMvcLinkBuilder.linkTo;

@Controller
@RequestMapping(value = "/api/events", produces = MediaTypes.HAL_JSON_VALUE)
public class EventController {
    @PostMapping()
    public ResponseEntity createEvent(@RequestBody Event event) {
        URI createdUri = linkTo(EventController.class).slash("{id}").toUri();
        event.setId(10); // 임의로 Id 세팅
        return ResponseEntity.created(createdUri).body(event); // createdUri를 헤더로 가지는 201 응답
    }
}
created() 응답을 보낼 때에는 항상 URI가 있어야하기 때문에, toUri() 메소드를 사용하여 createdUri 를 생성해야 한다.
여기서 URI란 특정 리소스를 식별하는 Uniform Resource Identifier를 의미한다.
입력값들을 전달하면 JSON 응답으로 201 이 나오는지 확인하기 위한 테스트 코드는 다음과 같다.
// import 생략
// EventControllerTests.java

@RunWith(SpringRunner.class)
@WebMvcTest // 슬라이싱 테스트용
public class EventControllerTests {

    @Autowired
    MockMvc mockMvc;

    @Autowired
    ObjectMapper objectMapper;

    @Test
    public void createEvent() throws Exception {
        Event event = Event.builder()
                .name("Spring")
                .description("REST API Development with Spring")
                .beginEnrollmentDateTime(LocalDateTime.of(2023, 11, 11, 11, 11))
                .closeEnrollmentDateTime(LocalDateTime.of(2023, 11, 12, 11, 11))
                .beginEventDateTime(LocalDateTime.of(2023, 11, 22, 11, 11))
                .endEventDateTime(LocalDateTime.of(2023, 11, 23, 11, 11))
                .basePrice(100)
                .maxPrice(200)
                .limitOfEnrollment(100)
                .location("이화여자대학교 신공학관")
                .build();

        mockMvc.perform(post("/api/events/") // HTTP POST 요청 보내면
                        .contentType(MediaType.APPLICATION_JSON_VALUE) // 요청의 본문에 JSON을 담아서 보내고 있음
                        .accept(MediaTypes.HAL_JSON) // 원하는 응답
                        .content(objectMapper.writeValueAsString(event)) // 위에서 작성한 event를 JSON으로 바꾸고 요청 본문에 넣기
                )
                .andDo(print()) // 실제 응답 확인
                .andExpect(status().isCreated()) // isCreated(201) 응답
                .andExpect(jsonPath("id").exists()) // id가 있는지 확인
        ;
    }
}
1장에서 정의한 이벤트 비즈니스 로직에 맞게 새로운 event를 하나 생성해서 POST 요청을 보내는 예제이다.
builder() 를 사용해서 생성한 이벤트를 요청 본문에 넣기 위해서는 JSON 형식으로 변환이 필요하기 때문에, ObjectMapper 를 사용할 수 있다.
테스트 코드를 수행하면 다음과 같이 201 응답이 오는 것을 확인할 수 있다.

이벤트 Repository
event 객체를 실제 DB에 저장할 수 있도록 EventRepository를 구현해 보자.
먼저, Event.java 클래스를 엔티티로 만들기 위해서 @Entity, @Id, @GeneratedValue 어노테이션을 추가해야 한다.
// Event.java

@Builder @AllArgsConstructor @NoArgsConstructor
@Getter @Setter @EqualsAndHashCode(of = "id")
@Entity
public class Event {
    @Id @GeneratedValue
    private Integer id; // 식별자

    private String name;
    private String description;
    private LocalDateTime beginEnrollmentDateTime; // 등록 시작 일시
    private LocalDateTime closeEnrollmentDateTime; // 등록 종료 일시
    private LocalDateTime beginEventDateTime; // 이벤트 시작 일시
    private LocalDateTime endEventDateTime; // 이벤트 종료 일시

    private String location; // (optional) 위치 : 이게 없으면 온라인 모임
    private int basePrice; // (optional)
    private int maxPrice; // (optional)
    private int limitOfEnrollment;

    private boolean offline; // 오프라인 여부
    private boolean free; // 이 모임이 유료인지 무료인지
    @Enumerated(EnumType.STRING) // 기본값인 ORDINAL을 STRING으로 바꾸기
    private EventStatus eventStatus = EventStatus.DRAFT;
}
그리고 @Enumerated 어노테이션을 이용해서 Enum을 JAP 매핑해야 한다.
이때 기본값인 EnumType.ORDINAL 은 0, 1, 2 숫자값으로 저장해서 Enum 순서가 바뀌면 데이터가 꼬일 수 있기 때문에 데이터 타입을 STRING으로 변경해야 한다.
EventRepository.java 인터페이스를 생성한 뒤, JPARepository 를 상속 받아 스프링 데이터 JPA를 만든다.
import org.springframework.data.jpa.repository.JpaRepository;

public interface EventRepository extends JpaRepository<Event, Integer> {

}
이렇게 생성한 EventRepository는
- 이벤트 컨트롤러에서 repository를 주입
- 생성자를 사용
두 가지 방법으로 만들 수 있다.
실습에서는 생성자를 구현하는 방법을 사용했다.
// EventController.java

@Controller
@RequestMapping(value = "/api/events", produces = MediaTypes.HAL_JSON_VALUE)
public class EventController {
    private final EventRepository eventRepository;

    public EventController(EventRepository eventRepository) {
        this.eventRepository = eventRepository;
    }

    @PostMapping()
    public ResponseEntity createEvent(@RequestBody Event event) {

        URI createdUri = linkTo(EventController.class).slash("{id}").toUri();
        event.setId(10); // 임의로 Id 세팅
        return ResponseEntity.created(createdUri).body(event); // createdUri를 헤더로 가지는 201 응답
    }
}
이제 EventRepository 를 이용해서 save 하면 저장된 객체가 나올 것이다.
// EventController.java

@Controller
@RequestMapping(value = "/api/events", produces = MediaTypes.HAL_JSON_VALUE)
public class EventController {
    private final EventRepository eventRepository;

    public EventController(EventRepository eventRepository) {
        this.eventRepository = eventRepository;
    }

    @PostMapping()
    public ResponseEntity createEvent(@RequestBody Event event) {
        Event newEvent = this.eventRepository.save(event);
        URI createdUri = linkTo(EventController.class).slash(newEvent.getId()).toUri();
        event.setId(10); // 임의로 Id 세팅
        return ResponseEntity.created(createdUri).body(event); // createdUri를 헤더로 가지는 201 응답
    }
}
그러나, 이 테스트 코드를 실행하면 테스트가 제대로 동작하지 않는다.
왜냐하면, 이전에 만들었던 테스트는 슬라이스 테스트이기 때문에 웹용 빈들만 등록되고, repository를 빈으로 등록해주지 않기 때문이다.
제대로 된 테스트를 위해서는@MockBean 어노테이션과 Mockito 를 사용해서 Mock 객체를 만들고 빈으로 등록해 주어야 한다.
// EventControllerTests.java

@RunWith(SpringRunner.class)
@WebMvcTest // 슬라이싱 테스트용
public class EventControllerTests {

    @Autowired
    MockMvc mockMvc;

    @Autowired
    ObjectMapper objectMapper;

    @MockBean
    EventRepository eventRepository; // EventRepository에 해당하는 빈을 목으로 만들기
    @Test
    public void createEvent() throws Exception {
        Event event = Event.builder()
                .name("Spring")
                .description("REST API Development with Spring")
                .beginEnrollmentDateTime(LocalDateTime.of(2023, 11, 11, 11, 11))
                .closeEnrollmentDateTime(LocalDateTime.of(2023, 11, 12, 11, 11))
                .beginEventDateTime(LocalDateTime.of(2023, 11, 22, 11, 11))
                .endEventDateTime(LocalDateTime.of(2023, 11, 23, 11, 11))
                .basePrice(100)
                .maxPrice(200)
                .limitOfEnrollment(100)
                .location("이화여자대학교 신공학관")
                .build();

        event.setId(10);
        Mockito.when(eventRepository.save(event)).thenReturn(event);

        mockMvc.perform(post("/api/events/") // HTTP POST 요청 보내면
                        .contentType(MediaType.APPLICATION_JSON_VALUE) // 요청의 본문에 JSON을 담아서 보내고 있음
                        .accept(MediaTypes.HAL_JSON) // 원하는 응답
                        .content(objectMapper.writeValueAsString(event)) // 위에서 작성한 event를 JSON으로 바꾸고 요청 본문에 넣기
                )
                .andDo(print()) // 실제 응답 확인
                .andExpect(status().isCreated()) // isCreated(201) 응답
                .andExpect(jsonPath("id").exists()) // id가 있는지 확인
                .andExpect(header().exists(HttpHeaders.LOCATION)) // Location 헤더가 있는지 확인
                .andExpect(header().string(HttpHeaders.CONTENT_TYPE,  MediaTypes.HAL_JSON_VALUE))
        ;
    }
}
이렇게 해서 id가 DB에 들어갈 때 자동생성된 값으로 나오는지에 대한 테스트가 끝났다.
입력값 제한하기
id 또는 입력 받은 데이터로 계산해야 하는 값들 (eventStatus, offline, free)은 입력을 받지 않아야 한다.
즉, 입력값을 제한해야 한다.
현재 Event 도메인에 어노테이션이 많이 있기 때문에, 분산을 위해 입력 값을 받는 EventDto.java 클래스를 따로 생성했다.
// EventDto.java

import lombok.*;

import java.time.LocalDateTime;

@Data @Builder @NoArgsConstructor @AllArgsConstructor
public class EventDto {

    private String name;
    private String description;
    private LocalDateTime beginEnrollmentDateTime; // 등록 시작 일시
    private LocalDateTime closeEnrollmentDateTime; // 등록 종료 일시
    private LocalDateTime beginEventDateTime; // 이벤트 시작 일시
    private LocalDateTime endEventDateTime; // 이벤트 종료 일시
    private String location; // (optional) 위치 : 이게 없으면 온라인 모임
    private int basePrice; // (optional)
    private int maxPrice; // (optional)
    private int limitOfEnrollment;
}
새로 만든 Dto 에서 값을 받아오도록 이벤트 컨트롤러를 수정해야 하는데, eventDto의 내용을 이벤트 클래스의 인스턴스로 변환하기 위해서 modelMapper 을 사용하면 편하다.
먼저 pom.xml에 다음과 같은 의존성을 추가하자.
(추가한 이후에는 설치를 위해 꼭 reload 해주어야 한다!)
<dependency>
	<groupId>org.modelmapper</groupId>
	<artifactId>modelmapper</artifactId>
	<version>2.3.1</version>
</dependency>
ModelMapper 은 공용으로 쓸 수 있는 객체이기 때문에 객체 빈으로 등록하여 사용할 수 있다.
스프링 부트 애플리케이션 클래스에 작성하면 아래 코드를 추가하면 된다.
@Bean
public ModelMapper modelMapper() {
	return new ModelMapper();
}
이벤트 컨트롤러 테스트를 수정하지 않고 테스트를 수행하면 NullPointerException 에러가 발생하는데, 그 이유는 목킹에서 사용되는 event 객체가 달라졌기 때문이다.
따라서 슬라이스 테스트가 아닌 통합 테스트로 전환해야 한다.
// EventControllerTests.java

@RunWith(SpringRunner.class)
@SpringBootTest
@AutoConfigureMockMvc
public class EventControllerTests {

    @Autowired
    MockMvc mockMvc;

    @Autowired
    ObjectMapper objectMapper;

    @Test
    public void createEvent() throws Exception {
        Event event = Event.builder()
                .id(100)
                .name("Spring")
                .description("REST API Development with Spring")
                .beginEnrollmentDateTime(LocalDateTime.of(2023, 11, 11, 11, 11))
                .closeEnrollmentDateTime(LocalDateTime.of(2023, 11, 12, 11, 11))
                .beginEventDateTime(LocalDateTime.of(2023, 11, 22, 11, 11))
                .endEventDateTime(LocalDateTime.of(2023, 11, 23, 11, 11))
                .basePrice(100)
                .maxPrice(200)
                .limitOfEnrollment(100)
                .location("이화여자대학교 신공학관")
                .free(true)
                .offline(false)
                .eventStatus(EventStatus.PUBLISHED)
                .build();

        mockMvc.perform(post("/api/events/") // HTTP POST 요청 보내면
                        .contentType(MediaType.APPLICATION_JSON) // 요청의 본문에 JSON을 담아서 보내고 있음
                        .accept(MediaTypes.HAL_JSON) // 원하는 응답
                        .content(objectMapper.writeValueAsString(event))) // 위에서 작성한 event를 JSON으로 바꾸고 요청 본문에 넣기
                .andDo(print()) // 실제 응답 확인
                .andExpect(status().isCreated()) // isCreated(201) 응답
                .andExpect(jsonPath("id").exists()) // id가 있는지 확인
                .andExpect(header().exists(HttpHeaders.LOCATION)) // Location 헤더가 있는지 확인
                .andExpect(header().string(HttpHeaders.CONTENT_TYPE,  MediaTypes.HAL_JSON_VALUE))
                .andExpect(jsonPath("id").value(Matchers.not(100)))
                .andExpect(jsonPath("free").value(Matchers.not(true)))
                .andExpect(jsonPath("eventStatus").value(Matchers.not(EventStatus.DRAFT)))
        ;
    }
}
@SpringBootTest 를 사용하면 애플리케이션을 실행했을 때와 가장 근사한 형태로 테스트를 수행할 수 있다.
입력값 이외에 에러 발생
이번에는 입력값 이외에 다른 값이 들어오면 에러를 발생하도록 테스트를 작성해 보자.
createEvent_Bad_Request() 이름의 새로운 테스트를 생성하고, unknown property인 id, free, , offline, eventStatus 에 대한 값이 들어오면 BadRequest 응답이 발생할 것으로 예상되는 테스트를 구현했다.
// EventControllerTests.java

@Test
public void createEvent_Bad_Request() throws Exception {
    Event event = Event.builder()
            .id(100) // unknown property
            .name("Spring")
            .description("REST API Development with Spring")
            .beginEnrollmentDateTime(LocalDateTime.of(2023, 11, 11, 11, 11))
            .closeEnrollmentDateTime(LocalDateTime.of(2023, 11, 12, 11, 11))
            .beginEventDateTime(LocalDateTime.of(2023, 11, 22, 11, 11))
            .endEventDateTime(LocalDateTime.of(2023, 11, 23, 11, 11))
            .basePrice(100)
            .maxPrice(200)
            .limitOfEnrollment(100)
            .location("이화여자대학교 신공학관")
            .free(true) // unknown property
            .offline(false) // unknown property
            .eventStatus(EventStatus.PUBLISHED) // unknown property
            .build();

    mockMvc.perform(post("/api/events/") // HTTP POST 요청 보내면
                    .contentType(MediaType.APPLICATION_JSON) // 요청의 본문에 JSON을 담아서 보내고 있음
                    .accept(MediaTypes.HAL_JSON) // 원하는 응답
                    .content(objectMapper.writeValueAsString(event))) // 위에서 작성한 event를 JSON으로 바꾸고 요청 본문에 넣기
            .andDo(print()) // 실제 응답 확인
            .andExpect(status().isBadRequest()) // BadRequest 응답(400)!
        ;
}
ObjectMapper 커스터마이징 을 통해 입력값 이외에 값에 대해 에러를 발생하도록 할 수 있는데, 이는 스프링 부트가 제공하는 properties를 이용해서 확장할 수 있다.
application.properties 파일에 아래의 내용을 추가하면 된다.
spring.jackson.deserialization.fail-on-unknown-properties=truedeserialization 은 JSON 문자열을 object로 변환하는 과정을 의미한다. 이 과정에서 unknown property가 있으면 실패하도록 커스터마이징 했다.
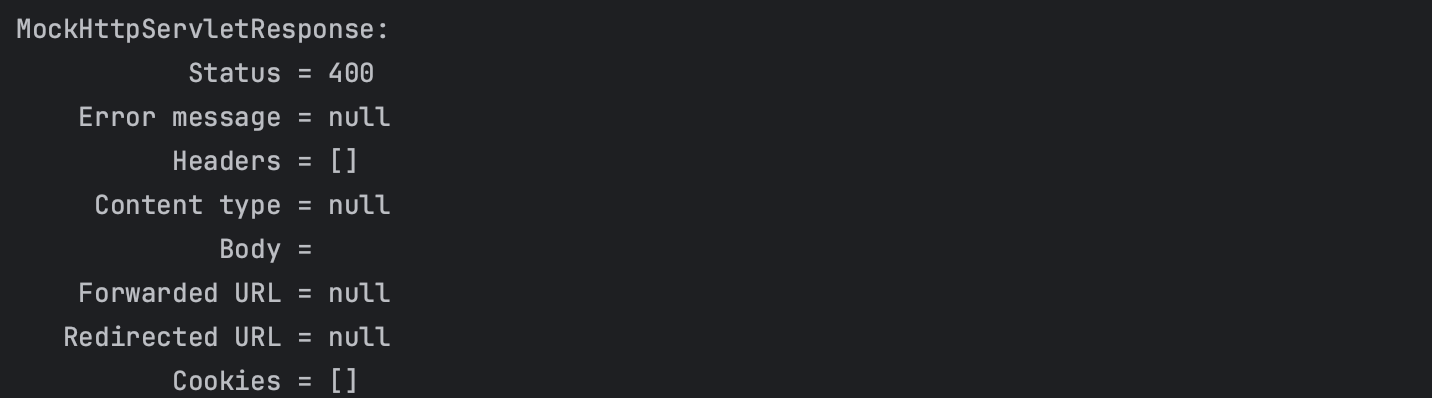
테스트를 실행해 보면, 다음과 같이 400 응답이 오는 것을 확인할 수 있다.
정리해 보면, 입력값 이외에 값이 들어왔을 때 두 가지 방법으로 처리할 수 있다.
BadRequest로 응답- 받기로 한 값 이외는 무시
이 부분은 프로젝트를 개발할 때 자유롭게 선택하면 된다!
Bad Request 처리
이번에는 Dto에서 입력을 받아야 하는 값이 오지 않는 경우에 대해 BadRequest를 처리하는 테스트 코드는 다음과 같다.
// EventControllerTests.java

@Test
public void createEvent_Bad_Request_Empty_Input() throws Exception{
    EventDto eventDto = EventDto.builder().build(); // 값 없이 보냄

    this.mockMvc.perform(post("/api/events")
                    .contentType(MediaType.APPLICATION_JSON)
                    .content(this.objectMapper.writeValueAsString(eventDto))
            )
            .andExpect(status().isBadRequest());
}
이제 BadRequest 처리를 위해 이벤트 컨트롤러에서 응답을 보내는 부분을 수정해야 한다.
Spring MVC에 해당하는 @Valid 어노테이션과 @NotNull, @NotEmpty, @Min, @Max 등의 어노테이션을 활용해서 입력값을 바인딩할 때 에러를 확인할 수 있다.
@Valid 어노테이션을 이벤트 컨트롤러의 ResponseEntity 위에 추가해야 하는데, 어노테이션이 생성되지 않는다면 아래 디펜던시를 pom.xml에 추가해 주어야 한다!
<dependency> <groupId>org.springframework.boot</groupId>
    <artifactId>spring-boot-starter-validation</artifactId>
    <version>2.5.2</version>
</dependency>
그리고 EventDto 에 어노테이션을 추가하면 바인딩 과정에서 에러가 발생하는지 확인할 수 있다.
// EventDto.java

@Data @Builder @NoArgsConstructor @AllArgsConstructor
public class EventDto {

    @NotEmpty
    private String name;
    @NotEmpty
    private String description;
    @NotNull
    private LocalDateTime beginEnrollmentDateTime; // 등록 시작 일시
    @NotNull
    private LocalDateTime closeEnrollmentDateTime; // 등록 종료 일시
    @NotNull
    private LocalDateTime beginEventDateTime; // 이벤트 시작 일시
    @NotNull
    private LocalDateTime endEventDateTime; // 이벤트 종료 일시
    private String location; // (optional) 위치 : 이게 없으면 온라인 모임
    @Min(0) // 최소 0 이상
    private int basePrice; // (optional)
    @Min(0)
    private int maxPrice; // (optional)
    @Min(0)
    private int limitOfEnrollment;
}
@Valid 를 사용하면 이벤트 컨트롤러에서 쉽게 에러를 잡아낼 수 있다.
// EventController.java

@Controller
@RequestMapping(value = "/api/events", produces = MediaTypes.HAL_JSON_VALUE)
public class EventController {
    private final EventRepository eventRepository;
    private final ModelMapper modelMapper;

    public EventController(EventRepository eventRepository, ModelMapper modelMapper) {
        this.eventRepository = eventRepository;
        this.modelMapper = modelMapper;
    }

    @PostMapping
    public ResponseEntity createEvent(@RequestBody @Valid EventDto eventDto, Errors errors) {
        if (errors.hasErrors()) { // 바인딩에서 에러 발생하면
            return ResponseEntity.badRequest().build();
        }

        Event event = modelMapper.map(eventDto, Event.class); // Deserialization : eventDto에 있는 것을 이벤트 클래스의 인스턴스로 만들기
        Event newEvent = this.eventRepository.save(event);
        URI createdUri = linkTo(EventController.class).slash(newEvent.getId()).toUri();

        return ResponseEntity.created(createdUri).body(event); // createdUri를 헤더로 가지는 201 응답
    }
엔티티에 바인딩할 때 @NotNull 과 같은 정보를 참고해서 검증을 수행한 후, 검증 수행 결과를 errors 객체에 담아주기 때문에 우리는 errors.hasErrors() 가 true일 때 BadRequest 처리를 할 수 있다.
위의 경우는 입력을 받아야 하는 값이 안 오는 경우이지만, 만약 입력값에 이상한 값이 들어오는 경우에는 어노테이션 만으로는 검증이 어렵다.
예를 들어, 시작 날짜보다 종료 날짜가 빠른 경우, basePrice > MaxPrice인 경우는 입력값이 이상한 경우이다.
잘못된 입력값이 들어온 경우에 대한 테스트 코드는 다음과 같다.
// EventControllerTests.java

@Test
public void createEvent_Bad_Request_Wrong_Input() throws Exception{
    EventDto eventDto = EventDto.builder()
            .name("Spring")
            .description("REST API Development with Spring")
            .beginEnrollmentDateTime(LocalDateTime.of(2023, 11, 14, 11, 11))
            .closeEnrollmentDateTime(LocalDateTime.of(2023, 11, 12, 11, 11))
            .beginEventDateTime(LocalDateTime.of(2023, 11, 24, 11, 11))
            .endEventDateTime(LocalDateTime.of(2023, 11, 23, 11, 11))
            .basePrice(10000)
            .maxPrice(200)
            .limitOfEnrollment(100)
            .location("이화여자대학교 신공학관")
            .build();

    this.mockMvc.perform(post("/api/events")
                    .contentType(MediaType.APPLICATION_JSON)
                    .content(this.objectMapper.writeValueAsString(eventDto))
                )
            .andExpect(status().isBadRequest());
    }
}
따라서 이 경우에는 도메인 Validator 를 생성해 주어야 한다.
EventValidator.java 인터페이스를 생성한 후, 직접 비즈니스 로직에 위배되는 경우에 대해 조건을 달아주면 된다.
// EventValidator.java

@Component
public class EventValidator {
    public void validate(EventDto eventDto, Errors errors) {
        if (eventDto.getBasePrice() > eventDto.getMaxPrice() && eventDto.getMaxPrice() > 0) { // 비즈니스 로직 위배
            errors.rejectValue("basePrice", "wrongValue", "BasePrice is wrong.");
            errors.rejectValue("maxPrice", "wrongValue", "MaxPrice is wrong.");
        }

        LocalDateTime endEventDateTime = eventDto.getEndEventDateTime();
        if (endEventDateTime.isBefore(eventDto.getBeginEventDateTime()) ||
                endEventDateTime.isBefore(eventDto.getCloseEnrollmentDateTime()) ||
                endEventDateTime.isBefore(eventDto.getBeginEnrollmentDateTime())) {
            errors.rejectValue("endEventDateTime", "wrongValue", "endEventDateTime is wrong.");
        }
    }
}
이렇게 해서 현재까지 테스트 메소드가 4개가 생성되었는데, 메소드명만으로 테스트를 구분하기 어렵다면 common 패키지를 생성하여 테스트 설명용 어노테이션을 만들 수 있다.
// TestDescription.java

import java.lang.annotation.ElementType;
import java.lang.annotation.Retention;
import java.lang.annotation.RetentionPolicy;
import java.lang.annotation.Target;

@Target(ElementType.METHOD)
@Retention(RetentionPolicy.SOURCE) // 어노테이션을 붙인 코드를 얼마나 오래 가져갈지
public @interface TestDescription {
    String value();
}
예를 들면, 다음과 같이 테스트에 대한 설명을 입력할 수 있다.
@TestDescription("입력 값이 잘못된 경우에 에러가 발생하는 테스트")이 방법은 필수는 아니고, 주석으로 테스트에 대한 설명을 달아주어도 된다!
Bad Request 응답
Bad Request 응답 본문을 만들어서 응답을 보내보자.
에러에 대한 정보는 errors 객체에 있지만, 응답에 실어보내기 위해 body()에 에러 객체를 담으려면 커스텀 JSON Serializer 가 필요하다.
errors 객체를 JSON으로 그냥 변환할 수 없기 때문에 commons 패키지 밑에 ErrorsSerializer.java 클래스를 생성해서 커스텀 JSON Serializer를 직접 구현해야 한다.
// ErrorsSerializer.java

@JsonComponent // Object Mapper는 이 Serializer를 사용하게 됨
public class ErrorsSerializer extends JsonSerializer<Errors> {

    @Override
    public void serialize(Errors errors, JsonGenerator gen, SerializerProvider serializerProvider) throws IOException {
        // errors 안에는 에러가 여러 개라 배열 사용
        gen.writeStartArray();
        errors.getFieldErrors().forEach(e -> {
            try {
                gen.writeStartObject();
                gen.writeStringField("field", e.getField());
                gen.writeStringField("objectName", e.getObjectName());
                gen.writeStringField("code", e.getCode());
                gen.writeStringField("defaultMessage", e.getDefaultMessage());
                Object rejectedValue = e.getRejectedValue();
                if (rejectedValue != null) {
                    gen.writeStringField("rejectedValue", rejectedValue.toString());
                }
                gen.writeEndObject();
            } catch (IOException e1) {
                e1.printStackTrace();
            }

        });

        errors.getGlobalErrors().forEach(e -> {
            try {
                gen.writeStartObject();
                gen.writeStringField("objectName", e.getObjectName());
                gen.writeStringField("code", e.getCode());
                gen.writeStringField("defaultMessage", e.getDefaultMessage());
                gen.writeEndObject();
            } catch (IOException e1) {
                e1.printStackTrace();
            }
        });
        gen.writeEndArray();

    }
}
errors 객체의 에러 종류에는 FieldError 와 GlobalError 가 있다.
에러는 검증을 할 때, rejectValue() 에서 FieldError가 생성되고, reject() 에서 GlobalError가 생성된다.
따라서 위의 Serializer에서 FieldError 와 GlobalError를 다 매핑해서 JSON에 담아야 한다.
응답 본문을 확인하기 위해 테스트 코드는 다음과 같이 작성할 수 있다.
// EventControllerTests.java

@Test
@TestDescription("입력 값이 잘못된 경우에 에러가 발생하는 테스트")
public void createEvent_Bad_Request_Wrong_Input() throws Exception{
    EventDto eventDto = EventDto.builder()
            .name("Spring")
            .description("REST API Development with Spring")
            .beginEnrollmentDateTime(LocalDateTime.of(2023, 11, 14, 11, 11))
            .closeEnrollmentDateTime(LocalDateTime.of(2023, 11, 12, 11, 11))
            .beginEventDateTime(LocalDateTime.of(2023, 11, 24, 11, 11))
            .endEventDateTime(LocalDateTime.of(2023, 11, 23, 11, 11))
            .basePrice(10000)
            .maxPrice(200)
            .limitOfEnrollment(100)
            .location("이화여자대학교 신공학관")
            .build();

    this.mockMvc.perform(post("/api/events")
                    .contentType(MediaType.APPLICATION_JSON)
                    .content(this.objectMapper.writeValueAsString(eventDto))
            )
            .andDo(print())
            .andExpect(status().isBadRequest())

             // 응답에 있기를 바라는 내용
            .andExpect(jsonPath("$[0].objectName").exists()) // 에러 배열에서 객체 이름
            .andExpect(jsonPath("$[0].defaultMessage").exists()) // 기본 메시지
            .andExpect(jsonPath("$[0].code").exists()) // 에러 코드
        ;
}
테스트 실행 결과를 보면 응답 본문에 다음과 같이 에러 정보가 담겨있는 것을 확인할 수 있다.
[
	{
      "field":"basePrice",
      "objectName":"eventDto",
      "code":"wrongValue",
      "defaultMessage":"BasePrice is wrong.",
      "rejectedValue":"10000"
  },
  {
      "field":"maxPrice",
      "objectName":"eventDto",
      "code":"wrongValue",
      "defaultMessage":"MaxPrice is wrong.",
      "rejectedValue":"200"
  },
  {
      "field":"endEventDateTime",
      "objectName":"eventDto",
      "code":"wrongValue",
      "defaultMessage":"endEventDateTime is wrong.",
      "rejectedValue":"2023-11-23T11:11"
  },
  {
      "objectName":"eventDto",
      "code":"wrongPrices",
      "defaultMessage":"Prices are wrong."
  }
]
비즈니스 로직 적용
이벤트가 가지고 있던 비즈니스 로직을 테스트해 보자.
비즈니스 로직에는 다음 두 가지 고려사항이 있었다.
basePrice,maxPrice값에 따라서free판단location값 유무로offline판단
먼저, Event 도메인에 update() 메소드를 추가하여 basePrice, maxPrice, location 값에 따라서 free 와 offline 이 업데이트될 수 있도록 하자.
// Event.java

public void update() {
    // Update free
    if (this.basePrice == 0 && this.maxPrice == 0) {
        this.free = true;
    } else {
        this.free = false;
    }

    // Update offline
    if (this.location == null || this.location.isBlank()) { // 실제 비어있는지 여부
        this.offline = false;
    } else {
        this.offline = true;
    }
}
그리고 EventTest.java 에서 비즈니스 로직에 맞게 테스트 코드를 작성하면 된다.
// EventTest.java

@Test
public void testFree() {
    // Given
    Event event = Event.builder()
            .basePrice(0)
            .maxPrice(0)
            .build();

    // When
    event.update();

    // Then
    assertThat(event.isFree()).isTrue();


    // Given
    event = Event.builder()
            .basePrice(100)
            .maxPrice(0)
            .build();

    // When
    event.update();

    // Then
    assertThat(event.isFree()).isFalse();


    // Given
    event = Event.builder()
            .basePrice(0)
            .maxPrice(100)
            .build();

    // When
    event.update();

    // Then
    assertThat(event.isFree()).isFalse();
}

@Test
public void testOffline() {
    // Given
    Event event = Event.builder()
            .location("이화여자대학교 신공학관")
            .build();

    // When
    event.update();

    // Then
    assertThat(event.isOffline()).isTrue();

    // Given - location 없으면
    event = Event.builder()
            .build();

    // When
    event.update();

    // Then
    assertThat(event.isOffline()).isFalse();
}
매개변수를 이용한 테스트
이번에는 테스트 코드 리팩토링을 하고자 한다.
앞선 예제에서 테스트 코드에서 다음 코드가 여러 번 중복되었다.
// Given
Event event = Event.builder()
        .basePrice(0)
        .maxPrice(0)
        .build();

// When
event.update();

// Then
assertThat(event.isFree()).isTrue();
basePrice 와 maxPrice 를 매개변수로 바꾸면 되기 때문에 우리는 JUnitParams 를 이용하여 테스트 코드를 리팩토링할 수 있다.
JUnitParams 는 메소드 파라미터를 이용하여 테스트 코드를 만들기 쉽게 도와주는 라이브러리이다.
pom.xml 에 다음 dependency를 추가해 보자.
<dependency>
	<groupId>pl.pragmatists</groupId>
	<artifactId>JUnitParams</artifactId>
	<version>1.1.1</version>
	<scope>test</scope>
</dependency>
이벤트 테스트 코드에서 아래 코드와 같이 @Parameters 어노테이션을 사용하면 코드의 중복을 줄일 수 있다.
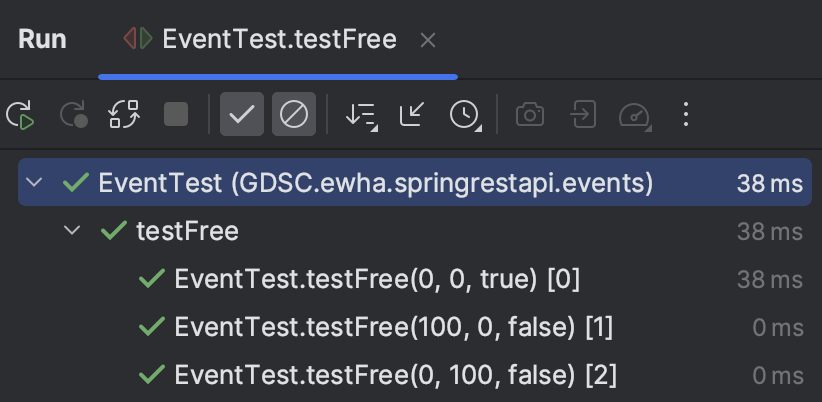
// EventTest.java

@Test
@Parameters({
        "0, 0, true",
        "100, 0, false",
        "0, 100, false"
    })
public void testFree(int basePrice, int maxPrice, boolean isFree) {
    // Given
    Event event = Event.builder()
            .basePrice(basePrice)
            .maxPrice(maxPrice)
            .build();

    // When
    event.update();

    // Then
    assertThat(event.isFree()).isEqualTo(isFree);
}
좀 더 type safe 하게 코드를 작성하고 싶다면 Object 배열을 생성해서 코드를 작성할 수도 있다.
// EventTest.java

@Test
@Parameters
public void testFree(int basePrice, int maxPrice, boolean isFree) {
    // Given
    Event event = Event.builder()
            .basePrice(basePrice)
            .maxPrice(maxPrice)
            .build();

    // When
    event.update();

    // Then
    assertThat(event.isFree()).isEqualTo(isFree);
}

private Object[] parametersForTestFree() {
    return new Object[] {
        new Object[] { 0, 0, true },
        new Object[] { 100, 0, false },
        new Object[] { 0, 100, false },
        new Object[] { 100, 200, false }
    };

}
IntelliJ 명령어 정리 (macOS)
💡
[cmd + shift + T]: test로 이동
💡[ctrl + shift + R]: 테스트 메소드 실행
→ 마우스를 메소드 밖에 두면 전체 테스트를 실행할 수 있음
인프런 백기선님의 스프링 기반 REST API 개발을 기반으로 작성했습니다.