Interface Stream
ref. Oracle-Java stream
java.util.stream
Interface Stream<T>
Type Parameters:
T - the type of the stream elements
All Superinterfaces:
AutoCloseable, BaseStreamT,[Stream](https://docs.oracle.com/javase/8/docs/api/java/util/stream/Stream.html)<T\>
public interface Stream<T> extends BaseStreamT,[Stream](https://docs.oracle.com/javase/8/docs/api/java/util/stream/Stream.html)<T\>
순차 및 병렬 집합 연산을 지원하는 일련의 요소. 다음 예제는 Stream 및 IntStream을 사용하는 집계 작업을 보여준다.
     int sum = widgets.stream()
                      .filter(w -> w.getColor() == RED)
                      .mapToInt(w -> w.getWeight())
                      .sum();
이 예제에서 widgets은 Collection <Widget>이다.
1. Collection.stream() : Widget 객체의 스트림을 생성
2. filter : 빨간색 위젯 만 포함하는 스트림을 생성
3. mapToInt : 한 다음 각 빨간색 위젯의 가중치를 나타내는 int 값의 스트림으로 변환한다.
4. 3의 스트림을 합하여 총 무게를 산출한다.
stream Exemple 1 - sum()
위의 과정을 다음을 따라 시도해보자.
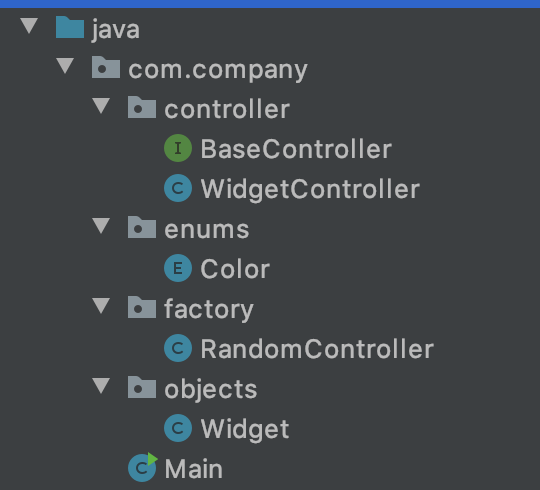
디렉토리 구조는 아래와 같다.
❗️ NOTE
objects와 controller를 나눈것은 한 클래스에 모든 작업에 대한 책임을 위임하지 않기 위함이다.
또한BaseController인터페이스를 상속받음으로써 중복되는 행위 혹은 필수적인 행위를 컨트롤러가 다룰 수 있도록 설계한 결과이다.
Widget
@Getter
public class Widget {

    private Color color;
    private int weight;

    @Builder
    public Widget(Color color, int weight){
        this.color = color;
        this.weight = weight;
    }
}
Color
public enum Color {
    RED, YELLOW, BLUE, GREEN;

    private static final List<Color> VALUES = Collections.unmodifiableList(Arrays.asList(values()));
    private static final int SIZE = VALUES.size();
    private static final Random RANDOM = new Random();

    public static Color randomColor()  {
        return VALUES.get(RANDOM.nextInt(SIZE));
    }
}
RandomController
public class RandomController {

    public static int randomInt(int min, int max) {
        return min + (int) (Math.random() * ((max - min) + 1));
    }
}
BaseController
public interface BaseController<T> {

    T random();
    Collection<T> randomList(int size);

}
WidgetController
public class WidgetController implements BaseController<Widget> {

    public static WidgetController get() {
        return new WidgetController();
    }

    @Override
    public Widget random() {
        return Widget.builder().color(Color.randomColor()).weight(RandomController.randomInt(1, 100)).build();
    }

    @Override
    public Collection<Widget> randomList(int size) {
        Collection<Widget> widgets = new ArrayList<Widget>();
        while (size-- != 0) {
            widgets.add(random());
        }
        return widgets;
    }


}
Main 클래스에서 도큐먼트에 나온 것과 동일하게 stream을 사용해보았다.
Main
public class Main {

    public static void main(String[] args) {
	    /**
	    * widget 클래스를 이용한 Stream 생성
	    * */

        Collection<Widget> widgets = WidgetController.get().randomList(10);
        int sum = widgets.stream()
                        .filter(widget -> widget.getColor().equals(Color.RED))
                        .mapToInt(widget -> widget.getWeight())
                        .sum();
        System.out.println(sum);
    }
}| 생성된 widget 객체 컬랙션 | (이어서) |
|---|---|
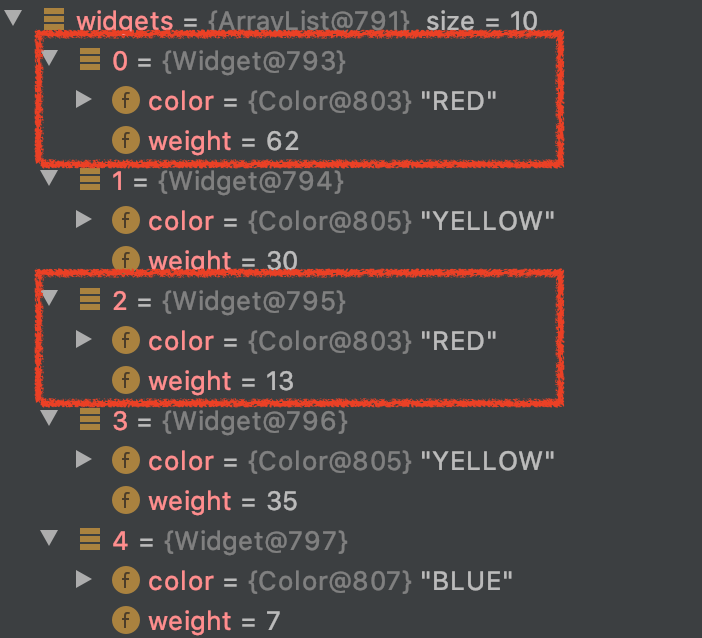 | 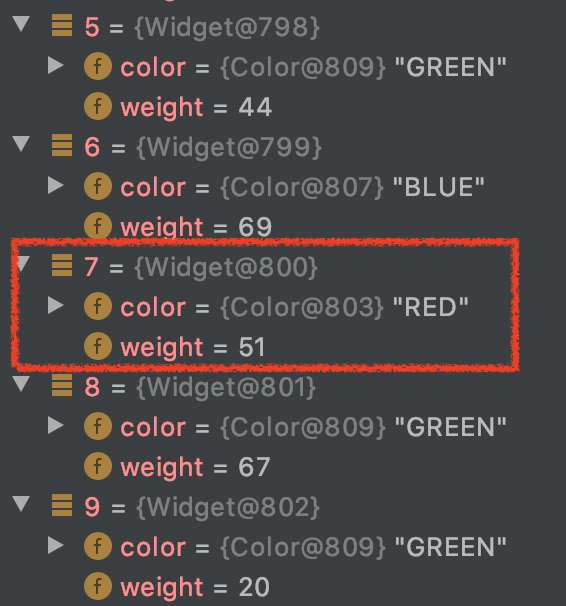 |
아래처럼 62, 13, 51을 더한 값인 126이 출력됐음을 확인 할 수 있다.

object를 참조하는 스트림인 Stream 뿐만 아니라 원시 객체를 위한 IntStream, LongStream, DoubleStream이 존재하며 이들은 모두 스트림의 일종이며 아래 설명된 특성과 제한 사항을 따른다.
계산을 수행하기 위해 스트림 작업은 스트림 파이프 라인으로 구성되며 스트림 파이프는 아래 요소들로 구성된다.
- 소스 : array, collection, 생성자 함수, I/O 채널 등
- 0개 이상의 중간 작업 :
filter(Predicate)와 같은 스트림을 다른 스트림으로 변환하는 것 등 - 터미널 작업 :
count()나forEach(Consumer)와 같이 결과나 side-effect를 생성하는 것
Streams are lazy; 소스 데이터에 대한 계산은 터미널 작업이 시작될 때만 수행되며 소스 엘리먼트는 필요한 경우에만 사용된다.
Collection과 Stream은 표현적인 유사성을 가지지만 목표는 서로 다르다. Collection은 주로 그들의 각 요소에 대한 효율적인 관리와 엑세스에 관련있다. 반면에 Stream은 그들의 요소를 직접 엑세스하거나 조작하기 위한 수단을 제공하지 않으며, 해당 소스에서 집계하여 수행될 계산 작업을 선언하는데에 관심이 있다. 그러나 제공된 스트림 작업이 원하는 기능을 제공하지 않는다면 BaseStream.iterator()이나 BaseStream.spliterator()을 사용해 제어 가능한 순회를 사용할 수 있다.
위의 "widgets" 예제와 같은 스트림 파이프 라인은 스트림 소스에서 쿼리로 볼 수 있다. ConcurrentHashMap과 같은 동시 수정을 위해 명시적으로 설계되지 않은 소스일 경우에는 이를 질의하는 도중에 스트림 소스가 수정되면 예상치 못한/잘못된 결과를 낳을 수도 있다.
대부분의 스트림 작업은 위 예제에서 mapToInt에 전달된 람다식인 wedget->w.getWeight()와 같이 사용자가 지정한 동작을 설명하는 매개 변수가 허용된다. 올바른 행동을 유지하기 위해선 다음과 같은 파라미터(함수형 인터페이스 등)을 사용해라.:
- 해당 파라미터가 스트림 소스를 수정하게 만들면 안된다. (방해가 되지 않아야 한다.)
- 대부분의 경우에 상태가 없어야 한다. (즉, 결과가 상태에 의존해 스트림 파이프 라인의 실행 중에 변경되면 안된다.)
이러한 매개 변수는 항상 Function과 같은 함수형 인터페이스이며, 종종 람다 표현식 또는 메소드 레퍼런스이다.
스트림은 (중간 또는 터미널 스트림 동작을 호출하는 단계에서) 한 번만 작동해야한다. 예를 들어, 이 규칙은 "forked" 스트림(동일한 소스가 둘 이상의 파이프 라인 또는 동일한 스트림에 대한 여러번의 순회를 가능하게 함)을 제외시킨다. 스트림이 재사용되고 있다면 스트림은 throw IllegalStateException 예외를 발생시킨다. 그러나 일부 스트림 작업은 새로운 스트림 개체가 아닌 receiver(수신기)를 반환하기 때문에 이런 경우에는 재사용을 감지하지 못한다.
스트림은 AutoCloseable의 구현하며 BaseStream.close() 메소드를 가지고 있으나 거의 모든 스트림 인스턴스에서 이를 사용한 뒤에 명시적으로 닫을 필요는 없다. 일반적으로 소스가 IO 채널인 스트림(Files.lines(Path, Charset)에 의해 반환된 스트림 등)인 경우에만 닫아야한다. 대부분의 스트림은 컬렉션, 배열 혹은 generating functions이 지원하며 특별한 리소스 관리가 필요하지 않다. (스트림을 닫을 필요가 있으면 try-with-resources 문에서 리소스로 선언하면 된다.)
스트림 파이프 라인은 순차적 혹은 병렬로도 실행될 수 있다. 이 실행 모드는 스트림의 property이다. 순차/병렬 실행에 대한 초기 선택에 의해 스트림이 생성된다. 예를 들어 Collection.stream()은 순차 스트림을 만들고 Collection.parallelStream()은 병렬 스트림을 만든다. 이 실행 모드 선택은 BaseStream.sequential() 혹은 BaseStream.parallel() 메소드에 의해 수정 될 수 있으며 BaseStream.isParallel() 메소드를 이용해 질의할 수 있다.
allMatch, anyMatch, noneMatch
| Modifier and Type | Method | Description |
|---|---|---|
| boolean | allMatch(Predicate<? super T> predicate) | Returns whether all elements of this stream match the provided predicate. |
| boolean | anyMatch(Predicate<? super T> predicate) | Returns whether any elements of this stream match the provided predicate. |
| boolean | noneMatch(Predicate<? super T> predicate) | Returns whether no elements of this stream match the provided predicate. |
모두/적어도 하나/0개가 조건에 일치하면 true를 반환하는 메소드이다.
stream Exceple 2 - XXMatch()
WidgetController에 다음처럼 색만 지정하여 widget 인스턴스를 반환하는 메소드를 추가하였다.
public Widget getColorWidget(Color color){
return Widget.builder().color(color).weight(RandomController.randomInt(1,100)).build();
}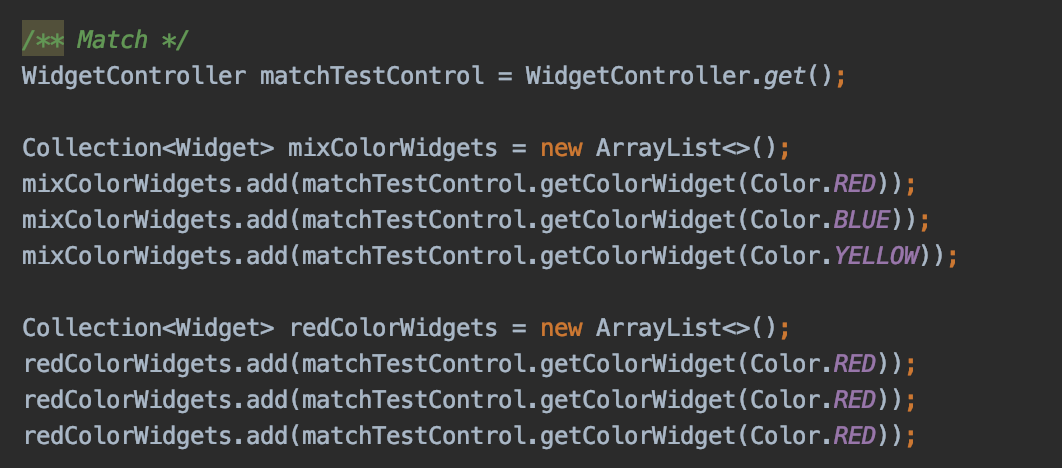 우선 빨간색, 노란색, 파란색인 각각의 위젯을 가진
 mixColorWidgets 컬렉션과 빨간색인 위젯만 가지고 있는 redColorWidgets를 생성해주었다.

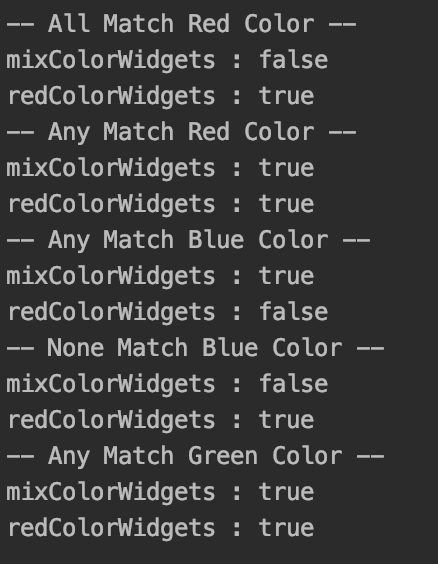
AllMatch를 통해 모두 빨간색인지 판별하는 로직이다. 첫번째는 false, 두번째는 true가 나올 것으로 예상된다.

AnyMatch를 통해 단 하나라도 빨간색인 경우와 단 하나라도 파란색인 경우를 각각 판단하였다. 위에서부터 차례대로 true, true, true, false가 예상된다.
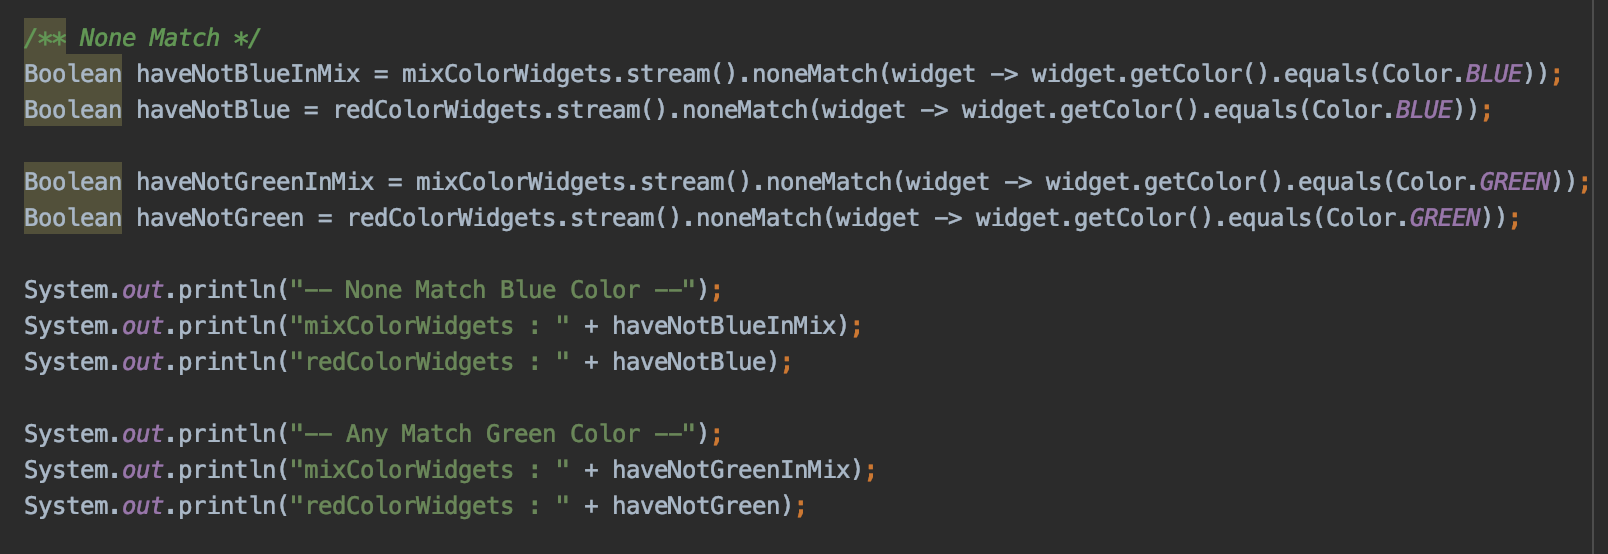
NoneMatch를 통해 모두 파란색이 아닌 경우와 모두 초록색이 아닌 경우를 각각 판단하였다. 위에서부터 차례대로 false, true, true, true가 예상된다.
실행 결과는 다음과 같다.
Main에 추가된 전체코드는 아래와 같다.
        /** Match */
        WidgetController matchTestControl = WidgetController.get();

        Collection<Widget> mixColorWidgets = new ArrayList<>();
        mixColorWidgets.add(matchTestControl.getColorWidget(Color.RED));
        mixColorWidgets.add(matchTestControl.getColorWidget(Color.BLUE));
        mixColorWidgets.add(matchTestControl.getColorWidget(Color.YELLOW));

        Collection<Widget> redColorWidgets = new ArrayList<>();
        redColorWidgets.add(matchTestControl.getColorWidget(Color.RED));
        redColorWidgets.add(matchTestControl.getColorWidget(Color.RED));
        redColorWidgets.add(matchTestControl.getColorWidget(Color.RED));

        /** All Match */
        Boolean isAllRedInMix = mixColorWidgets.stream().allMatch(widget -> widget.getColor().equals(Color.RED));
        Boolean isAllRed = redColorWidgets.stream().anyMatch(widget -> widget.getColor().equals(Color.RED));

        System.out.println("-- All Match Red Color --");
        System.out.println("mixColorWidgets : " + isAllRedInMix);
        System.out.println("redColorWidgets : " + isAllRed);

        /** Any Match */
        Boolean isAnyRedInMix = mixColorWidgets.stream().anyMatch(widget -> widget.getColor().equals(Color.RED));
        Boolean isAnyRed = redColorWidgets.stream().anyMatch(widget -> widget.getColor().equals(Color.RED));

        Boolean isAnyBlueInMix = mixColorWidgets.stream().anyMatch(widget -> widget.getColor().equals(Color.BLUE));
        Boolean isAnyBlue = redColorWidgets.stream().anyMatch(widget -> widget.getColor().equals(Color.BLUE));

        System.out.println("-- Any Match Red Color --");
        System.out.println("mixColorWidgets : " + isAnyRedInMix);
        System.out.println("redColorWidgets : " + isAnyRed);

        System.out.println("-- Any Match Blue Color --");
        System.out.println("mixColorWidgets : " + isAnyBlueInMix);
        System.out.println("redColorWidgets : " + isAnyBlue);

        /** None Match */
        Boolean haveNotBlueInMix = mixColorWidgets.stream().noneMatch(widget -> widget.getColor().equals(Color.BLUE));
        Boolean haveNotBlue = redColorWidgets.stream().noneMatch(widget -> widget.getColor().equals(Color.BLUE));

        Boolean haveNotGreenInMix = mixColorWidgets.stream().noneMatch(widget -> widget.getColor().equals(Color.GREEN));
        Boolean haveNotGreen = redColorWidgets.stream().noneMatch(widget -> widget.getColor().equals(Color.GREEN));

        System.out.println("-- None Match Blue Color --");
        System.out.println("mixColorWidgets : " + haveNotBlueInMix);
        System.out.println("redColorWidgets : " + haveNotBlue);

        System.out.println("-- Any Match Green Color --");
        System.out.println("mixColorWidgets : " + haveNotGreenInMix);
        System.out.println("redColorWidgets : " + haveNotGreen);
Test code로 작성
위와 같이 println을 이용하는 것은 여간 귀찮은 작업이 아니기 때문에, Test코드를 이용해보도록 하겠다.
pom.xml
테스트에 필요한 (내가 자주 사용하는) 테스트 라이브러리 종속성을 추가하였다.
        <!-- https://mvnrepository.com/artifact/org.mockito/mockito-core -->
        <dependency>
            <groupId>org.mockito</groupId>
            <artifactId>mockito-core</artifactId>
            <version>3.1.0</version>
            <scope>test</scope>
        </dependency>

        <!-- https://mvnrepository.com/artifact/org.mockito/mockito-junit-jupiter -->
        <dependency>
            <groupId>org.mockito</groupId>
            <artifactId>mockito-junit-jupiter</artifactId>
            <version>3.1.0</version>
            <scope>test</scope>
        </dependency>

        <!-- https://mvnrepository.com/artifact/org.junit.jupiter/junit-jupiter -->
        <dependency>
            <groupId>org.junit.jupiter</groupId>
            <artifactId>junit-jupiter</artifactId>
            <version>5.4.2</version>
            <scope>test</scope>
        </dependency>

        <!-- https://mvnrepository.com/artifact/org.hamcrest/hamcrest-all -->
        <dependency>
            <groupId>org.hamcrest</groupId>
            <artifactId>hamcrest-all</artifactId>
            <version>1.3</version>
            <scope>test</scope>
        </dependency>

        <!-- https://mvnrepository.com/artifact/org.assertj/assertj-core -->
        <dependency>
            <groupId>org.assertj</groupId>
            <artifactId>assertj-core</artifactId>
            <version>3.15.0</version>
            <scope>test</scope>
</dependency>objects/widget에서 shift + command + t를 누르면 테스트를 생성할 수 있다.
그러면 아래 그림과 같이 test 폴더 아래에 자동으로 테스트 클래스가 생성됐음을 볼 수 있을 것이다.

Main 클래스에 있던 로직들을 테스트로 옮겨주자.
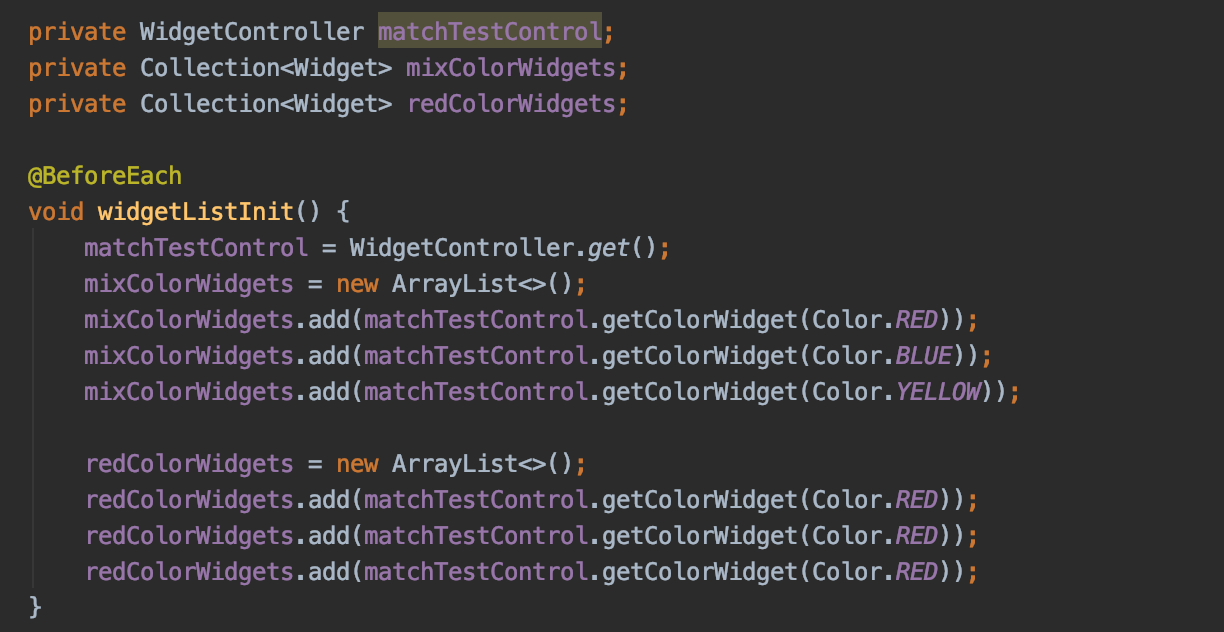 우선
우선 @BeforeEach 어노테이션을 사용해 각 테스트가 실행되기 전에 필요한 데이터를 초기화하도록 하였다.
 테스트 코드는 매우 간단하다.
 Main 클래스에서 수행한 것과 같이 stream().XXMatch( .. )를 이용하여 Boolean 값을 받아오고 assertThat을 이용해 true/false 판정을 수행하였다.
assertThat은 assertj에서 제공하는 것도 있고, hamcrest에서 제공하는 것도 있는데 필자는 Hamcrest를 사용하였다.
나머지 테스트 코드도 동일한 방식으로 작성해보자.
❗️NOTE
assertj를 사용하고 싶으면 다음처럼 작성하면 된다.
assertj와 hamcrest 중 어떤것을 선택하느냐는 취향이나 목적에 따라 다르다고 생각하는데, 지원하는 api가 조금씩 상이하므로 필요한 것으로 적절히 사용하면 되지 않을까 🤔
모든 샘플 코드는 github에서 확인 할 수 있습니다.


