[프로젝트1] 2. 도메인 설계 및 DB 연동

목표
1. 도메인 설계는 간단하게 진행하며, ORM인 JPA를 사용할 것이기 때문에 최대한 RDB에 구애받지 않도록 작성한다.
2. jpa 종속성을 추가하고, 연관된 spring 설정을 셋팅한다.
3. 도메인을 추가한다.
4. DB 연동을 확인하는 test code를 작성한다.
1. 도메인 설계
프로토타입으로 개발할 것이므로, 추후에 추가될 것을 미리 예상하기보다 지금 필요한 것들만 추가한다는 생각으로 진행할 것이다. 따라서 프로젝트가 진행되면서 추가/변경되는 Entity가 존재할 수도 있다.

현재 목표는 게시판의 목록을 출력과 글 작성하기 수준(최소한의 CRUD)이므로 게시판 도메인만 생성할 것이다.
2. Spring 설정
build.gradle에 다음과 같이 필요한 종속성을 추가하였다.
spring-data-jpa, hibernate, mysql, lombok, logback을 추가했으며 추가적으로 spring-webmvc 버전을 올려줬다.
어디서 뻑났는지 모르겠는데, spring 관련 라이브러리들은 전부 5.2.5 버전으로 돼있고 build.gradle에 명시돼있던 spring-web, spring-webmvc만 하위버전으로 돼있었다.
덕분에Error during artifact deployment에러 발생하고 톰캣이 돌아가지 않음.
artifact에 라이브러리가 안들어가있거나 잘못들어가 있을 때 생기는 문제여서 file-project structure-artifact에서 war파일에 들어갈 library를 다시 추가해주고 버전을 맞춰주었음.
plugins {
    id 'java'
}

group 'org.example'
version '1.0-SNAPSHOT'

sourceCompatibility = 1.8

repositories {
    mavenCentral()
}

dependencies {

    /***
     * test dependencies
     * */
    testCompile group: 'junit', name: 'junit', version: '4.12'
    // https://mvnrepository.com/artifact/org.springframework/spring-test
    testCompile group: 'org.springframework', name: 'spring-test', version: '5.2.5.RELEASE'

    /***
     * web dependencies
     * */
    compile 'javax.servlet:servlet-api:2.5'
    // https://mvnrepository.com/artifact/org.springframework/spring-webmvc
    compile group: 'org.springframework', name: 'spring-webmvc', version: '5.2.5.RELEASE'

    /***
     *  front template dependencies
     */
    // https://mvnrepository.com/artifact/com.github.jknack/handlebars
    compile group: 'com.github.jknack', name: 'handlebars', version: '4.0.6'
    /*// https://mvnrepository.com/artifact/com.github.jknack/handlebars-jackson2
    compile group: 'com.github.jknack', name: 'handlebars-jackson2', version: '4.0.6'*/
    // https://mvnrepository.com/artifact/com.github.jknack/handlebars-springmvc
    compile group: 'com.github.jknack', name: 'handlebars-springmvc', version: '4.0.6'

    /***
     * datebase dependencies
     * */
    // https://mvnrepository.com/artifact/org.springframework.data/spring-data-jpa
    compile group: 'org.springframework.data', name: 'spring-data-jpa', version: '2.2.6.RELEASE'
    // https://mvnrepository.com/artifact/org.hibernate/hibernate-entitymanager
    compile group: 'org.hibernate', name: 'hibernate-entitymanager', version: '5.4.10.Final'
    // https://mvnrepository.com/artifact/mysql/mysql-connector-java
    compile group: 'mysql', name: 'mysql-connector-java', version: '8.0.15'

    /***
     * lombok annotation dependencies
     * */
    // https://mvnrepository.com/artifact/org.projectlombok/lombok
    compile group: 'org.projectlombok', name: 'lombok', version: '1.18.12'

    testCompileOnly("org.projectlombok:lombok:1.18.12")
    annotationProcessor("org.projectlombok:lombok:1.18.12")
    testAnnotationProcessor("org.projectlombok:lombok:1.18.12")

    /***
     * logger dependencies
     * */
    // https://mvnrepository.com/artifact/org.slf4j/slf4j-api
    compile group: 'org.slf4j', name: 'slf4j-api', version: '1.7.30'

    // https://mvnrepository.com/artifact/ch.qos.logback/logback-classic
    compile group: 'ch.qos.logback', name: 'logback-classic', version: '1.2.3'
    // https://mvnrepository.com/artifact/ch.qos.logback/logback-classic
    testCompile group: 'ch.qos.logback', name: 'logback-classic', version: '1.2.3'

}
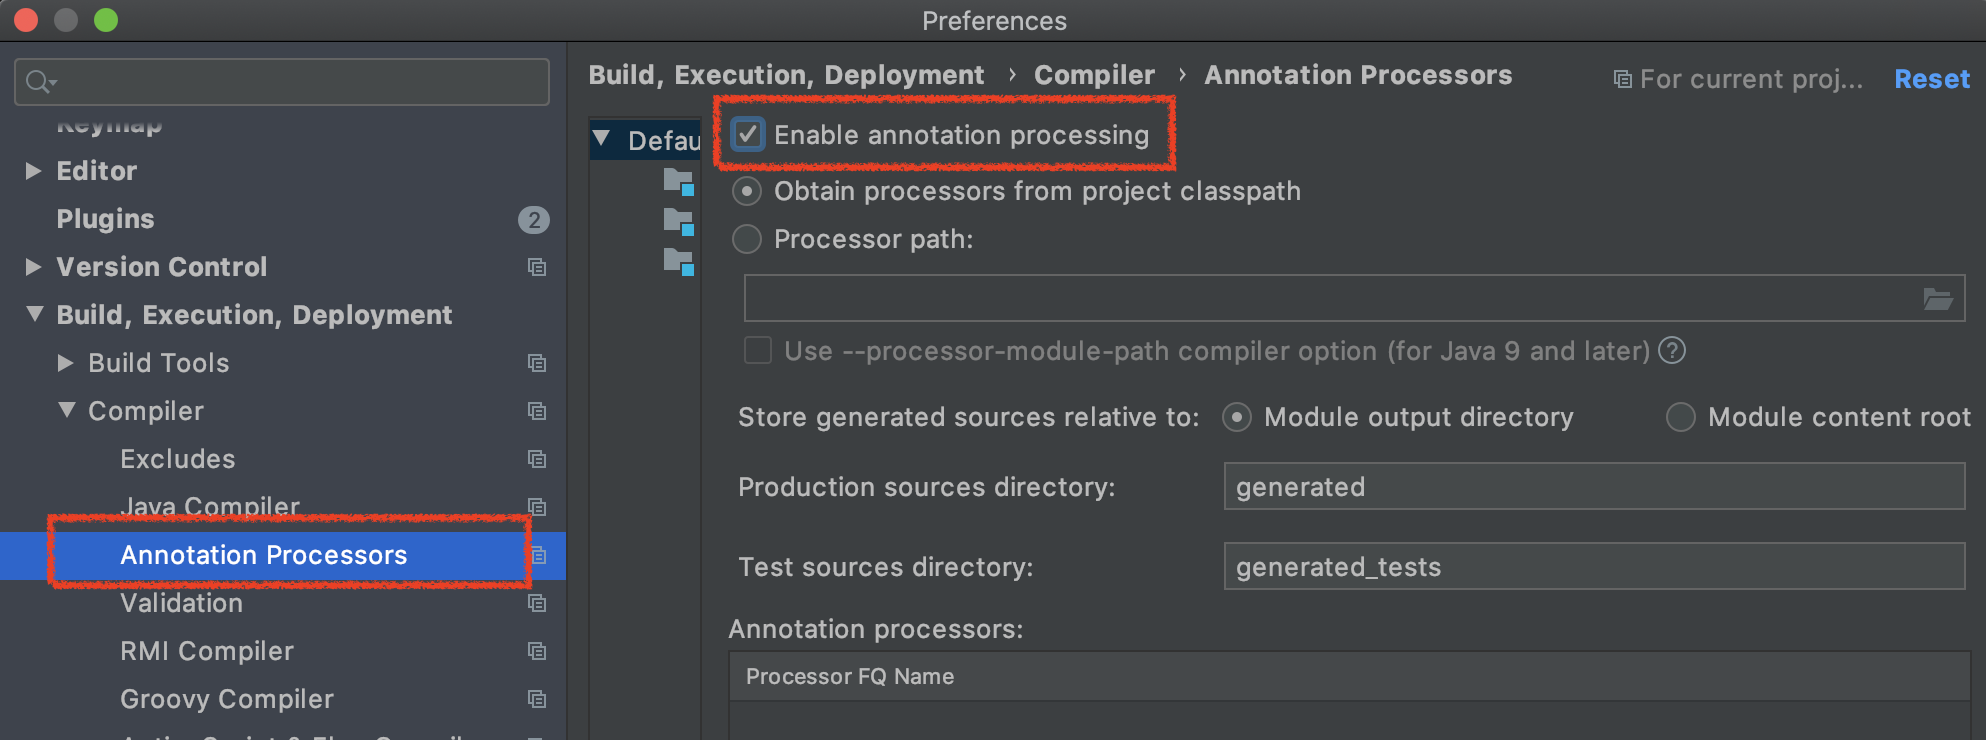
📌 Preferences - Build, Execution, Deployment - Compiler - Annotaion Process 의 Enable annotation processing 을 체크해야 lombok을 사용하는데 문제가 생기지 않는다.
logback 설정
src/main/resource에 logback.xml을 추가하여 디버깅에 필요한 최소한의 설정을 작성한다.
이 경로와 파일명은 규격이므로 반드시 지키도록 한다.
<configuration>

    <appender name="STDOUT" class="ch.qos.logback.core.ConsoleAppender">
        <layout class="ch.qos.logback.classic.PatternLayout">
            <Pattern>
                %date{yyyy-MM-dd HH:mm:ss.SSS} [%-5level] [%thread] [%class{0}.%method:%line] - %msg %xException%n
            </Pattern>
        </layout>
    </appender>

    <logger name="org.springframework" level="WARN" additivity="false">
        <appender-ref ref="STDOUT" />
    </logger>

    <root level="debug">
        <appender-ref ref="STDOUT" />
    </root>

</configuration>
MySQL 추가하기
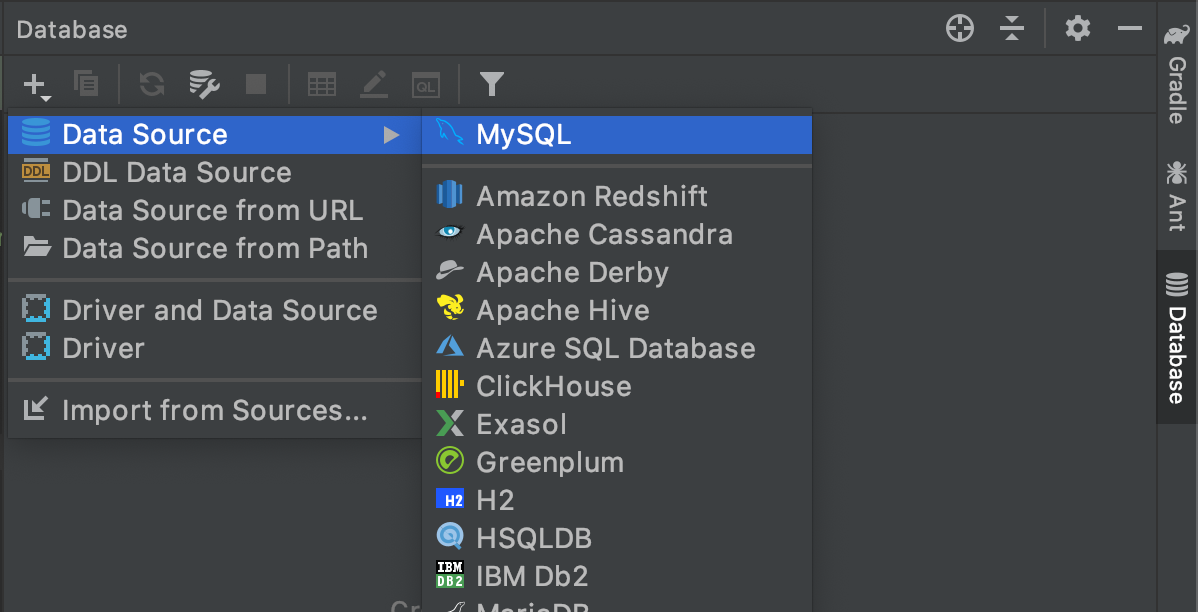 우측의 Database 탭에 들어간 뒤
 ﹢ 버튼을 눌러 MySQL을 추가해준다. workbench를 사용하거나 terminal을 사용해도 무관하나 이렇게 등록해두면 IDE에서 굳이 벗어나서 다른 작업을 할 필요가 없기 때문에 꽤 편하게 사용할 수 있다.
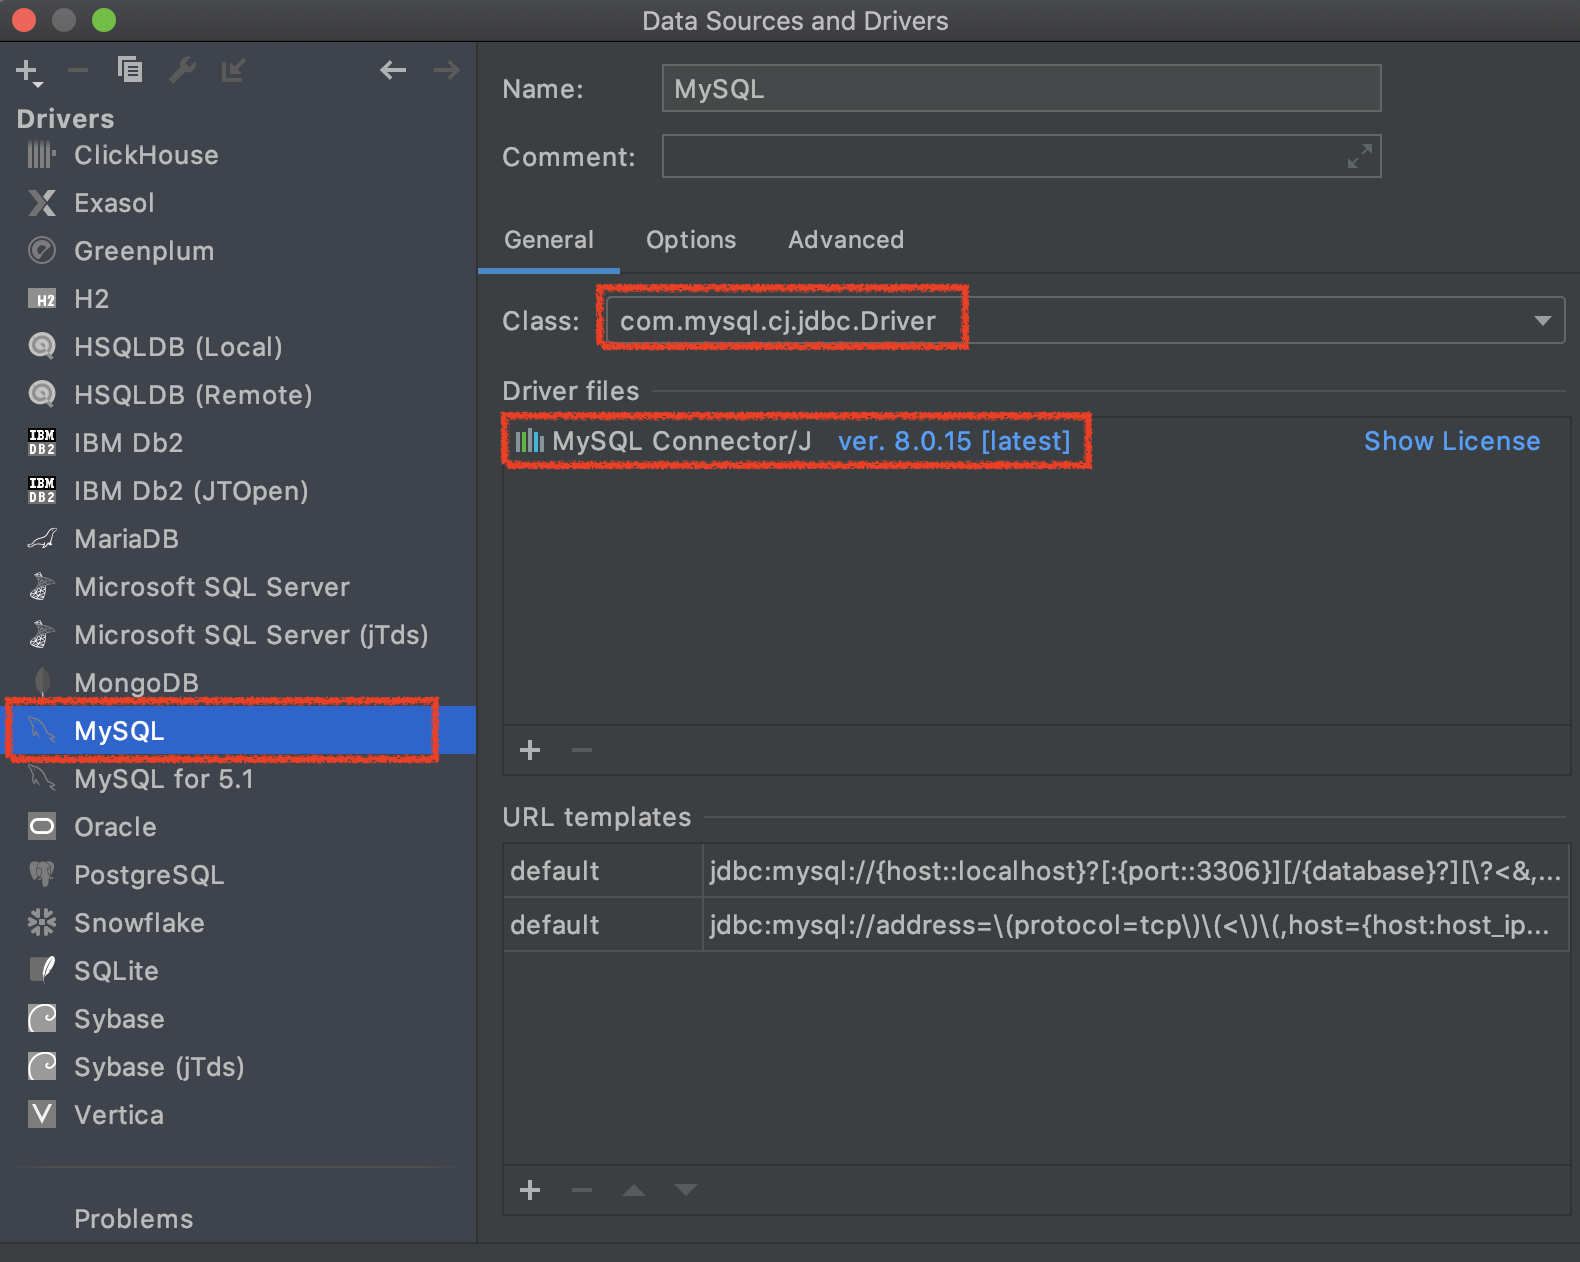 우선 좌측 목록을 내리다보면
 MySQL 탭이 있을 것이다. 여기서 드라이버를 설정하게 되는데 위의 build.gradle에 설정한 종속성과 동일한 버전인지 체크하자.
Class 이름은 추후에 데이터 베이스 연결시테 사용하므로 건들지 않는다.

url에 뒤의 serverTimezone=UTC를 붙이지 않으면 Server returns invalid timezone. Go to 'Advanced' tab and set 'serverTimezone' property manually.라는 오류가 나게되는데 이는 데이터 베이스에서 스키마를 만들 때 따로 설정해주지 않아서 생기는 것이다.
데이터베이스로 들어가 아래의 쿼리를 입력
SELECT @@global.time_zone, @@session.time_zone; 위 이미지처럼 뜬다면 시스템 설정에 따르겠다는건데 DB와 연동하는 시스템에서 설정을 명시하지 않았기 때문에 오류가 발생할 것이다.
✏️ xml 수정
applicationContext.xml
ref. https://www.baeldung.com/the-persistence-layer-with-spring-and-jpa
비어있던 applicationContext.xml에 다음과 같이 내용을 추가한다.
<?xml version="1.0" encoding="UTF-8"?>
<beans xmlns="http://www.springframework.org/schema/beans"
xmlns:xsi="http://www.w3.org/2001/XMLSchema-instance"
xmlns:jpa="http://www.springframework.org/schema/data/jpa"
xmlns:context="http://www.springframework.org/schema/context"
xsi:schemaLocation="http://www.springframework.org/schema/beans http://www.springframework.org/schema/beans/spring-beans.xsd
http://www.springframework.org/schema/data/jpa
http://www.springframework.org/schema/data/jpa/spring-jpa-1.8.xsd
http://www.springframework.org/schema/context
http://www.springframework.org/schema/context/spring-context.xsd">
<bean id="entityManagerFactory" class="org.springframework.orm.jpa.LocalContainerEntityManagerFactoryBean">
<property name="dataSource" ref="dataSource" />
<property name="packagesToScan" value="com.freeboard01.domain" />
<property name="jpaVendorAdapter">
<bean class="org.springframework.orm.jpa.vendor.HibernateJpaVendorAdapter" />
</property>
<property name="jpaProperties">
<props>
<prop key="hibernate.hbm2ddl.auto">update</prop>
<prop key="hibernate.dialect">org.hibernate.dialect.MySQL5Dialect</prop>
</props>
</property>
</bean>
<bean id="dataSource" class="org.springframework.jdbc.datasource.DriverManagerDataSource">
<property name="driverClassName" value="com.mysql.cj.jdbc.Driver"/>
<property name="url" value="jdbc:mysql://호스트:포트넘버/스키마 이름?serverTimezone=UTC&useSSL=false"/>
<property name="username" value="DB 유저 아이디"/>
<property name="password" value="DB 유저 비밀번호"/>
</bean>
<bean id="transactionManager" class="org.springframework.orm.jpa.JpaTransactionManager">
<property name="entityManagerFactory" ref="entityManagerFactory" />
</bean>
<jpa:repositories base-package="com.freeboard01.domain" />
<context:component-scan base-package="com.freeboard01.domain">
<context:include-filter type="annotation" expression="org.springframework.stereotype.Repository" />
<context:include-filter type="annotation" expression="org.springframework.stereotype.Service" />
<context:include-filter type="annotation" expression="org.springframework.stereotype.Component" />
<context:exclude-filter type="annotation" expression="org.springframework.stereotype.Controller"/>
</context:component-scan>
</beans>
.properties파일을 이용해도 되지만 추후에 변경하도록 하고 지금은 하드코딩으로 진행하도록 하자.
entityManagerFactory
- EntityManager 인스턴스를 관리하는 주체
- 어플리케이션을 통들어 하나만 존재하며 공유된다.
- property
dataSource를 참조하고 있는데 이는 아래에 연결할 DB와 유저정보로써DriverManagerDataSource빈으로 등록되어있다. 여기 들어가는driverClassName은 위에서 드라이버 설정할 때 Class에 적어놓은 이름을 사용하면된다.packagesToScan: 어노테이션 기반으로 스캔할 패키지이다.jpaVendorAdapter: Jpa는 인터페이스로서 다양한 구현체가 존재하는데 구현체별 설정을 지원하기 위한 클래스이다.<prop key="hibernate.hbm2ddl.auto">update</prop>: @Entity 어노테이션이 쓰인 클래스를 확인해 hibernate가 연결된 DB에 자동으로 특정 작업을 수행하게 해준다.
ref. http://chomman.github.io/blog/java/hibernate-hbm2ddl-%EC%84%A4%EC%A0%95/<prop key="hibernate.dialect">org.hibernate.dialect.MySQL5Dialect</prop>: 사용하는 DB에 맞춰 hibernate가 적절한 프로퍼티값을 선택할 수 있게 한다.
transactionManager
JpaTransactionManager : JPA를 지원하는 TransactionManager를 등록한다. 프로퍼티로 위에서 먼저 설정한 entityManagerFactory를 가진다.
namespace를 이용한 빈 스캔
jpa:repositories: @Repository를 스캔하여 JPA repository로 사용할 수 있도록 자동등록한다.context:component-scan: 데이터베이스에서 사용하게 될 빈들을 명시하여 등록한다.context:include-filter: 어노테이션을 사용하므로 이를 명시하고 Repository, Service, Component 어노테이션을 가진 클래스를 빈으로 등록한다.context:exclude-filter: dispatcher-servlet.xml에서 @Controller 어노테이션을 가진 클래스를 빈으로 등록하라고 명시했기 때문에 이를 제외해준다.
dispatcher-servlet.xml
<?xml version="1.0" encoding="UTF-8"?>
<beans xmlns="http://www.springframework.org/schema/beans"
       xmlns:xsi="http://www.w3.org/2001/XMLSchema-instance"
       xmlns:context="http://www.springframework.org/schema/context"
       xmlns:mvc="http://www.springframework.org/schema/mvc"
       xsi:schemaLocation="http://www.springframework.org/schema/beans
                           http://www.springframework.org/schema/beans/spring-beans.xsd
                           http://www.springframework.org/schema/context
                           http://www.springframework.org/schema/context/spring-context.xsd
                           http://www.springframework.org/schema/mvc
                           http://www.springframework.org/schema/mvc/spring-mvc.xsd">
    <mvc:annotation-driven />
    <context:component-scan base-package="com.freeboard01.controller" use-default-filters="false">
        <context:include-filter type="annotation" expression="org.springframework.stereotype.Controller"/>
    </context:component-scan>
    <bean class="org.springframework.web.servlet.view.InternalResourceViewResolver">
        <property name="prefix" value="/WEB-INF/view/"></property>
        <property name="suffix" value=".jsp"></property>
    </bean>
</beans>
3. domain package
domain 생성
앞서 생성한 controller와 같은 댑스에 domain 패키지를 만들고 하위에 board 패키지를 만들었다.
Id는 데이터베이스의 자동생성을 사용하고, createAt/updateAt은 어노테이션을 사용해 자동으로 셋되게 하였다.
@Entity
@Getter
@Table(name = "board")
@NoArgsConstructor
public class BoardEntity {

    @Id
    @Setter
    @GeneratedValue(strategy = GenerationType.IDENTITY)
    private long id;

    @CreationTimestamp
    @Column
    private LocalDateTime createdAt;

    @UpdateTimestamp
    @Column
    private LocalDateTime updatedAt;

    @Column
    private String user;

    @Column
    private String password;

    @Column
    private String contents;

    @Column
    private String title;

    @Builder
    public BoardEntity(String user, String password, String contents, String title){
        this.user = user;
        this.password = password;
        this.contents = contents;
        this.title = title;
    }
}
repository 생성
boardEntity와 같은 뎁스에 BoardRepository를 생성한다.
package com.freeboard01.domain.board;

import org.springframework.data.jpa.repository.JpaRepository;
import org.springframework.stereotype.Component;
import org.springframework.stereotype.Repository;

@Repository
public interface BoardRepository extends JpaRepository<BoardEntity, Long> {

}
톰캣을 띄워 서버가 문제없이 올라간 것을 확인한 뒤, 데이터 베이스를 refresh하면 다음과 같이 테이블이 생성됨을 확인할 수 있다.

테스트 코드를 이용해 Data 추가하기
domain/board/BoardRepository.java에서 command + control + t를 누르면 테스트 클래스를 생성할 수 있다.
@RunWith(SpringJUnit4ClassRunner.class)
@ContextConfiguration(locations={"file:src/main/webapp/WEB-INF/applicationContext.xml"})
@Transactional
@Rollback(value = false)
public class boardRepositoryIntegrationTest {

    @Autowired
    private BoardRepository boardRepository = null;

    @Test
    public void test1(){
        BoardEntity entity = BoardEntity.builder().user("myName").password("1234").contents("test data~").build();
        boardRepository.save(entity);
    }

}
일단은 테스트 코드를 통해 데이터가 잘 삽입되는 것을 확인하는 것이 목표이므로 IntegrationTest를 작성해 눈으로 DB에서 데이터를 확인하도록 하겠다.
JUnit4를 사용할 것이므로 해당 클래스를 함께 이용할 것을 명시하고, DB설정이 들어가있는 applicationContext.xml파일을 context 설정으로 추가한다.
@Transactional이 포함된 테스트 코드는 테스트가 끝나는 즉시 롤백하므로 @Rollback(value = false)를 추가함으로써 강제로 롤백을 막도록 한다.
간단하게 테스트 코드를 작성하고 실행시키면 아래와 같이 데이터가 추가된 것을 볼 수 있을 것이다.

🔎 현재 디렉토리 구조는 아래와 같다.

4. 톰캣 실행오류 해결하기
serverTimezone
✔️발생한 오류
org.hibernate.engine.jdbc.spi.SqlExceptionHelper.logExceptions The server time zone value 'KST' is unrecognized or represents more than one time zone. You must configure either the server or JDBC driver (via the serverTimezone configuration property) to use a more specifc time zone value if you want to utilize time zone support.
✔️해결
DataSource 빈 설정에 <property name="url" value="jdbc:mysql://127.0.0.1:3306/free_board?serverTimezone=UTC"/>로 변경.
serverTimezone을 설정해주지 않아서 생긴 오류
useSSL
✔️발생한 오류
javax.net.ssl.SSLException: closing inbound before receiving peer's close_notify
 jpa 설정에서 계속 터지고 있음.
ref. https://wiki.kldp.org/HOWTO/html/SSL-Certificates-HOWTO/x70.html
🤔SSL이란
SSL(Secure Socket Layer) 프로토콜은 처음에 Netscape사에서 웹서버와 브라우저 사이의 보안을 위해 만들었다. SSL은 Certificate Authority(CA)라 불리는 서드 파티로부터 서버와 클라이언트의 인증을 하는데 사용된다.
✔️해결
DataSource 빈 설정에 <property name="url" value="jdbc:mysql://127.0.0.1:3306/free_board?serverTimezone=UTC&useSSL=false"/>로 변경.
인증의 일종인 ssl을 사용하지 않겠다고 명시하였다.
&는 xml 파일에서 &를 사용하기 위해 쓰이는 이스케이프문자이다.
Bean 생성 오류
✔️발생한 오류
Caused by: org.springframework.beans.factory.BeanCreationException: Error creating bean with name 'boardRepository': Invocation of init method failed; nested exception is java.lang.IllegalArgumentException: Not a managed type: class java.lang.Object
✔️해결
 Repository어노테이션과 관련된 에러인 줄 알았는데, 그게아니라 JpaRepository를 상속받은 객체를 빈으로 만드는데서 문제가 생긴 것이었다.
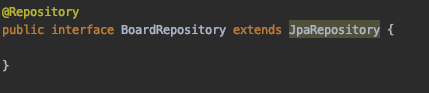
위에 ErrorCode를 자세히 살펴보면 Object 타입은 관리할 수 없다고 말하는데 JpaRepository interface는 두 개의 Generic type을 가지고 있고 나는 이를 명시하지 않아 자동으로 Object type이 등록된 것 같음.
따라서 위를 아래 이미지처럼 Generic type을 명시함으로써 고칠 수 있었다.