
목표
1. 댓글 출력을 구현한다.
2. 댓글 추가와 삭제를 구현한다.
Front에 댓글 기능 추가하기
댓글 출력
템플릿 생성
view/template 하위에 comments.hbs 파일을 추가한다.
<script id="commentsTemplate" type="text/x-handlebars-template">
    <div class="row border-top border-primary py-3">
        <div class="col-12">Comments</div>
    </div>
    \{{#comments}}
    <div class="row border-bottom py-1" data-id="\{{id}}">
        <p class="col-2" style="margin-bottom: 0; !important">\{{writer.accountId}}</p>
        <p class="col-7" style="margin-bottom: 0; padding-right: 0; padding-left: 0; !important">\{{contents}}</p>
        <p class="col-3" style="margin-bottom: 0; padding-right: 0; !important"><small>\{{createdAt}}</small></p>
        </div>
    \{{/comments}}
</script>
데이터는 comments라는 key를 가지는 배열로 전달받을 것이다.
view/template/modal.hbs 파일에 위 댓글 템플릿이 랜더링될 자리를 만들어준다.

api 요청 후 랜더링
board.hbs 파일을 수정한다.
게시글 내용은 페이지 마다 통채로 가져오지만 댓글은 게시글을 클릭하는 경우에만 가져오도록 할 것이다.
우선 만들어둔 commentsTemplate을 추가해준다.
// 생략

{{#partial "js"}}
    {{> template/table}}
    {{> template/pageMarker}}
    {{> template/modal}}
    {{> template/comments}} // 추가된 부분

  // 생략

{{/partial}}
게시글 목록의 각 row를 누르면 같은 파일(board.hbs)의 fetchDetails 함수가 호출되는데 모달이 열리기 전에 데이터와 모달 내 레이아웃을 수정하는 함수이므로 이 때 api 호출과 댓글 랜더링을 수행할 것이다.
var fetchDetails = (index) => {
nowBoardIndex = index;
setModalData(index);
setModifyModal();
getComments(nowBoardList[index].id, 1, setComments);
$('#boardModal').modal("show");
}
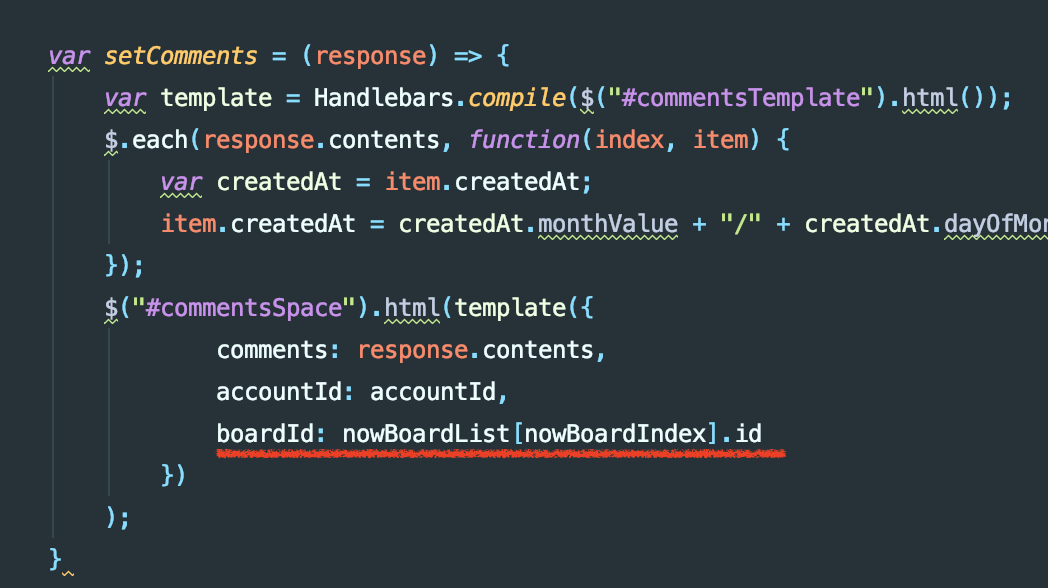
var setComments = (response) => {
var template = Handlebars.compile($("#commentsTemplate").html());
$.each(response.contents, function(index, item) {
var createdAt = item.createdAt;
item.createdAt = createdAt.monthValue + "/" + createdAt.dayOfMonth + " (" + createdAt.hour + ":" + createdAt.minute + ")"
});
$("#commentsSpace").html(template({comments: response.contents, accountId: accountId}));
}
var getComments = (boardId, page = 1, callback = null) => {
const SIZE = 5;
$.ajax({
method: 'GET',
url: 'api/comments?page=' + page + "&size=" + SIZE + "&boardId=" + boardId
}).done(function (response) {
if (typeof response != 'undefined') {
if (typeof response.code != 'undefined') {
alert(response.message);
} else if (callback != null) {
callback(response);
}
}
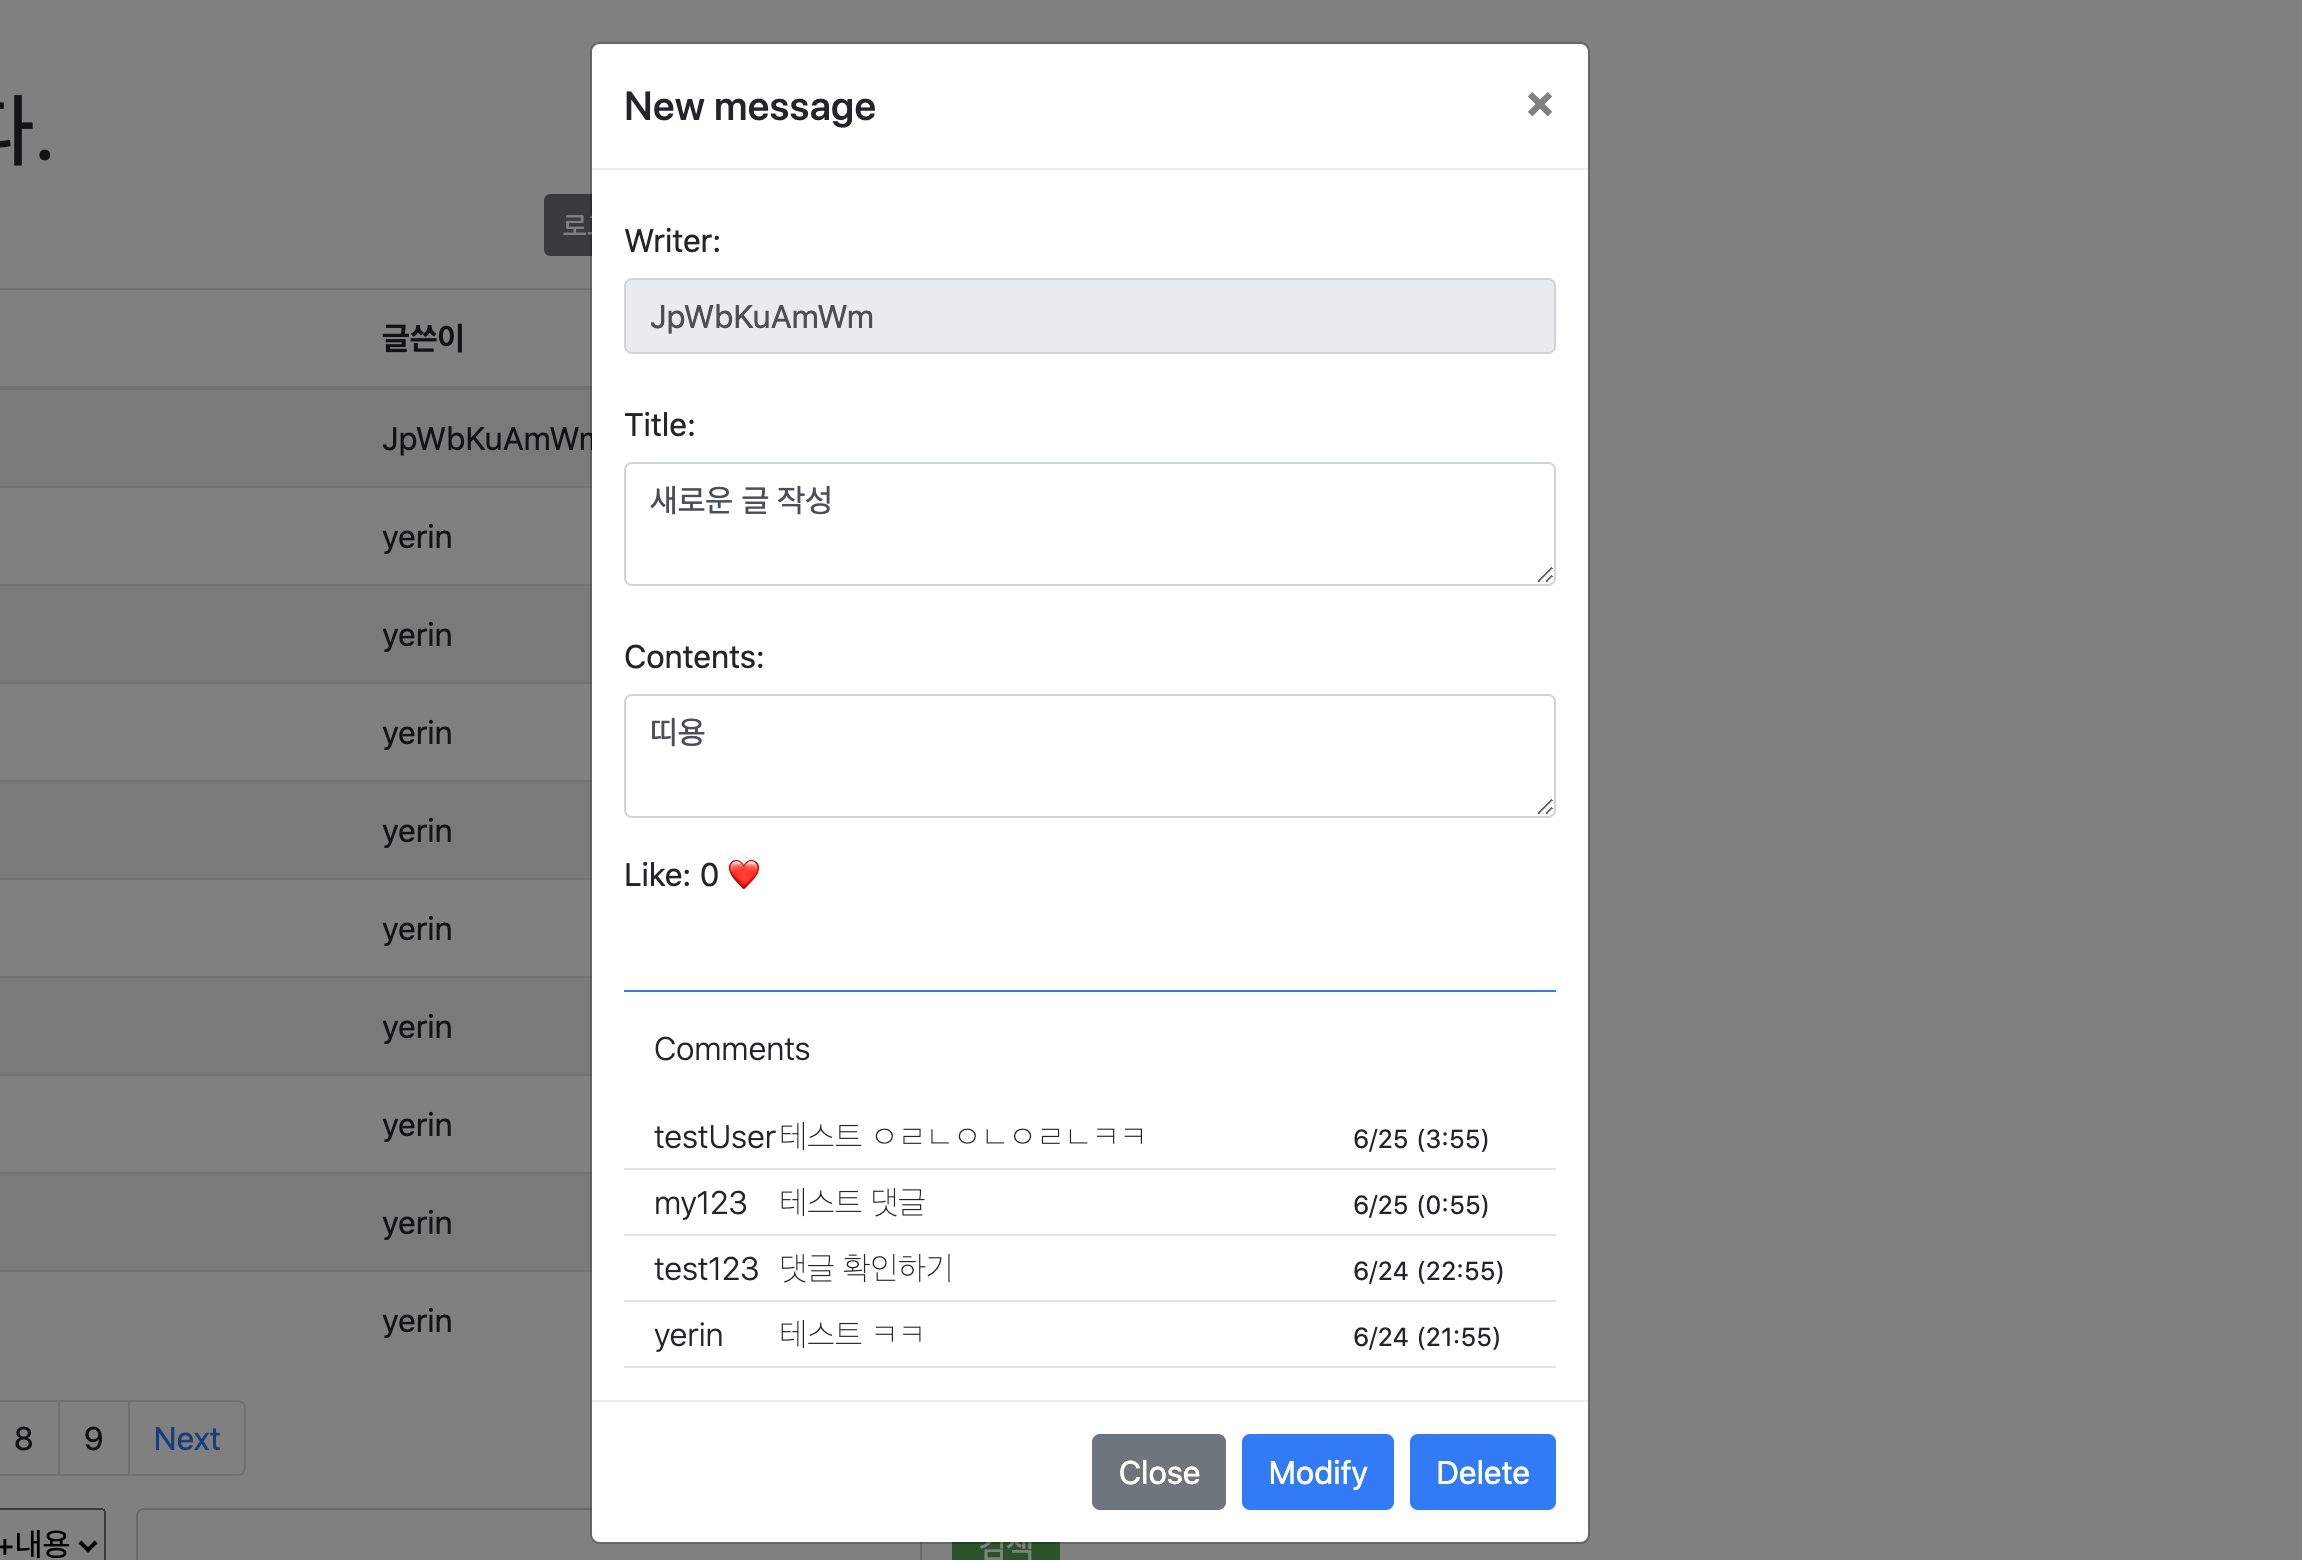
})
}댓글이 랜더링된 모달은 아래와 같다.
댓글 작성
comments.hbs
 댓글 작성란을 추가한다. 간단하게 인풋태그와 버튼만으로 이뤄져있으며 api 요청을 보낼 때 게시글 id가 필요하므로
 data-boardId=\{{boardId}} attribute를 추가하였다.
<script id="commentsTemplate" type="text/x-handlebars-template">
    <div class="row border-top border-primary py-3">
        <div class="col-12 mb-2">Comments</div>
        <div class="col-10" style="padding-left: 0; !important"><input type="text" class="form-control" id="commentInput"></div>
        <button type="button" class="col-2 btn btn-primary btn-sm" id="addCommentButton" data-boardId=\{{boardId}}>댓글 입력</button>
    </div>
    \{{#comments}}
    <div class="row border-bottom py-1" data-id="\{{id}}">
        <p class="col-2" style="margin-bottom: 0; !important">\{{writer.accountId}}</p>
        <p class="col-7" style="margin-bottom: 0; padding-right: 0; padding-left: 0; !important">\{{contents}}</p>
        <p class="col-3" style="margin-bottom: 0; padding-right: 0; !important"><small>\{{createdAt}}</small></p>
        </div>
    \{{/comments}}
</script>
board.hbs
setComments 함수에서 템플릿에 넘겨줄 오브젝트에 boardId를 담아준다.
댓글을 입력하는 버튼을 누르면 (1) 서버로 보낼 폼을 생성하고, (2) api 요청을 보낸뒤 (3) 성공하면 댓글 첫페이지를 데이터를 다시 요청해 재랜더링한다.
$(document).on('click', '#addCommentButton', function (event) {
      var commentForm = setCommentForm();

   $.ajax({
      method: 'POST',
      url: 'api/comments?boardId=' + event.target.dataset.boardid,
      contentType: 'application/json',
      data: JSON.stringify(commentForm)
   }).done(function (response) {
      if (typeof response != 'undefined') {
        if (typeof response.code != 'undefined') {
           alert(response.message);
        } else {
           getComments(event.target.dataset.boardid, 1, setComments);
        }
      }
   })
})

var setCommentForm = () => {
   var commentForm = new Object();
   commentForm.contents = $("#commentInput").val();
   return commentForm;
}
서비스를 실행해서 댓글을 달아보자 🙋🏻
자동으로 댓글란이 재랜더링되기 때문에 마치 새로 단 댓글만 추가되는 것처럼 보일 것이다.
| 댓글 달기 전 | 새로운 댓글 단 후 |
|---|---|
 |  |
댓글 삭제
사실 수정도 만들어야하는데.. ㅎㅎ.. 귀찮아서 못 만들겠다.; 댓글을 예쁘게 잘 다는게 목적이 아니라 댓글 개수를 이용해서 스케줄링을 해보는게 목적이기 때문에 (서버에는 이미 만들어뒀지만) 프론트에서는 댓글 수정은 안만들거다 🙅🏻
comments.hbs
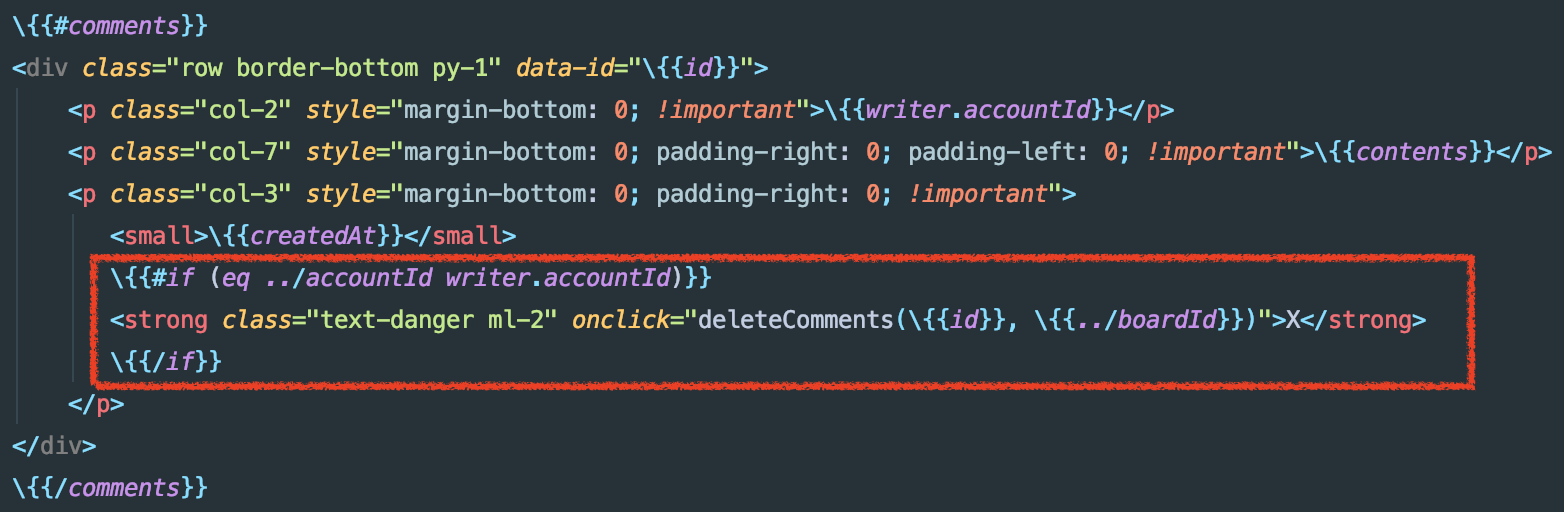 댓글 작성 일시 옆에 댓글 작성자와 현재 로그인한 계정이 동일하면
 X 표시가 나타나는 코드를 추가하였다.
if문 안에서 사용되고 있는 eq는 handleber helper로 미리 layout에 추가해둔 라이브러리를 이용하는 것이다. (view/layout/layout.hbs 파일에 <script src="https://unpkg.com/just-handlebars-helpers@1.0.16/dist/h.min.js"></script>이다. 자세한 내용은 여기를 참고하라.)
../accountId에서 ../는 파일 탐색을 할 때 상위 위치로 이동하는 것과 같은 이치로 동작한다. 지금 위치가 순회중인 comments 리스트 내부이므로 여길 빠져나가는 것이다.
전체 코드는 아래와 같다.
<script id="commentsTemplate" type="text/x-handlebars-template">
    <div class="row border-top border-primary py-3">
        <div class="col-12 mb-2">Comments</div>
        <div class="col-10" style="padding-left: 0; !important"><input type="text" class="form-control" id="commentInput"></div>
        <button type="button" class="col-2 btn btn-primary btn-sm" id="addCommentButton" data-boardId=\{{boardId}}>댓글 입력</button>
    </div>
    \{{#comments}}
    <div class="row border-bottom py-1" data-id="\{{id}}">
        <p class="col-2" style="margin-bottom: 0; !important">\{{writer.accountId}}</p>
        <p class="col-7" style="margin-bottom: 0; padding-right: 0; padding-left: 0; !important">\{{contents}}</p>
        <p class="col-3" style="margin-bottom: 0; padding-right: 0; !important">
           <small>\{{createdAt}}</small>
           \{{#if (eq ../accountId writer.accountId)}}
           <strong class="text-danger ml-2" onclick="deleteComments(\{{id}}, \{{../boardId}})">X</strong>
           \{{/if}}
        </p>
    </div>
    \{{/comments}}
</script>
board.hbs
X 표시를 누르면 delete 요청을 보내는 함수를 추가한다. 삭제에 성공하면 댓글 첫페이지로 리로드한다.
var deleteComments = (commentId, boardId) => {
  $.ajax({
      method: 'DELETE',
      url: 'api/comments/' + commentId
  }).done(function (response) {
      if (typeof response != 'undefined' && typeof response.code != 'undefined') {
          alert(response.message);
      } else {
          getComments(boardId, 1, setComments);
      }
  })
}
직접 웹에서 댓글을 작성하고 삭제하는 과정을 수행해보자!
| 댓글 2개 추가 | 2번째 댓글(먼저 작성한 것)의 X 버튼 클릭 후 |
|---|---|
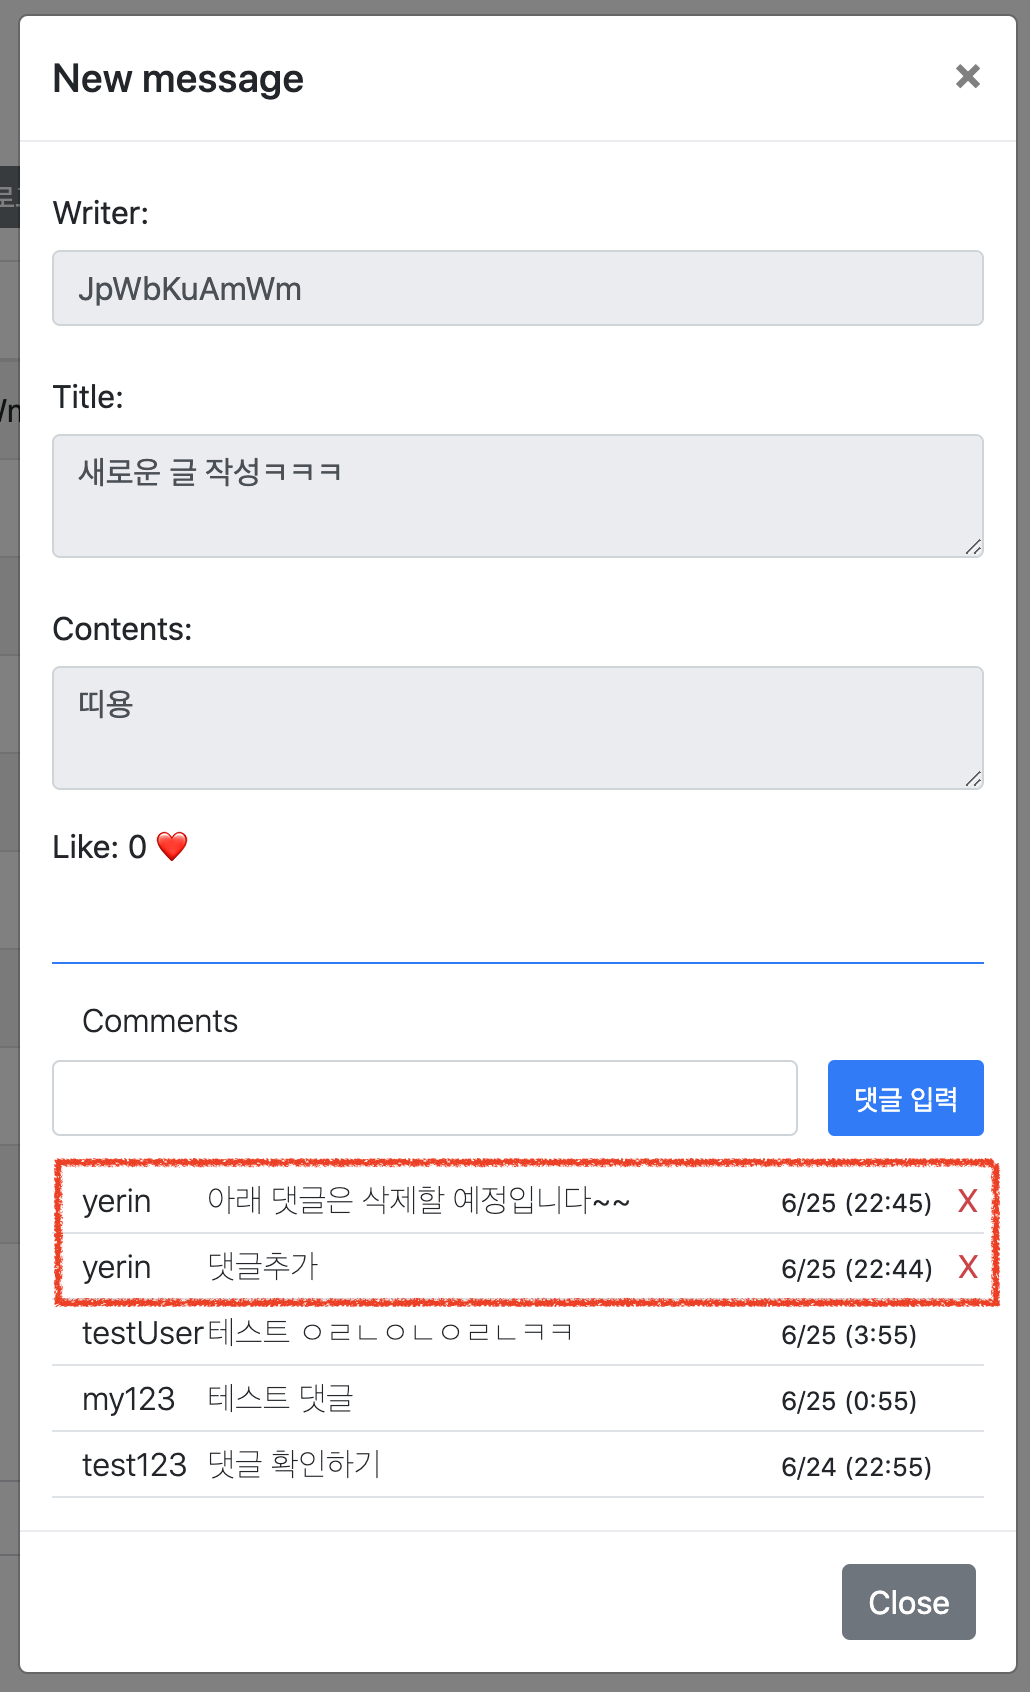 내가 쓴 댓글에만 X 표시가 나타나는 것을 확인 할 수 있다. 내가 쓴 댓글에만 X 표시가 나타나는 것을 확인 할 수 있다. | 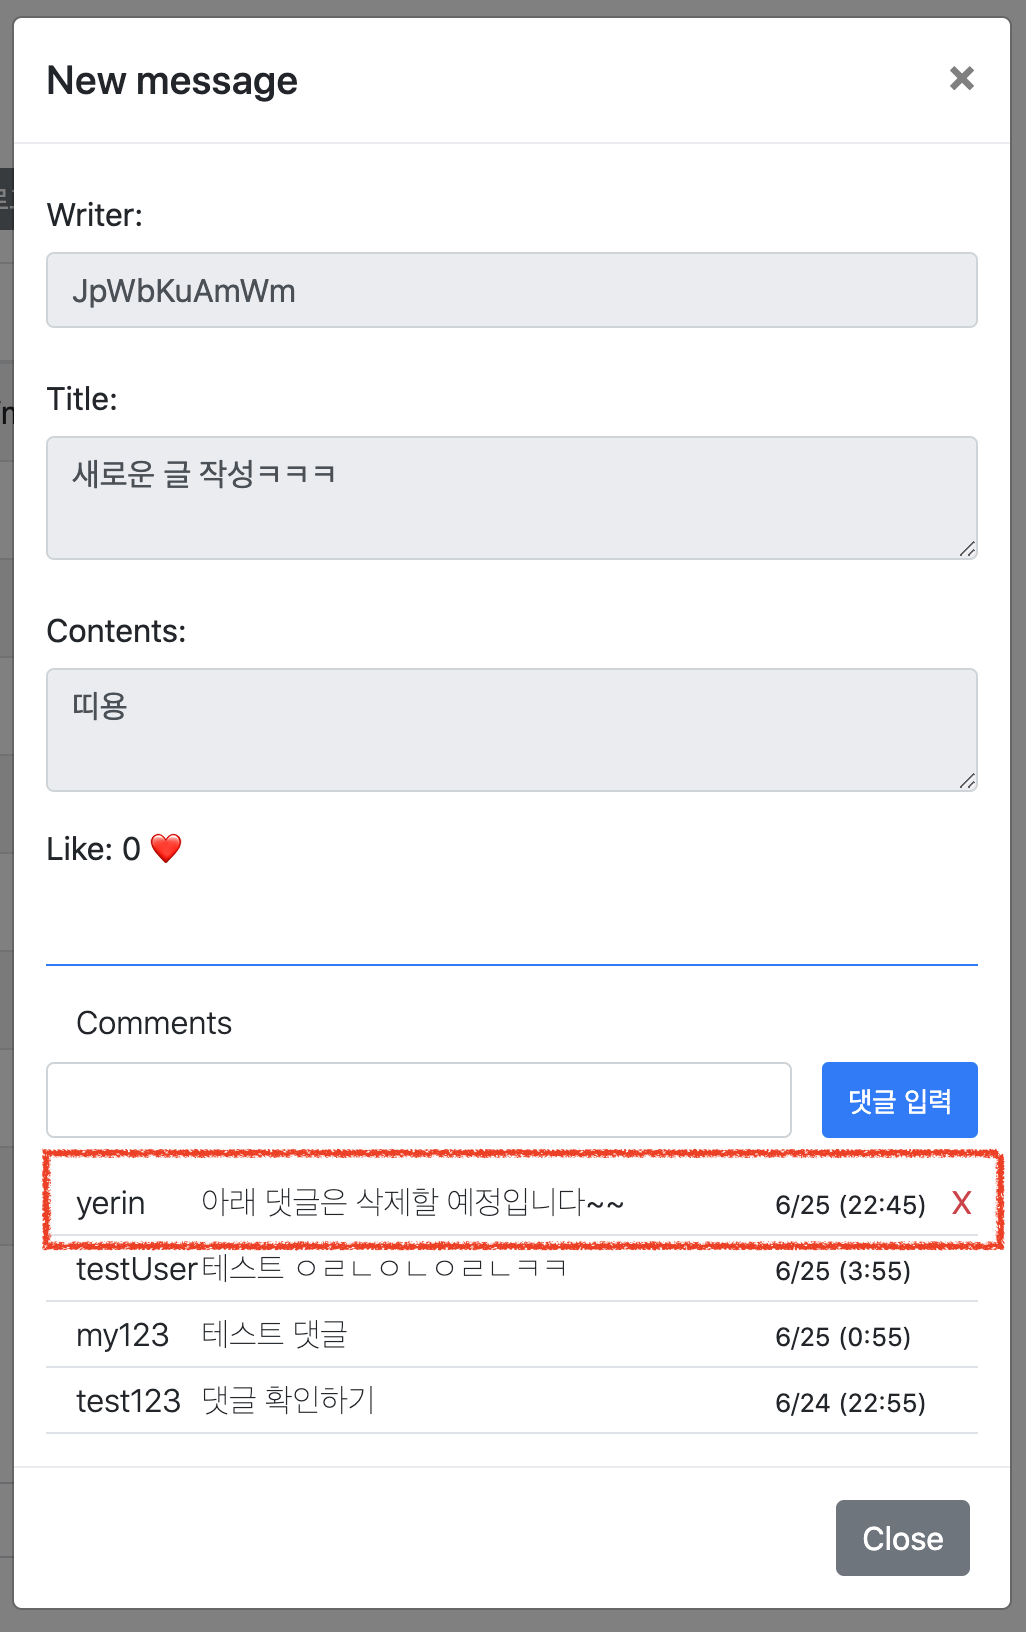 |
🙅🏻 원래 댓글도 페이징 처리를 하려고 서버 로직은 짜놨으나.. 수정을 생략하는 것과 같은 이유로 이것도 생략하도록 하겠다.
다음 게시글부터 본격적으로 배치 잡을 추가할 것이다!
전체 코드는 github에서 확인할 수 있습니다.