
Apple Developer

Overview

- 단일 열에 행을 사용하여 데이터를 표시하는 뷰
- Table View는 수직 스크롤 콘텐츠 행을 단일 열에 표시
Table View 생성
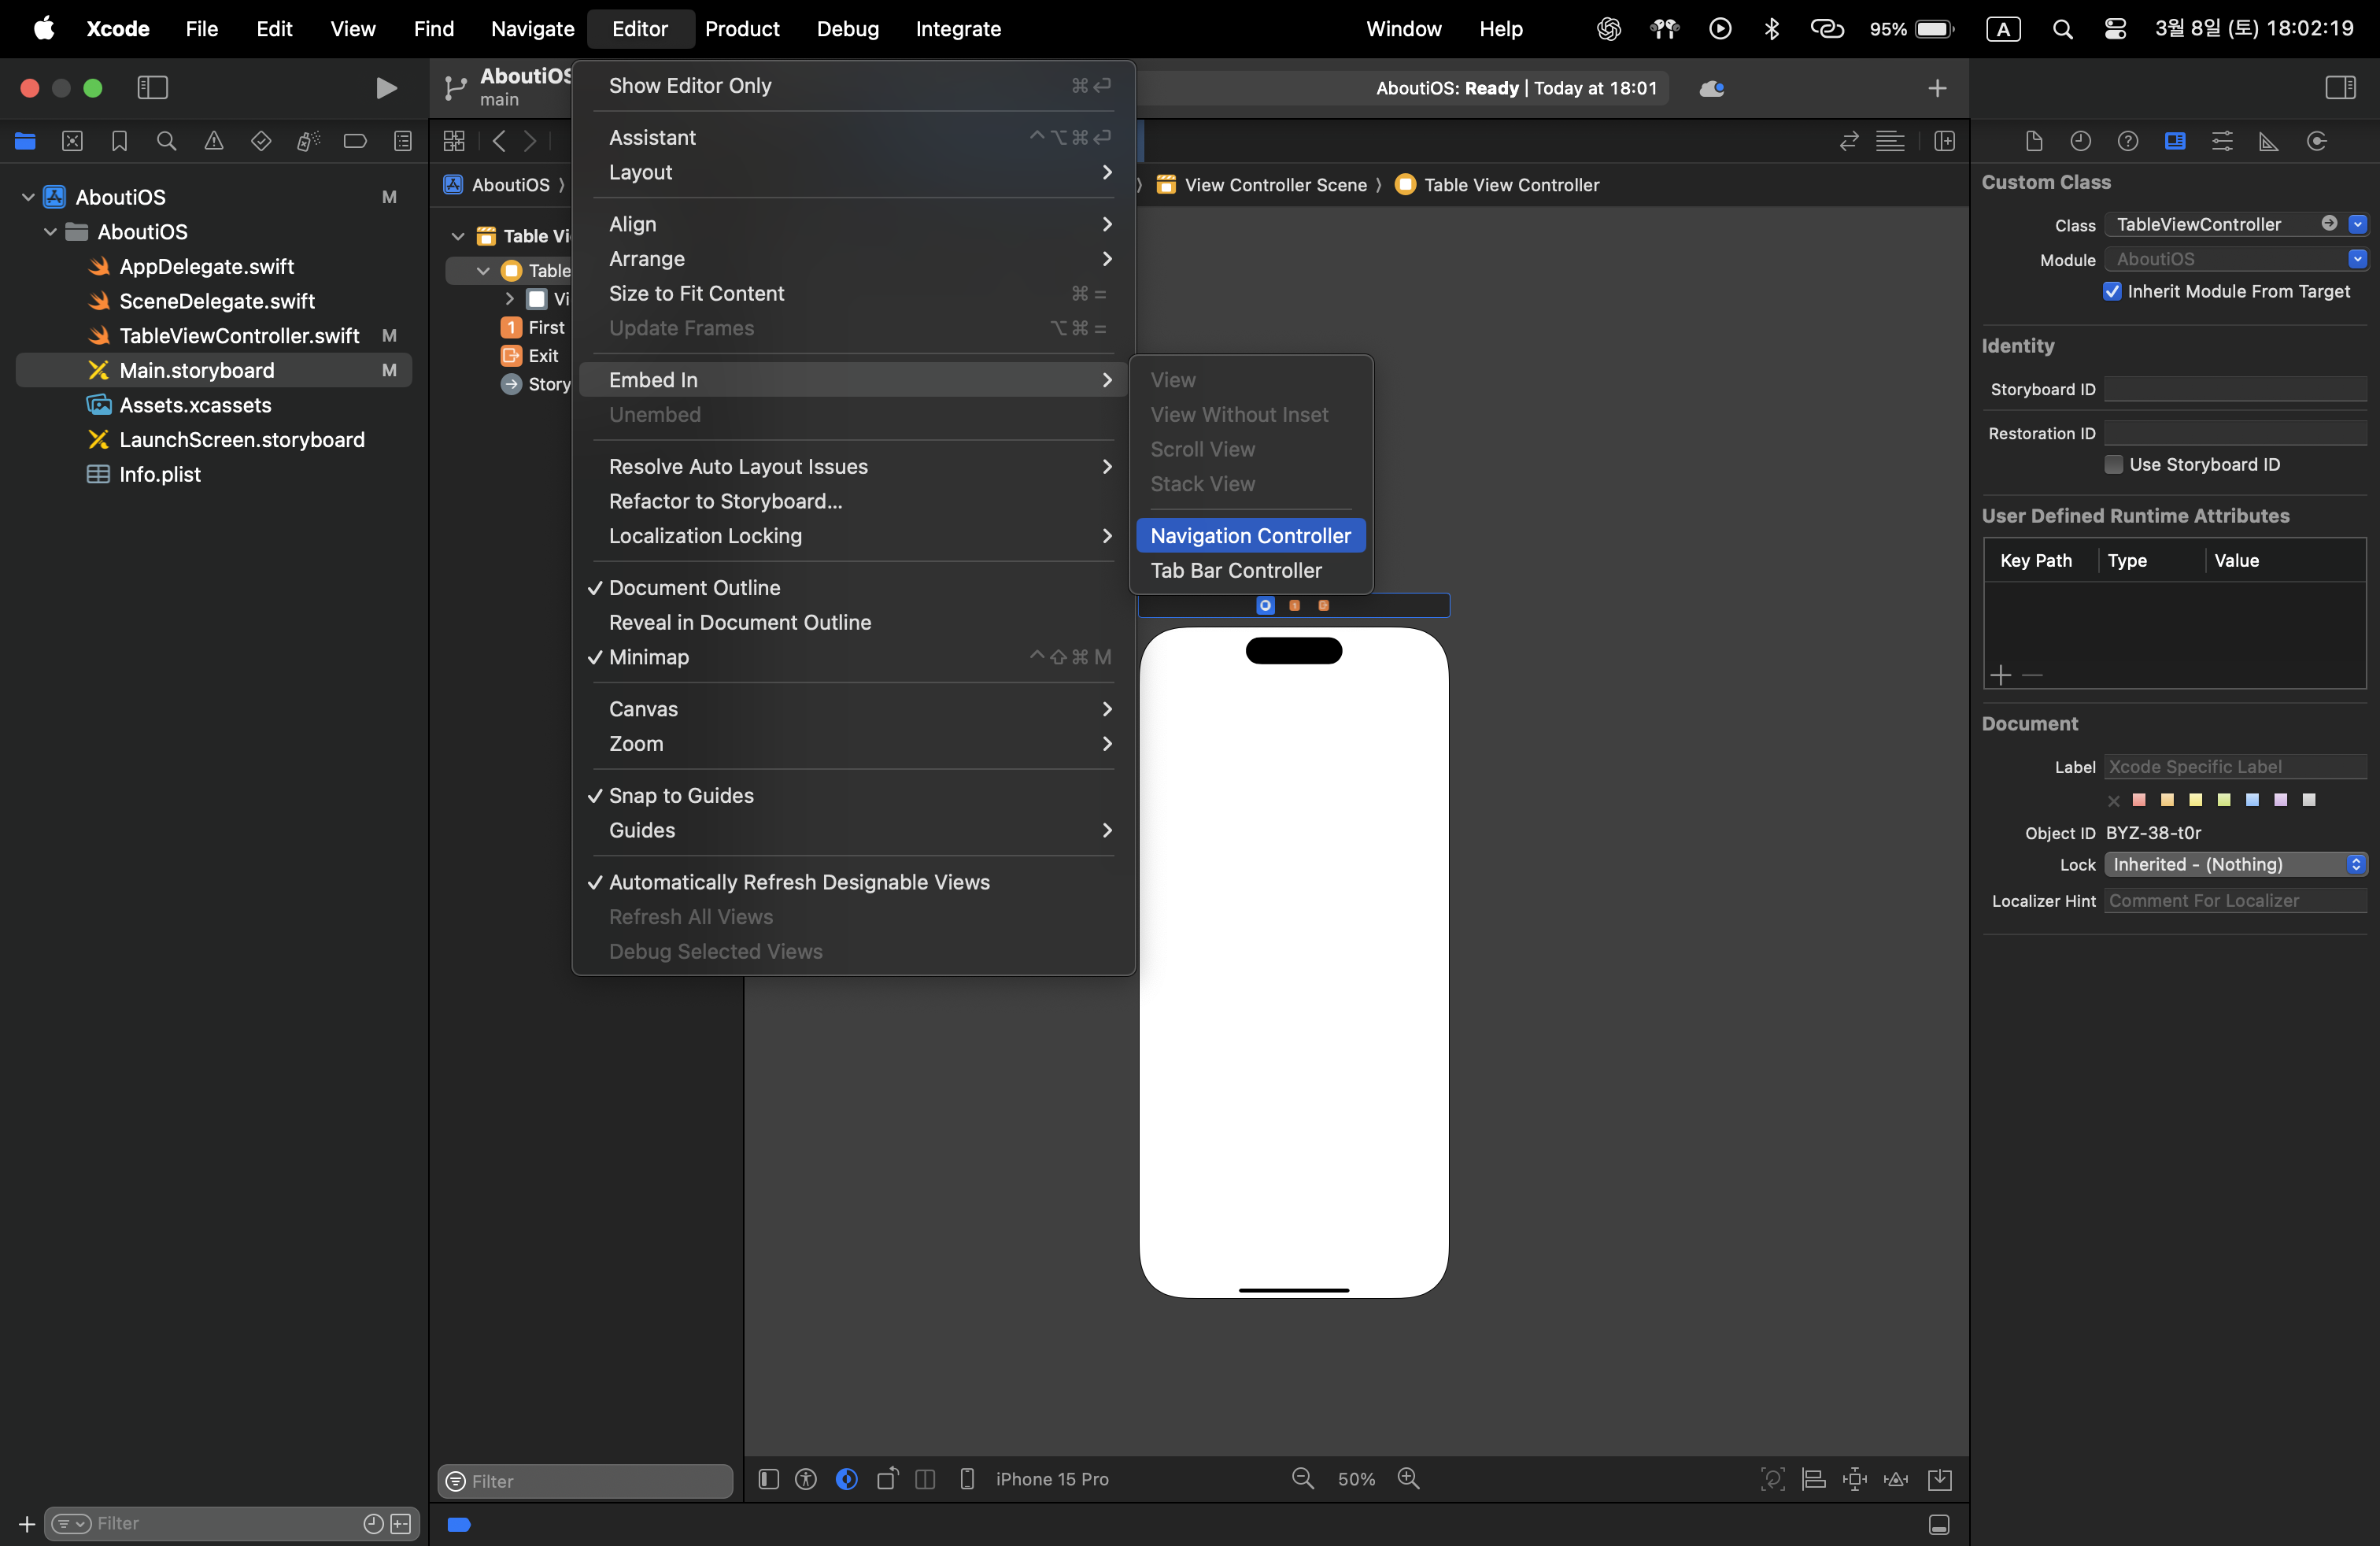
- TableView에서 특정 셀을 선택하여 다음 화면으로 이동하기 위해 UINavigationController를 사용
- Edit -> Embed In -> Navigation Controller
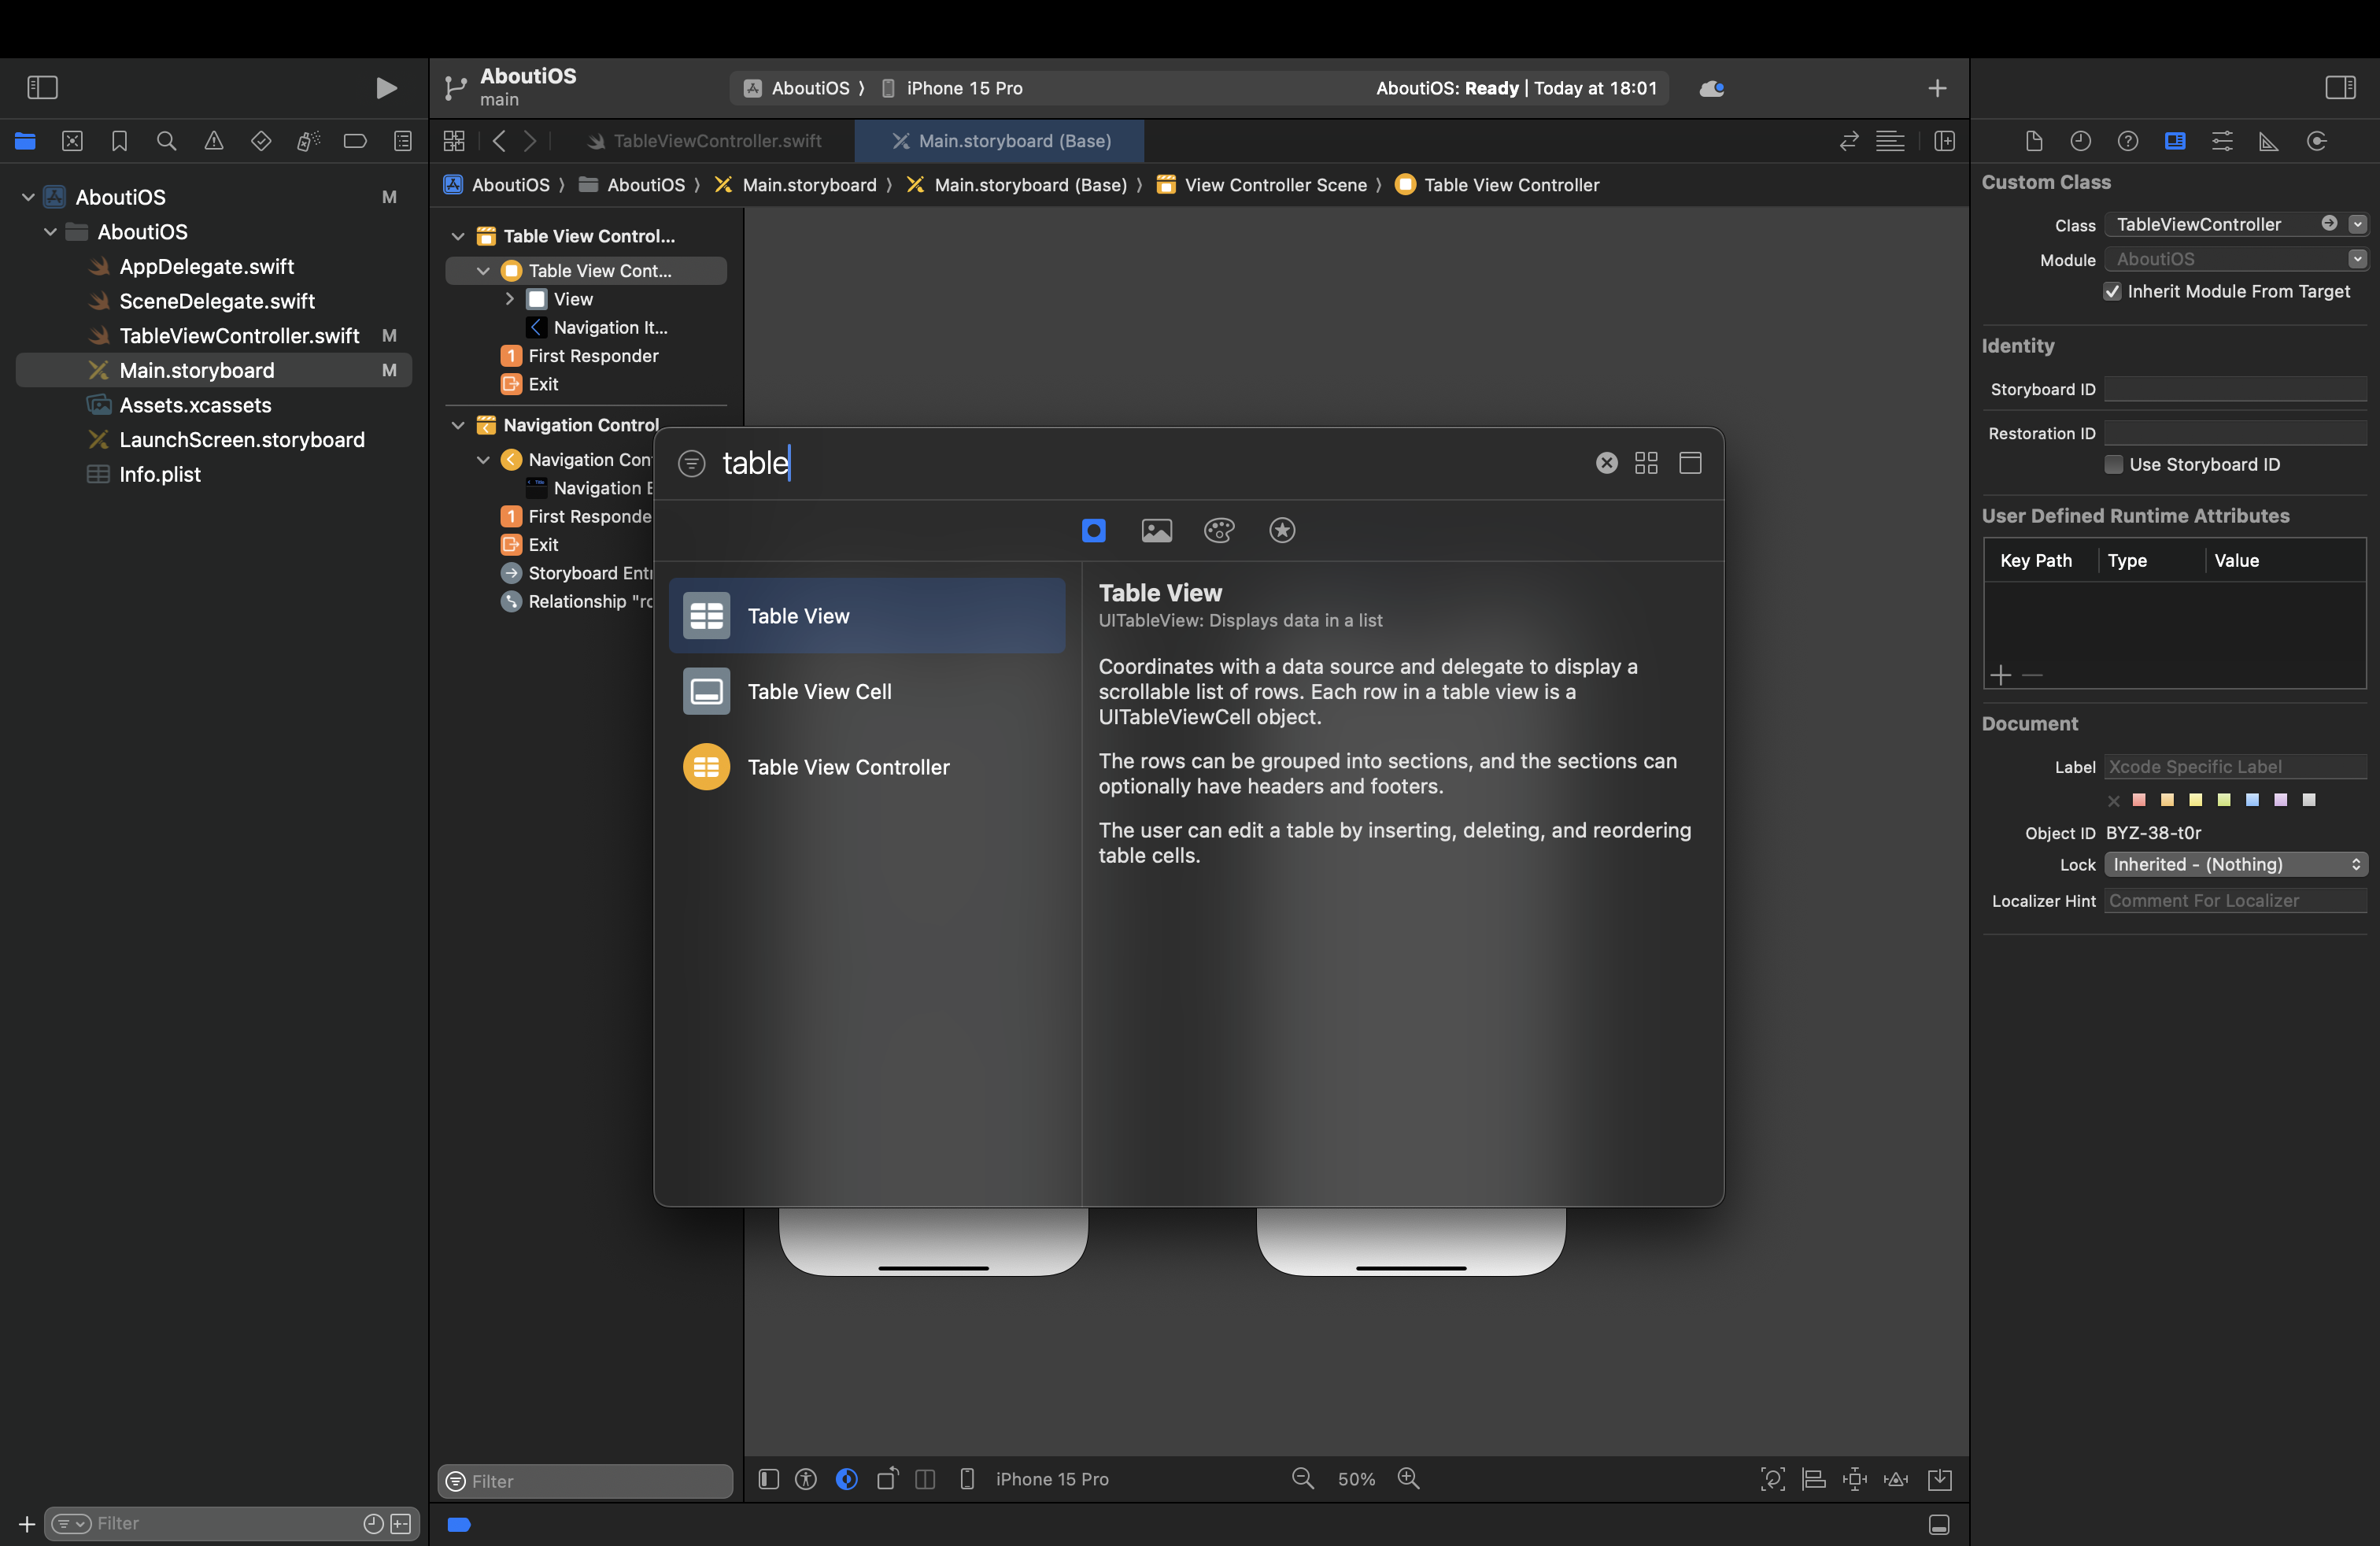
- [Command + Shift + L]을 통해 Table View, Table View Cell 라이브러리 가져오기
- cell을 Xib 파일로 따로 분리해서 구성해도 되나 Main.storyboard에 구성
- 디테일한 UI가 필요하면 cell.xib를 구현하는 것이 효율적
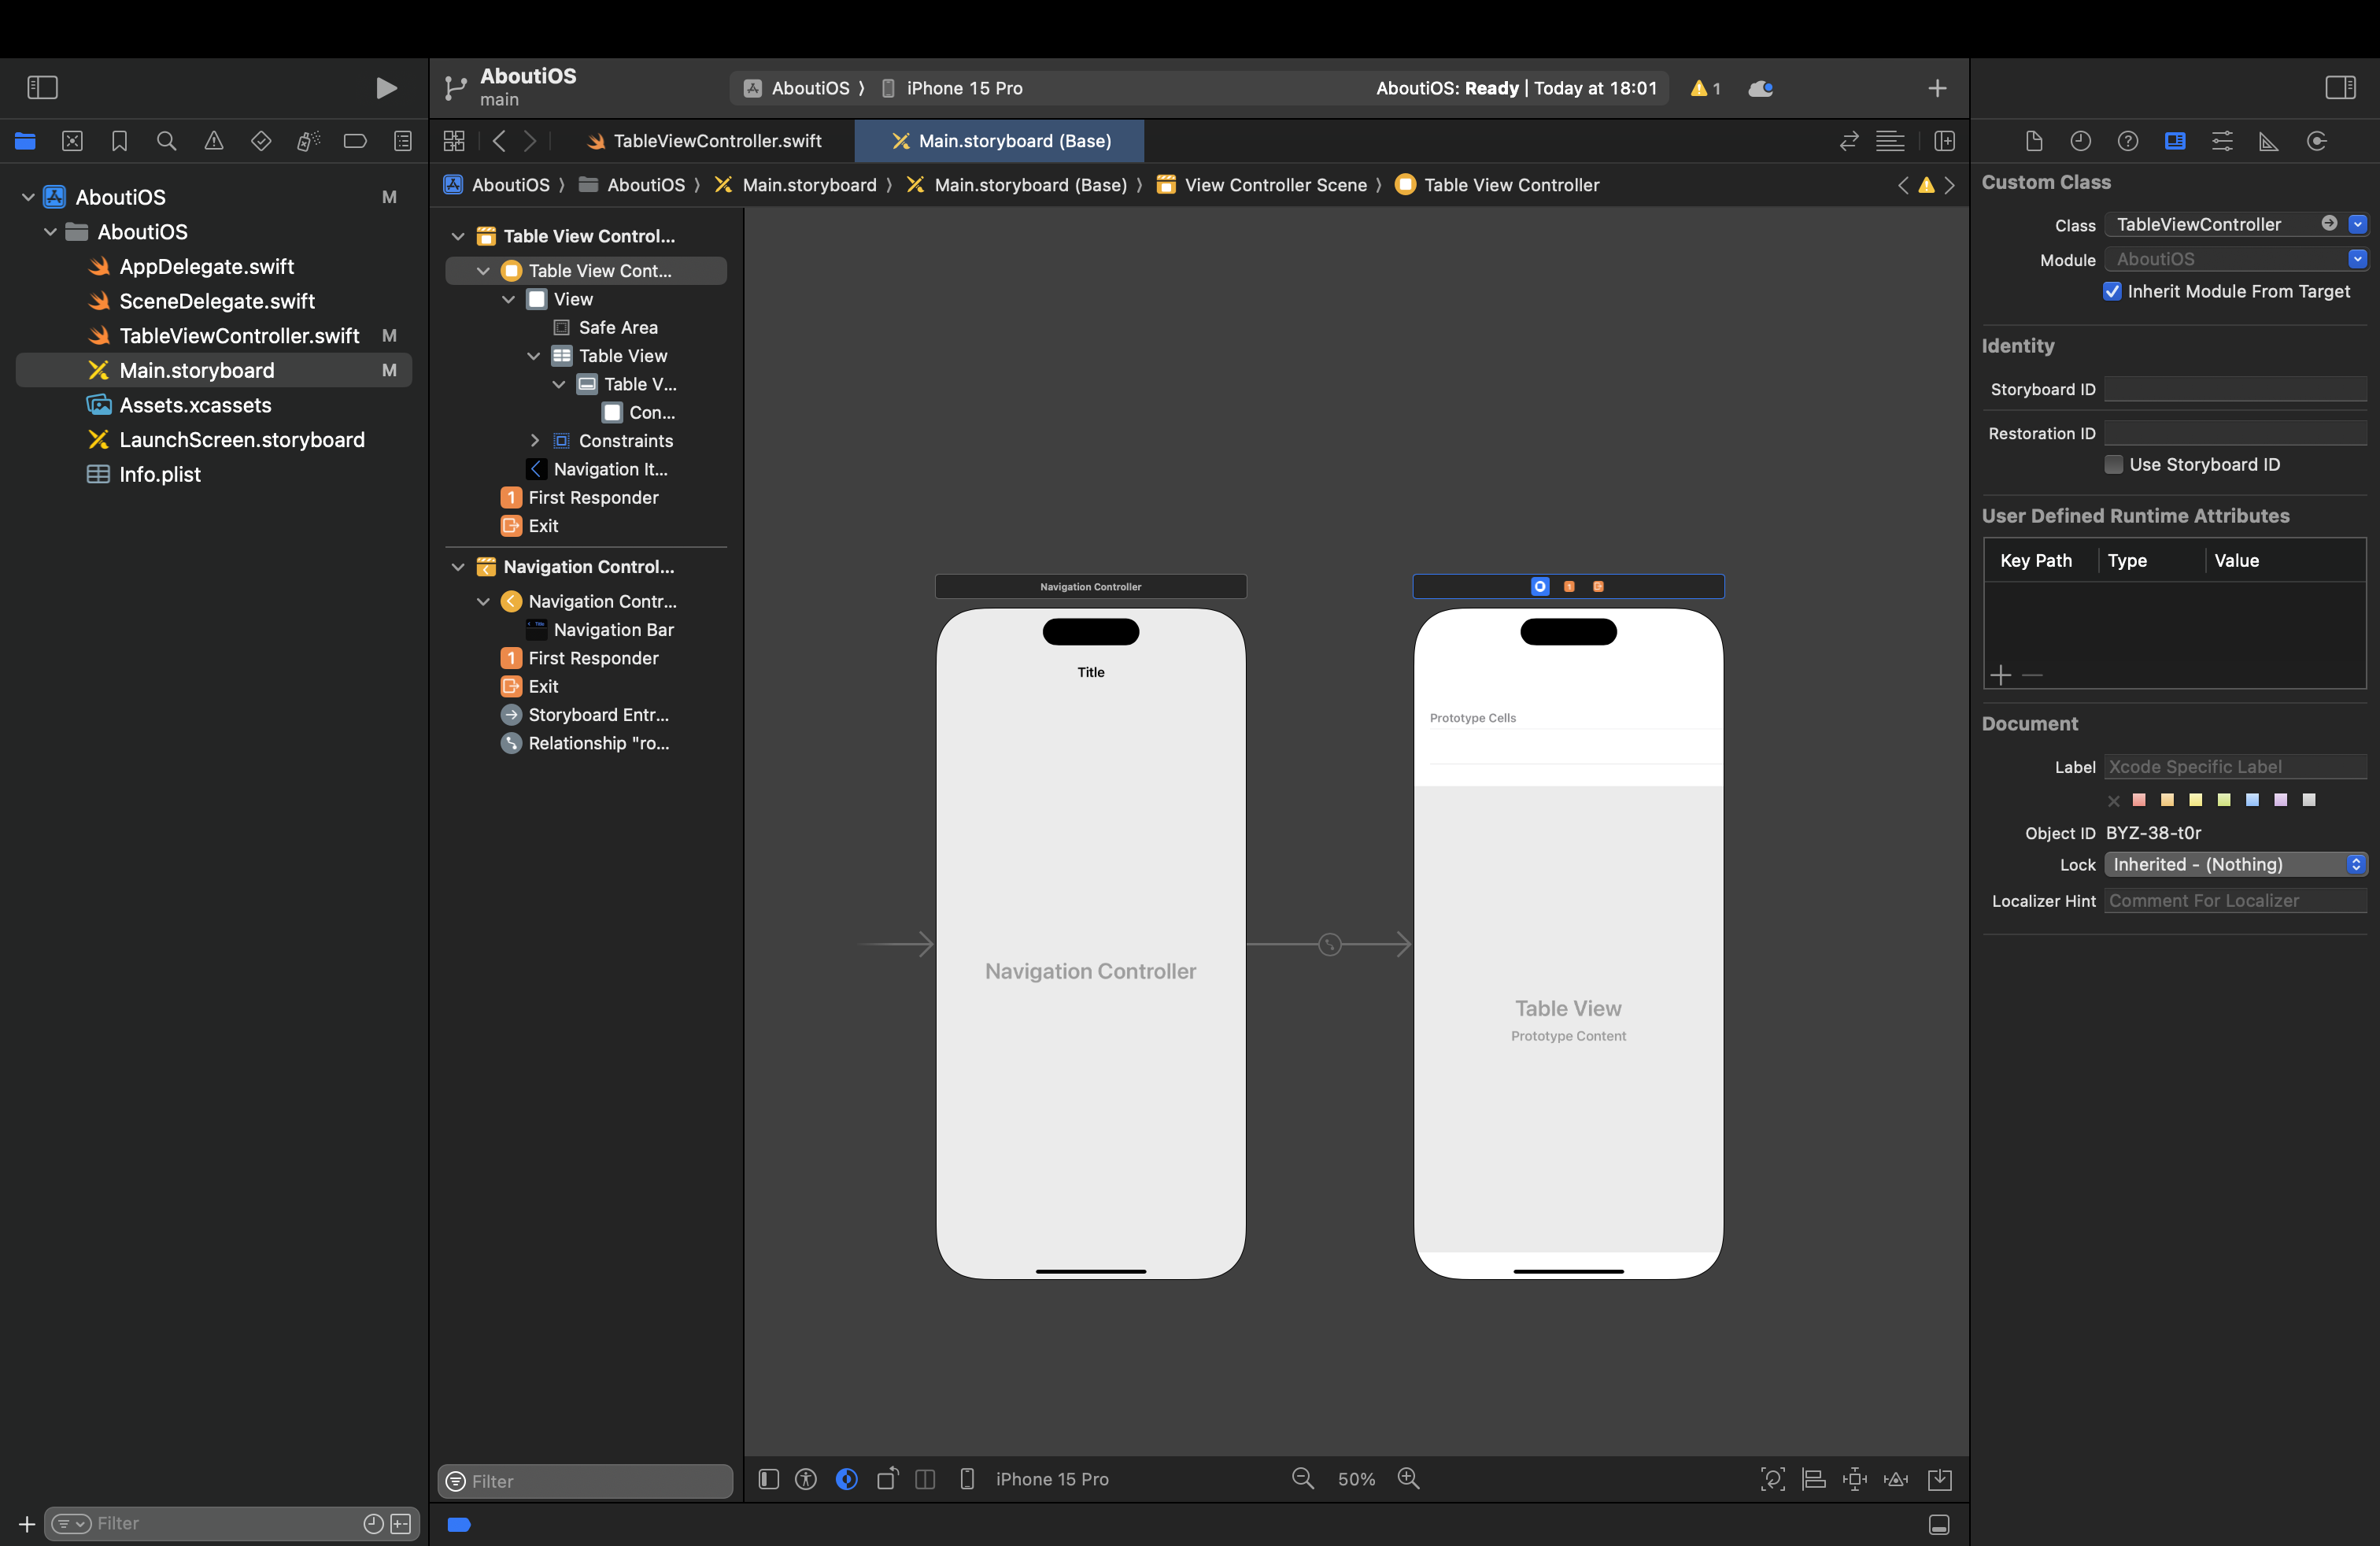
- 기본 설정앱과 비슷하게 해주기 위해 cell을 추가해준 후 Inset Grouped style 적용
코드
class TableViewController: UIViewController {
    @IBOutlet weak var tableView: UITableView!

    // 각 섹션별 데이터
    private let sections: [(header: String?, items: [(imageName: String, title: String)])] = [
        (nil, [
            ("wifi", "Wi-Fi"),
            ("bolt.horizontal", "Bluetooth"),
            ("airplane", "Airplane Mode"),
            ("battery.100", "Battery")
        ]),
        ("General", [
            ("gear", "General"),
            ("magnifyingglass", "Search")
        ]),
        ("Other", [
            ("person.crop.circle", "Profile"),
            ("lock", "Privacy")
        ])
    ]

    override func viewDidLoad() {
        super.viewDidLoad()
        setNavigationTitle()
        tableView.delegate = self
        tableView.dataSource = self
    }

    //navigation title 세팅
    func setNavigationTitle() {
        title = "Table View"
        navigationController?.navigationBar.prefersLargeTitles = true
        navigationItem.largeTitleDisplayMode = .automatic
    }
}

extension TableViewController: UITableViewDelegate, UITableViewDataSource {
    // 섹션 개수
    func numberOfSections(in tableView: UITableView) -> Int {
        return sections.count
    }

    // 각 섹션별 행 개수
    func tableView(_ tableView: UITableView, numberOfRowsInSection section: Int) -> Int {
        return sections[section].items.count
    }

    // 셀 설정
    func tableView(_ tableView: UITableView, cellForRowAt indexPath: IndexPath) -> UITableViewCell {
        let cell = tableView.dequeueReusableCell(withIdentifier: "Cell") ??
                   UITableViewCell(style: .default, reuseIdentifier: "Cell")

        let cellData = sections[indexPath.section].items[indexPath.row]

        cell.imageView?.image = UIImage(systemName: cellData.imageName)
        cell.textLabel?.text = cellData.title
        cell.accessoryType = .disclosureIndicator

        return cell
    }

    // 섹션 헤더 설정
    func tableView(_ tableView: UITableView, titleForHeaderInSection section: Int) -> String? {
        return sections[section].header
    }

    // 셀 선택 시 동작
    func tableView(_ tableView: UITableView, didSelectRowAt indexPath: IndexPath) {
        tableView.deselectRow(at: indexPath, animated: true)
        print("\(tableCellData[indexPath.row].title) 선택됨")
    }
}
주요 구현 내용
- Storyboard에서 기본 UITableViewCell의 스타일을 Subtitle 또는 Default로 설정
- @IBOutlet으로 TableView만 Code와 Storyboard 연결
- Storyboard에 cell을 제거 후 코드에서 동적으로 생성
- UITableViewCell을 추가하고 Style을 Basic 또는 Subtitle로 설정하면 코드 없이도 textLabel과 imageView를 사용 가능
- UITableViewCell의 기본 imageView와 textLabel 사용
- 오른쪽에 화살표(Disclosure Indicator) 추가
주요 메서드
UITableViewDataSource 프로토콜 메서드
테이블 뷰의 데이터 관리
- numberOfSections(in tableView: UITableView) -> Int
- 테이블 뷰의 섹션 개수 반환
- tableView(_ tableView: UITableView, numberOfRowsInSection section: Int) -> Int
- 각 섹션별 행 개수 반환
- tableView(_ tableView: UITableView, cellForRowAt indexPath: IndexPath) -> UITableViewCell
- 각 셀 생성 및 반환
- 재사용 가능한 셀을 가져와(dequeueReusableCell) 데이터를 설정한 후 반환
UITableViewDelegate 프로토콜 메서드
테이블 뷰의 동작 및 UI 관리
- tableView(_ tableView: UITableView, titleForHeaderInSection section: Int) -> String?
- 각 섹션의 헤더 제목 반환
- nil -> 헤더 없음
- tableView(_ tableView: UITableView, didSelectRowAt indexPath: IndexPath)
- 사용자가 특정 셀을 선택했을 때 호출
- 화면 전환이나 데이터 처리 작업
- tableView.deselectRow(at: indexPath, animated: true): 선택 효과 제거
주요 포인트
- 기본 UITableViewCell 스타일 사용
- UITableViewCell(style: .default, reuseIdentifier: "Cell") 사용하여 imageView와 textLabel을 기본 제공하는 스타일 사용
- 아이콘 및 텍스트 설정
- cell.imageView?.image = UIImage(systemName: cellData.imageName)
- SF Symbols을 통해 기본 아이콘을 사용 시 정확한 이미지 파일이 존재하는지 확인
- cell.textLabel?.text = cellData.title
- cell.imageView?.image = UIImage(systemName: cellData.imageName)
- Disclosure Indicator 추가
- cell.accessoryType = .disclosureIndicator 설정하면 오른쪽에 화살표 생성
- 셀 선택 시 반응
- didSelectRowAt에서 선택된 항목을 출력하거나 다른 화면으로 이동하는 동작 추가 가능
실행 결과
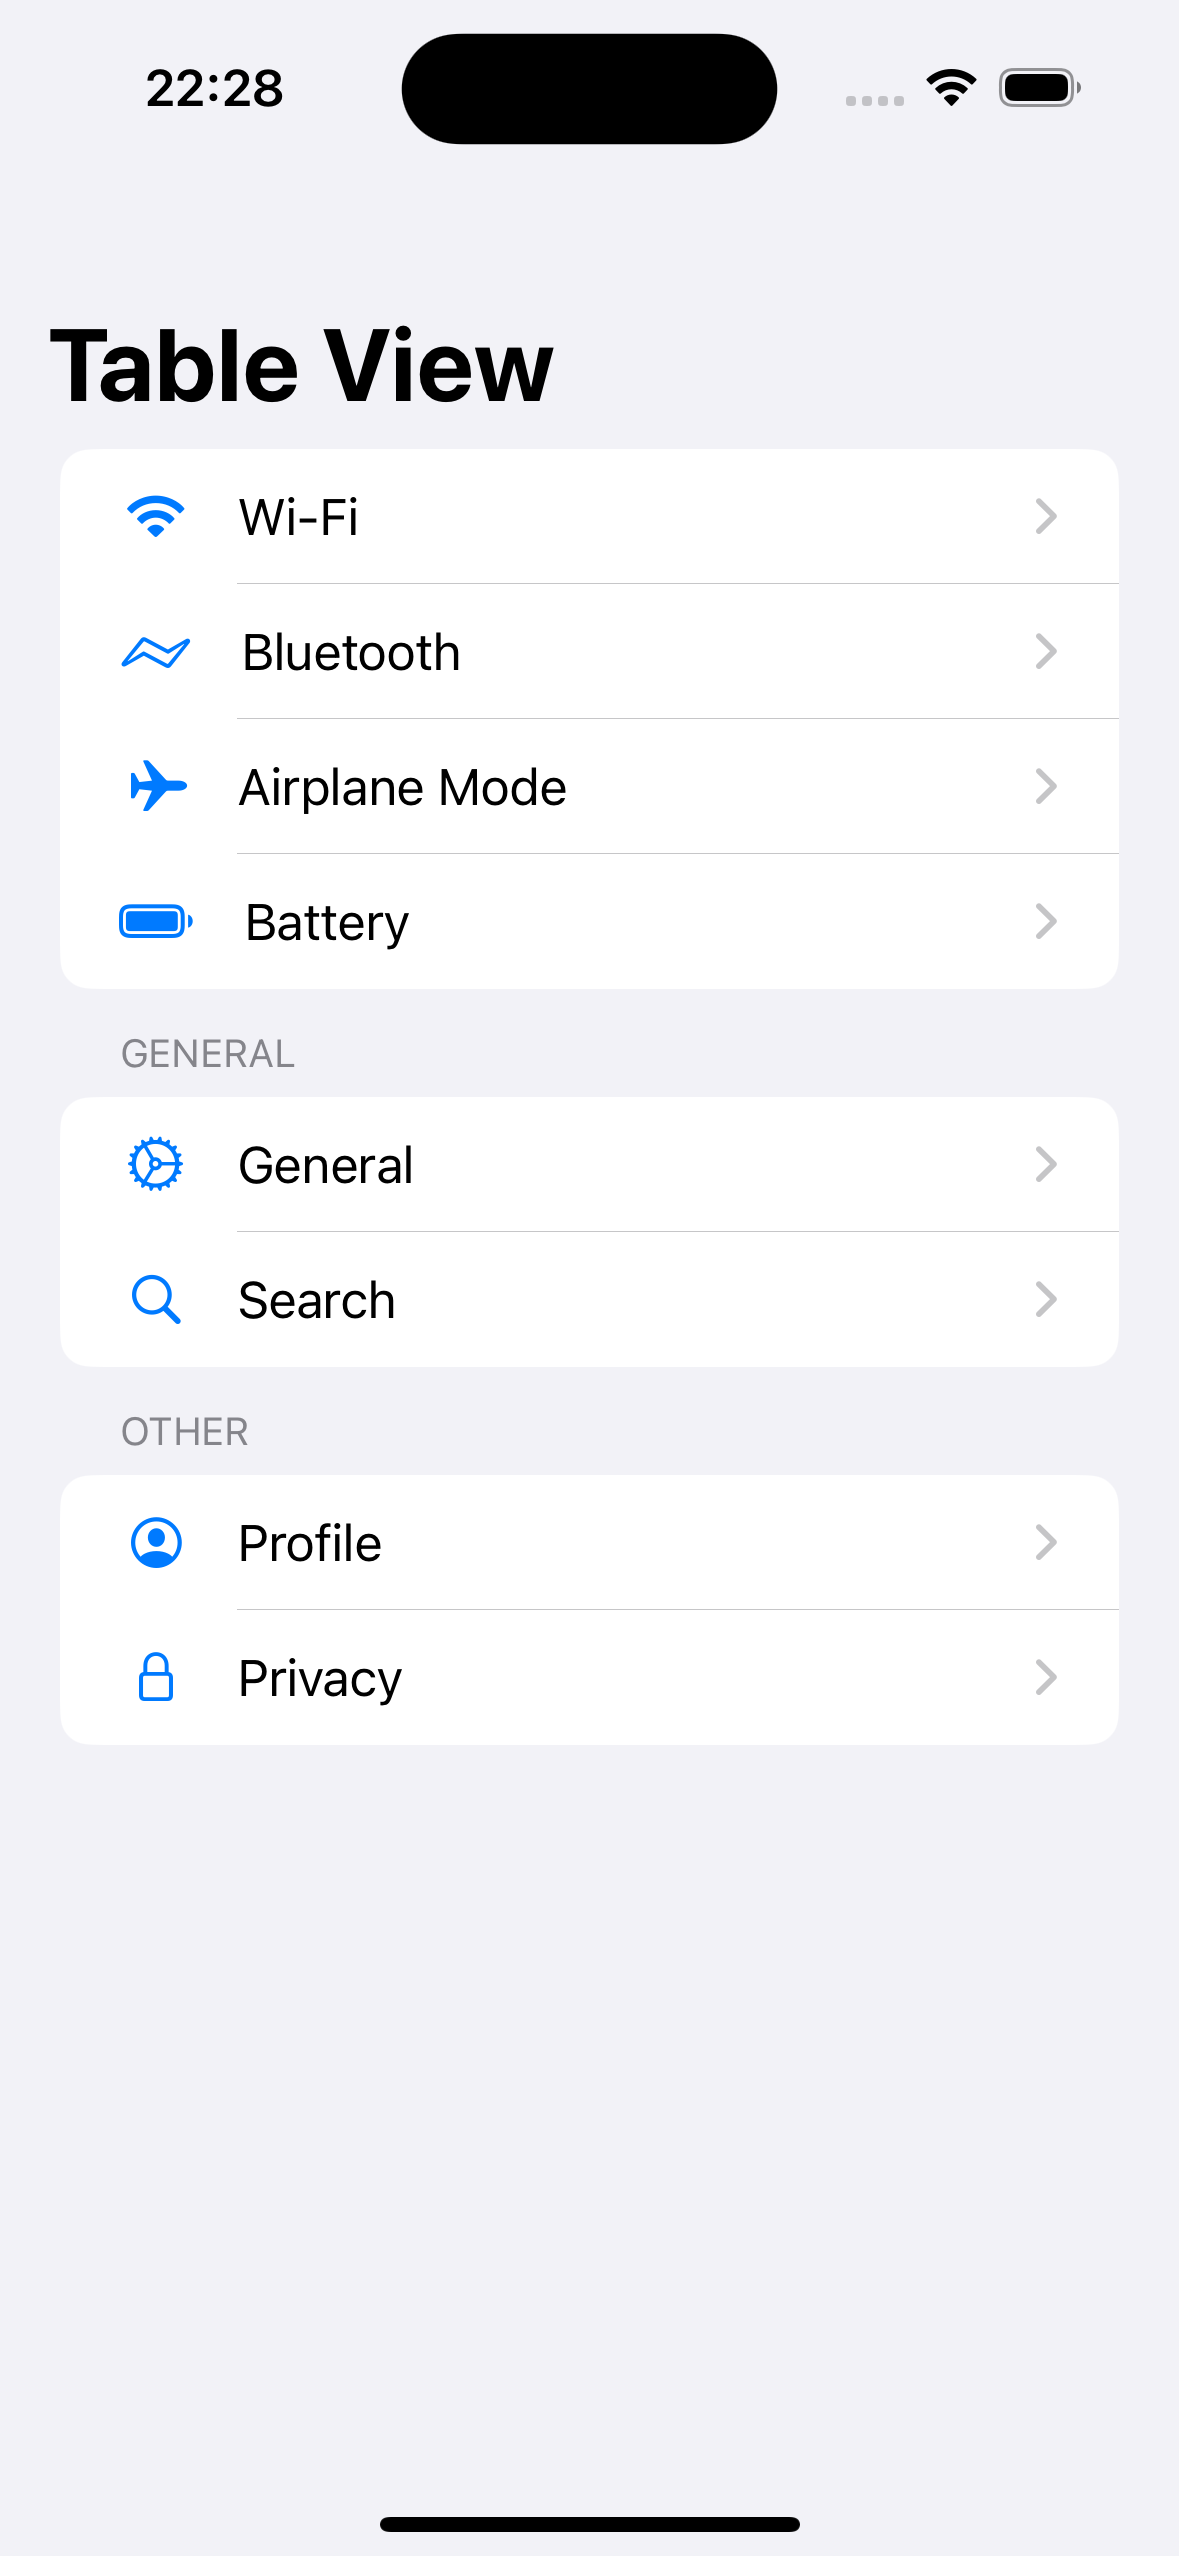
- 설정 앱 main에는 없지만 header 설정
- 설정 앱과 비슷하게 구현하기 위해 Background와 cell의 color 설정
추가 구현
func tableView(_ tableView: UITableView, didSelectRowAt indexPath: IndexPath) {
        tableView.deselectRow(at: indexPath, animated: true)
        switch indexPath.section {
        case 0:
            switch indexPath.row {
            case 0:
                if let viewController = UIStoryboard(name: "Main", bundle: nil).instantiateViewController(withIdentifier: "WifiViewController") as? WifiViewController {
                    self.navigationController?.pushViewController(viewController, animated: true)
                }
            default: break
            }
        default: break
        }
}- 예시로 WifiViewController 생성
- TableViewController의 didSelectRowAt에서 navigationController의 pushViewController를 통해 View 이동
class WifiViewController: UIViewController {
    @IBOutlet weak var label: UILabel!
    override func viewDidLoad() {
        super.viewDidLoad()
        title = "Wifi"
        label.text = "WifiViewController"
        navigationController?.navigationBar.prefersLargeTitles = false
    }

    override func viewWillDisappear(_ animated: Bool) {
        super.viewWillDisappear(animated)
        navigationController?.navigationBar.prefersLargeTitles = true
    }
}- 생명주기를 통해 Large Title 여부를 설정
전체 코드
TableViewController(현재 MVVM 패턴으로 변환)
https://github.com/zongbeen/AboutiOS/blob/main/AboutiOS/VIew/TableViewController.swift
실행 영상

vis ta vie