크롬 브라우저 번역 기능 말고 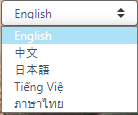 직접 선택해서 언어를 전환하는 걸 만들려고 합니다.
vue-i18n 라이브러리를 쓸겁니다.
cli로 vue-i18n 라이브러리를 설치합니다.
npm install vue-i18n
# or
yarn add vue-i18n
그 다음 src폴더 안에 i18n.js 파일을 만들고 locales 폴더를 만들어 그 안에 사용하려는 언어와 json파일을 만들어 줍니다.
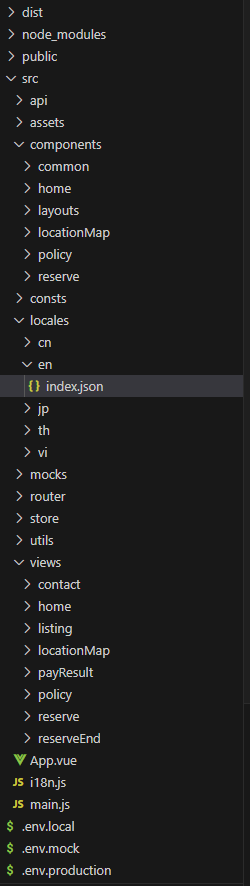
이제 i18n.js에 코드를 작성 해봅시다.
import Vue from "vue";
import VueI18n from "vue-i18n";

// json 파일을 읽어들이기 위한 function
const requireLang = require.context(
  "@/locales", // 폴더명 입니다.
  true,
  /\.json$/, // 폴더 아래 json 찾기용
);

const messages = {};

// json file read
for (const file of requireLang.keys()) {
  const path = file.replace(/(\.\/|\.json$)/g, "").split("/"); // 폴더 패스

  path.reduce((o, s, i) => {
    if (o[s]) return o[s];

    o[s] = i + 1 === path.length ? requireLang(file) : {};

    return o[s];
  }, messages);
}

Vue.use(VueI18n);

const i18n = new VueI18n({
  locale: "en", // 기본 locale
  fallbackLocale: "cn", // locale 설정 실패시 사용할 locale
  messages, // 다국어 메시지
  silentTranslationWarn: true, // 메시지 코드가 없을때 나오는 console 경고 off
});

export default i18n;
JSON들을 i18n과 연결시키기 위해 만든 설정입니다.
그 다음으로 main.js에 vue 생성자를 설정합니다.
import Vue from "vue";
import App from "./App.vue";
import store from "./store";
import router from "./router";

import i18n from "./i18n";

if (process.env.NODE_ENV === "development") {
  const { worker } = require("./mocks/browser");

  worker.start();
}

Vue.config.productionTip = false;

new Vue({
  store,
  router,
  i18n,
  render: (h) => h(App),
}).$mount("#app");
이제 아까 만든 json 파일을 작성합니다.
en폴더에 index.json 입니다.
{
	"1": "Hello",
    "2": "Bye",
}
이제 설정은 끝났습니다. 사용하러 가봅시다.
<template>
  <button @click="changeLocale">{{ $t('index.1') }}</button>
</template>

<script>
export default {
  methods: {
    changeLocale() {
      if (this.$i18n.locale === 'en') return (this.$i18n.locale = 'ko')
      this.$i18n.locale = 'en'
    }
  }
}
</script>
이제 설정한 값에 따라 바뀌는 걸 확인하실 수 있습니다.

프론트엔드 개발자