UITabelView
테이블을 보여주고 관리할 수 있는 컨트롤러이다. 하나의 열에 세로로 스크롤되는 콘텐츠 행들을 표시한다. UIScrollView를 상속받고 있다.
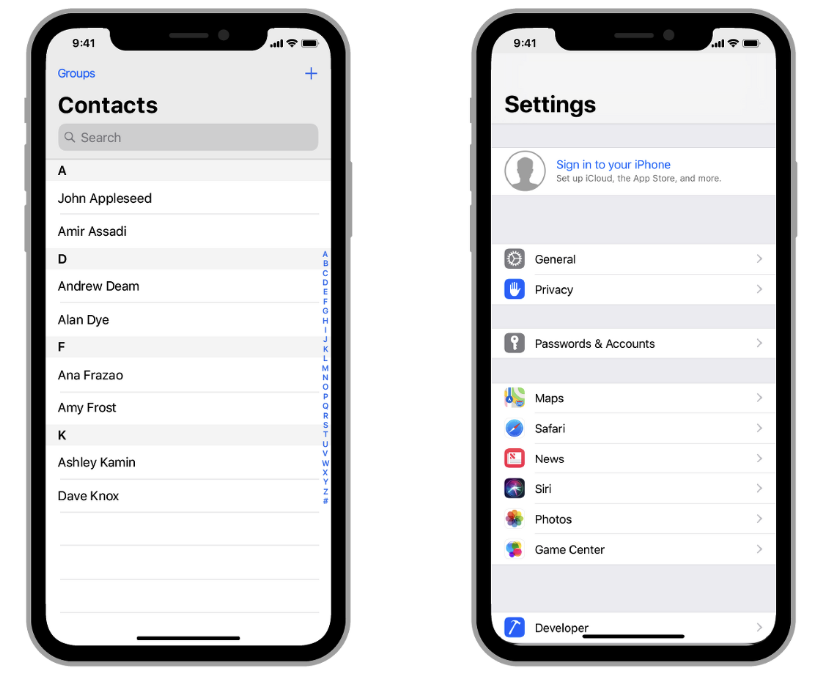
ios의 UITableView는 UIScrollView를 상속받아 스크롤이 가능하다.
하나의 열에 세로로 행들을 표시하거나,
관련된 행끼리 섹션형태로 그룹화하여 표시할 수 있다.
header, footer를 생성해 각 섹션에 대한 추가적인 정보를 제공할수도 있다.
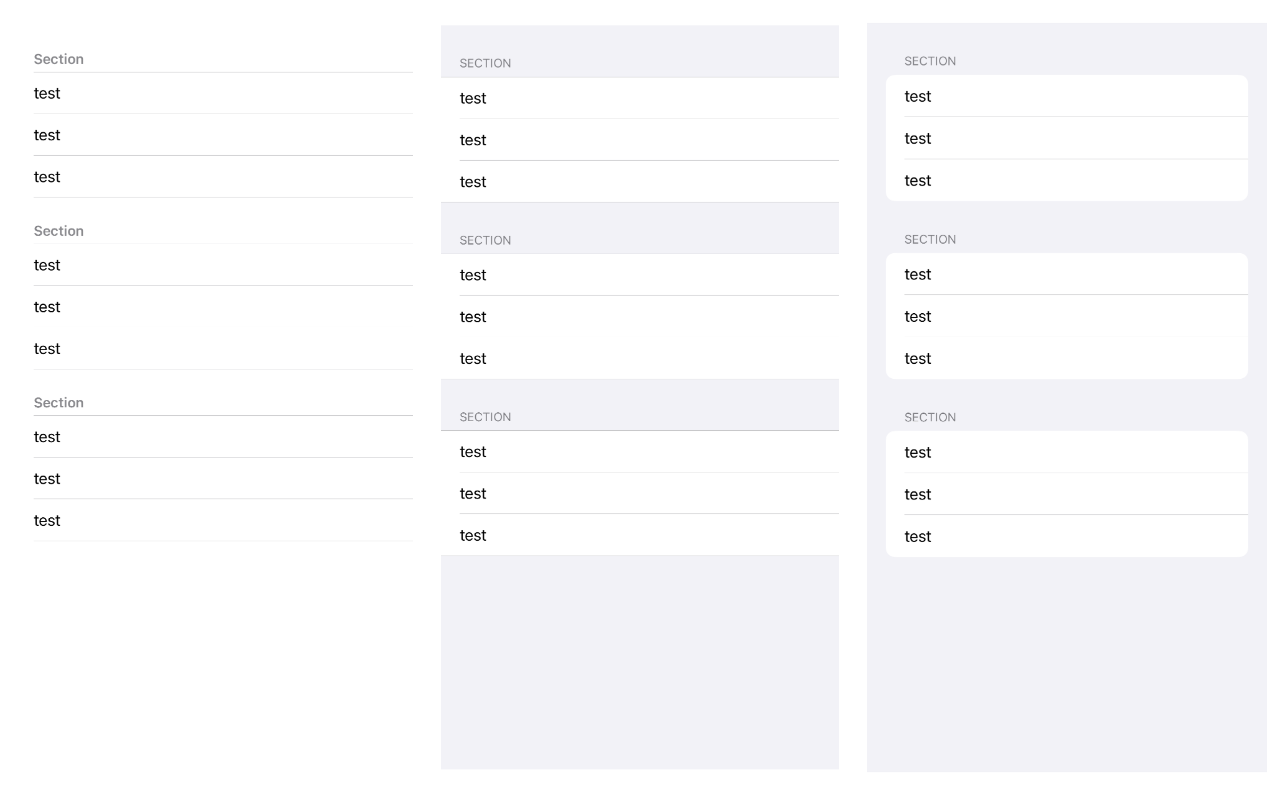
TableView Style
plain : 기본 스타일
grouped : 각 섹션에 고유한 행들의 그룹이 있는 스타일
insetGrouped : 각 섹션의 그룹이 동근 모서리 형태로 처리된 스타일
TableView 만들기
1. 테이블뷰 그리기
class ViewController: UIViewController {

    // 1. 테이블뷰 객체 만들기
    var tableView = UITableView(frame: .zero, style: .insetGrouped)

    // 테이블뷰에 나타낼 섹션과 섹션의 행들을 리스트 형태로 만들어줬다.
    let list = [["1","2","3","4"],["1","2"],["1","2","3"]]
    let header = ["섹션 1","섹션 2","섹션 3"]


    override func viewDidLoad() {
        super.viewDidLoad()
        // 2. 테이블뷰 addSubview
        self.view.addSubview(self.tableView)


 // 3. 테이블뷰 오토레이아웃 지정
 self.tableView.translatesAutoresizingMaskIntoConstraints = false
        NSLayoutConstraint.activate([
            self.tableView.topAnchor.constraint(equalTo: self.view.safeAreaLayoutGuide.topAnchor),
            self.tableView.bottomAnchor.constraint(equalTo: self.view.safeAreaLayoutGuide.bottomAnchor),
            self.tableView.leadingAnchor.constraint(equalTo: self.view.safeAreaLayoutGuide.leadingAnchor),
            self.tableView.trailingAnchor.constraint(equalTo: self.view.safeAreaLayoutGuide.trailingAnchor)
        ])

    }

}
2. UITableViewDataSource
Cell에 데이터를 적용하고 이를 TableView에 넣어주는 역할이다.
UITableViewDataSource는 꼭 작성해줘야 하는 필수 메소드가 있다.
-
func tableView(_ tableView: UITableView, numberOfRowsInSection section: Int) -> Int
TableView의 각 section이 몇개의 row를 포함시킬 것인지를 묻는 메소드 -
func tableView(_ tableView: UITableView, cellForRowAt indexPath: IndexPath)
cell을 본격적으로 생성하는 메소드. indexPath에는 현재 생성하려는 cell이 몇번째 section의 몇번째 row인지에 대한 정보가 있다.
// 1. extension으로 UITableViewDataSource를 채택하고 delegate를 self 로 지정한다.
self.tableView.dataSource = self


 // 2. 재사용할 cell을 등록해줘야 한다. 셀의 Identifier로 재사용할 셀을 확인한다.
 self.tableView.register(UITableViewCell.self, forCellReuseIdentifier: "TableViewCell")


// 3. UITableViewDataSource 프로토콜은 필수 메소드를 구현해줘야한다.
// 그 외에 섹션을 나타내기 위해 추가로 메소드를 작성했다.
extension ViewController: UITableViewDataSource {

    // 섹션의 개수를 반환하는 메소드
    func numberOfSections(in tableView: UITableView) -> Int {
        return header.count
    }

    // 섹션마다 헤더의 제목을 반환하는 메소드
    func tableView(_ tableView: UITableView, titleForHeaderInSection section: Int) -> String? {
        return header[section]
    }

    // 각 섹션마다 몇개의 행을 갖고 있는지 정하는 메소드 (필수메소드 1)
    func tableView(_ tableView: UITableView, numberOfRowsInSection section: Int) -> Int {
        return list[section].count
    }

    // cell을 생성하는 메소드 (필수메소드 2)
    func tableView(_ tableView: UITableView, cellForRowAt indexPath: IndexPath) -> UITableViewCell {
        let cell = tableView.dequeueReusableCell(withIdentifier: "TableViewCell", for: indexPath)
        cell.textLabel?.text = list[indexPath.section][indexPath.row]
        return cell
    }
}
3. UITableViewDelegate
- Custom Header 및 Footer View를 만들고 관리
- Row, Header 및 Footer에 대한 사용자 정의 높이를 지정
- 더 나은 스크롤 지원을 위해 높이 추정치를 제공
- Row에 Indent를 부여
- Row 선택에 응답
- Swipe를 포함한 action에 응답
- table의 내용을 편집하는데 도움을 줌
// 1. extension으로 UITableViewDelegate를 채택하고 delegate를 self 로 지정한다.
self.tableView.delegate = self

// 2. UITableViewDelegate는 필수 메소드가 없으며 원하는 메소드를 골라서 작성해주면 된다.
extension ViewController: UITableViewDelegate {

    func tableView(_ tableView: UITableView, didSelectRowAt indexPath: IndexPath) {
        tableView.deselectRow(at: indexPath, animated: true)
    }

    func tableView(_ tableView: UITableView, heightForRowAt indexPath: IndexPath) -> CGFloat {
        return 70
    }
}
💡 cell Reuse
UITableView와 UICollectionView에서는 메모리 효율을 위해 모든 Cell을 한번에 생성하지 않는다.
1000개, 10000개가 넘어가는 cell을 모두 한번에 메모리에 올렸다간 시스템이 힘들어할 것이다!
그래서 iOS의 TableView에서는 dequeue의 형식으로 화면에 표시될 cell만을 메모리에 올리고 스크롤로 새로운 cell이 보여져야하면, 기존에 올라가있던 cell 중 안보이도록 변한 cell을 내리고 새롭게 보여져야하는 cell을 올리는 행위를 반복한다.
그런데 이렇게하면 cell을 내리고 올리는 과정에서 발생하는 오버헤드가 부담스러워진다.
스크롤 할때마다 매번 cell 인스턴스를 메모리에서 올리고 내리고하면 당연히 시스템을 성능 중 일부를 사용하게 되고 사용자 경험에도 안좋은 영향을 주게된다.
이를 극복하기 위해 iOS는 현재 생성되어 있는 cell을 재사용할 수 있도록 한다.
형태가 같은 cell이라면 굳이 메모리에 내릴거없이 재활용하고 내용만 좀 바꿔서 보여주는 것이다.
이렇게 cell을 재사용하기 위해서는 관련 메소드를 작성해주어야한다.
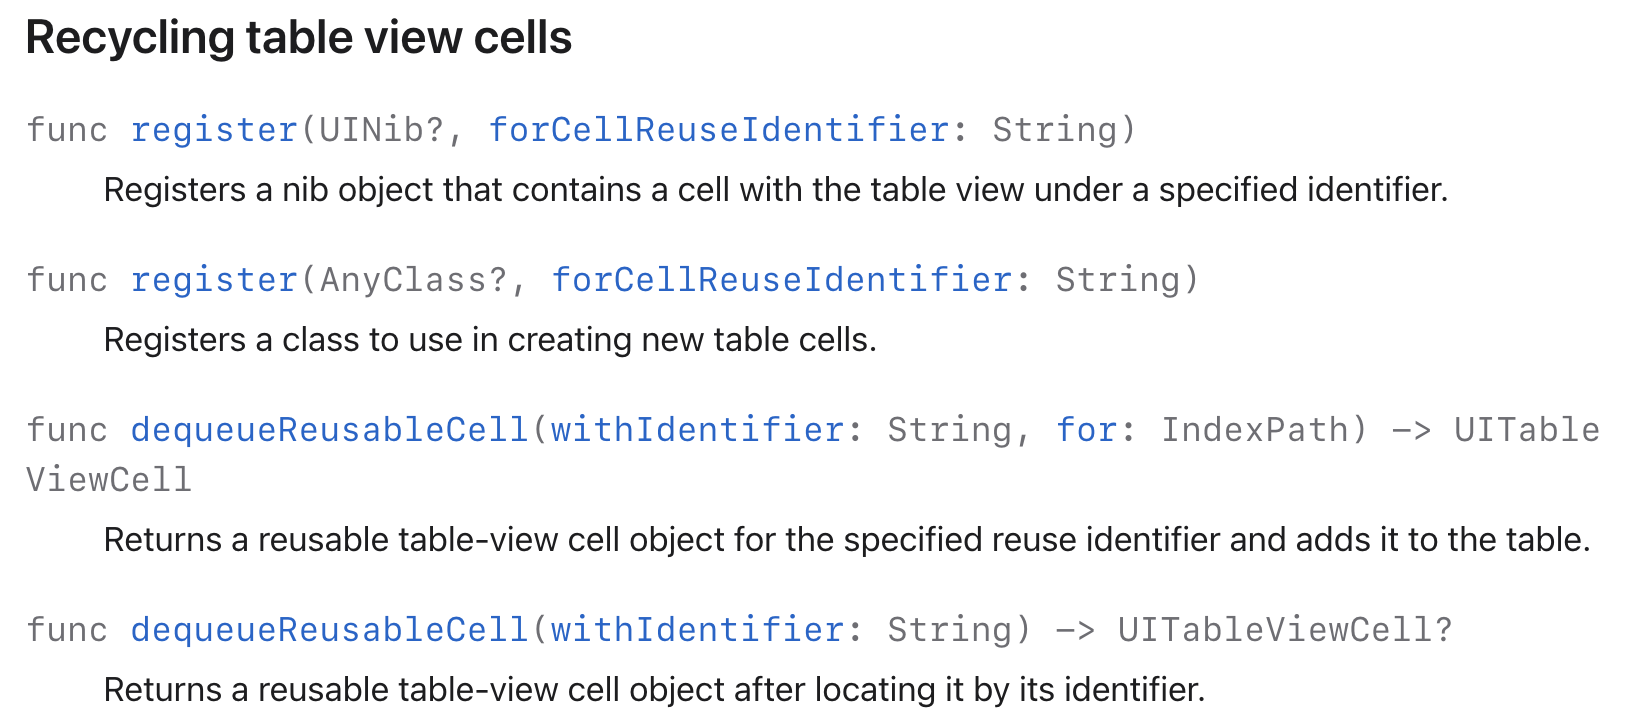
공식문서에서 register와 dequeueReusableCell로 구분되어 있음을 확인할 수 있다.
register
재활용 할 cell 타입을 String 형태의 identifier를 기반으로 확인하겠다는 것을 tableView에 알려주는 메서드이다.
셀의 identifier를 등록하고 이 identifier를 기준으로 재활용할 수 있는 cell이 현재 새로 넣어주는 cell과 동일한 타입인지 확인 후 사용한다.
공식문서에 2개가 소개되어 있는데 하나는 UINib를 기반으로, 하나는 AnyClass를 기반으로 등록할 수 있도록 한다.
self.tableView.register(UITableViewCell.self, forCellReuseIdentifier: "TableViewCell")dequeueReusableCell
실질적으로 재활용할 cell을 찾아서 활용하는 메서드이다. withIdentifier에 앞서 등록한 identifier를 입력해주는 것으로 적절한 타입의 재사용 Cell을 가져올 수 있다. 입력된 identifier에 해당하는 Cell타입이 register를 통해 등록되지 않은 경우 에러를 발생시킬 수 있다.
 func tableView(_ tableView: UITableView, cellForRowAt indexPath: IndexPath) -> UITableViewCell {
        let cell = tableView.dequeueReusableCell(withIdentifier: "TableViewCell", for: indexPath)
        cell.textLabel?.text = list[indexPath.section][indexPath.row]
        return cell
    }
전체코드
import UIKit

class ViewController: UIViewController {

    var tableView = UITableView(frame: .zero, style: .insetGrouped)
    let list = [["1","2","3","4"],["1","2"],["1","2","3"]]
    let header = ["섹션 1","섹션 2","섹션 3"]


    override func viewDidLoad() {
        super.viewDidLoad()
      //  self.view.backgroundColor = .white
        self.view.addSubview(self.tableView)
        self.tableView.dataSource = self
        self.tableView.delegate = self

        self.tableView.translatesAutoresizingMaskIntoConstraints = false
        NSLayoutConstraint.activate([
            self.tableView.topAnchor.constraint(equalTo: self.view.safeAreaLayoutGuide.topAnchor),
            self.tableView.bottomAnchor.constraint(equalTo: self.view.safeAreaLayoutGuide.bottomAnchor),
            self.tableView.leadingAnchor.constraint(equalTo: self.view.safeAreaLayoutGuide.leadingAnchor),
            self.tableView.trailingAnchor.constraint(equalTo: self.view.safeAreaLayoutGuide.trailingAnchor)
        ])

        self.tableView.register(UITableViewCell.self, forCellReuseIdentifier: "TableViewCell")

    }

}

extension ViewController: UITableViewDataSource {

    func numberOfSections(in tableView: UITableView) -> Int {
        return header.count
    }

    func tableView(_ tableView: UITableView, titleForHeaderInSection section: Int) -> String? {
        return header[section]
    }

    func tableView(_ tableView: UITableView, numberOfRowsInSection section: Int) -> Int {
        return list[section].count
    }

    func tableView(_ tableView: UITableView, cellForRowAt indexPath: IndexPath) -> UITableViewCell {
        let cell = tableView.dequeueReusableCell(withIdentifier: "TableViewCell", for: indexPath)
        cell.textLabel?.text = list[indexPath.section][indexPath.row]
        return cell
    }
}


extension ViewController: UITableViewDelegate {

    func tableView(_ tableView: UITableView, didSelectRowAt indexPath: IndexPath) {
        tableView.deselectRow(at: indexPath, animated: true)
    }

    func tableView(_ tableView: UITableView, heightForRowAt indexPath: IndexPath) -> CGFloat {
        return 70
    }
}