개발환경 세팅(2) - Vim Editor 꾸미기
시작하며
요즈음에는 GUI를 지원하는 Cloud 서버 환경에서 개발하는 경우가 많기에 잘 쓰이지 않을 수도 있으나, 최근에도 Linux 환경에서는 Vim Editor를 사용해야 할 경우가 생긴다. FTP를 이용해서 다른 에디터를 사용해도 되고, nano Editor 등 다른 에디터를 사용하는 방법들이 있을 수 있겠으나, vim Editor 사용을 익혀서 나쁠 것은 없다고 생각하기에 Vim Editor 꾸미는 방법을 알아보기로 했다.
터미널 창 열기
먼저 터미널 창을 열고
$ vi ~/.vimrc위의 명령어를 입력해서 .vimrc 파일을 수정한다.
Vim Editor의 세가지 모드
Vim Editor 명령모드, 입력모드, 마지막 행 모드로 총 3가지 모드로 구성되어있다.
| 모드 | 역할 및 특징 |
|---|---|
| 명령 모드 | vi를 실행시키면 가장 먼저 접하는 기본이 되는 모드로 커서의 이동, 수정, 삭제, 복사 붙이기, 탐색 등을 한다. 입력 모드 전환키인 i,a,o,I,A,O 등을 입력하면 입력 모드로 전환되고, 명령 모드로 다시 전환하려면 [Esc] 키를 누르면 된다. |
| 입력 모드 | 입력 모드 이외에도 편집 모드, input mode, insert mode 등으로 불리며, 글자를 입력하는 문서를 만드는 모드이다.명령 모드에서 입력 전환키를 눌러서 전환하면 화면 아래에 '-- INSERT --'라고 표시된다. |
| 마지막 행 모드 | 명령 모드에서 ':'키를 입력했을 때 화면 맨 아랫줄에서 :__ 명령을 수행하는 모드로저장, 종료, 탐색, 치환 및 vi 환경 설정 등의 역할을 하는 모드이다. |
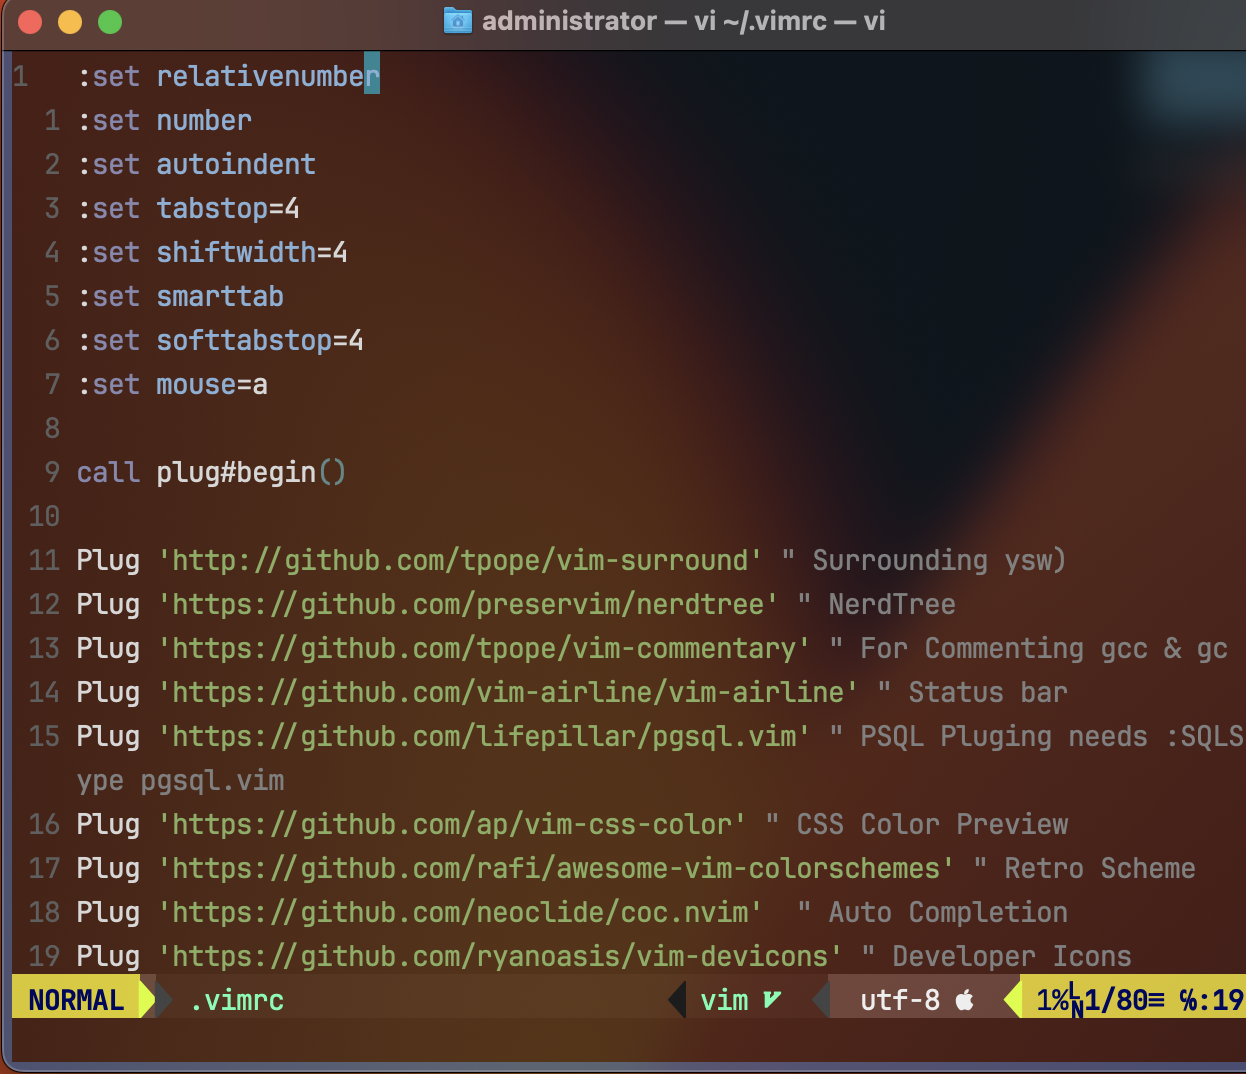
:set relativenumber
:set number
:set autoindent
:set tabstop=4
:set shiftwidth=4
:set smarttab
:set softtabstop=4
:set mouse=a
call plug#begin()
Plug 'http://github.com/tpope/vim-surround' " Surrounding ysw)
Plug 'https://github.com/preservim/nerdtree' " NerdTree
Plug 'https://github.com/tpope/vim-commentary' " For Commenting gcc & gc
Plug 'https://github.com/vim-airline/vim-airline' " Status bar
Plug 'https://github.com/lifepillar/pgsql.vim' " PSQL Pluging needs :SQLSetType pgsql.vim
Plug 'https://github.com/ap/vim-css-color' " CSS Color Preview
Plug 'https://github.com/rafi/awesome-vim-colorschemes' " Retro Scheme
Plug 'https://github.com/neoclide/coc.nvim' " Auto Completion
Plug 'https://github.com/ryanoasis/vim-devicons' " Developer Icons
Plug 'https://github.com/tc50cal/vim-terminal' " Vim Terminal
Plug 'https://github.com/preservim/tagbar' " Tagbar for code navigation
Plug 'https://github.com/terryma/vim-multiple-cursors' " CTRL + N for multiple cursors
Plug 'https://github.com/rstacruz/vim-closer' " For brackets autocompletion
" Auto-completion For Javascript
Plug 'neoclide/coc.nvim', {'do': 'yarn install --frozen-lockfile'} " this is for auto complete, prettier and tslinting
let g:coc_global_extensions = ['coc-tslint-plugin', 'coc-tsserver', 'coc-css', 'coc-html', 'coc-json', 'coc-prettier'] " list of CoC extensions needed
Plug 'jiangmiao/auto-pairs' "this will auto close ( [ {
" these two plugins will add highlighting and indenting to JSX and TSX files.
Plug 'yuezk/vim-js'
Plug 'HerringtonDarkholme/yats.vim'
Plug 'maxmellon/vim-jsx-pretty'
set encoding=UTF-8
call plug#end()
nnoremap <C-f> :NERDTreeFocus<CR>
nnoremap <C-n> :NERDTree<CR>
nnoremap <C-t> :NERDTreeToggle<CR>
nnoremap <C-l> :call CocActionAsync('jumpDefinition')<CR>
nmap <F8> :TagbarToggle<CR>
:set completeopt-=preview " For No Previews
:colorscheme jellybeans
let g:NERDTreeDirArrowExpandable="+"
let g:NERDTreeDirArrowCollapsible="~"
" --- Just Some Notes ---
" :PlugClean :PlugInstall :UpdateRemotePlugins
"
" :CocInstall coc-python
" :CocInstall coc-clangd
" :CocInstall coc-snippets
" :CocCommand snippets.edit... FOR EACH FILE TYPE
" air-line
let g:airline_powerline_fonts = 1
if !exists('g:airline_symbols')
let g:airline_symbols = {}
endif
" airline symbols
let g:airline_left_sep = ''
let g:airline_left_alt_sep = ''
let g:airline_right_sep = ''
let g:airline_right_alt_sep = ''
let g:airline_symbols.branch = ''
let g:airline_symbols.readonly = ''
let g:airline_symbols.linenr = ''
inoremap <expr> <Tab> pumvisible() ? coc#_select_confirm() : "<Tab>"위의 내용을 전체 다 복사해서 붙여넣기 한 후 [esc] 키를 눌러 명령모드로 전환 후 :wq를 입력하여 문서를 저장 후 터미널로 나간다.
터미널에서
$ curl -L -o ~/.vim/autoload/plug.vim --create-dirs https://raw.githubusercontent.com/junegunn/vim-plug/master/plug.vim위의 명령어로 플러그인을 설치할 수 있도록 plug.vim을 설치해주도록 하자.
다시 vi ~/.vimrc 를 입력해서 .vimrc를 수정해주려 하면 error가 뜰 것인데 아직 플러그인이 설치되지 않아서 그런 것이므로 [Enter]키로 넘겨주면 된다.
vim Editor의 명령모드에서 :PlugInstall 을 입력하고 [Enter]를 쳐주면
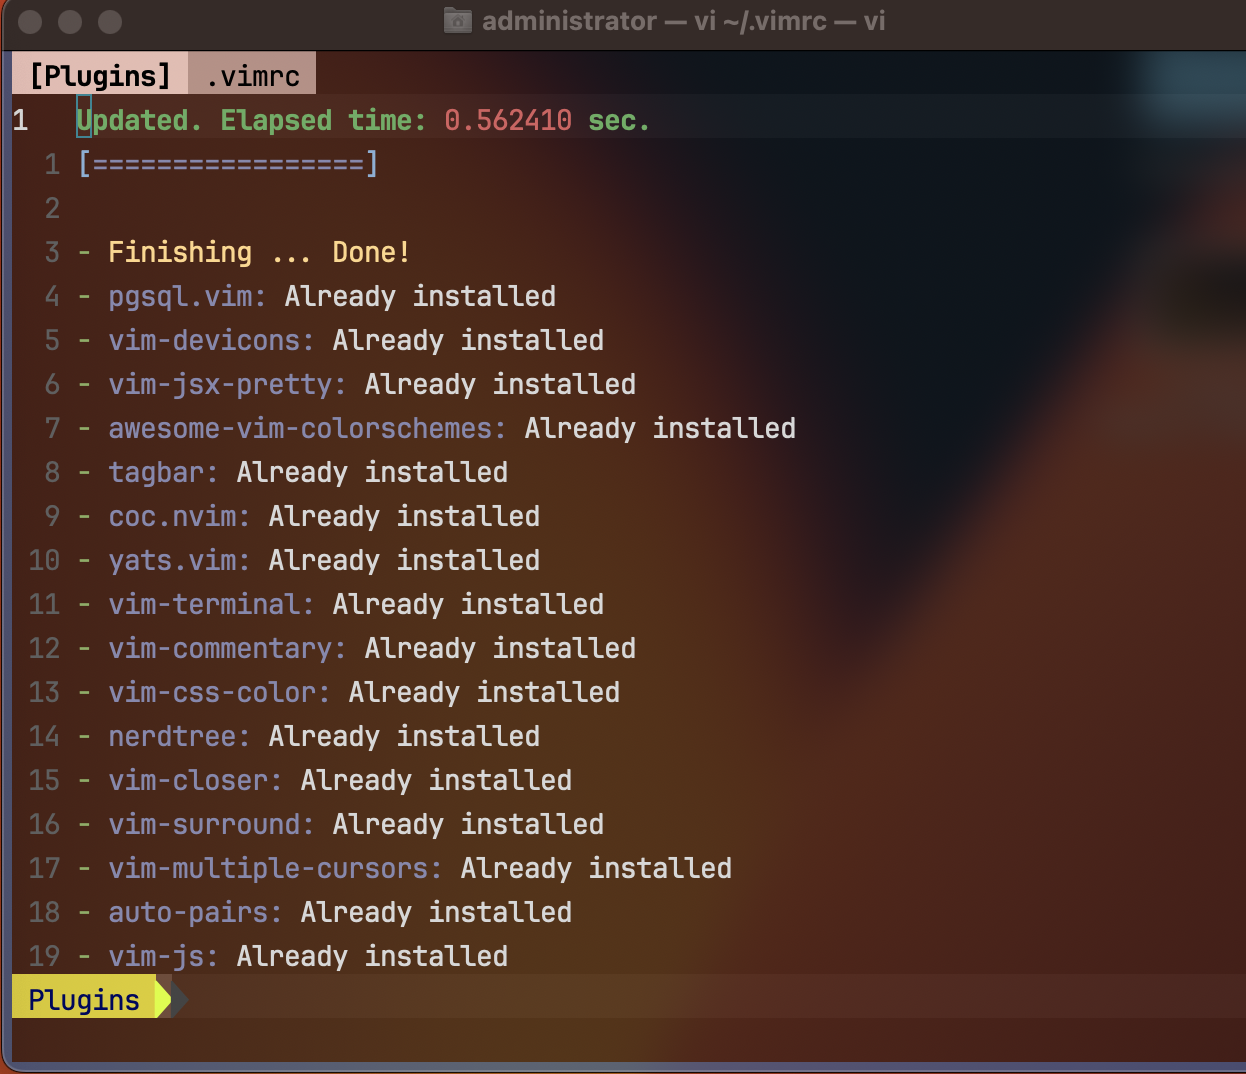
위와 같이 플러그인이 설치된다.
:q로 다시 터미널 창으로 나간다.
$ brew install nodenodeJs를 설치한 후 coc.nvim 디렉토리로 이동한다.
$ cd .vim/plugged/coc.nvim/$ npm install --global yarn$ yarn install$ yarn buildyarn 설치 후 vi 명령어 통해 vim Editor를 실행시킨다.
vim 명령모드에서
:CocInstall coc-python
:CocInstall coc-pyright
:CocInstall coc-tabnine
:CocInstall coc-json
등을 설치해준다. 여기까지 정상적으로 설치가 된다면
위와 같이 자동완성 기능을 지원한다.
자동완성을 사용하는 방법은 ctrl + p 또는 ctrl + n으로 사용한다.