우선 파워셀에
pip install Faker
pip install mysqlclient
pip install sqlalchemy
를 입력해서 파이썬 더미데이터 생성에 필요한 라이브러리를 설치한다.
gpt의 힘을 빌려서
import csv
import random
from faker import Faker

# Faker instance to generate random data
fake = Faker()

# List of accommodation types
accommodation_types = ["GUESTHOUSE", "HOTEL", "MOTEL", "PENSION", "HANOK", "APARTMENT"]

# Number of records to generate
num_records = 200000

# CSV file path
csv_file_path = 'accommodations.csv'

# Function to generate a random positive integer
def random_positive_int(start=1, end=100):
    return random.randint(start, end)

# Function to generate a list of random hashtags
def generate_hashtags(num_hashtags=5):
    return [fake.word() for _ in range(num_hashtags)]

# Create CSV file and write data
with open(csv_file_path, mode='w', newline='') as file:
    writer = csv.writer(file)
    # Write header
    writer.writerow([
        "name", "price", "address", "maxCapacity", "roomCount",
        "bedCount", "description", "amenity", "accommodationType", "hashtagContents"
    ])

    for _ in range(num_records):
        writer.writerow([
            fake.company(),  # name
            random_positive_int(50, 500),  # price
            fake.address(),  # address
            random_positive_int(1, 10),  # maxCapacity
            random_positive_int(1, 10),  # roomCount
            random_positive_int(1, 10),  # bedCount
            fake.text(max_nb_chars=200),  # description
            fake.text(max_nb_chars=100),  # amenity
            random.choice(accommodation_types),  # accommodationType
            "|".join(generate_hashtags(random_positive_int(1, 10)))  # hashtagContents
        ])

print(f'{num_records} records have been written to {csv_file_path}')
python C:/Users/정연호/Desktop/테스트/ddd.py
20만건의 데이터를 랜덤으로 생성하는 스크립트를 짰다.
이 데이터는 csv 파일로 만들어진다.
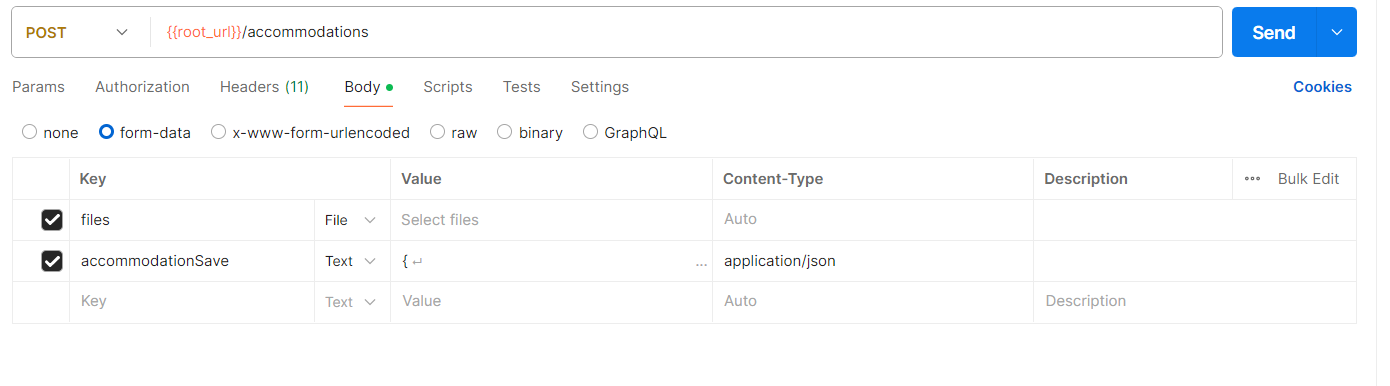
포스트맨으로 먼저 데이터를 넣어보려고 했는데 계속 안들어가서 봤더니
{
"name": "숙소61",
"price": 1000,
"address": "부천시 소사",
"maxCapacity": 2,
"roomCount": 2,
"bedCount": 1,
"description": "방이 예뻐요",
"amenity": "없음",
"hostId": 1,
"hashtags": null,
"accommodationType": "HOTEL"
}
-->이거 데이터가 application/json으로 가게끔 설정을 변경해야 했다.
config:
  target: "ip"
  phases:
    - duration: 100
      arrivalRate: 10
      rampTo: 100
  defaults:
    headers:
      Authorization: "Bearer eyJ0eXAiOiJKV1QiLCJhbGciOiJIUzUxMiJ9.eyJzdWIiOiJBY2Nlc3NUb2tlbiIsImlkIjoiZHVzZ2gxMjM0IiwiZXhwIjoxNzIwMTc5ODkyfQ.wgV5df8S8k1UrrzdZvrWixt_D4sITc2ncLpOjZpSafZpovQCciG6dPopXFNq5JxnVmcuFMphGKxPhYV7kmKgJQ"
  payload:
    path: "accommodations.csv"
    fields:
      - "name"
      - "price"
      - "address"
      - "maxCapacity"
      - "roomCount"
      - "bedCount"
      - "description"
      - "amenity"
      - "accommodationType"
      - "hashtagContents"

scenarios:
  - name: "create accommodation"
    flow:
      - post:
          url: "/accommodations"
          headers:
            Content-Type: "application/json"
          body: |
            {
              "name": "{{ name }}",
              "price": {{ price }},
              "address": "{{ address }}",
              "maxCapacity": {{ maxCapacity }},
              "roomCount": {{ roomCount }},
              "bedCount": {{ bedCount }},
              "description": "{{ description }}",
              "amenity": "{{ amenity }}",
              "accommodationType": "{{ accommodationType }}",
              "hostId": 1,
              "hashtags": "{{ hashtagContents }}"
            }
스크립트를 짜는데 계속 mutlpart 부분 데이터를 어떻게 보내야할지 몰라서 실행이 안된다...
지금 코드를 변경하기보단 우선 user를 만들고 login하는 걸 테스트해보기로 했다.
import csv
import random
from faker import Faker
from datetime import datetime

# Faker instance to generate random data
fake = Faker()

# Number of records to generate
num_records = 200000

# CSV file path
csv_file_path = 'user.csv'

# Function to generate a random birthdate
def random_birthdate(start_year=1950, end_year=2000):
    start_date = datetime(start_year, 1, 1)
    end_date = datetime(end_year, 12, 31)
    return fake.date_between(start_date=start_date, end_date=end_date).strftime('%Y-%m-%d')

# Create CSV file and write data
with open(csv_file_path, mode='w', newline='') as file:
    writer = csv.writer(file)
    # Write header
    writer.writerow([
        "loginId", "name", "password", "address", "birthdate"
    ])

    for _ in range(num_records):
        writer.writerow([
            fake.user_name(),  # loginId
            fake.name(),  # name
            fake.password(),  # password
            fake.address(),  # address
            random_birthdate()  # birthdate
        ])

print(f'{num_records} records have been written to {csv_file_path}')
config:
  target: "ip"
  phases:
    - duration: 100
      arrivalRate: 10
      rampTo: 100
  payload:
    path: "user.csv"
    fields:
      - "loginId"
      - "name"
      - "password"
      - "address"
      - "birthdate"

scenarios:
  - name: "create user"
    flow:
      - post:
          url: "/user"
          json:
            loginId: "{{ loginId }}"
            name: "{{ name }}"
            password: "{{ password }}"
            address: "{{ address }}"
            birthdate: "{{ birthdate }}"
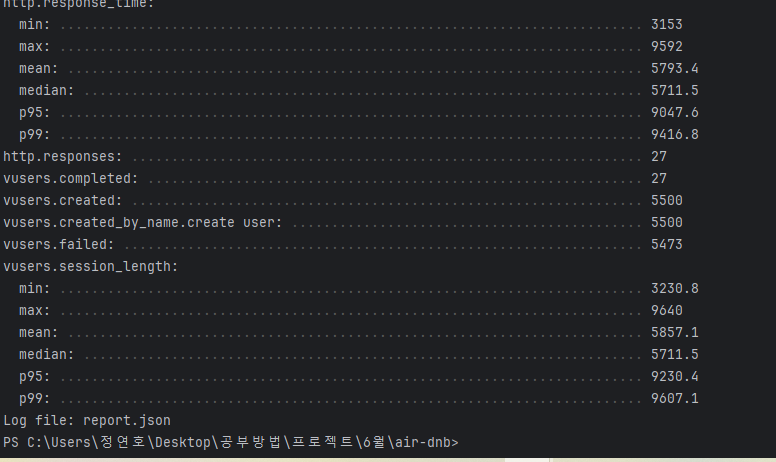
user 가입의 경우 상당한 지연시간이 걸리는 걸 알 수 있다.
public Long save(JoinRequestServiceDto requestDto){

        String hash = bCryptPasswordEncoder.encode(requestDto.getPassword());
        User user = new User(requestDto.getLoginId()
                , requestDto.getName()
                , hash
                , requestDto.getAddress()
                , requestDto.getBirthdate());

       return userRepository.save(user).getId();
    }
비밀번호 암호화를 비동기 처리할까? 고민했는데 어차피
db에는 암호화된 비밀번호가 저장돼야 한다. 그렇다면, 비동기를 해도 큰 의미가 없다.
근데 여기서 반환타입이 db에 저장되고서 id를 가져오는건데...
이렇게 하는 걸
    public void save(JoinRequestServiceDto requestDto){

        String hash = bCryptPasswordEncoder.encode(requestDto.getPassword());
        User user = new User(requestDto.getLoginId()
                , requestDto.getName()
                , hash
                , requestDto.getAddress()
                , requestDto.getBirthdate());

        userRepository.save(user);
    }
코드를 이렇게 변경해보았다.
다시 배포서버로 보낸뒤
docker-compose down
후에 docker-compose up -d
다시 테스트해보니 차이가 거의 없었따 ㅎ....
