
😀 시작
어플리케이션을 만들다보면 회원의 프로필 사진을 추가하는 경우가 많은데, 보통 사각형 이미지 보다는 둥근 모양의 이미지를 선택하는 경우가 많다. 이번 포스팅에서는 어떻게 둥근 이미지를 만들 수 있는지 알아볼 것이다.
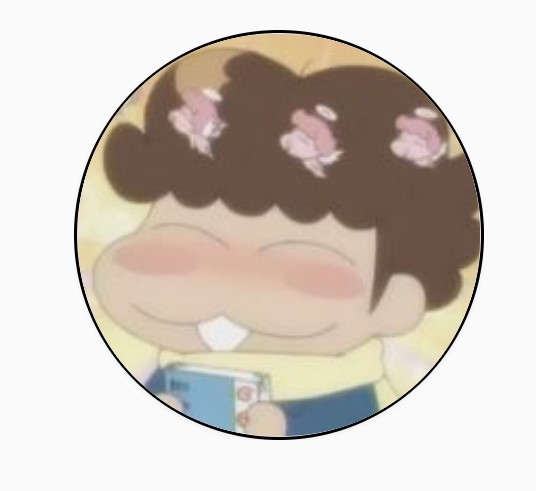
정상적으로 입력된다면, 우리는 위의 사진과 같은 결과를 얻을 수 있을 것이다. 자세히 보면 사진 바깥 쪽에 굵은 테두리가 그려진 것도 확인할 수 있다.
🙃 실습
📌 1. 의존성 부여
implementation 'com.github.bumptech.glide:glide:4.9.0'우선, 브라우저 혹은 서버에서 이미지를 로드할 때 사용하는 glide 라이브러리를 사용하도록 한다. 로컬에서 이미지를 사용할 것이라면 굳이 이 과정을 밟지 않아도 된다.
📌 2. 레이아웃 구성
둥근 이미지를 그려줄 레이아웃을 구성한다.
2-1. 메인 레이아웃
    <RelativeLayout
        android:layout_marginTop="20dp"
        android:layout_width="152dp"
        android:layout_height="152dp"
        android:layout_gravity="center"
        android:background="@drawable/style_circle_user_profile">

        <androidx.cardview.widget.CardView
            android:id="@+id/info_user_cardView"
            android:layout_width="150dp"
            android:layout_height="150dp"
            android:layout_centerHorizontal="true"
            android:layout_centerVertical="true"
            android:clickable="true"
            android:foreground="?android:attr/selectableItemBackground"
            app:cardCornerRadius="75dp">

            <ImageView
                android:id="@+id/info_user_profile"
                android:layout_width="match_parent"
                android:layout_height="match_parent"
                android:scaleType="centerCrop"
                android:src="@drawable/item_user_image"/>
        </androidx.cardview.widget.CardView>
    </RelativeLayout>
코드의 구성은 RelativeLayout 을 바탕으로 CardView 와 ImageView 가 구성된 것을 확인할 수 있다.
-
CardView의app:cardCornerRadius에서 모서리를 둥글게 만드는 역할을 수행하고,ImageView를CardView의 자식으로 넣음으로서 뼈대를 구축한다.
이 때scaleType="centerCrop"을 꼭 넣어줘야 둥근 형태로 이미지가 들어간다. 😉 -
RelativeLayout영역의background에 설정된 xml이 위에서 보았던 원의 굵은 테두리를 그리는 역할을 수행한다.
물론 테두리가 굳이 필요하지 않다면 넣지 않아도 무방하다.
미세먼지 팁 🤭
clickable을 설정하면 CardView의 클릭 이벤트도 생성할 수 있다.
2-2. 굵은 테두리를 그려주는 xml
<?xml version="1.0" encoding="utf-8"?>
<shape xmlns:android="http://schemas.android.com/apk/res/android"
    android:shape="oval">
    <solid android:color="#fff" />
    <stroke
        android:width="1dp"
        android:color="@color/black" />
</shape>
<stroke> 단에서 테두리의 굵기와 색깔을 지정하니 원하는 모습으로 커스텀하면 된다.
🙋♂️ RelativeLayout 의 크기는 어떻게 지정하나요?
RelativeLayout = CardView + (stroke width * 2)
위의 예시에서는 해당 계산식을 거쳐 152dp 의 값을 넣었다.
📌 3. 서버에서 값을 넣을 때
     ImageView user_profile = findViewById(R.id.info_user_profile);

     Glide.with(getApplicationContext())
         .load(YOUR_URL)
         .into(user_profile);
Glide 라이브러리를 이용해 URL을 입력해주면 된다.
😊 참 쉽지요?
😆 결과
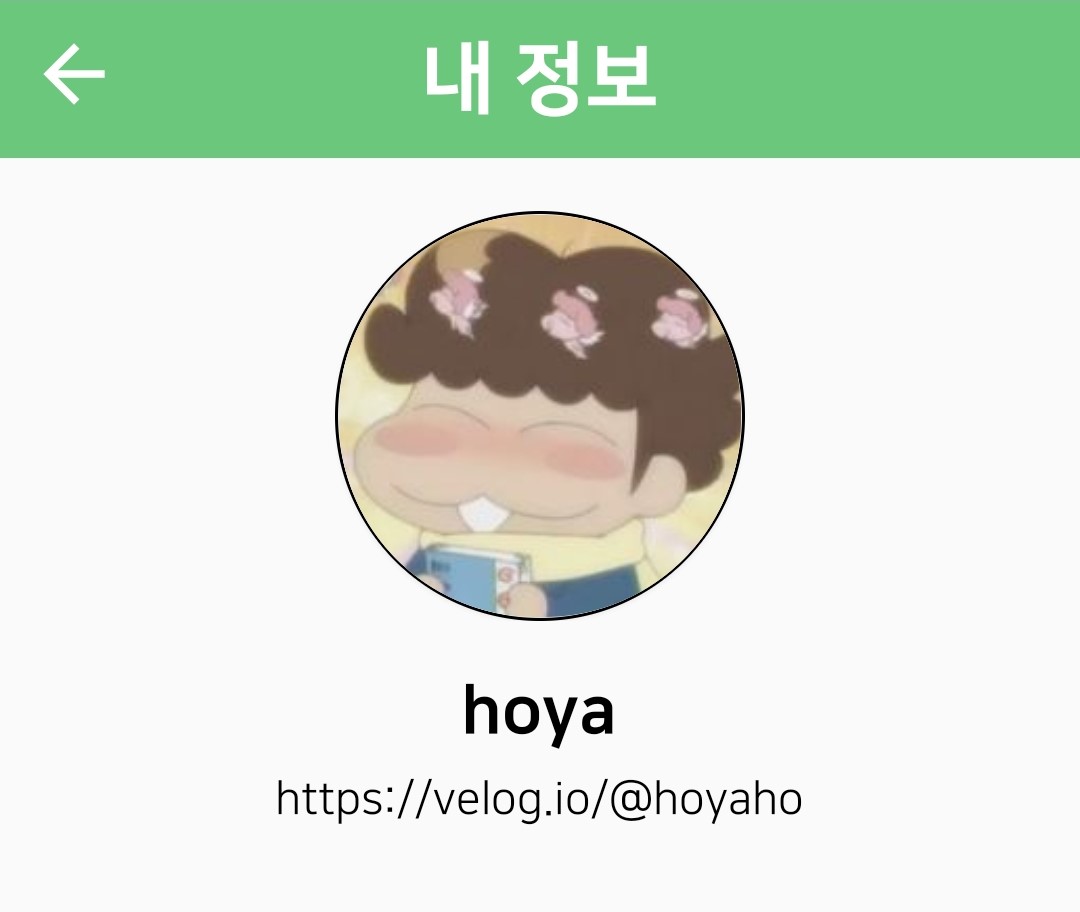
정말 쉽게 완성됐다. 해당 포스팅에서는 라이브러리나 플러그인의 도움 없이 둥근 이미지를 제작하기 때문에 속도가 저하되거나 데이터에 영향을 미칠 일이 없다는 것이 장점이다. 이 방법을 이용해 각자의 프로젝트에 잘 써먹어 보도록 하자.
참고 및 출처