📒 어쩌다 마주친 별점 영역
꽤 오래전 별점 영역이 포함된 화면을 할당받은 경험이 있다. 초기 기획/디자인은 셀렉트박스를 통해 1점부터 0.5점 단위로 5점까지 선택하는 형태였다.
이런저런 과정을 거치며.. 마우스 오버 시 별점을 선택할 수 있도록 수정되었는데
대략 이런 형태이다. ⬇️

❗️ 간단해 보이는데..?
그렇다. 간단해보인다. 그냥... 라벨이랑 인풋이랑 이렇게이렇게 묶어서 백그라운드 바꿔주면 되는거 아냐? 🤔..
맞다. 하지만 별이 점수에 맞게 차오르는 화면까지 구현해야하는데, html/css만을 사용해야하는 환경이 이슈였다.
- 시작부분부터 ~ 마우스오버한 부분까지 별이 채워져야한다.
➡️ 마우스오버한 부분까지의 넓이가 계산되어야한다.label태그 하나하나에 백그라운드를 주는것이 의미가 없다. 자식요소 선택시, 또는자식요소:hover시 ->부모와부모의 형제를 선택할 수 없다.
➡️label태그 내부에input을 둘 수 없다.
그래서 정돈되어 보이지 않는 구조가 탄생했다. 오랜만에 봤는데 역시나 구조나 접근성이나.. 맘에 들지않아서 조만간 시간내서 다시 만들어보고 싶은 생각이 있다.
📌 구현하기
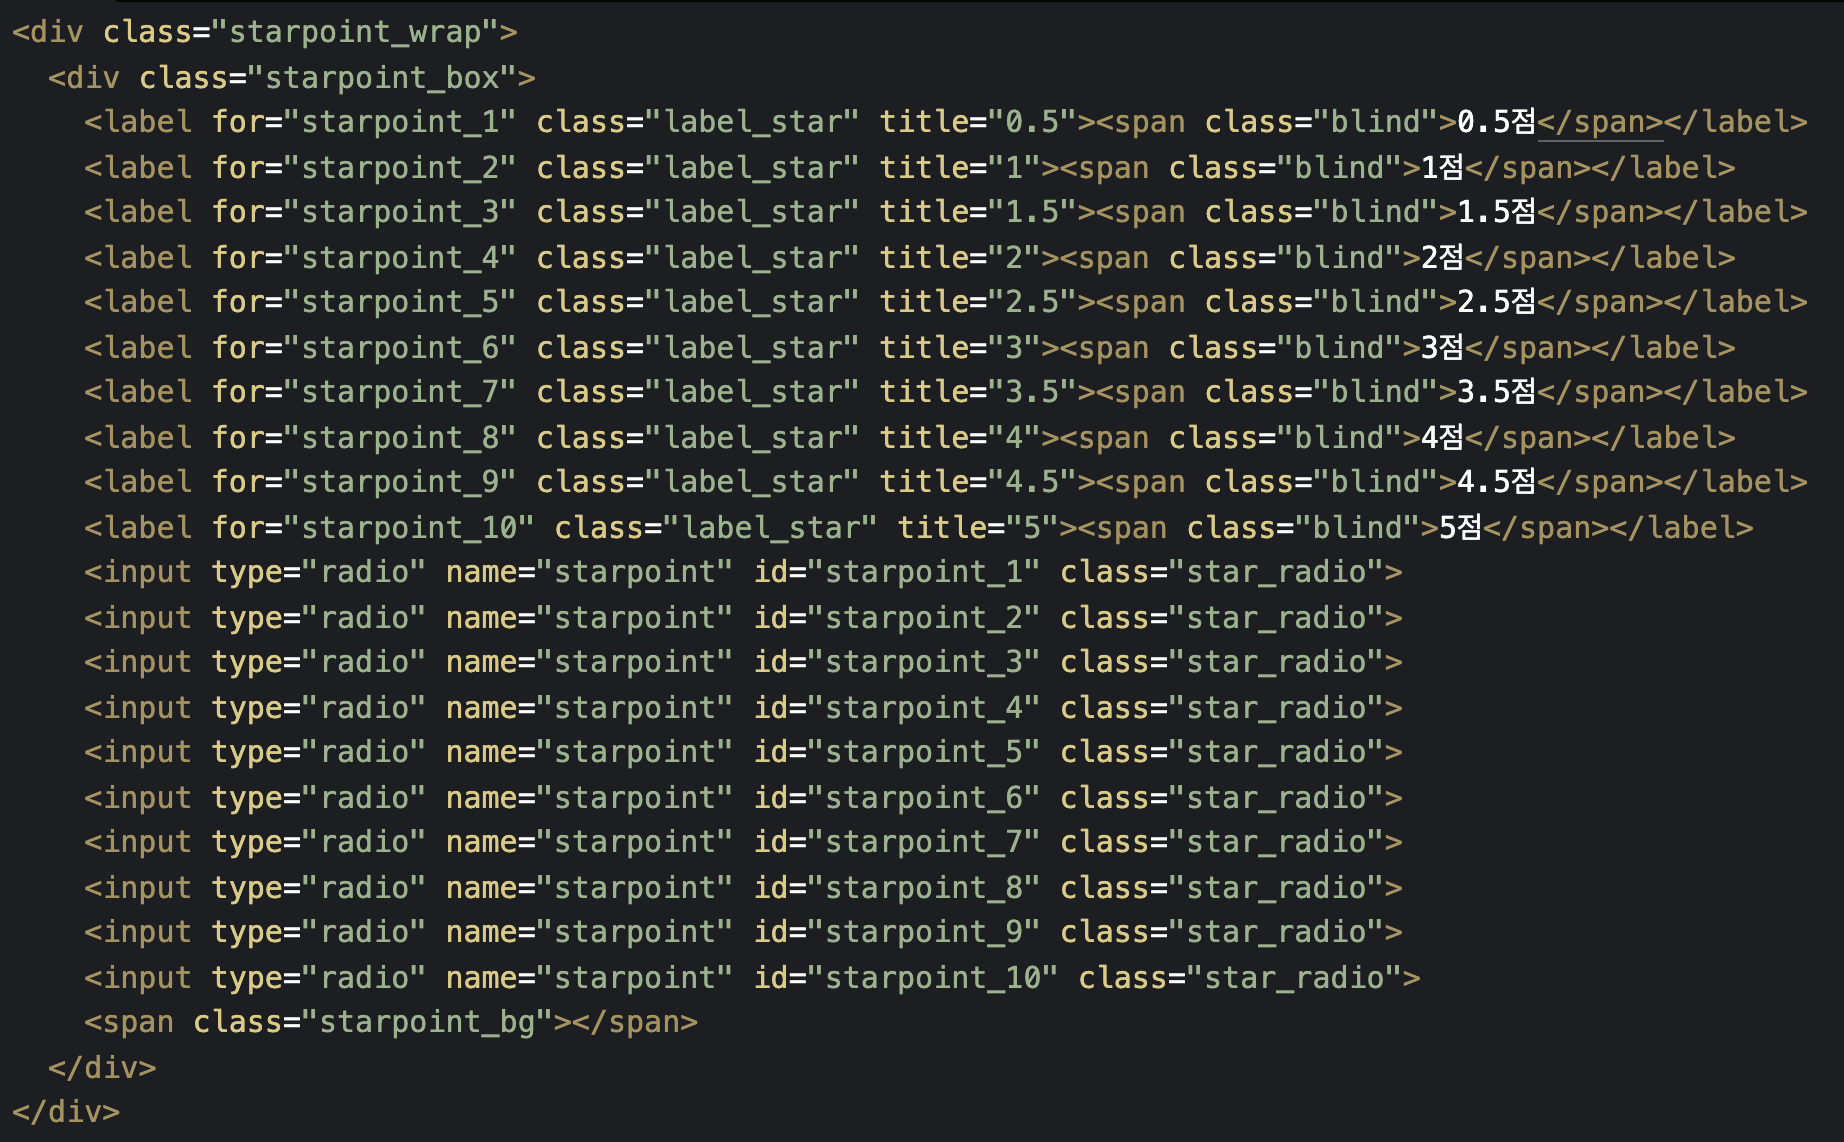
1. html 구조
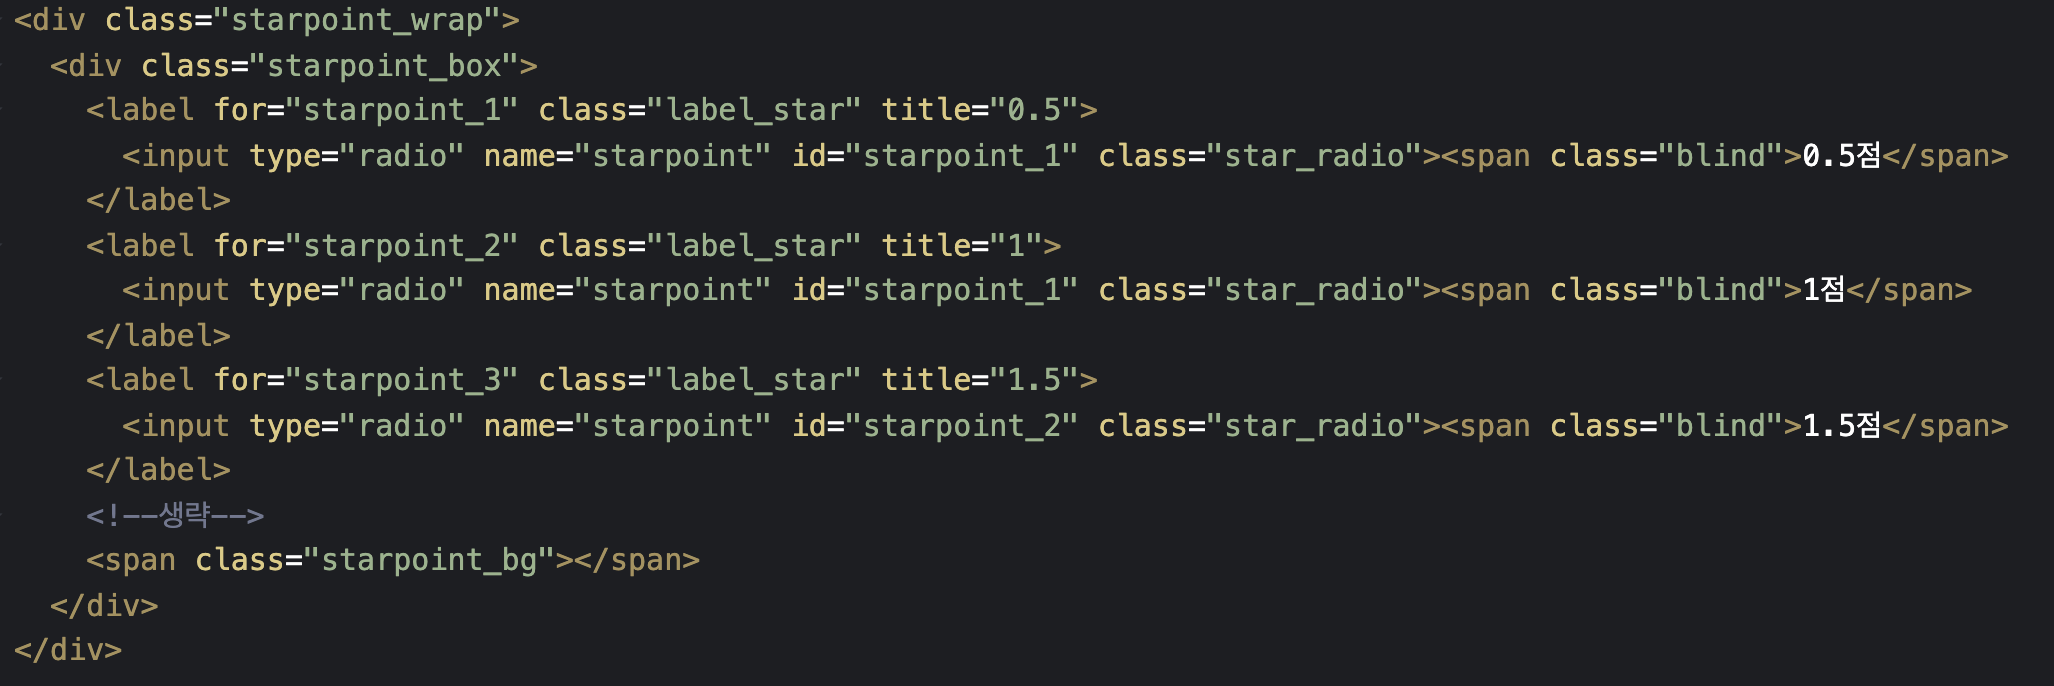
초반에는 하단처럼 label 태그로 input 태그를 감싸서 구현할 생각이었으나,
input:checked 시 active될 별의 백그라운드(starpoint_bg)를 선택할 수가 없어서 부득이하게 label / input / active background(starpoint_bg) 가 같은 레벨로 있는 구조를 만들게 되었다.
+) 추가적으로 wrap으로 한번 더 감싼 이유는 '평가하기' 타이틀과 별점 우측 선택한 점수를 보여주는 영역이 starpoint_box 와 같은 레벨로 있기 때문에 추가해둔 것.

⬇️⬇️⬇️

2. css
2-0. 이미지 만들기
예시에서 이미지는 하단 스프라이트 이미지를 사용한다.
![]()
2-1. 별점영역 백그라운드로 선택 전 회색 별 백그라운드로 깔기
.starpoint_box{position:relative;background:url(https://hsecode.github.io/images_codepen/codepen_sp_star.png) 0 0 no-repeat;font-size:0;}2-2. 마우스 오버 시 바뀔 활성화된 별 백그라운드 깔기
.starpoint_box .starpoint_bg{display:block;position:absolute;top:0;left:0;height:18px;background:url(https://hsecode.github.io/images_codepen/codepen_sp_star.png) 0 -20px no-repeat;pointer-events:none;}2-3. input과 연결된 label의 넓이 지정하기
본 예시에서는 radio input을 사용해서 별점을 구현한다.
디자인(별모양) input을 사용하기위해 ipnut 역할을 대신해줄 label을 사용한다.
0.5점 단위로 점수를 선택할 것이기 때문에 label의 width값을 한개의 별 넓이의 1/2로 잡고,
radio input은 숨김처리한다.
.starpoint_box .label_star{display:inline-block;width:10px;height:18px;box-sizing:border-box;}
.starpoint_box .star_radio{opacity:0;width:0;height:0;position:absolute;}
2-4. 마우스 오버 시 + input에 체크 시 active될 넓이를 지정한다.
radio input에 마우스오버 됐을때와 checked 되었을 때 active될 백그라운드의 넓이를 지정해준다. 이때 같은 레벨에 있는 형제 선택자인 ~를 사용해서 active 백그라운드인 starpoint_bg를 선택한다.
.starpoint_box .star_radio:nth-of-type(1):hover ~ .starpoint_bg,
.starpoint_box .star_radio:nth-of-type(1):checked ~ .starpoint_bg{width:10%;}
.starpoint_box .star_radio:nth-of-type(2):hover ~ .starpoint_bg,
.starpoint_box .star_radio:nth-of-type(2):checked ~ .starpoint_bg{width:20%;}
.starpoint_box .star_radio:nth-of-type(3):hover ~ .starpoint_bg,
.starpoint_box .star_radio:nth-of-type(3):checked ~ .starpoint_bg{width:30%;}
.starpoint_box .star_radio:nth-of-type(4):hover ~ .starpoint_bg,
.starpoint_box .star_radio:nth-of-type(4):checked ~ .starpoint_bg{width:40%;}
.starpoint_box .star_radio:nth-of-type(5):hover ~ .starpoint_bg,
.starpoint_box .star_radio:nth-of-type(5):checked ~ .starpoint_bg{width:50%;}
.starpoint_box .star_radio:nth-of-type(6):hover ~ .starpoint_bg,
.starpoint_box .star_radio:nth-of-type(6):checked ~ .starpoint_bg{width:60%;}
.starpoint_box .star_radio:nth-of-type(7):hover ~ .starpoint_bg,
.starpoint_box .star_radio:nth-of-type(7):checked ~ .starpoint_bg{width:70%;}
.starpoint_box .star_radio:nth-of-type(8):hover ~ .starpoint_bg,
.starpoint_box .star_radio:nth-of-type(8):checked ~ .starpoint_bg{width:80%;}
.starpoint_box .star_radio:nth-of-type(9):hover ~ .starpoint_bg,
.starpoint_box .star_radio:nth-of-type(9):checked ~ .starpoint_bg{width:90%;}
.starpoint_box .star_radio:nth-of-type(10):hover ~ .starpoint_bg,
.starpoint_box .star_radio:nth-of-type(10):checked ~ .starpoint_bg{width:100%;}
완성본
👏🏻 마무리
🐱 : 서두에도 작성하였듯 이 구조가 나는 여전히 마음에 들지 않는다. 접근성 부분에서 너무나 신경쓰인다..
js를 사용해서 전체 구현까지 해야하는 입장이었다면 구조가 바뀌었겠으나.. 우선 html/css까지만, 마우스 움직임에 따라 별이 칠해지는 것 까지의 화면구현.만이 필요한 상황이었기에 부득이하게 이런 구조를 사용했다. 조만간 구조를 다듬어서 다시 만들어보고싶다.


공부하는데 많은 도움이 되었습니다! 감사합니다🥰❤️