※ 이 포스트는 클래스형 컴포넌트를 기준으로 작성되었다.
1. 왜 필요한가?
웹에서 특정 사용자한테 푸시 알림을 보내는 기능이 필요하였다. 푸시 알림은 다양하게 활용이 될 수 있다. 예를 들어, 웹에서 관리자가 공지사항 글을 게시하였을 경우에 사용자는 앱에서 알림을 통하여 해당 게시글을 푸시 알림으로 알 수 있다. 예와 같은 기능을 구현하고자 푸시 알림 기능을 테스트 버전으로 개발하였다.
2. 과정
필자는 expo-notifications 라이브러리를 사용하여 푸시 알림을 구현하였다. 하지만 이 것은 로컬환경에서만 사용이 가능하였고 서버를 통해서 알림을 제공할려면 구글의 FCM(Firebase Cloud Messaging)을 사용하여야 한다.
3. 결과
FCM을 사용하기 위해서는 구글의 파이어베이스에서 프로젝트를 만들어 FCM의 서버키를 발급받아야 한다.
1. FCM 서버 키 발급 받기
아래의 링크로 가서 새 프로젝트 생성 버튼을 누른다.
https://console.firebase.google.com/?hl=ko
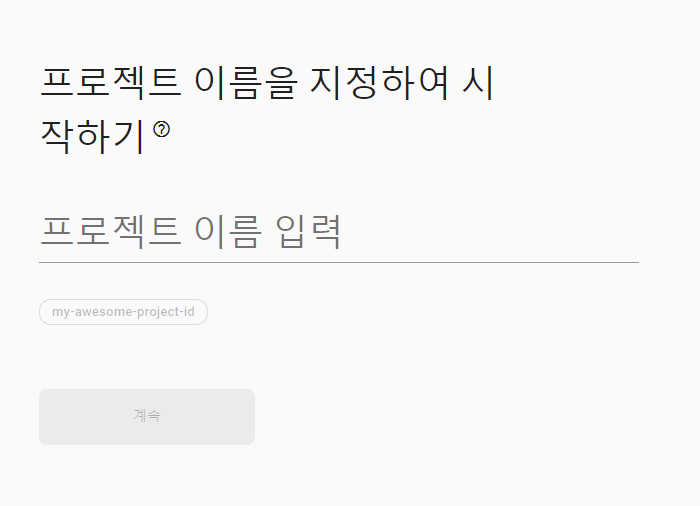
새 프로젝트를 누르면 다음과 같이 프로젝트의 이름을 마음대로 입력하면 된다.
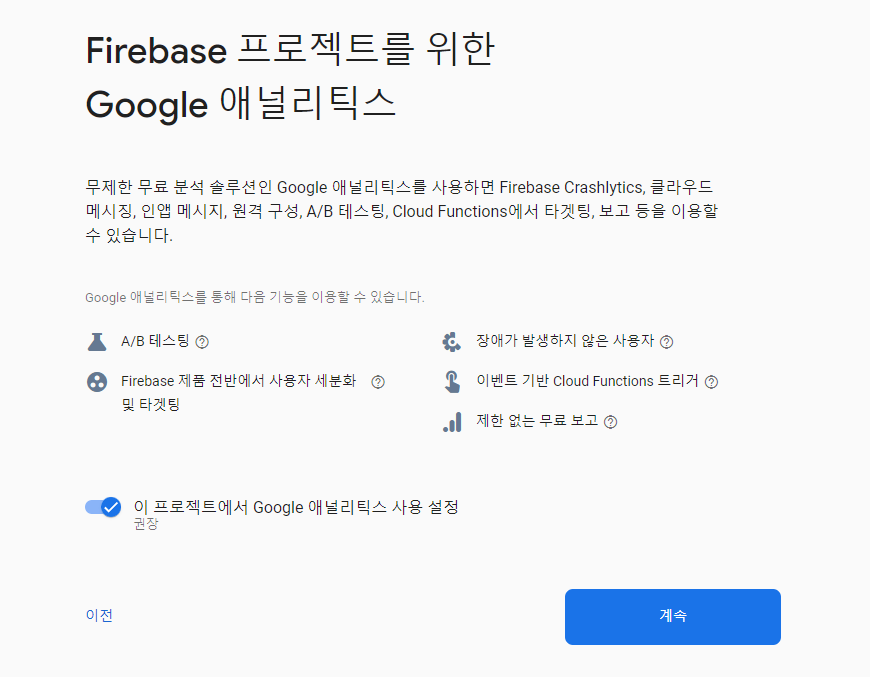
자동으로 체크 박스가 선택되어지기 때문에 계속을 누른다.
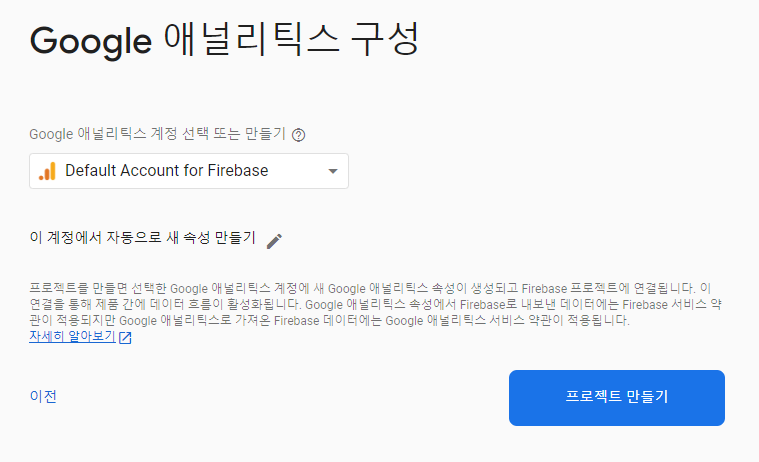
프로젝트를 생성할 구글의 계정을 선택하고 프로젝트 만들기를 누른다. Default Account for Firebase를 선택할 경우 파이어베이스에 등록된 기본 계정에 생성이 된다.
프로젝트 생성이 완료되면 안드로이드 앱을 생성한 프로젝트에 등록해야 한다. 다음의 그림처럼 안드로이드 모양의 버튼을 누른다.
Android 패키지 이름을 app.json에서 다음과 같이 앱의 패키지 이름이 있다.
"android": {
      "adaptiveIcon": {
        "foregroundImage": "./assets/adaptive-icon.png",
        "backgroundColor": "#FFFFFF"
      },
      "package": "패키지이름",
    },
package에 있는 텍스트를 복사하여 Android 패키지 이름란에 붙여넣기 한 후 앱 등록 버튼을 누른다.
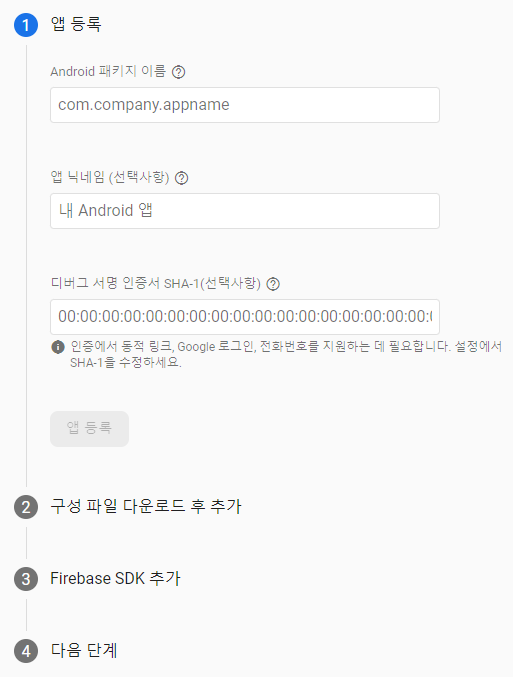
google-services.json 다운로드버튼을 누르고 해당 파일을 다운로드 한다.

그 후의 과정은 다음을 누르고 콘솔로 이동 버튼을 눌러서 스킵하면 된다.
google-services.json파일을 expo프로젝트 폴더의 app.json과 package.json파일의 같은 위치에 복사하거나 이동시킨 후 app.json파일에서 다음과 같이 수정한다.
"android": {
"adaptiveIcon": {
"foregroundImage": "./assets/adaptive-icon.png",
"backgroundColor": "#FFFFFF"
},
"package": "패키지 이름",
"googleServicesFile": "./google-services.json" // 추가
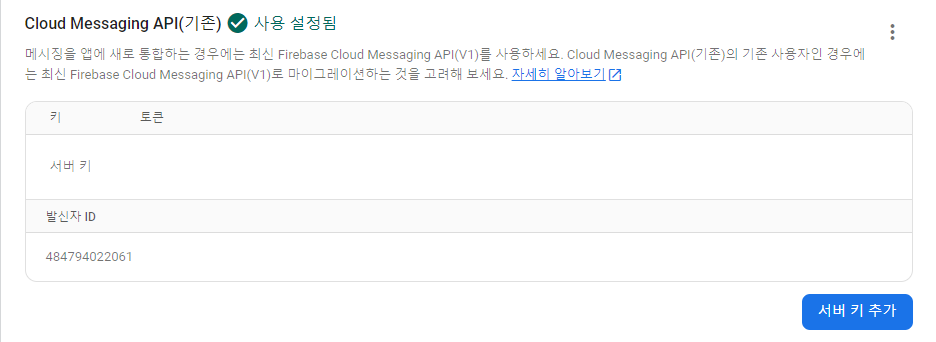
},프로젝트 개요 옆에 있는 톱니바퀴 모양의 버튼을 누른 후 프로젝트 설정 메뉴를 누른다. 프로젝트 설정 탭에서 클라우드 메시징 탭을 누르면 다음과 같이 기본적으로 Cloud Messaging API의 사용이 중지되어 있다.

오른쪽의 3개의 점을 누른 후 Google Cloud Console에서 API관리탭을 눌러 Cloud Messaging의 페이지가 실행되면 사용버튼을 누른다. 그 후 파이어베이스의 프로젝트 설정 페이지를 새로고침하면 다음과 같이 서버 키를 발급 받을 수 있다.
프로젝트 폴더에서 명령 프롬프트를 실행 후 다음의 명령어를 입력하여 실행한다.
expo push:android:upload --api-key [서버 키]※주의:
google-services.json은 패키지 별로 파이어베이스 프로젝트에 앱을 등록 후에 만들어지는 파일을 사용하여야 하며 중복 사용이 불가능하다.
2. 푸시 알림 앱 개발
아래의 명령어를 명령 프롬프트에 입력하여 expo-notifications라이브러리를 설치한다.
npx expo install expo-notifications다음과 같이 설치한 라이브러리를 import한다.
import * as Notifications from "expo-notifications";다음의 코드로 Notifications의 핸들러를 설정한다.
Notifications.setNotificationHandler({
  handleNotification: async () => ({
    shouldShowAlert: true,
    shouldPlaySound: true,
    shouldSetBadge: false,
  }),
});constructor안에 다음과 같이 변수 및 Ref를 생성한다.
this.responseListener = React.createRef();
this.notificationListener = React.createRef();
this.state = {
      pushToken: "",
      notification: false,
    };
알림을 보내는 함수를 정의한다.
async function schedulePushNotification(data) {
  await Notifications.scheduleNotificationAsync({
    content: {
      title: "테스트 알림",
      body: data,
    },
    trigger: null,
  });
}
여기서 data는 알림의 내용을 의미한다. trigger로 알림이 실행되는 시간을 설정할 수 있다.
알림의 채널 설정 및 권한을 받은 후 expo의 푸시 토큰을 받아서 변수에 저장한다.
async componentDidMount() {
    if (Platform.OS === "android") {
      await Notifications.setNotificationChannelAsync("default", {
        name: "default",
        importance: Notifications.AndroidImportance.MAX,
        vibrationPattern: [0, 250, 250, 250],
        lightColor: "#FF231F7C",
      });
    }
    const { granted } = await Notifications.getPermissionsAsync();
    if (granted) {
      const { data } = await Notifications.getExpoPushTokenAsync();
      this.setState({ pushToken: data });
    } else if (!granted) {
      alert("알림이 거부 되었습니다.");
    } else {
      alert("알림이 지원 되지않습니다.");
    }
    Notifications.addNotificationReceivedListener((notification) => {
      console.log("NOTIFICATION:", notification);
    });
    this.notificationListener.current =
      Notifications.addNotificationReceivedListener((notification) => {
        this.setState({ notification: notification });
      });
    this.responseListener.current =
      Notifications.addNotificationResponseReceivedListener((response) => {
        console.log(response);
      });
  }
마지막으로 Button태그를 생성하여 expo의 푸시 토큰을 알림으로 받는 버튼을 생성한다.
  render() {
    return (
      <View>
        <Button
          title="Show Push Token"
          onPress={async () => {
            await schedulePushNotification(this.state.pushToken);
          }}
        />
      </View>
    );
  }
앱의 예제 코드는 다음과 같다.
import React from "react";
import * as Notifications from "expo-notifications";
import { View, Button, Platform } from "react-native";

Notifications.setNotificationHandler({
  handleNotification: async () => ({
    shouldShowAlert: true,
    shouldPlaySound: true,
    shouldSetBadge: false,
  }),
});

// 알림 울리기
async function schedulePushNotification(data) {
  await Notifications.scheduleNotificationAsync({
    content: {
      title: "테스트 알림",
      body: data,
    },
    trigger: null,
  });
}

export default class App extends React.Component {
  constructor(props) {
    super(props);
    this.responseListener = React.createRef();
    this.notificationListener = React.createRef();
    this.state = {
      pushToken: "",
      notification: false,
    };
  }

  // 이벤트 등록
  async componentDidMount() {
    if (Platform.OS === "android") {
      await Notifications.setNotificationChannelAsync("default", {
        name: "default",
        importance: Notifications.AndroidImportance.MAX,
        vibrationPattern: [0, 250, 250, 250],
        lightColor: "#FF231F7C",
      });
    }
    const { granted } = await Notifications.getPermissionsAsync();
    if (granted) {
      const { data } = await Notifications.getExpoPushTokenAsync();
      this.setState({ pushToken: data });
    } else if (!granted) {
      alert("알림이 거부 되었습니다.");
    } else {
      alert("알림이 지원 되지않습니다.");
    }
    Notifications.addNotificationReceivedListener((notification) => {
      console.log("NOTIFICATION:", notification);
    });
    this.notificationListener.current =
      Notifications.addNotificationReceivedListener((notification) => {
        this.setState({ notification: notification });
      });
    this.responseListener.current =
      Notifications.addNotificationResponseReceivedListener((response) => {
        console.log(response);
      });
  }

  // 이벤트 해제
  componentWillUnmount() {
    Notifications.removeNotificationSubscription(this.responseListener.current);
    Notifications.removeNotificationSubscription(
      this.notificationListener.current
    );
  }

  render() {
    return (
      <View>
        <Button
          title="Show Push Token"
          onPress={async () => {
            await schedulePushNotification(this.state.pushToken);
          }}
        />
      </View>
    );
  }
}
3. 푸시 알림 서버 개발
expo의 API를 호출하는 용도이기 때문에 React Native에서도 처리가 가능하지만 웹에서 앱으로 푸시 알림을 보내기 위한 백엔드 서버가 필요하다. 백엔드 서버는 express와 node-fetch를 사용하여 간단하게 구현하였다. 백엔드 서버에서 expo API로 알림 요청을 보내는 코드는 다음과 같다.
const sendPushNotification = async (expoPushToken, message) => {
  const response = await fetch("https://exp.host/--/api/v2/push/send", {
    method: "POST",
    headers: {
      Accept: "application/json",
      "Accept-encoding": "gzip, deflate",
      "Content-Type": "application/json",
    },
    body: JSON.stringify({
      to: expoPushToken,
      sound: "default",
      title: "Push Notification Title",
      body: message,
    }),
  });
  const data = await response.json();
  console.log("Push notification sent:", data);
};
백엔드 서버에서 알림 기능을 하는 핵심적인 코드이고 title도 message처럼 함수의 인자값으로 받아서 원하는 제목으로 변경이 가능하다. 다음은 간단하게 테스트 용도의 expo API로 푸시 알림을 요청하는 코드이다.
const express = require("express");
const fetch = require("node-fetch");
const bodyParser = require("body-parser");
const app = express();
const sendPushNotification = async (expoPushToken, message) => {
  const response = await fetch("https://exp.host/--/api/v2/push/send", {
    method: "POST",
    headers: {
      Accept: "application/json",
      "Accept-encoding": "gzip, deflate",
      "Content-Type": "application/json",
    },
    body: JSON.stringify({
      to: expoPushToken,
      sound: "default",
      title: "Push Notification Title",
      body: message,
    }),
  });
  const data = await response.json();
  console.log("Push notification sent:", data);
};
app.use(bodyParser.json());
app.use(bodyParser.urlencoded({ extended: !0 }));
app.set("port", process.env.PORT || 5500);
app.set("host", process.env.HOST || "0.0.0.0");
app.get("/", function (req, res) {
  res.sendFile(__dirname + "/index.html");
});
app.post("/sendPushNotification", async (req, res) => {
  try {
    const { expoPushToken, message } = req.body;
    await sendPushNotification(expoPushToken, message);
    res.status(200).send({ success: true });
  } catch (error) {
    console.error(error);
    res.status(500).send({ success: false, error });
  }
});
app.listen(app.get("port"), app.get("host"), () => {
  console.log("Server started on :" + app.get("port"));
});
간단하게 웹에서 앱으로 메세지 알림을 보낼 수 있는 index.html페이지이다.
<!DOCTYPE html>
<html lang="en">
  <head>
    <meta charset="UTF-8" />
    <meta http-equiv="X-UA-Compatible" content="IE=edge" />
    <meta name="viewport" content="width=device-width, initial-scale=1.0" />
    <title>Document</title>
  </head>
  <body>
    <input id="input" />
    <button id="send">전송</button>
    <script src="https://cdn.jsdelivr.net/npm/axios/dist/axios.min.js"></script>
    <script>
      document.querySelector("#send").addEventListener("click", function () {
        axios
          .post("http://localhost:5500/sendPushNotification", {
            expoPushToken: "expo push token",
            message: document.getElementById("input").value,
          })
          .then(function (response) {
            console.log(response);
          })
          .catch(function (error) {
            console.log(error);
          });
      });
    </script>
  </body>
</html>