→ Jsp라는 새로운 프로젝트 생성
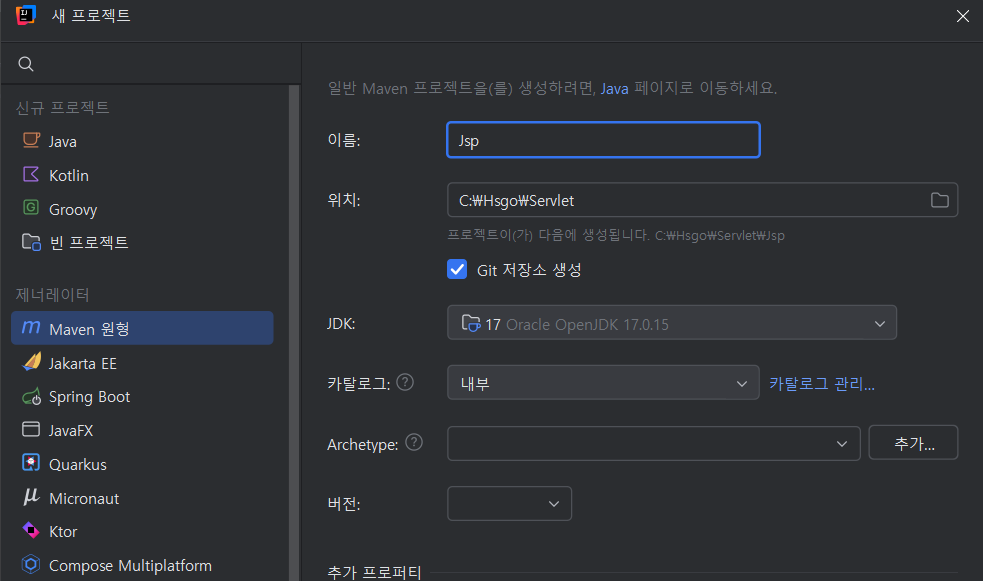
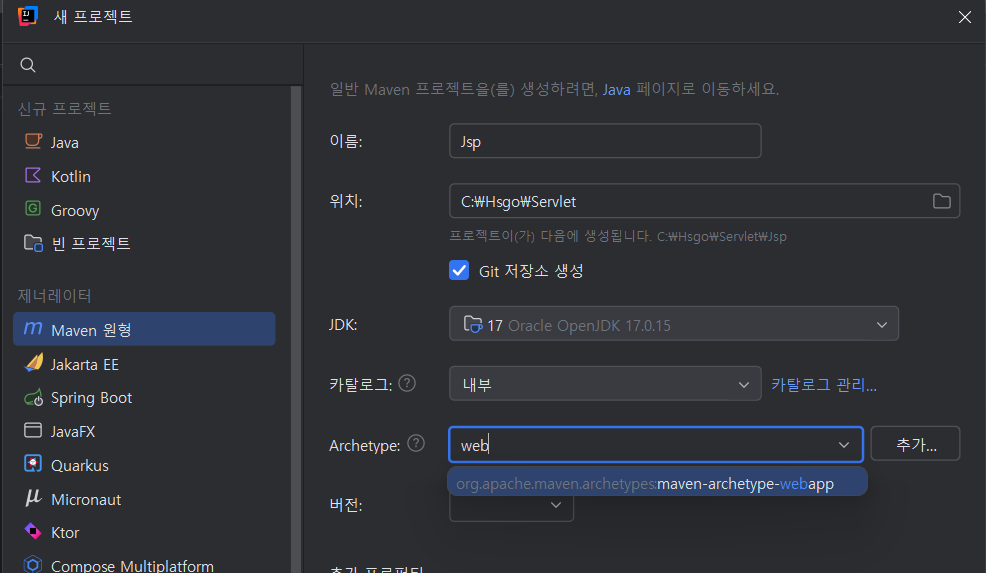
버전은 1.0
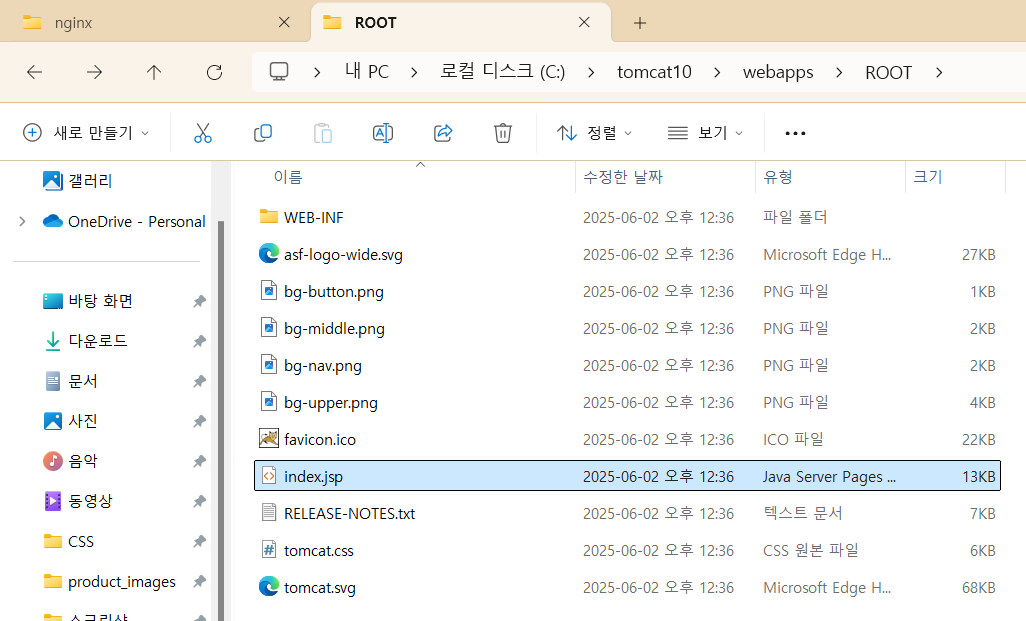
localhost:8081에서 보이는 고양이 화면은 이 파일 경로의 index.jsp
이 파일 경로의 WEB-INF는 웹이 연결된 것.
인텔리제이 톰켓 설정
- 파일 - 설정 - 플러그인 - 마켓플레이스 tomcat 검색 - smart Tomcat 설치 - 인텔리제이 재실행
- 파일 - 설정 - 도구 - 시작 작업 - 실행 구성(+) - Smart Tomcat
Tomcat server: 톰켓 설치 폴더 선택
JSP(Java Server Pages)
- 사용자가 코드를 작성한 다음 컴파일 과정을 거치지 않고 서버에서 실행시킬 수 있음
- WAS에 의해 서블릿으로 변환된 다음 실행
- 자바 코드를 사용 가능
.jsp확장자- 웹서버와 통신시에 자동으로 Servlet으로 변환됨
- MVC패턴에서 View로 이용됨
Servelts
- 서버에서 실행되는 자바 프로그램
- 서블릿이 사용자에 의해 요청되면 서버에서는 HTTP request에 응답하기 위해 WAS에서 서블릿 객체를 생성하고 이를 통해 사용자의 요청을 처리
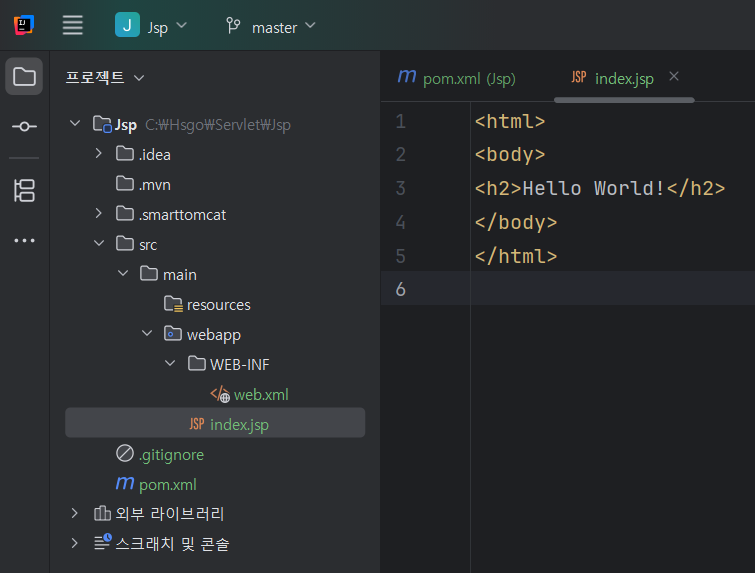
이 index.jsp를 실행하면!
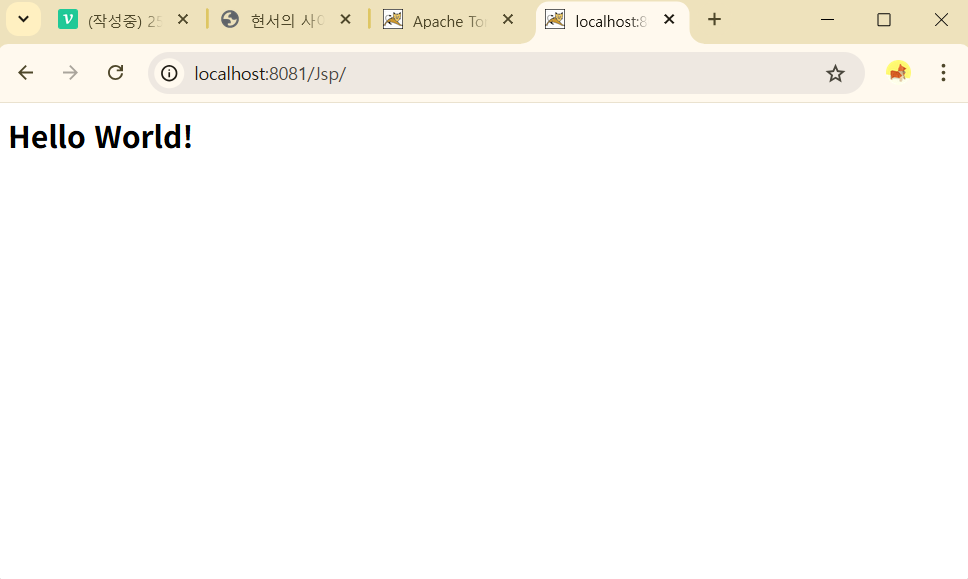
이렇게 결과를 확인할 수 있다.
(단, cmd에서 localhost:8081 고양이 화면을 실행 중이라면 shutdown 시켜야 함)
JSP 태그
- Servlet은 Java언어를 이용하여 문서를 작성하고, 출력객체(PrintWrite)를 이용하여 HTML 코드를 삽입
- jsp는 서블릿과 반대로 html 코드에 java언어를 삽입하여 동적 문서를 만듦
<% %> 스크립트릿: 모든 자바 코드 기술 가능
<%@ %> 지시자: 페이지 속성을 지정
<%! %> 선언자: 변수나 메서드 선언
<%= %> 표현식: 결과 값을 출력
<%-- --%> 주석: 코드 주석처리
쉬운 설명
- JSP는 레스토랑 주방에 있는 요리 레시피
- 서버는 요리사
- 클라이언트는 손님
손님이 메뉴(JSP)를 주문하면:
- 요리사(서버)가 레시피(JSP)를 보고 요리(서블릿 실행)를 함
- 요리 결과물(HTML)을 손님(브라우저)에게 제공
<%
  String name = "홍길동";
  out.println("<h1>안녕하세요, " + name + "님!</h1>");
%>
➡ 브라우저에 전달되는 건 아래처럼 순수 HTML
<h1>안녕하세요, 홍길동님!</h1>Java 코드는 클라이언트에 전혀 보이지 않는다.
➿ 예제 1_jsptag.jsp
<%@ page contentType="text/html;charset=UTF-8" language="java" %>
<html>
<head>
    <title>Jsp 태그</title>
</head>
<body>
<%
    // 모든 자바 코드가 들어갈 수 있음
    int a = 10;
    if(a >= 10){
        out.print("참!");
    }else{
        out.print("거짓!");
    }
%>
<hr>
<% for(int i=0; i<5; i++){ %>
        <input type="checkbox" name="hobby">
<% } %>
</body>
</html>
➿ 예제 2_include_header.jsp
<%@ page contentType="text/html;charset=UTF-8" language="java" %>
<html>
<head>
    <title>헤더</title>
</head>
<body>
<header>
    <h2>여기는 헤더 영역</h2>
    <nav>
        <ul>
            <li>메뉴1</li>
            <li>메뉴2</li>
            <li>메뉴3</li>
        </ul>
    </nav>
</header>
</body>
</html>
➿ 예제 2_include_section.jsp
<%@ page contentType="text/html;charset=UTF-8" language="java" %>
<%@ include file="2_include_header.jsp"%> // header 포함
<html>
<body>
<section>
    <p>여기는 본문입니다.</p>
    <p>아래 footer가 include 됩니다.</p>
</section>
<%@ include file="2_include_footer.jsp"%> // footer 포함
</body>
<head>
    <title>Title</title>
</head>
</html>
➿ 예제 2_include_footer.jsp
<%@ page contentType="text/html;charset=UTF-8" language="java" %>
<html>
<body>
<footer>
    copyright 2025 현서
</footer>
</body>
</html>
➿ 예제 3_import.jsp
<%@ page import="java.util.Arrays" %>
<%@ page import="java.util.List" %>
<%@ page contentType="text/html;charset=UTF-8" language="java" %>
<html>
<head>
    <title>import</title>
</head>
<body>
<%
    List<String> list = Arrays.asList("apple", "banana", "orange", "melon");
%>
<h2>select 태그에 list의 값을 반복문으로 생성</h2>
<select>
<% for(int i = 0; i<list.size(); i++){ %>
    <option value="<%=list.get(i)%>"><%=list.get(i)%></option>
<% } %>
</select>
</body>
</html>
JSP 내장 객체
- 개발자가 jsp파일 내에 객체를 생성하지 않고 바로 사용할 수 있는 객체
- jsp 컨테이너에 의해 서블릿으로 변환될 때 자동으로 객체가 생성
1. request
javax.servlet.http.HttpServletRequest- 클라이언트와 관련된 정보 읽기
- 클라이언트가 전송한 요청 파라미터 읽기
- 클라이언트가 전송한 쿠키 읽기
➿ 예제 4_request.jsp
<%@ page contentType="text/html;charset=UTF-8" language="java" %>
<html>
<head>
    <title>request</title>
</head>
<body>
<%--<form method="get" action="4_request_ok.jsp">--%>
<form method="post" action="4_request_ok.jsp">
    <p>아이디: <input type="text" name="userid"></p>
    <p>비밀번호: <input type="password" name="userpw"></p>
    <p><a href="4_request_ok.jsp?userid=banana&userpw=1004">클릭하세요</a></p>
    <p>취미: 게임<input type="checkbox" name="hobby" value="게임">운동<input type="checkbox" name="hobby" value="운동">영화<input type="checkbox" name="hobby" value="영화">음악<input type="checkbox" name="hobby" value="음악"></p>
    <p><button type="submit">전송</button></p>
</form>
</body>
</html>
➿ 예제 4_request_ok.jsp
<%@ page import="java.util.Arrays" %>
<%@ page contentType="text/html;charset=UTF-8" language="java" %>
<%
    String userid = request.getParameter("userid");
    String userpw = request.getParameter("userpw");
    String[] hobby = request.getParameterValues("hobby");
%>
<html>
<head>
    <title>request</title>
</head>
<body>
    <p>아이디: <%=userid%></p>
    <p>비밀번호: <%=userpw%></p>
    <p>취미: <%=Arrays.toString(hobby)%></p>
</body>
</html>
2. response
- 웹 브라우저의 요청에 응답하는 객체
- 클라이언트에게 전송할 문서의 인코딩 형태를 설정
- 클라이언트에게 지정한 URL로 이동
- 클라이언트에게 쿠키를 설정
➿ 예제 5_response.jsp
<%@ page contentType="text/html;charset=UTF-8" language="java" %>
<html>
<head>
    <title>response</title>
</head>
<body>
<form method="post" action="5_response_ok.jsp">
    <p>이름: <input type="text" name="name"></p>
    <p>나이: <input type="text" name="age"></p>
    <p><button type = "submit">확인</button></p>
</form>
</body>
</html>
➿ 예제 5_response_fail.jsp
<%@ page contentType="text/html;charset=UTF-8" language="java" %>
<html>
<head>
    <title>response</title>
</head>
<body>
<h2>미성년자는 주류 구매 불가</h2>
</body>
</html>
➿ 예제 5_response_ok.jsp
<%@ page contentType="text/html;charset=UTF-8" language="java" %>
<%
    String name = request.getParameter("name");
    String age = request.getParameter("age");

    int a = Integer.parseInt(age);

    if(a > 19){
        // 주류 구매 페이지로 이동
        response.sendRedirect("5_response_success.jsp");
    }else{
        response.sendRedirect("5_response_fail.jsp");
    }
%>
<html>
<head>
    <title>response</title>
</head>
<body>

</body>
</html>
➿ 예제 5_response_success.jsp
<%@ page contentType="text/html;charset=UTF-8" language="java" %>
<html>
<head>
    <title>response</title>
</head>
<body>
<h2>성인입니다! 주류 구매 가능</h2>
</body>
</html>
쿠키
- 웹 브라우저에서 서버로 요청하면, 서버는 알맞은 로직을 수행한 후 데이터를 웹 브라우저에 응답
- http 프로토콜은 응답 후에 웹 브라우저와의 관계를 종료
- 연결이 끊겼을 때, 정보를 지속적으로 유지하기 위한 수단으로 쿠키를 사용
- 서버에서 요청할 때마다 쿠키의 속성값을 참조 또는 변경할 수 있음
- 쿠키는 4kb로 용량이 제한적이며, 300개까지(1.2MB) 데이터 정보를 가질 수 있음
➿ 예제 6_cookie_get.jsp
<%@ page contentType="text/html;charset=UTF-8" language="java" %>
<%
    Cookie [] cookies = request.getCookies();
    if(cookies != null){
        for(Cookie cookie: cookies){
            String cookieName = cookie.getName();
            if(cookieName.equals("userid")){
                String cookieValue = cookie.getValue();
                out.print("userid 쿠키의 값: " + cookieValue);
            }
        }
    }else{
        out.print("쿠키가 존재하지 않습니다.");
    }
%>
<html>
<head>
    <title>cookie</title>
</head>
<body>
<h2>쿠키 가져오기</h2>
</body>
</html>
➿ 예제 6_cookie_set.jsp
<%@ page contentType="text/html;charset=UTF-8" language="java" %>
<%
    // 쿠키는 서버에서 생성, 클라이언트로 전달
    Cookie cookie1 = new Cookie("userid", "apple");
    Cookie cookie2 = new Cookie("username", "김사과");
    cookie1.setMaxAge(1800); // 1800초
    cookie2.setMaxAge(30); // 30초

    response.addCookie(cookie1);
    response.addCookie(cookie2);
%>
<html>
<head>
    <title>cookie</title>
</head>
<body>
<h2>쿠키 설정</h2>
<p><a href = "6_cookie_get.jsp">쿠키 가져오기</a></p>
</body>
</html>
The light shines in the darkness.