
이번 글에서는 우분투 리눅스 상에서 도커 인프라를 만드는 방법을 정리한다.
- 우분투 설치 패키지
hostnamectl set-hostname docker-00

# 비밀번호 설정
sudo passwd root

# 방화벽 내리기
ufw disable

apt install -y net-tools vim openssh-server iptables-persistent

apt install -y ca-certificates curl gnupg lsb-release
# ca-certificates : 신뢰할 수 있는 Root 인증서 설치
# curl URL에서 Data 받을 때 (https)
# gnupg : Repository의 GPG 키를 받아오고 검증하는 Package
# lsb-release : 배포판의 정보 출력- ssh 접속을 위한 설정 - MovaX 접속시 사용
vi /etc/ssh/sshd_config

# 변경한 내용(33번 라인)
PermitRootLogin yes

# ssh
systemctl restart ssh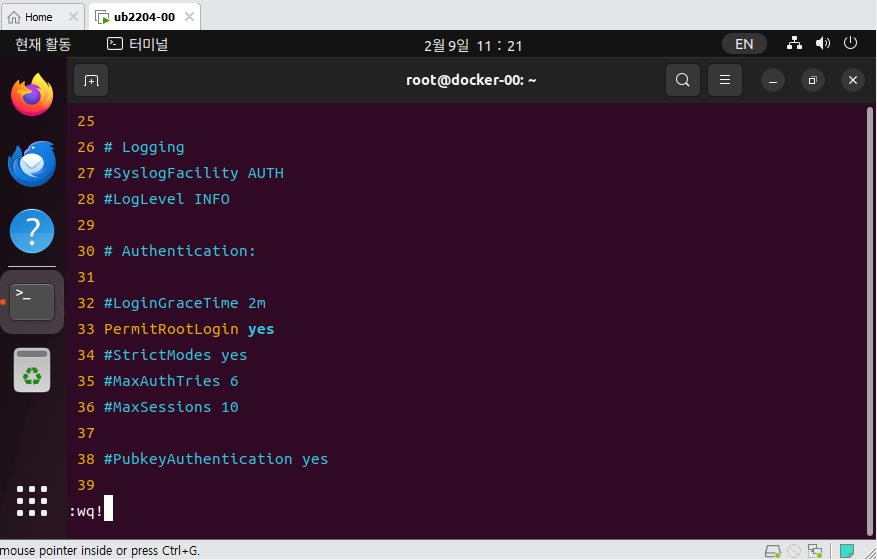
- ssh로 접속해서 MovaX에서 진행한다.
- 도커 패키지 인증키 적용
# apy-key 추가
curl -fsSL https://download.docker.com/linux/ubuntu/gpg | sudo apt-key add
# 검증
apt-key fingerprint 0EBFCD88
# 현재 Ubuntu 배포판의 버전 확인
(현재 우분투 배포판 버전에 맞는 저장소 추가한다.)
lsb_release -cs
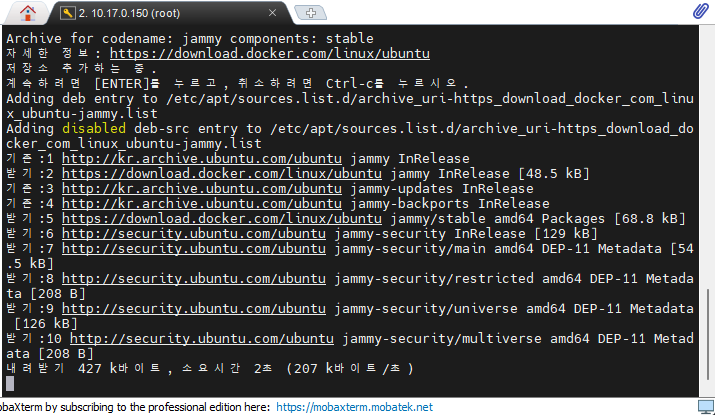
# 현재 Ubuntu 배포판 버전에 맞는 저장소 추가
add-apt-repository "deb [arch=amd64] https://download.docker.com/linux/ubuntu $(lsb_release -cs) stable"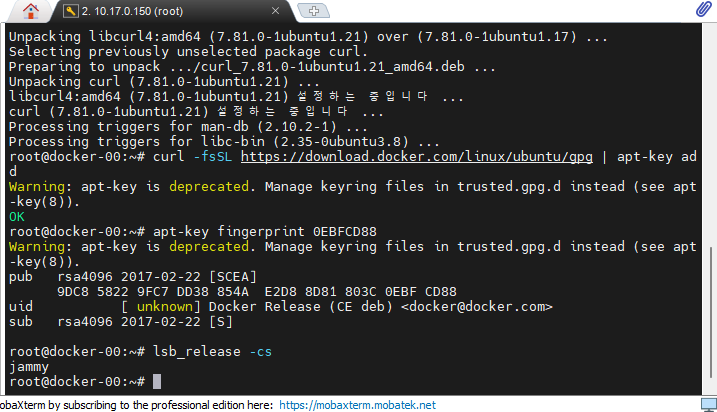
- 도커 패키지 설치
apt install -y docker-ce docker-ce-cli containerd.io

docker --version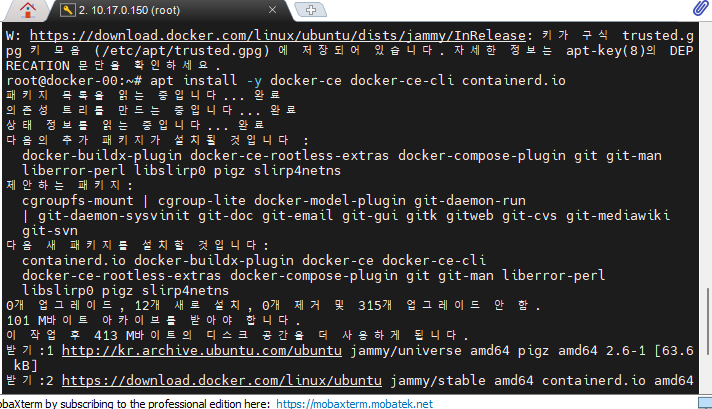
- iptables 상태 확인
systemctl status iptables.service

iptables -nL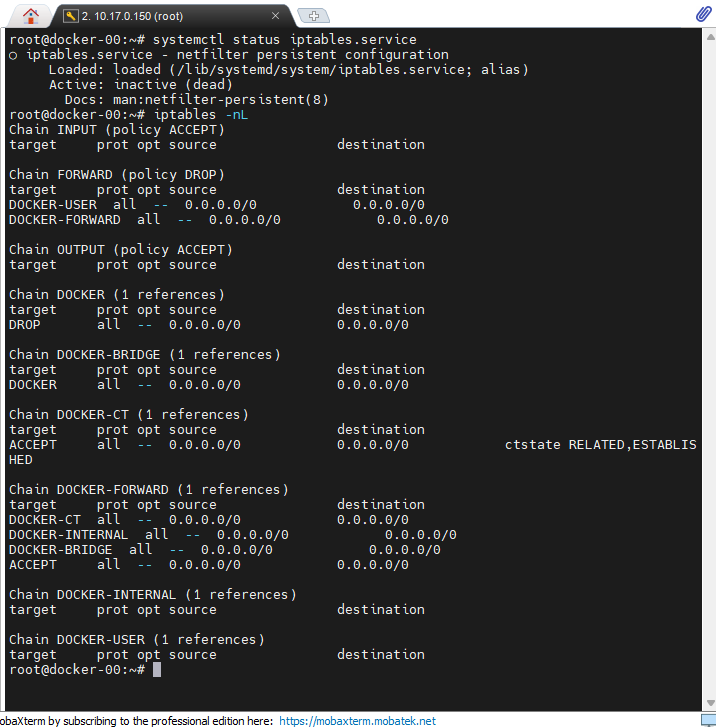

- docker를 로그인한다. confirmation code를 입력하고 로그인 하면된다.

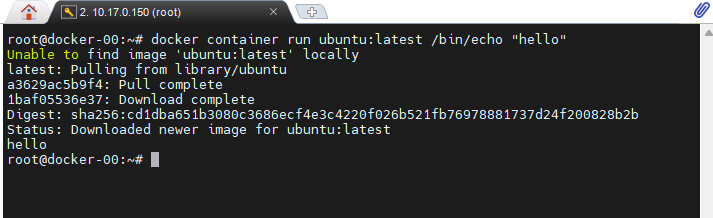
- ubuntu 컨테이너를 실행해본다.
# Docker 컨테이너 실행
docker container run ubuntu:latest /bin/echo "hello"

# Docker 실행 환경 확인
docker system info

# Docker system 디스크 사용량
docker system df

# Docker system 모니터링
docker system events

# Images
docker images
docker images ls
docker rmi [ID]

# Containers
docker container ps
docker container ps -a
docker rm [ID|CONTAINER]
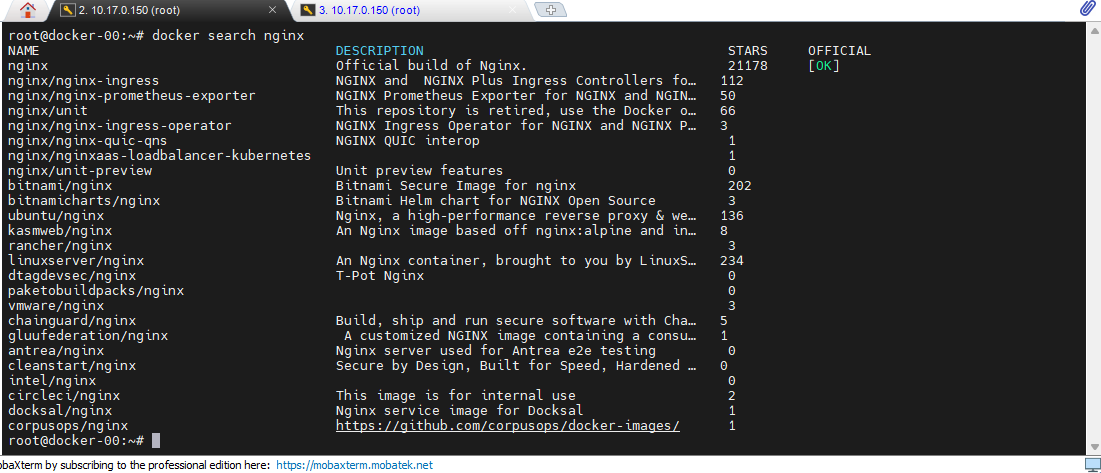
- 도커 허브에 올라와 있는 Nginx 조회, Official 부분이 가장 베이스이다.
# Search
docker search nginx
# Pull
docker pull nginx
# 이미지 이름 규칙
repository-name/image-name:tag
# nginx 실행
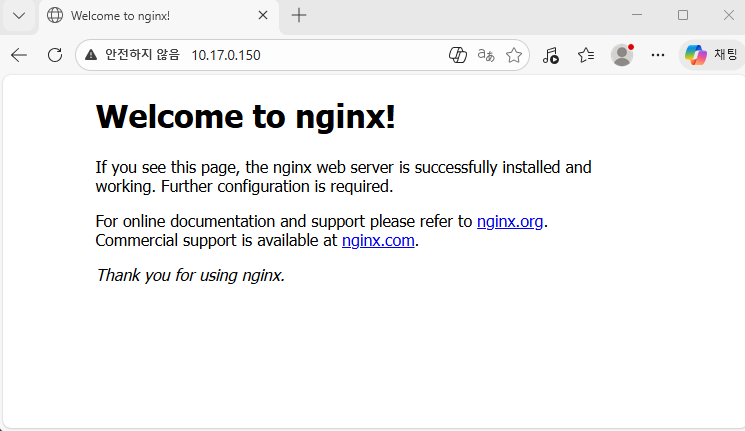
docker container run --name webserver -d -p 80:80 nginx:latest
- 우분투 자체에는 nginx가 설치되지 않았지만, 밖에서 우분투 ip인 10.17.0.150을 치고 들어가면 nginx가 실행된다.
# 사용하지 않는 요소들을 삭제
docker image prune

# 모든 이미지 삭제 방법
docker image rm $(docker images -q)