프론트엔드 개발에 유용한 도구 및 라이브러리
코드의 품질을 향상시키고 안정적인 애플리케이션을 개발하는데 도움이 되는 도구들을 다음과 같이 정리하였다.
ESLint
- What: 코드의 품질을 검사하고, 문제가 있는 부분을 찾아내는 도구
- Why: 일관된 코드 스타일을 유지하고, 정적 분석을 통해 오류를 미리 발견하여 코드의 품질을 향상시킬 수 있다.
- How: 프로젝트에 ESLint를 설정하고 필요한 규칙을 추가하여 코드를 검사하고 수정할 수 있다.
Jest
- What: JavaScript 및 TypeScript 코드를 테스트하는 도구
- Why: 코드의 동작을 자동으로 확인할 수 있으며, 이를 통해 개바자는 코드 변경으로 인한 오류를 미리 발견할 수 있다.
- How: Jest를 사용하여
test파일을 작성하고npm test명령을 사용하여 테스트를 실행한다.
Zod
- What: 데이터 유효성 검사와 스키마 정의를 위한 라이브러리로, 데이터의 유효성을 검사하고 정의하는 데 사용된다.
- Why: 데이터의 유효성을 쉽게 검사하고, 안전하게 다룰 수 있다. 이를 통해 개발자는 더욱 안정적이고 신뢰할 수 있는 애플리케이션을 개발할 수 있다.
- How: Zod를 사용하여 데이터 스키마를 정의하고, 데이터를 검증하거나 변환하는 메서드를 사용하여 데이터를 다룬다.
예시 코드
ESLint
- 코드 스타일 검사: 일관된 코드 스타일을 유지하기 위해 사용된다.
- 문법 오류 확인: Javascript 및 TypeScript 코드의 문법 오류를 검사한다.
- 코드 품질 향상: 잠재적인 오류를 미리 방지하여 코드의 품질을 향상시킨다.
// .eslintrc.js

module.exports = {
  extends: ['eslint:recommended', 'plugin:react/recommended'],
  parserOptions: {
    ecmaVersion: 12,
    sourceType: 'module',
    ecmaFeatures: {
      jsx: true,
    },
  },
  rules: {
    // 여기에 필요한 규칙을 추가한다.
    'no-console': 'warn',
    'no-unused-vars': 'warn',
  },
};
Jest
유닛 테스트
각각의 함수나 컴퓨넌트가 독립적으로 분리된 환경에서 의도된 대로 정확히 작동하는지 검증하는 테스트
const sum = (a: number, b: number): number => {
  return a + b;
};

export default sum;
import sum from "./unitTest";
test("adds 1 + 2 to equal 3", () => {
expect(sum(1, 2)).toBe(3);
});통합 테스트
유닛 테스트를 통과한 여러 컴포넌트가 묶여서 하나의 기능으로 정상적으로 작동하는지 확인하는 테스트
interface ButtonProps {
  onClick: () => void;
  label: string;
}

const Button = (props: ButtonProps) => {
  return <button onClick={props.onClick}>{props.label}</button>;
};

export default Button;
// 컴포넌트를 import 하고 사용하게 될 때부터는 jsx 파일 확장자로 작성해야한다.
import { fireEvent, render } from "@testing-library/react";
import Button from "./integrationTest";
test("renders button with correct label", () => {
const handleClick = jest.fn();
const { getByText } = render(
<Button onClick={handleClick} label="Click me" />
);
const buttonElement = getByText(/Click me/i);
expect(buttonElement).toBeInTheDocument();
});
test("calls onClick prop when button is clicked", () => {
const handleClick = jest.fn();
const { getByText } = render(
<Button onClick={handleClick} label="Click me" />
);
const buttonElement = getByText(/Click me/i);
fireEvent.click(buttonElement);
expect(handleClick).toHaveBeenCalledTimes(1);
});엔드 투 엔드(End to End Test)
E2E 테스트라 하며, 실제 사용자처럼 작동하는 로봇을 활용해 애플리케이션의 전체적인 기능을 확인하는 테스트
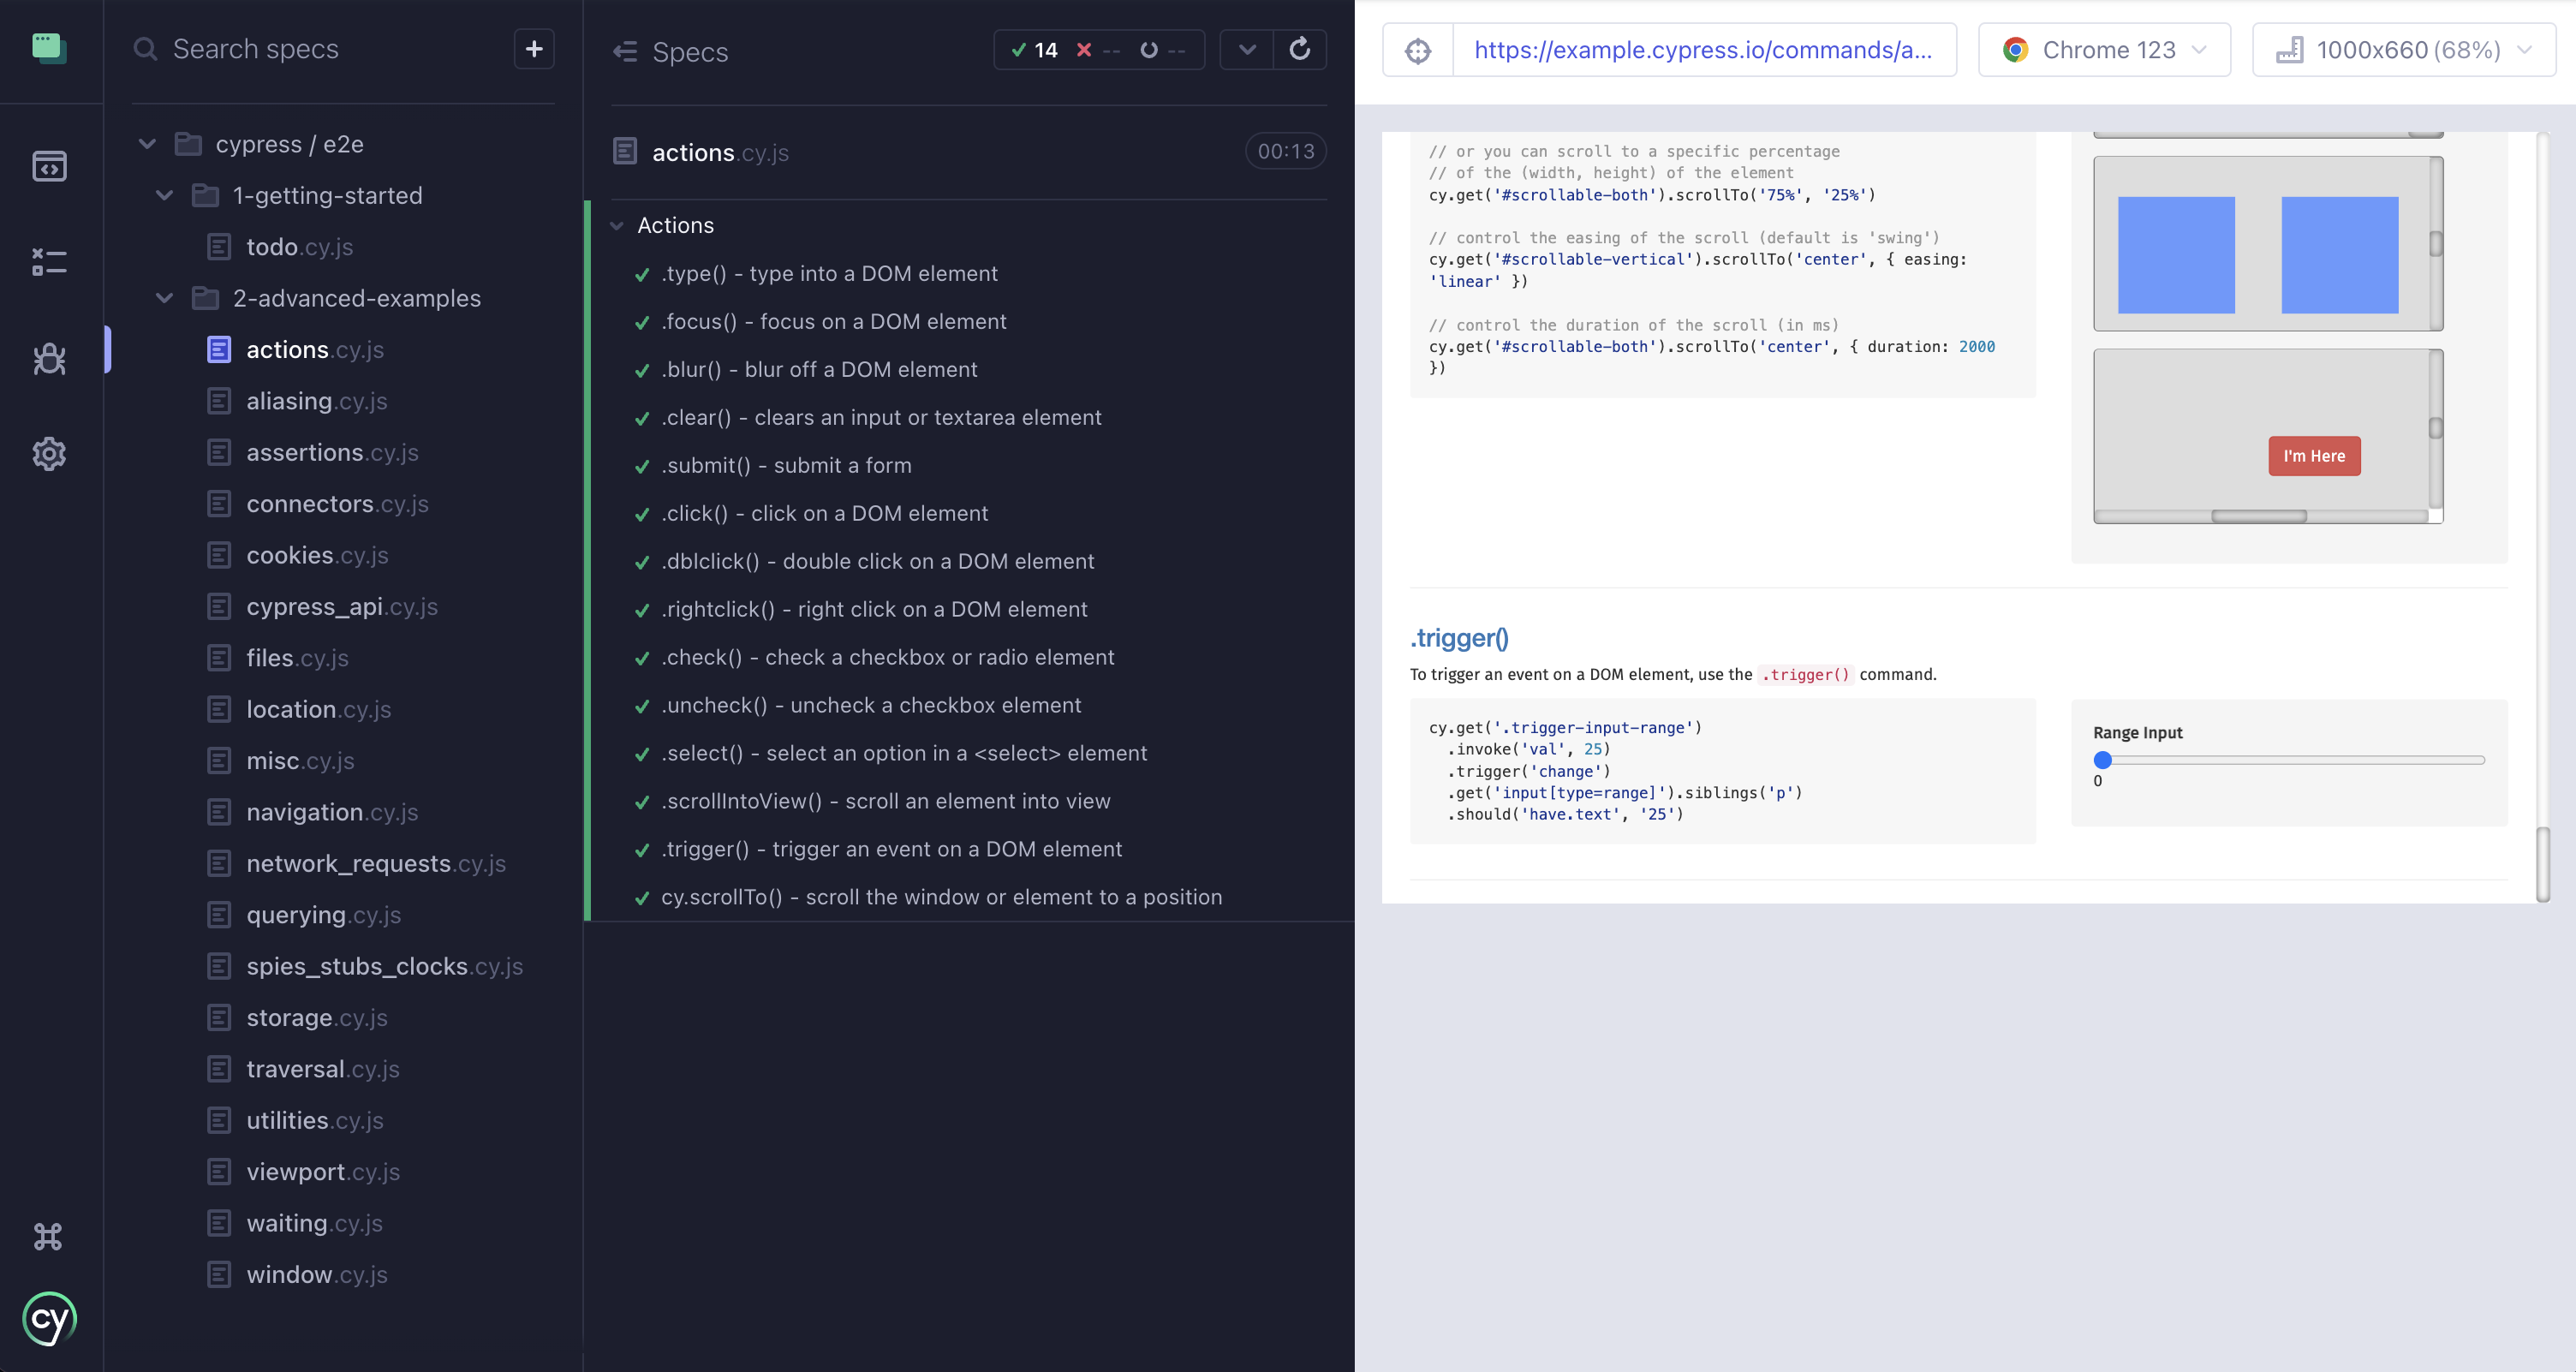
- Cypress 라이브러리를 활용한 E2E test GUI

- Cypress를 사용하여 웹 페이지의 DOM 요소와 상호작용하는 다양한 액션을 수행하는 테스트
-
cy.visit으로 테스트를 실행할 브라우저를 열고 페이지를 로드하며, 해당 페이지에 있는 요소들에 접근하여 테스트를 수행 -
.type(): 실제로 웹 페이지에서 사용자가 키보드로 텍스트를 입력하는 것과 유사한 동작을 시뮬레이트 -
입력 지연 설정:
{ delay: 100 }옵션을 사용하여 입력 간격을 지연시킴으로써 실제 사용자의 타이핑과 유사한 경험 제공 -
에러 무시:
{ force: true }옵션을 사용하여 입력 필드가 비활성화되어 있거나 화면에 보이지 않더라도 액션을 수행// Cypress에서는 테스트를 그룹화하는 context 함수를 제공 context('Actions', () => { // beforeEach(() => { ... }): 각 테스트가 실행되기 전에 실행될 함수를 정 beforeEach(() => { cy.visit('http://localhost:8080/commands/actions') }) // https://on.cypress.io/interacting-with-elements it('.type() - type into a DOM element', () => { // https://on.cypress.io/type cy.get('.action-email').type('fake@email.com') cy.get('.action-email').should('have.value', 'fake@email.com') // .type() with special character sequences cy.get('.action-email').type('{leftarrow}{rightarrow}{uparrow}{downarrow}') cy.get('.action-email').type('{del}{selectall}{backspace}') // .type() with key modifiers cy.get('.action-email').type('{alt}{option}') //these are equivalent cy.get('.action-email').type('{ctrl}{control}') //these are equivalent cy.get('.action-email').type('{meta}{command}{cmd}') //these are equivalent cy.get('.action-email').type('{shift}') // Delay each keypress by 0.1 sec cy.get('.action-email').type('slow.typing@email.com', { delay: 100 }) cy.get('.action-email').should('have.value', 'slow.typing@email.com') cy.get('.action-disabled') // Ignore error checking prior to type // like whether the input is visible or disabled .type('disabled error checking', { force: true }) cy.get('.action-disabled').should('have.value', 'disabled error checking') })
-
Zod
Zod를 사용하지 않은 경우
- 복잡성: Zod를 사용하지 않으면 수동으로 데이터 유효성을 검사해야 하므로 코드가 복잡해진다.
- 가독성: 여러 조건문을 작성해야 하므로 가독성이 떨어질 수 있다.
- 유지보수성: 수동으로 검사할 때는 여러 곳에서 검사 로직이 중복되어 유지보수성이 감소할 수 있다.
// 데이터 유효성 검사를 수행하는 함수
function validateUserData(userData) {
  if (
    typeof userData.username !== 'string' ||
    userData.username.length < 3 ||
    userData.username.length > 20 ||
    typeof userData.email !== 'string' ||
    !userData.email.includes('@') ||
    typeof userData.age !== 'number' ||
    userData.age <= 0 ||
    !Number.isInteger(userData.age)
  ) {
    throw new Error('Invalid user data');
  }
}

// 사용자 정보를 입력받는 함수
function createUser(userData) {
  try {
    // 데이터 유효성 검사 수행
    validateUserData(userData);

    // 데이터베이스에 저장
    saveUserToDatabase(userData);

    console.log('User created successfully:', userData);
    return userData;
  } catch (error) {
    // 유효성 검사 실패 시 예외 처리
    console.error('Failed to create user:', error.message);
    throw new Error('Failed to create user: Invalid data');
  }
}

// 사용자 정보
const userData1 = {
  username: 'john_doe',
  email: 'john@example.com',
  age: 30,
};

const userData2 = {
  username: 'j',
  email: 'notAnEmail',
  age: -10,
};

createUser(userData1); // 유효한 데이터
createUser(userData2); // 유효하지 않은 데이터
Zod를 사용한 경우
- 복잡성: Zod를 사용하면 간단한 메서드 체인을 사용하여 데이터 유효성 검사를 정의할 수 있다.
또한, Zod로 정의한 데이터 스키마를 추론하여 타입스크립트 인터페이스도 정의할 수 있다. - 가독성: 정의한 데이터 스키마로 parse 메서드를 통해 유효성 검사를 하기 때문에, 가독성이 높다.
- 유지보수성: 유효성 검사 규칙을 한 곳에서 관리할 수 있으므로 유지보수가 쉽다.
import { z } from "zod";

// 사용자 데이터 스키마 정의
const userSchema = z.object({
  username: z.string().min(3).max(20),
  email: z.string().email(),
  age: z.number().int().positive(),
});

// ** Zod 스키마를 활용하여 타입도 함께 정의할 수 있다. **
type UserType = z.infer<typeof userSchema>;

// 사용자 정보를 입력받는 함수
export function createUser(userData: UserType) {
  try {
    const validatedUserData = userSchema.parse(userData);

    // 유효한 데이터인 경우 데이터베이스에 저장
    // saveUserToDatabase(validatedUserData);

    console.log("User created successfully:", validatedUserData);
    return validatedUserData;
  } catch (error) {
    return error;
  }
}

const userData1 = {
  username: "john_doe",
  email: "john@example.com",
  age: 30,
};

const userData2 = {
  username: "j",
  email: "notAnEmail",
  age: -10,
};

createUser(userData1); // 유효한 데이터
createUser(userData2); // 유효하지 않은 데이터
zod를 적용한 코드의 test
import { createUser } from "./zodecode";

describe("createUser function", () => {
  // 유효한 사용자 데이터
  const validUserData = {
    username: "john_doe",
    email: "john@example.com",
    age: 30,
  };

  // 유효하지 않은 사용자 데이터
  const invalidUserData = {
    username: "j",
    email: "notAnEmail",
    age: -10,
  };

  it("creates a user with valid data", () => {
    const createdUser = createUser(validUserData);

    expect(createdUser).toEqual(validUserData);
  });

  // 유효하지 않은 데이터를 입력했을 때
  it("throws an error with invalid data", () => {
    try {
      expect(() => {
        createUser(invalidUserData);
      });
    } catch (error) {
      expect(error).toBeInstanceOf(Error);
    }
  });
});
참고 자료
Cypress: https://github.com/cypress-io/cypress-example-kitchensink/tree/master
Jest: https://jestjs.io/docs/getting-started
Zod: https://zod.dev/?id=introduction
Stack overflow: https://stackoverflow.com/questions/46042613/how-to-test-the-type-of-a-thrown-exception-in-jest