
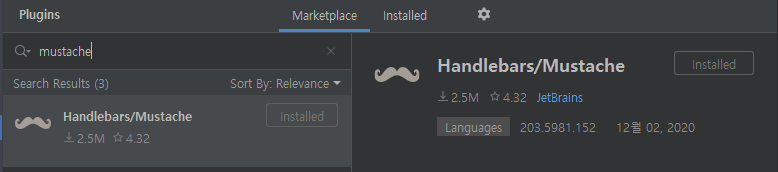
0. 머스테치 플러그인 설치
- 인텔리제이 커뮤니티 버전을 사용해도 플러그인을 사용할 수 있음
- mustache를 검색하여 해당 플러그인 설치
1. 기본 페이지 만들기
- build.gradle에 머스테치 스타터 의존성을 등록함
compile('org.springframework.boot:spring-boot-starter-mustache') - 머스테치는 스프링 부트에서 공식 지원하는 템플릿 엔진
- 머스테치 파일의 기본 위치 :
src/main/resources/templates: 이 위치에 머스테치 파일을 두면 스프링 부트에서 자동으로 로딩함
1-1. index.mustache 파일 생성
<!DOCTYPE HTML>
<html>
<head>
    <title>스프링부트 웹서비스</title>
    <meta http-equiv="Content-Type" content="text/html; charset=UTF-8" />
</head>
<body>
<h1>스프링부트로 시작하는 웹 서비스 Ver.2</h1>
</body>
</html>
1-2. IndexController 생성하기
- web패키지안에 IndexController 생성
@Controller
public class IndexController {

    @GetMapping("/")
    public String index(){
        return "index";
    }
}- 머스테치 스타터로 인해 컨트롤러에서 문자열을 반환할 때 앞의 경로(src/main/resources/templates)와 뒤의 파일 확장자(.mustache)는 자동으로 지정됨
2. 게시글 등록 화면 만들기
- 부트스트랩 : 외부 CDN 사용, 제이쿼리 사용
- 부트스트랩과 제이쿼리는 어느 화면에서나 사용되기 때문에 공통영역으로 별도 파일을 분리하여 필요한 곳에 가져다 쓰는 방식(레이아웃 방식)으로 작성
2.1 src/main/resources/templates/layout 폴더 추가하여 footer.mustache, header.mustache 파일 생성
//footer.mustache
<script src="https://code.jquery.com/jquery-3.3.1.min.js"></script>
<script src="https://stackpath.bootstrapcdn.com/bootstrap/4.3.1/js/bootstrap.min.js"></script>

<!--index.js 추가-->
<script src="/js/app/index.js"></script>
</body>
</html>
//header.mustache
<!DOCTYPE HTML>
<html>
<head>
<title>스프링부트 웹서비스</title>
<meta http-equiv="Content-Type" content="text/html; charset=UTF-8" />
<link rel="stylesheet" href="https://stackpath.bootstrapcdn.com/bootstrap/4.3.1/css/bootstrap.min.css">
</head>
<body>- 페이지 로딩 속도를 높이기 위해 css는 header, js는 footer에 두었음
- HTML은 위에서부터 코드가 실행되기 때문에 head가 다 실행되고 나서 body가 실행됨
- js의 용량이 크면 클수록 body 부분의 실행이 늦어지기 때문에 js는 body 하단에 두어 화면이 다 그려진 후에 호출하는 것이 좋음
- css는 화면을 그리는 역할이므로 head에서 호출하는게 좋음, 아니면 사용자가 css가 적용되지 않은 깨진 화면을 볼 수 있기 때문에
- 부트스트랩의 경우 제이쿼리를 필요로 하기때문에 부트스트랩보다 먼저 호출되도록 작성함
2-2. index.mustache 코드 수정 - 등록 버튼 생성
{{>layout/header}}

<h1>스프링부트로 시작하는 웹 서비스 Ver.2</h1>
<div class="col-md-12">
    <div class="row">
        <div class="col-md-6">
            <a href="/posts/save" role="button" class="btn btn-primary">글 등록</a>
        </div>
    </div>
    <br>
<div>
{{>layout/footer}}- {{>}}는 현재 머스테치 파일을 기준으로 다른 파일을 가져옴
<a>태그를 사용해 글 등록 버튼 생성, 이동할 페이지의 주소 "/posts/save"
2-3. IndexController 메소드 추가
@RequiredArgsConstructor
@Controller
public class IndexController {

    @GetMapping("/posts/save")
    public String postsSave(){
        return "posts-save";
    }
}posts/save를 호출하면posts-save.mustache를 호출하는 메소드
2-4. posts-save.mustache 파일 생성
{{>layout/header}}

<h1>게시글 등록</h1>

<div class="col-md-12">
    <div class="col-md-4">
        <form>
            <div class="form-group">
                <label for="title">제목</label>
                <input type="text" class="form-control" id="title" placeholder="제목을 입력하세요">
            </div>
            <div class="form-group">
                <label for="author"> 작성자 </label>
                <input type="text" class="form-control" id="author" placeholder="작성자를 입력하세요">
            </div>
            <div class="form-group">
                <label for="content"> 내용 </label>
                <textarea class="form-control" id="content" placeholder="내용을 입력하세요"></textarea>
            </div>
        </form>
        <a href="/" role="button" class="btn btn-secondary">취소</a>
        <button type="button" class="btn btn-primary" id="btn-save">등록</button>
    </div>
</div>

{{>layout/footer}}
2-5. 등록버튼 기능 js 생성
src/main/resourcws/static/js/app폴더 생성,index.js파일 생성
var main = {
    init : function () {
        var _this = this;
        $('#btn-save').on('click', function () {
            _this.save();
        });
    },
    save : function () {
        var data = {
            title: $('#title').val(),
            author: $('#author').val(),
            content: $('#content').val()
        };

        $.ajax({
            type: 'POST',
            url: '/api/v1/posts',
            dataType: 'json',
            contentType:'application/json; charset=utf-8',
            data: JSON.stringify(data)
        }).done(function() {
            alert('글이 등록되었습니다.');
            window.location.href = '/';
        }).fail(function (error) {
            alert(JSON.stringify(error));
        });
    }
};

main.init();
var main = { } 형태로 작성한 이유
- 브라우저의 스코프는 공용공간으로 사용되기 때문에 동일한 이름의 함수가 있는 경우 나중에 로딩된 js의 함수가 먼저 로딩된 js의 함수를 덮어쓰게 됨
- 이런 문제를 피하려고 해당 파일만의 스코프를 만들어서 사용함
2-6. footer.mustache 파일에 js 참조 경로 추가하기
<script src="/js/app/index.js"></script>
- 코드를 보면 절대경로(/)로 바로 시작함 : 스프링부트는
src/main/resources/static에 위치한 정적파일들은 URL에서 /로 설정됨
3. 전체 조회 화면 만들기
3-1. index.mustache 코드 변경
{{>layout/header}}

<h1>스프링부트로 시작하는 웹 서비스 Ver.2</h1>
<div class="col-md-12">
    <div class="row">
        <div class="col-md-6">
            <a href="/posts/save" role="button" class="btn btn-primary">글 등록</a>
        </div>
    </div>
    <br>
    <!-- 목록 출력 영역 -->
    <table class="table table-horizontal table-bordered">
        <thead class="thead-strong">
        <tr>
            <th>게시글번호</th>
            <th>제목</th>
            <th>작성자</th>
            <th>최종수정일</th>
        </tr>
        </thead>
        <tbody id="tbody">
        {{#posts}}
            <tr>
                <td>{{id}}</td>
                <td>{{title}}</a></td>
                <td>{{author}}</td>
                <td>{{modifiedDate}}</td>
            </tr>
        {{/posts}}
        </tbody>
    </table>
</div>

{{>layout/footer}}- {{#posts}} : 서버에서 보낸 'posts'라는 List를 순회함, for문과 동일하게 동작
- {{id}} 등 {{변수명}} : List에서 뽑아낸 객체의 필드
3-2. PostsRepository 수정
public interface PostsRepository extends JpaRepository<Posts, Long> {
    @Query("SELECT p FROM Posts p ORDER BY p.id DESC")
    List<Posts> findAllDesc();
}
3-3. PostsService 코드 추가
@Transactional(readOnly = true)
public List<PostsListResponseDto> findAllDesc(){
        return postsRepository.findAllDesc().stream()
        .map(PostsListResponseDto::new).collect(Collectors.toList());
}
3-4. PostsListResponseDto 생성
@Getter
public class PostsListResponseDto {
    private Long id;
    private String title;
    private String author;
    private LocalDateTime modifiedDate;

    public PostsListResponseDto(Posts entity){
        this.id = entity.getId();
        this.title = entity.getTitle();
        this.author = entity.getAuthor();
        this.modifiedDate = entity.getModifiedDate();
    }
}
3-5. IndexController 수정
@GetMapping("/")
    private final PostsService postsService;

    public String index(Model model){
        model.addAttribute("posts", postsService.findAllDesc());
        return "index";
}- Model : 서버 템플릿 엔진에서 사용할 수 있는 객체를 저장할 수 있음, 여기서는
postsService.findAllDesc()로 가져온 결과를posts로index.mustache에 전달함
4. 게시글 수정 화면 만들기
4-1. post-update.mustache 생성
{{>layout/header}}

<h1>게시글 수정</h1>

<div class="col-md-12">
    <div class="col-md-4">
        <form>
            <div class="form-group">
                <label for="title">글 번호</label>
                <input type="text" class="form-control" id="id" value="{{post.id}}" readonly>
            </div>
            <div class="form-group">
                <label for="title">제목</label>
                <input type="text" class="form-control" id="title" value="{{post.title}}">
            </div>
            <div class="form-group">
                <label for="author"> 작성자 </label>
                <input type="text" class="form-control" id="author" value="{{post.author}}" readonly>
            </div>
            <div class="form-group">
                <label for="content"> 내용 </label>
                <textarea class="form-control" id="content">{{post.content}}</textarea>
            </div>
        </form>
        <a href="/" role="button" class="btn btn-secondary">취소</a>
        <button type="button" class="btn btn-primary" id="btn-update">수정 완료</button>
    </div>
</div>

{{>layout/footer}}- {{post.id}} : 머스테치는 객체의 필드 접근 시 점으로 구분함, Post 클래스의 id에 대한 접근은 post.id로 사용
4-2. index.js 파일에 수정 기능 추가
var main = {
    init : function () {
        var _this = this;

        $('#btn-update').on('click', function () {
            _this.update();
        });
    },

    update : function () {
        var data = {
            title: $('#title').val(),
            content: $('#content').val()
        };

        var id = $('#id').val();

        $.ajax({
            type: 'PUT',
            url: '/api/v1/posts/'+id,
            dataType: 'json',
            contentType:'application/json; charset=utf-8',
            data: JSON.stringify(data)
        }).done(function() {
            alert('글이 수정되었습니다.');
            window.location.href = '/';
        }).fail(function (error) {
            alert(JSON.stringify(error));
        });
    },
};

main.init();
type : 'PUT': PostApiController에 있는 API에서 이미 @PutMapping으로 선언했기 때문에 PUT을 사용해야함url: '/api/v1/posts/'+id,: 어느 게시글을 수정할지 URL Path로 구분하기 위해 id를 추가함
4-3. index.mustache 수정
{{#posts}}
    <tr>
      <td>{{id}}</td>
      <td><a href="/posts/update/{{id}}">{{title}}</a></td>
      <td>{{author}}</td>
      <td>{{modifiedDate}}</td>
    </tr>
{{/posts}}
4-4. IndexController 메소드 추가
@GetMapping("/posts/update/{id}")
    public String postsUpdate(@PathVariable Long id, Model model){
        PostsResponseDto dto = postsService.findById(id);
        model.addAttribute("post", dto);
        return "posts-update";
}
5. 게시글 삭제 기능 만들기
5-1. post-update.mustache에 삭제버튼 추가
<button type="button" class="btn btn-danger" id="btn-delete">삭제</button>- 수정완료 버튼 밑에 삭제 버튼 추가
5-2. index.js 파일에 삭제 기능 추가
var main = {
    init : function () {
        var _this = this;
        $('#btn-delete').on('click', function () {
            _this.delete();
        });
    },
    delete : function () {
        var id = $('#id').val();

        $.ajax({
            type: 'DELETE',
            url: '/api/v1/posts/'+id,
            dataType: 'json',
            contentType:'application/json; charset=utf-8'
        }).done(function() {
            alert('글이 삭제되었습니다.');
            window.location.href = '/';
        }).fail(function (error) {
            alert(JSON.stringify(error));
        });
    }

};

main.init();
5-3. PostsService 코드 추가
@Transactional
    public void delete(Long id){
        Posts posts = postsRepository.findById(id).orElseThrow(() -> new IllegalArgumentException("해당 게시글이 없습니다. id = " + id));
        postsRepository.delete(posts);
}- JpaRepository에서 지원하는 delete 메소드 사용, 존재하는 Posts인지 확인을 위해 엔티티 조회 후 그대로 삭제
5-4. PostsApiController 코드 추가
@DeleteMapping("/api/v1/posts/{id}")
    public Long delete(@PathVariable Long id){
        postsService.delete(id);
        return id;
}