Intro
이번 글에서는 RecyclerView로 GridLayout을 구현하는 방법에 대해 다뤄보려고 한다.
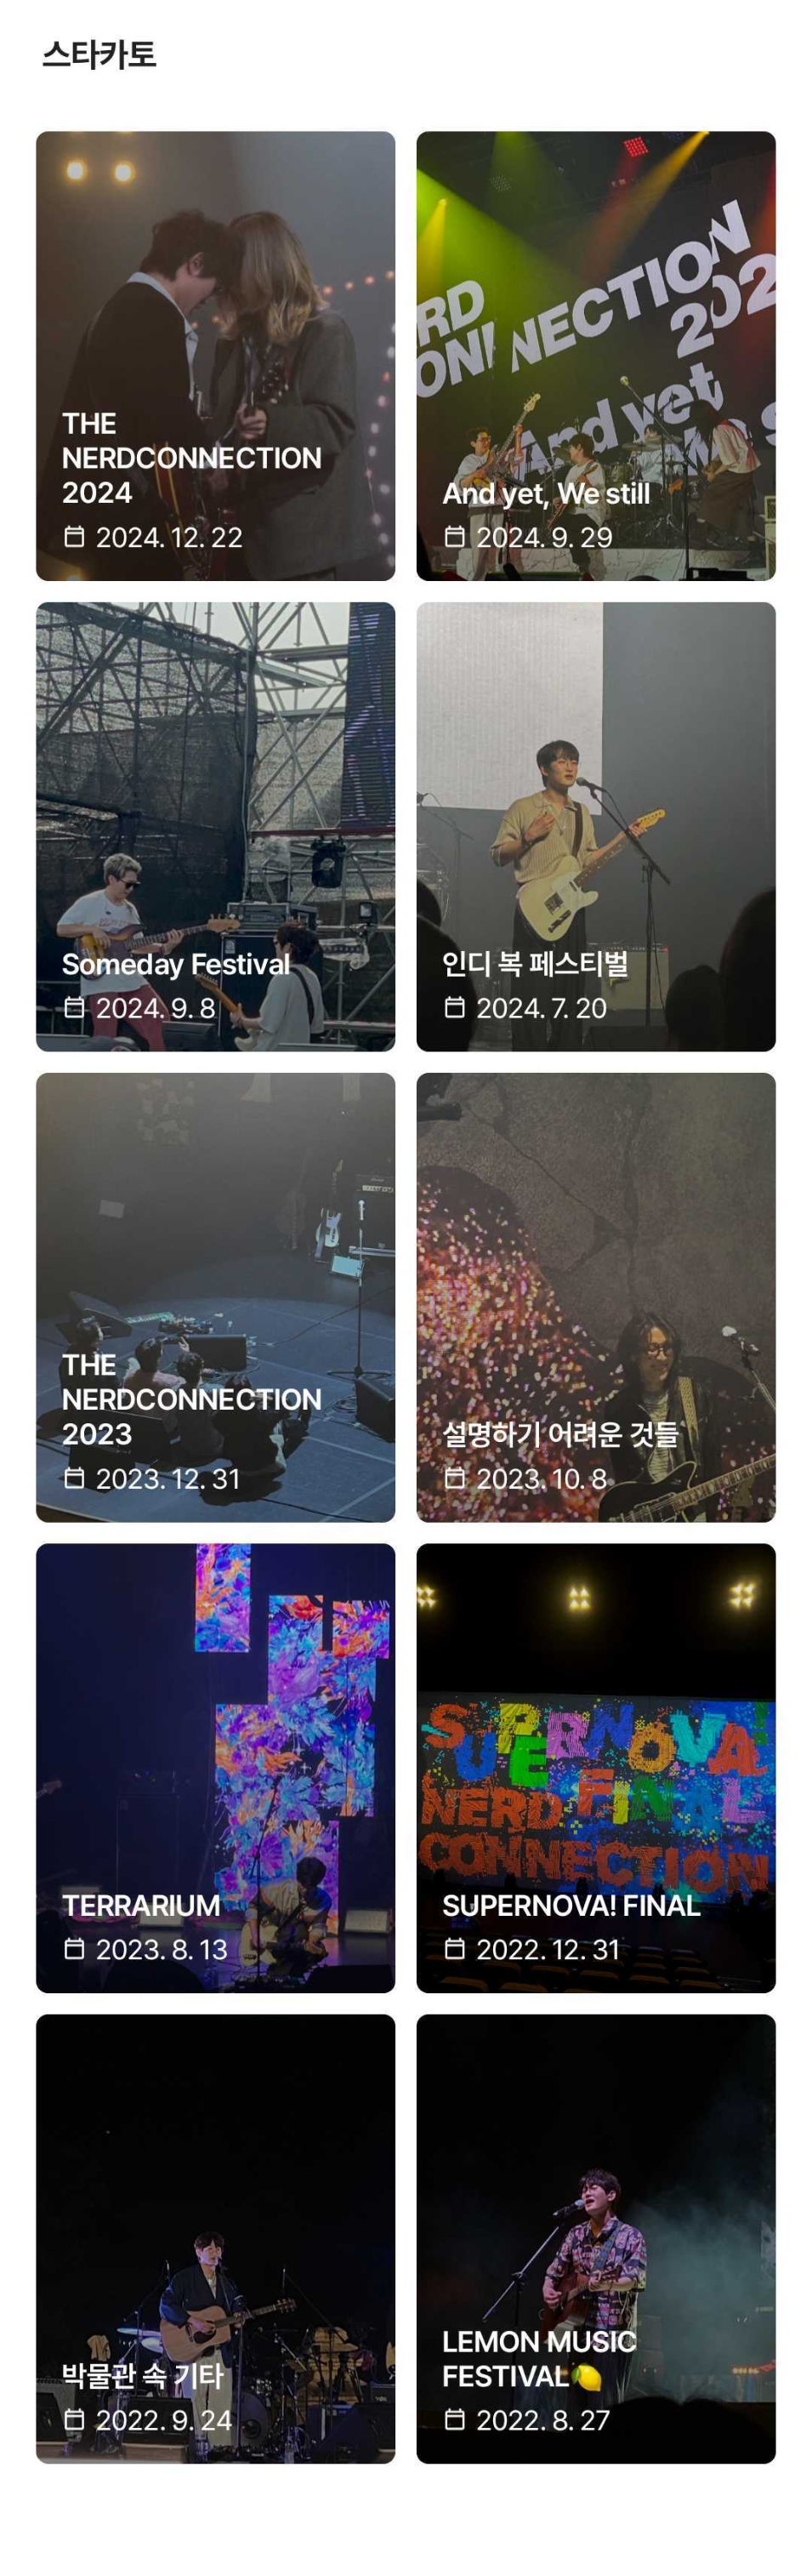
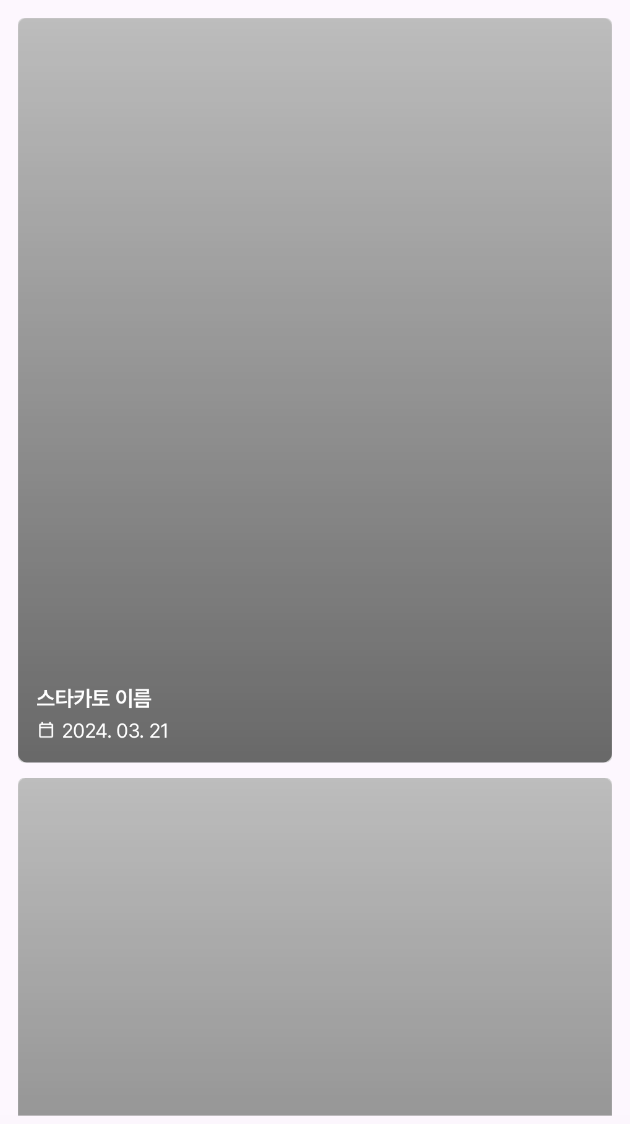
스타카토를 개발하면서 아래와 같은 뷰를 만들어야 했다. 이미지와 동일한 뷰를 RecyclerView를 활용해서 구현하려면 어떻게 해야할까?
RecyclerView는 ListView(아이템의 레이아웃이 세로 고정)와 달리 LayoutManager를 지원해주기 때문에 세로/가로/그리드 레이아웃을 구현할 수 있다.
본격적으로 그리드 레이아웃을 구현하기 전에 LayoutManager에 대해 알아보자.
LayoutManager란?
안드로이드 공식 문서에서는 LayoutManager를 아래와 같이 설명하고 있다.
안드로이드 공식 문서 - LayoutManager
A LayoutManager is responsible for measuring and positioning item views within a RecyclerView as well as determining the policy for when to recycle item views that are no longer visible to the user.
LayoutManager는 RecyclerView의 아이템을 배치하고 크기를 정하는 역할을 한다. 즉, RecyclerView의 LayoutManager 종류에 따라 아이템의 배치가 변경되는 것이다.
LayoutManager의 종류
LayoutManager에는 3가지 종류(Linear, Grid, StaggeredGrid)가 있다.
-
LinearLayoutManager
LinearLayoutManager는 ListView와 비슷한 동작을 제공한다.
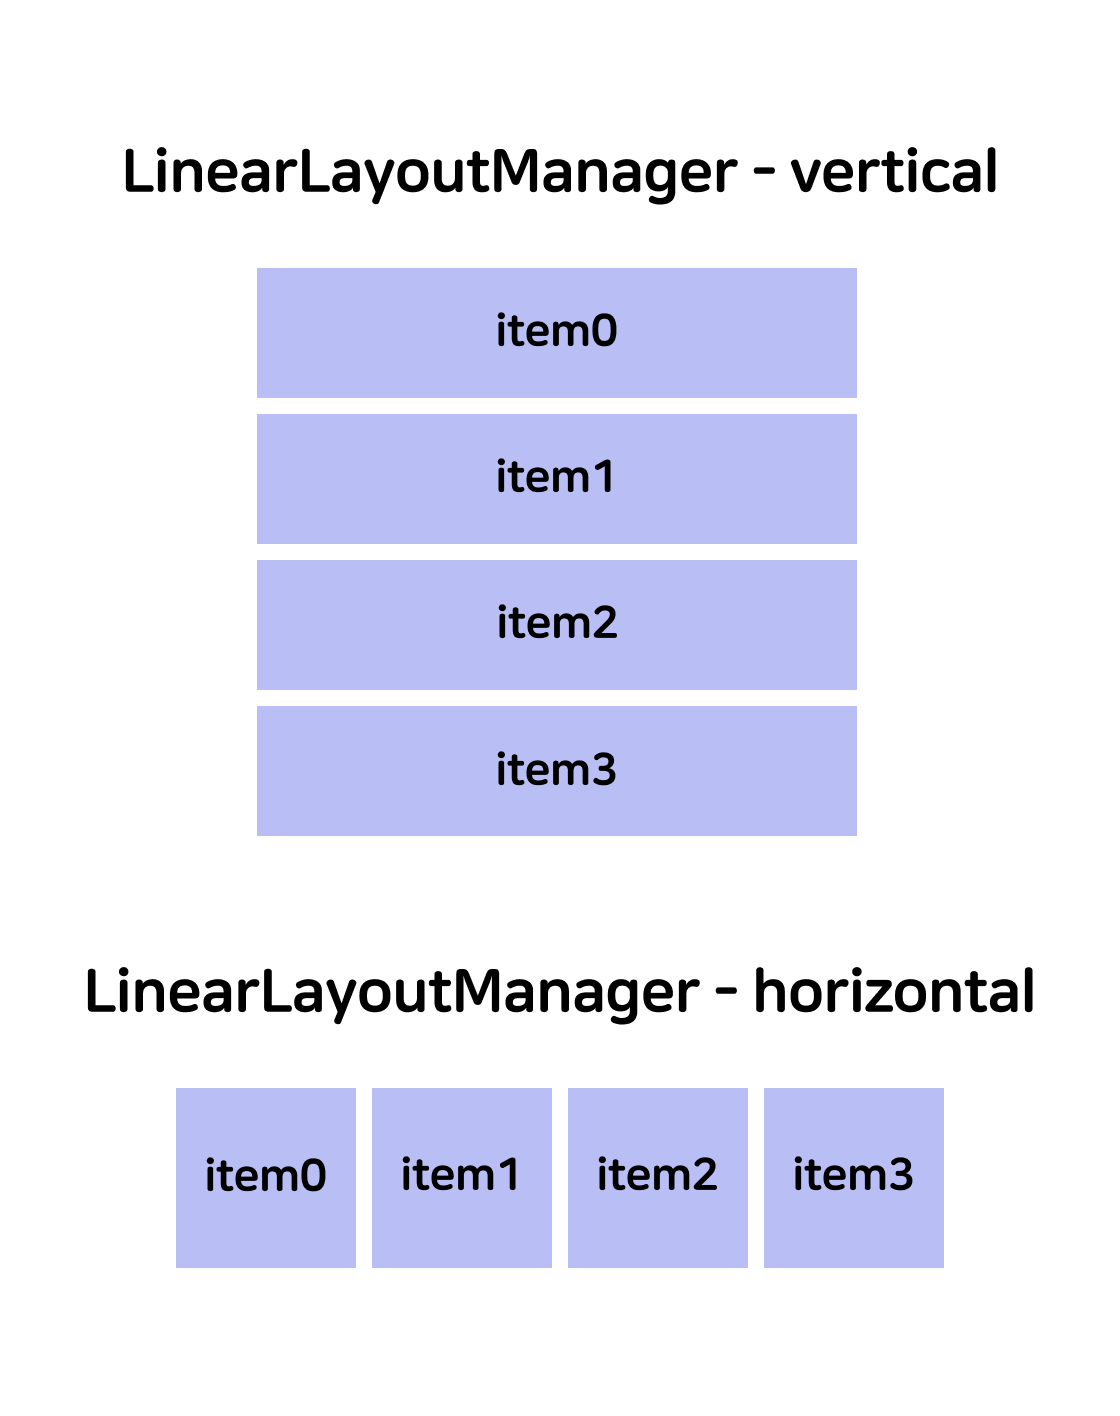
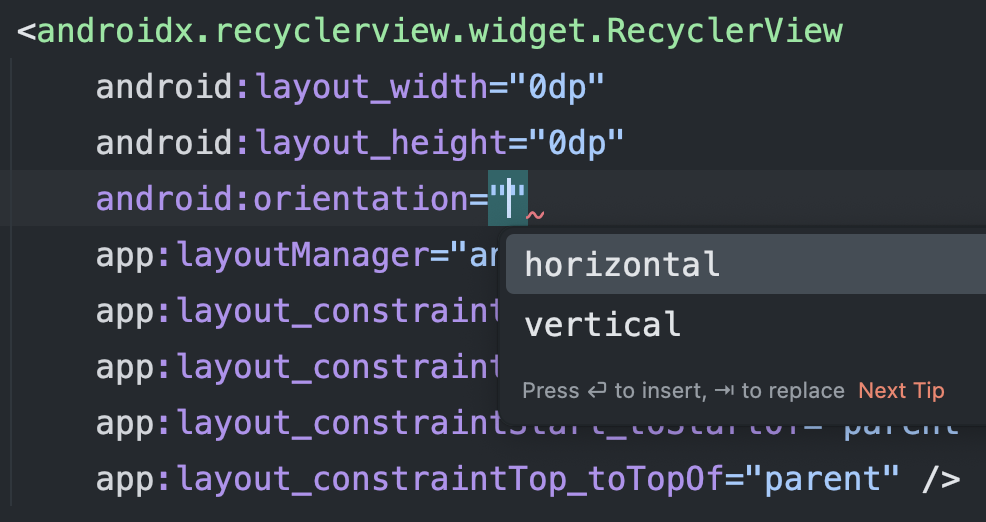
XML에서orientation속성을 설정하여 수직(vertical), 수평(horizontal) 레이아웃을 구현할 수 있다.
-
GridLayoutManager
여러 열의 아이템을 노출할 때 사용한다.
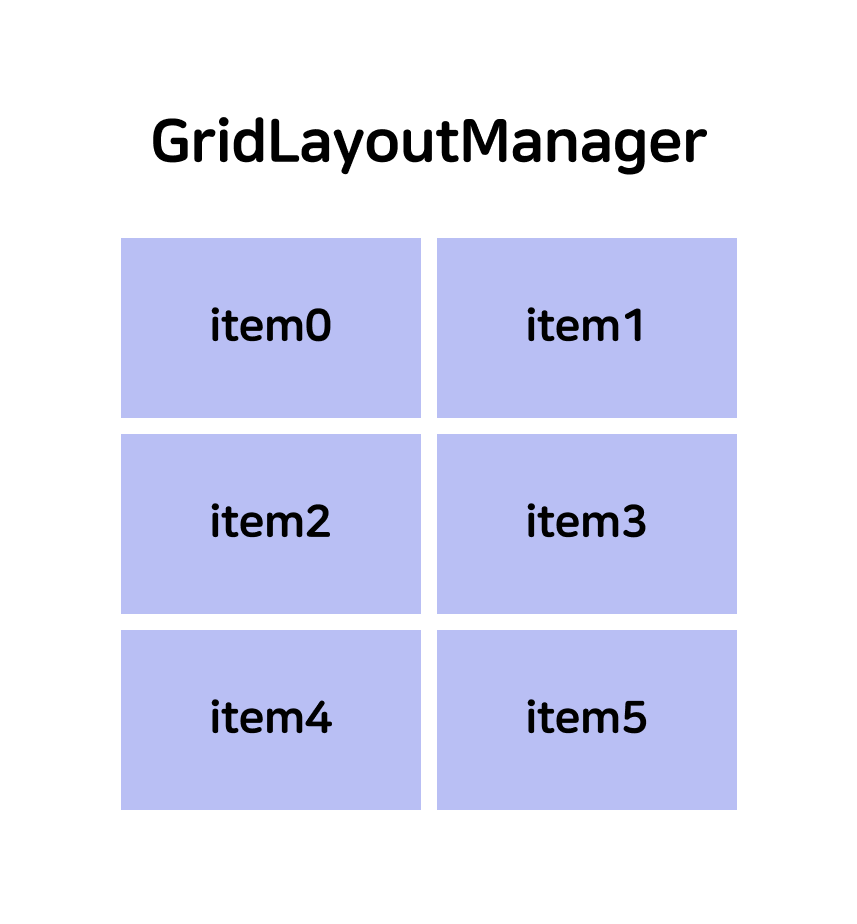
GridLayout은 쇼핑몰의 상품 목록에서 흔히 볼 수 있는 layout이다.
크림 무신사 마켓컬리 


-
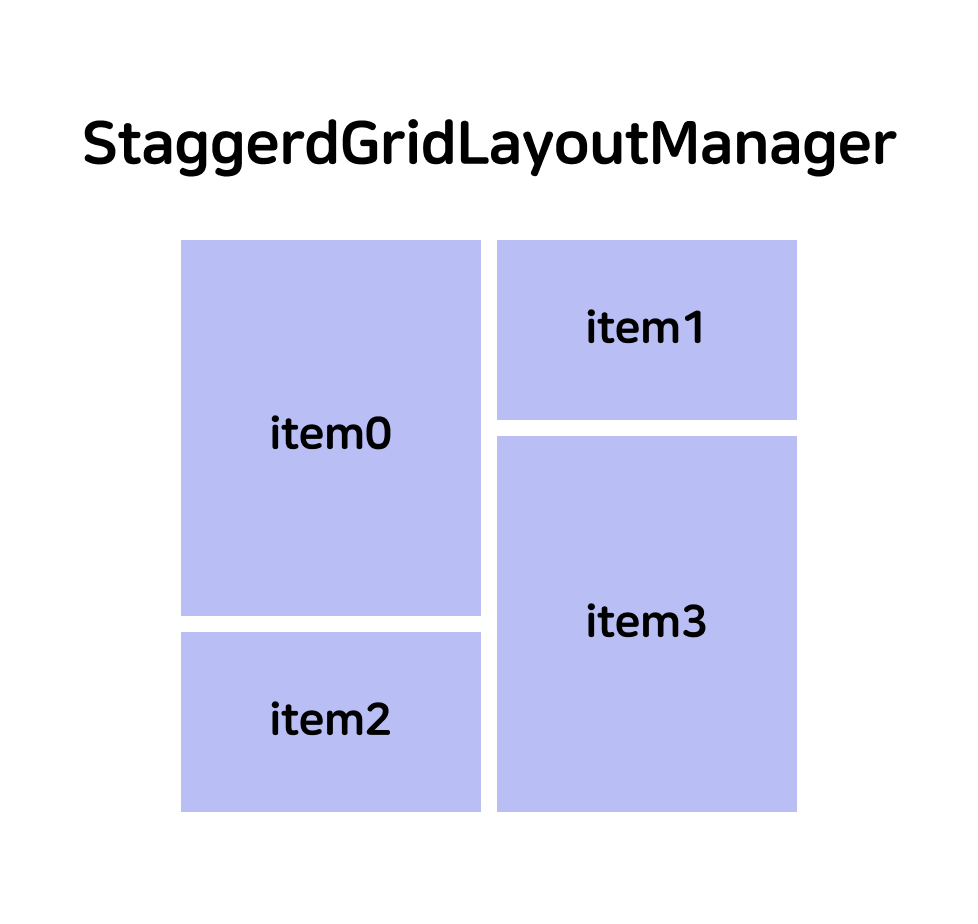
StaggeredGridLayoutManager
GridLayoutManager와 비슷하지만 행과 열이 같은 높이가 아닌 View를 구현해야할 때 사용한다.
지금까지 LayoutManager에 대해서 간단히 알아보았으니 이제 RecyclerView로 GridLayout을 구현하는 방법을 알아보자!
RecyclerView로 GridLayout 구현하기
아래 이미지는 앞서 말했듯이 스타카토의 스타카토 목록 뷰이다.
이미지와 동일한 뷰를 RecyclerView를 활용해서 구현해보자!
1. data class 정의
데이터를 가지고 있을 data class를 정의해야 한다. 아이템에서 보여줄 정보나 클릭 이벤트 발생 시에 처리해야하는 로직 등이 있다면 이와 관련해서 필요한 값들을 data class가 가지고 있으면 된다.
필자는 스타카토의 제목, 방문날짜, 썸네일 사진을 아이템에서 보여줘야하기 때문에 3가지 정보를 프로퍼티로 추가했다. 또한 스타카토 아이템 클릭 시 스타카토 조회 화면으로 이동하기 위해 스타카토의 id가 필요해서 id도 추가했다.
data class MemoryStaccatoUiModel(
    val id: Long,
    val staccatoTitle: String,
    val staccatoImageUrl: String? = null,
    val visitedAt: LocalDateTime,
)
2. 아이템 XML 구현
data class를 정의했다면 정보를 보여줄 아이템의 뷰를 구현해야한다.
스타카토 목록의 아이템은 아래와 같이 디자인 되어있다.

⚠️ 필자는 XML, DataBinding과 BindingAdapter, Coil을 사용하고 있다.
item_staccatos.xml
<?xml version="1.0" encoding="utf-8"?>
<layout xmlns:android="http://schemas.android.com/apk/res/android"
   xmlns:app="http://schemas.android.com/apk/res-auto"
   xmlns:bind="http://schemas.android.com/apk/res-auto"
   xmlns:tools="http://schemas.android.com/tools">

   <data>

       <variable
           name="handler"
           type="com.on.staccato.presentation.memory.MemoryHandler" />

       <variable
           name="staccato"
           type="com.on.staccato.presentation.memory.model.MemoryStaccatoUiModel" />
   </data>

   <androidx.constraintlayout.widget.ConstraintLayout
       android:layout_width="match_parent"
       android:layout_height="wrap_content"
       android:onClick="@{() -> handler.onStaccatoClicked(staccato.id)}"
       android:padding="5dp">

       <ImageView
           android:id="@+id/iv_staccatos"
           android:layout_width="0dp"
           android:layout_height="0dp"
           android:contentDescription="@string/staccatos_thumbnail_photo_description"
           android:scaleType="centerCrop"
           app:layout_constraintBottom_toBottomOf="parent"
           app:layout_constraintDimensionRatio="4:5"
           app:layout_constraintEnd_toEndOf="parent"
           app:layout_constraintStart_toStartOf="parent"
           app:layout_constraintTop_toTopOf="parent"
           bind:coilRoundedCornerImageUrl="@{staccato.staccatoImageUrl}"
           bind:coilRoundedCornerPlaceHolder="@{@drawable/staccato_gradient}"
           bind:coilRoundingRadius="@{16f}"
           tools:src="@drawable/shape_all_gray2_4dp" />

       <View
           android:layout_width="0dp"
           android:layout_height="0dp"
           android:background="@drawable/staccato_gradient"
           app:layout_constraintBottom_toBottomOf="@id/iv_staccatos"
           app:layout_constraintEnd_toEndOf="@id/iv_staccatos"
           app:layout_constraintStart_toStartOf="@id/iv_staccatos"
           app:layout_constraintTop_toTopOf="@id/iv_staccatos" />

       <TextView
           android:id="@+id/tv_staccatos_place_name"
           android:layout_width="0dp"
           android:layout_height="wrap_content"
           android:layout_marginHorizontal="12dp"
           android:layout_marginVertical="2dp"
           android:ellipsize="end"
           android:maxLines="3"
           android:text="@{staccato.staccatoTitle}"
           android:textAppearance="@style/Typography.Title3"
           android:textColor="@color/absolute_white"
           app:layout_constraintBottom_toTopOf="@id/tv_staccatos_visited_at"
           app:layout_constraintEnd_toEndOf="@id/iv_staccatos"
           app:layout_constraintStart_toStartOf="@id/iv_staccatos"
           app:layout_constraintTop_toTopOf="@id/iv_staccatos"
           app:layout_constraintVertical_bias="1.0"
           tools:text="스타카토 이름" />

       <ImageView
           android:id="@+id/iv_staccatos_calendar"
           android:layout_width="wrap_content"
           android:layout_height="0dp"
           android:layout_marginStart="12dp"
           android:layout_marginBottom="12dp"
           android:contentDescription="@string/staccatos_calendar_icon_description"
           android:src="@drawable/calendar_today"
           app:layout_constraintBottom_toBottomOf="@id/iv_staccatos"
           app:layout_constraintEnd_toStartOf="@id/tv_staccatos_visited_at"
           app:layout_constraintStart_toStartOf="@id/iv_staccatos"
           app:layout_constraintTop_toTopOf="@id/tv_staccatos_visited_at" />

       <TextView
           android:id="@+id/tv_staccatos_visited_at"
           android:layout_width="0dp"
           android:layout_height="wrap_content"
           android:layout_marginStart="4dp"
           android:layout_marginEnd="12dp"
           android:layout_marginBottom="12dp"
           android:text="@{@string/all_date_dots_format(staccato.visitedAt.year, staccato.visitedAt.monthValue, staccato.visitedAt.dayOfMonth)}"
           android:textAppearance="@style/Typography.Body4.Not.Resizable"
           android:textColor="@color/absolute_white"
           app:layout_constraintBottom_toBottomOf="@id/iv_staccatos"
           app:layout_constraintEnd_toEndOf="@id/iv_staccatos"
           app:layout_constraintStart_toEndOf="@id/iv_staccatos_calendar"
           tools:text="2024. 03. 21" />

   </androidx.constraintlayout.widget.ConstraintLayout>

</layout>
3. RecyclerView XML 구현
아이템의 뷰를 구현했다면 이제 아이템들을 보여줄 목록의 뷰를 구현해야 한다.
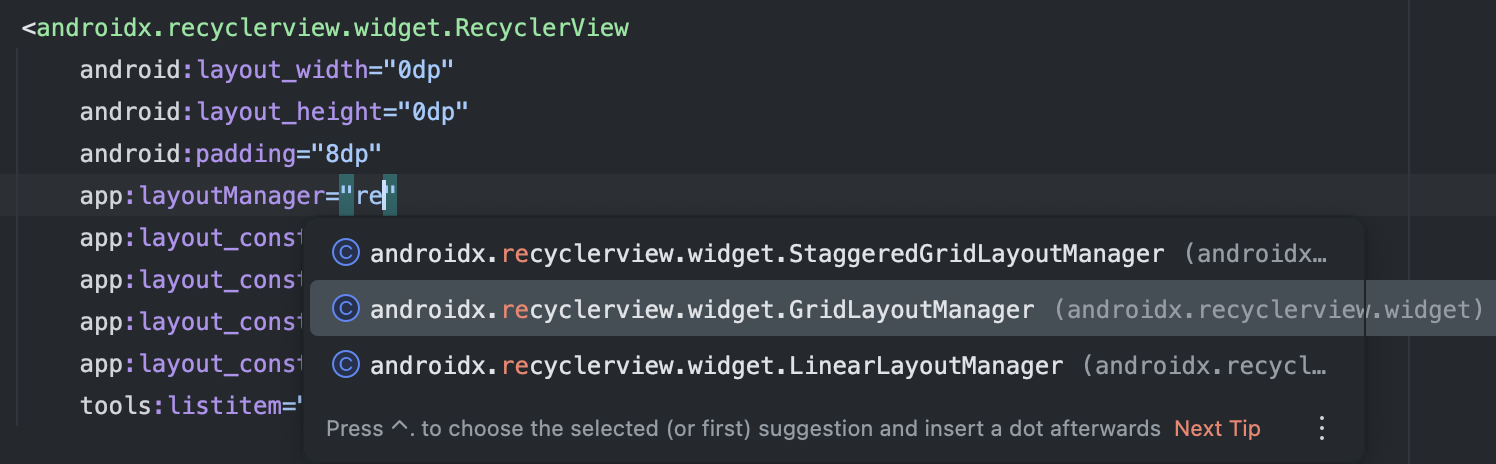
이때 주의깊게 보아야할 부분은 layoutManager 속성과 spanCount 속성이다.
layoutManager 속성으로 원하는 layout 종류를 설정할 수 있다.
spanCount 속성을 활용해 열의 갯수를 설정할 수 있다.
| spanCount 설정 X | spanCount 2로 설정했을 때 | spanCount 3으로 설정했을 때 |
|---|---|---|
 | 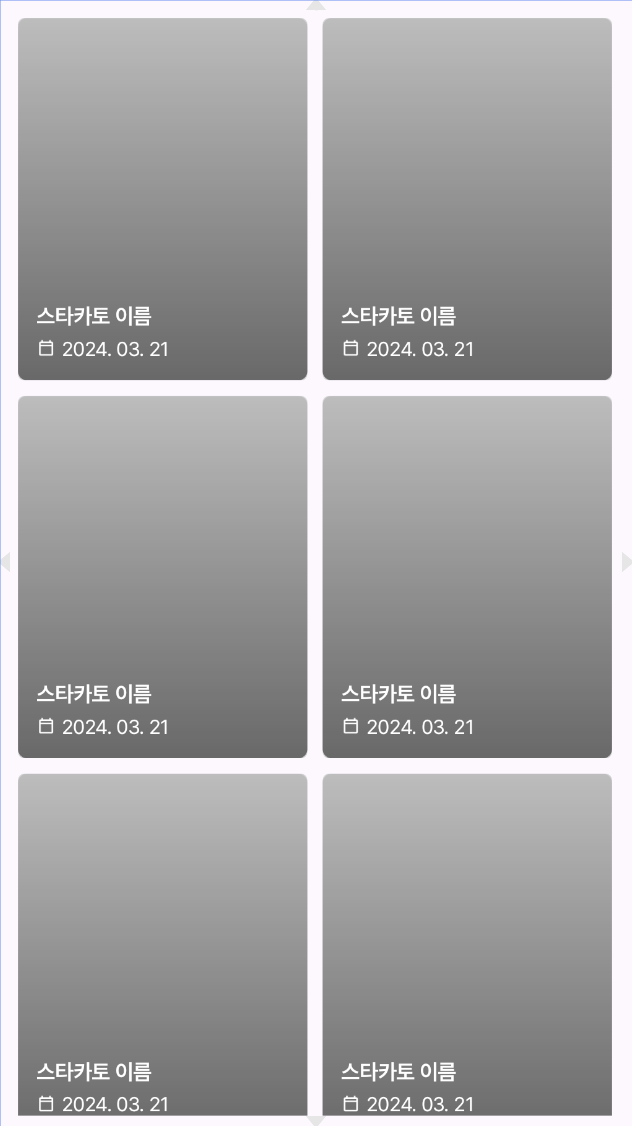 | 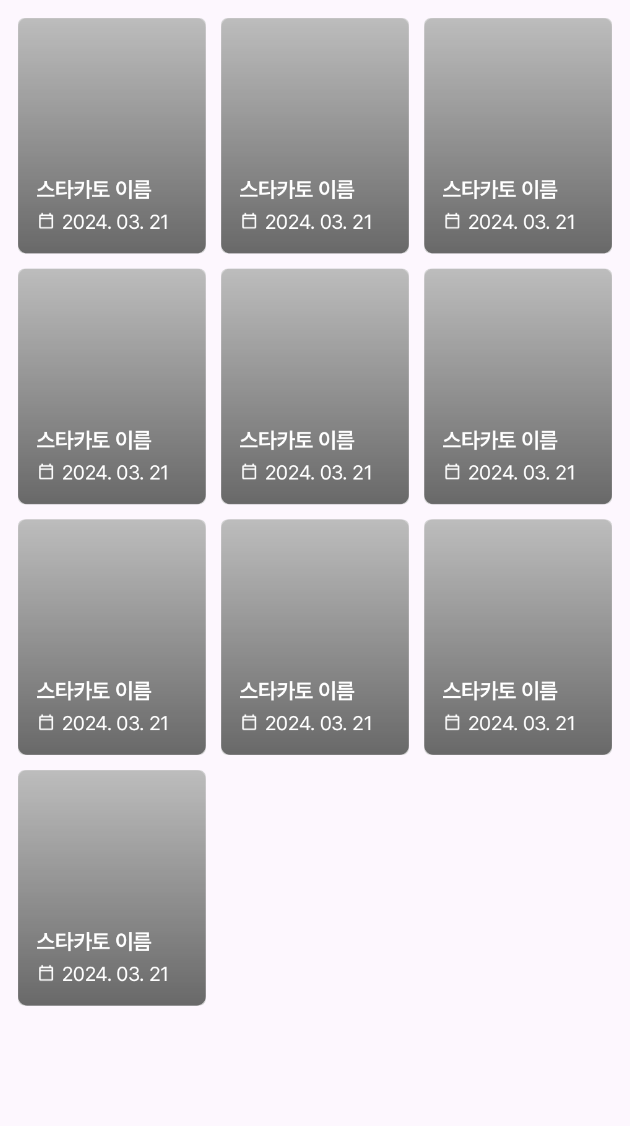 |
RecyclerView를 보여주고 싶은 화면의 XML 파일에 RecyclerView를 구현하면 된다.
RecyclerView XML
<?xml version="1.0" encoding="utf-8"?>
<androidx.constraintlayout.widget.ConstraintLayout xmlns:android="http://schemas.android.com/apk/res/android"
    xmlns:app="http://schemas.android.com/apk/res-auto"
    xmlns:tools="http://schemas.android.com/tools"
    android:layout_width="match_parent"
    android:layout_height="match_parent">

    <androidx.recyclerview.widget.RecyclerView
        android:layout_width="0dp"
        android:layout_height="0dp"
        android:padding="8dp"
        app:layoutManager="androidx.recyclerview.widget.GridLayoutManager"
        app:layout_constraintBottom_toBottomOf="parent"
        app:layout_constraintEnd_toEndOf="parent"
        app:layout_constraintStart_toStartOf="parent"
        app:layout_constraintTop_toTopOf="parent"
        app:spanCount="2"
        tools:listitem="@layout/item_staccatos" /> <!-- tools:listitem을 활용하면 item을 미리보기 할 수 있다.-->

</androidx.constraintlayout.widget.ConstraintLayout>
4. RecyclerView ViewHolder 구현
RecyclerView는 View 재사용을 위해 ViewHolder 패턴 사용을 강제하기 때문에 ViewHolder를 구현해야 한다.
앞서 작성했던 아이템의 Binding 클래스와 클릭 이벤트를 처리해줄 Handler interface를 ViewHolder의 주 생성자로 넣어준다.
Binding 클래스는 필수로 넣어줘야 한다. Handler는 구현 방식에 따라 필요하지 않을 수도 있다.
마지막으로 bind() 메서드를 구현하면 ViewHolder 구현은 끝이다.
bind()는 아이템의 데이터를 뷰에 연결하는 역할이다. xml에 정의해둔 variable과 데이터를 연결해주면 된다.
item_staccatos.xml
<?xml version="1.0" encoding="utf-8"?>
<layout ...>

    <data>

        <variable
            name="handler"
            type="com.on.staccato.presentation.memory.MemoryHandler" />

        <variable
            name="staccato"
            type="com.on.staccato.presentation.memory.model.MemoryStaccatoUiModel" />
    </data>
  ...
</layout>
class StaccatoViewHolder(
private val binding: ItemStaccatosBinding, // 아이템 Binding 클래스
private val handler: MemoryHandler, // 아이템 클릭 이벤트를 처리해 줄 handler
) : ViewHolder(binding.root) {
fun bind(memoryStaccato: MemoryStaccatoUiModel) {
binding.staccato = memoryStaccato
binding.handler = handler
}
}
5. RecyclerView Adapter 구현
다음으로는 Adapter를 구현해야한다. Adapter는 RecyclerView에 데이터를 연결해주는 역할을 한다.
Adapter는 뷰에 데이터를 바인딩하고, UI 관련 로직만 처리해야 한다. 어댑터에 비즈니스 로직이 있다면 이는 단일 책임 원칙을 위반한 것이다.
Adapter에서 주의깊게 봐야할 메서드는 onCreateViewHolder와 onBindViewHolder이다.
onCreateViewHolder
onCreateViewHolder에는 레이아웃을 인플레이트하고 ViewHolder를 생성하고 반환해주는 로직을 작성해주면 된다.
    override fun onCreateViewHolder(
        parent: ViewGroup,
        viewType: Int,
    ): StaccatoViewHolder {
        val inflater = LayoutInflater.from(parent.context)
        val binding = ItemStaccatosBinding.inflate(inflater, parent, false)
        return StaccatoViewHolder(binding, handler)
    }
onBindViewHolder
onBindViewHolder에는 필요한 데이터를 가져와서 ViewHolder에 데이터를 연결 해주고, 화면에 표시할 아이템 뷰를 갱신해주는 로직을 작성해주면 된다.
    override fun onBindViewHolder(
        holder: StaccatoViewHolder,
        position: Int,
    ) {
        holder.bind(getItem(position))
    }
⚠️ 필자는 ListAdapter를 사용하고 있다.
Adapter 전체 코드
package com.on.staccato.presentation.memory.adapter

import android.view.LayoutInflater
import android.view.ViewGroup
import androidx.recyclerview.widget.DiffUtil
import androidx.recyclerview.widget.ListAdapter
import com.on.staccato.databinding.ItemStaccatosBinding
import com.on.staccato.presentation.memory.MemoryHandler
import com.on.staccato.presentation.memory.model.MemoryStaccatoUiModel

class StaccatosAdapter(private val handler: MemoryHandler) : ListAdapter<MemoryStaccatoUiModel, StaccatoViewHolder>(diffUtil) {
    override fun onCreateViewHolder(
        parent: ViewGroup,
        viewType: Int,
    ): StaccatoViewHolder {
        val inflater = LayoutInflater.from(parent.context)
        val binding = ItemStaccatosBinding.inflate(inflater, parent, false)
        return StaccatoViewHolder(binding, handler)
    }

    override fun onBindViewHolder(
        holder: StaccatoViewHolder,
        position: Int,
    ) {
        holder.bind(getItem(position))
    }

    fun updateStaccatos(staccatos: List<MemoryStaccatoUiModel>) {
        submitList(staccatos)
    }

    companion object {
        val diffUtil =
            object : DiffUtil.ItemCallback<MemoryStaccatoUiModel>() {
                override fun areItemsTheSame(
                    oldItem: MemoryStaccatoUiModel,
                    newItem: MemoryStaccatoUiModel,
                ): Boolean = oldItem.id == newItem.id

                override fun areContentsTheSame(
                    oldItem: MemoryStaccatoUiModel,
                    newItem: MemoryStaccatoUiModel,
                ): Boolean = oldItem == newItem
            }
    }
}
6. Adapter 초기화
마지막으로 RecyclerView를 보여줄 화면에 Adpater를 초기화해주면 된다.
@AndroidEntryPoint
class MemoryFragment :
    BindingFragment<FragmentMemoryBinding>(R.layout.fragment_memory),
    ...

    private lateinit var staccatosAdapter: StaccatosAdapter

    override fun onViewCreated(
        view: View,
        savedInstanceState: Bundle?,
    ) {
        ...
        initStaccatosAdapter()
        ...
    }

    ...

    // Adapter 초기화
    private fun initStaccatosAdapter() {
        staccatosAdapter = StaccatosAdapter(handler = this)
        binding.rvMemoryStaccatos.adapter = staccatosAdapter
    }

    ...
}
Fragment 전체 코드
@AndroidEntryPoint
class MemoryFragment :
    BindingFragment<FragmentMemoryBinding>(R.layout.fragment_memory),
    MemoryHandler {
    private val memoryId by lazy {
        arguments?.getLong(MEMORY_ID_KEY) ?: throw IllegalArgumentException()
    }
    private val viewModel: MemoryViewModel by viewModels()

    private lateinit var staccatosAdapter: StaccatosAdapter

    override fun onViewCreated(
        view: View,
        savedInstanceState: Bundle?,
    ) {
        initBinding()
        initStaccatosAdapter()
        observeMemory()
        viewModel.loadMemory(memoryId)
    }

    override fun onStaccatoClicked(staccatoId: Long) {
        viewModel.memory.value?.let {
            val bundle =
                bundleOf(
                    STACCATO_ID_KEY to staccatoId,
                )
            findNavController().navigate(R.id.action_memoryFragment_to_staccatoFragment, bundle)
        }
    }

    override fun onStaccatoCreationClicked() {
        viewModel.memory.value?.let {
            val staccatoCreationLauncher = (activity as MainActivity).staccatoCreationLauncher
            StaccatoCreationActivity.startWithResultLauncher(
                memoryId,
                it.title,
                requireContext(),
                staccatoCreationLauncher,
            )
        }
    }

    private fun initBinding() {
        binding.lifecycleOwner = this
        binding.viewModel = viewModel
        binding.memoryHandler = this
    }

    // Adapter 초기화
    private fun initStaccatosAdapter() {
        staccatosAdapter = StaccatosAdapter(handler = this)
        binding.rvMemoryStaccatos.adapter = staccatosAdapter
    }

    private fun observeMemory() {
        viewModel.memory.observe(viewLifecycleOwner) { memory ->
            staccatosAdapter.updateStaccatos(memory.staccatos)
        }
    }

    companion object {
        const val MEMORY_ID_KEY = "memoryId"
    }
}
결과
아래 영상에서 GridLayout이 잘 구현된 것을 확인할 수 있다!