스프링 클라우드 컨피그
스프링 클라우드 컨피그는 애플리케이션 구성 데이터(특히 환경별 구성 데이터)를 관리한다.
장점으로는 아무리 많은 마이크로서비스 인스턴스를 실행하더라도 항상 동일한 구성을 보장할 수 있다.
이번 프로젝트에는 컨피그 서버를 구축하고, 라이선스 서비스에서 JPA를 사용하여 데이터베이스 접근하도록 하고 프로퍼티를 컨피스 서버에 구성시킬 것이다.(깃과 같은 오픈소스 프로젝트에도 통합이되지만 예시를 위해 자체 프로퍼티 관리 저장소를 사용한다.) 서버 구축을 해보면서 해당 내용을 살펴보자.
아래는 진행하고자하는 서비스들의 소스를 참고할 깃헙 주소이다.
https://github.com/hyeokjinON/microservice_study/tree/master/chapter5
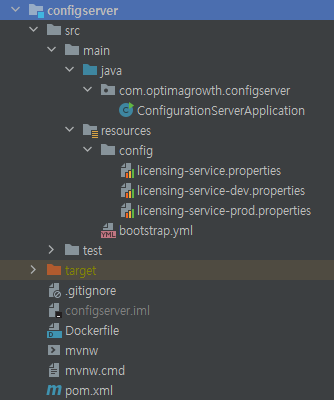
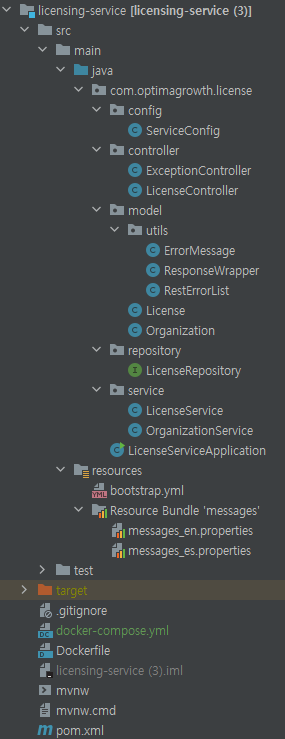
먼저 프로젝트 소스구성이다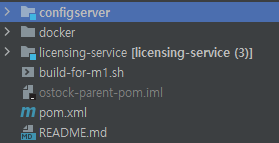
스프링 클라우드 컨피그 설정 및 서비스 구성정보 등록
pom.xml에 컨피그와 클라우드 의존성을 추가한다.
configServer pom.xml
<?xml version="1.0" encoding="UTF-8"?>
<project xmlns="http://maven.apache.org/POM/4.0.0" xmlns:xsi="http://www.w3.org/2001/XMLSchema-instance"
	xsi:schemaLocation="http://maven.apache.org/POM/4.0.0 https://maven.apache.org/xsd/maven-4.0.0.xsd">
	<modelVersion>4.0.0</modelVersion>
	<parent>
		<groupId>org.springframework.boot</groupId>
		<artifactId>spring-boot-starter-parent</artifactId>
		<version>2.2.4.RELEASE</version>
		<relativePath/> <!-- lookup parent from repository -->
	</parent>
	<groupId>com.optimagrowth</groupId>
	<artifactId>configserver</artifactId>
	<version>0.0.1-SNAPSHOT</version>
	<name>Configuration Server</name>
	<description>Configuration Server</description>

	<properties>
		<java.version>11</java.version>
		<docker.image.prefix>ostock</docker.image.prefix>
		<spring-cloud.version>Hoxton.SR1</spring-cloud.version>
	</properties>

	<!-- ConfigServer를 실행하기 위한 스프링 클라우드 프로젝트와 기본 의존성-->
	<dependencies>
		<dependency>
			<groupId>org.springframework.cloud</groupId>
			<artifactId>spring-cloud-config-server</artifactId>
		</dependency>
		<dependency>
			<groupId>org.springframework.boot</groupId>
			<artifactId>spring-boot-starter-actuator</artifactId>
		</dependency>
		<dependency>
			<groupId>org.springframework.boot</groupId>
			<artifactId>spring-boot-starter-test</artifactId>
			<scope>test</scope>
			<exclusions>
				<exclusion>
					<groupId>org.junit.vintage</groupId>
					<artifactId>junit-vintage-engine</artifactId>
				</exclusion>
			</exclusions>
		</dependency>

	</dependencies>

	<!-- 스프링 클라우드 BOM(Bill Of Materials) 정의-->
	<dependencyManagement>
		<dependencies>
			<dependency>
				<groupId>org.springframework.cloud</groupId>
				<artifactId>spring-cloud-dependencies</artifactId>
				<version>${spring-cloud.version}</version>
				<type>pom</type>
				<scope>import</scope>
			</dependency>
		</dependencies>
	</dependencyManagement>

	<build>
		<plugins>
			<plugin>
				<groupId>org.springframework.boot</groupId>
				<artifactId>spring-boot-maven-plugin</artifactId>
			</plugin>
			<!-- This plugin is used to create a docker image and publish the image to docker hub-->
			<plugin>
				<groupId>com.spotify</groupId>
				<artifactId>dockerfile-maven-plugin</artifactId>
				<version>1.4.13</version>
				<configuration>
					<repository>${docker.image.prefix}/${project.artifactId}</repository>
	                <tag>${project.version}</tag>
					<buildArgs>
						<JAR_FILE>target/${project.build.finalName}.jar</JAR_FILE>
					</buildArgs>
				</configuration>
				<executions>
					<execution>
						<id>default</id>
						<phase>install</phase>
						<goals>
							<goal>build</goal>
							<goal>push</goal>
						</goals>
					</execution>
				</executions>
			</plugin>
		</plugins>
	</build>

</project>
ConfigurationServerApplication.java
package com.optimagrowth.configserver;

import org.springframework.boot.SpringApplication;
import org.springframework.boot.autoconfigure.SpringBootApplication;
import org.springframework.cloud.config.server.EnableConfigServer;

@SpringBootApplication
// 이 애너테이션은 이 서비스를 스프링 클라우드 컨피그 서비스로 활성화 한다.
@EnableConfigServer
public class ConfigurationServerApplication {
	// main() 메서드는 이 서비스와 스프링 컨테이너를 시작한다.
	public static void main(String[] args) {
		SpringApplication.run(ConfigurationServerApplication.class, args);
	}

}
부트스트랩 파일은 스프링 클라우드의 특정 파일 타입이며
스프링 애플리케이션 이름, 스프링 클라우드 구성 서버 위치, 암호화/복호화 정보등을 지정한다.
특히 부트스트랩 파일은 부모 격인 스프링 ApplicationContext로 로드되고 이 부모 컴포넌트는 application.property나 application.yml 파일을 사용하는 컴포넌트보다 먼저 로드된다.
configServer bootstrap.yml
spring:
  application:
    # 컨피그 서버 애플리케이션 이름
    name: config-server
  profiles:
    # 백엔드 저장소와 관련된 스프링 프로파일을 설정한다.
    active: native #, git, vault
  cloud:
    config:
      server:
        encrypt.enabled: false
        native:
          # native의 경우 클래스패스 경로의 config 파일의 구성정보를 확인한다
          search-locations: classpath:/config
        git:
          # git의 경우 git 경로에서의 파일 구성정보를 확인한다
          uri: https://github.com/klimtever/config.git
          searchPaths: licensingservice
        vault:
          # vault의 경우 vault 페이지에 저장되어 있는 파일의 구성정보를 확인한다
          port: 8200
          host: 127.0.0.1
          kvVersion: 2
          profile-separator: /
          backend: licensing-service
# 서버포트
server:
  port: 8071

# 암호화 키(추후 키 보관은 하드코딩말고 변수에 대입해서 사용하자)
encrypt:
  key: fje83Ki8403Iod87dne7Yjsl3THueh48jfuO9j4U2hf64Lo

#Enable all Spring Boot Actuator endpoints.
management:
  endpoints:
    web:
      exposure:
        include: "*"
다음은 라이선싱 서비스를 위해 제공할 애플리케이션 구성 데이터이다.
라이선싱 profile이 default일때는 licensing-service.properties 파일만 참조하고, profile이 dev나 prod 일 때, 각각 licensing-service-dev.properties, licensing-service-prod.properties를 추가로 참조한다
configServer licensing-service.properties
example.property= I AM THE DEFAULT


spring.jpa.hibernate.ddl-auto=none
spring.jpa.database=POSTGRESQL
spring.datasource.platform=postgres
spring.jpa.show-sql = true
spring.jpa.hibernate.naming-strategy = org.hibernate.cfg.ImprovedNamingStrategy
spring.jpa.properties.hibernate.dialect = org.hibernate.dialect.PostgreSQLDialect
spring.database.driverClassName= org.postgresql.Driver
spring.datasource.testWhileIdle = true
spring.datasource.validationQuery = SELECT 1


management.endpoints.web.exposure.include=*
management.endpoints.enabled-by-default=true
configServer licensing-service-dev.properties
example.property= I AM DEV

# DataSource settings: set here your own configurations for the database
spring.datasource.url = jdbc:postgresql://database:5432/ostock_dev
spring.datasource.username = postgres
spring.datasource.password = {cipher}f4609209a3e75d8ac79a5e3063ce151c2cd28aa431170bb06974b9421e807b6a
이제 라이선스 서비스로 돌아가 스프링 클라우드 컨피그 서비스 의존성을 추가하자. (이전 챕터(2)에 진행했던 코드에서 추가되는 부분만 작성한다)
licensing-service pom.xml
		<dependency>
			<groupId>org.springframework.cloud</groupId>
			<!--스프링 클라우드 컨피그에 필요한 의존성을 가져오도록 스프링 부트를 설정한다-->
			<artifactId>spring-cloud-starter-config</artifactId>
		</dependency>
		<dependency>
		  <groupId>org.springframework.boot</groupId>
			<!-- 서비스에서 JPA를 사용한다-->
		  <artifactId>spring-boot-starter-data-jpa</artifactId>
		</dependency>
		<dependency>
		    <groupId>org.postgresql</groupId>
			<!--Postgresql 드라이버를 가져오도록 스프링 부트를 설정한다-->
		    <artifactId>postgresql</artifactId>
		</dependency>
licensing-service bootstrap.yml
spring:
    application:
      # 라이선싱 서비스의 이름을 지정해서 스프링 클라우드 컨피그 클라이언트는 어떤 서비스가 검색되는지 알 수 있다.
     name: licensing-service
    profiles:
      # 서비스가 실행될 프로파일을 지정한다. 프로파일 환경에 매핑된다.
      active: dev
    cloud:
        config:
          # 스프링 클라우드 컨피그 서버의 위치를 지정한다(도커 컴포즈를 이용해 실핼항 예정)
            uri: http://configserver:8071
이제 JPA를 설정하기 위한
licensing-service의 java 코드를 살펴보자
참고로 프로젝트내 docker 이라고 생성한 폴더안에는
data.sql, init.sql 각각 인서트데이터와, 테이블 생성 코드가 준비되어 있다.
(또 추후에 애플리케이션을 실행시킬 docker-compose.yml도 작성되어 있다.)
licence.java
package com.optimagrowth.license.model;

import javax.persistence.Column;
import javax.persistence.Entity;
import javax.persistence.Id;
import javax.persistence.Table;

import org.springframework.hateoas.RepresentationModel;

import lombok.Getter;
import lombok.Setter;
import lombok.ToString;


@Getter @Setter @ToString
// 이 클래스는 JPA 클래스라고 스프링에 알린다
@Entity
// 데이터베이스 테이블에 해당한다
@Table(name="licenses")
public class License extends RepresentationModel<License> {

	// 이 필드를 기본키로 지정한다
	@Id
	@Column(name = "license_id", nullable = false)
	private String licenseId;
	private String description;
	// 데이터베이스의 특정 컬럼으로 매핑한다.
	@Column(name = "organization_id", nullable = false)
	private String organizationId;
	@Column(name = "product_name", nullable = false)
	private String productName;
	@Column(name = "license_type", nullable = false)
	private String licenseType;
	@Column(name="comment")
	private String comment;

	public License withComment(String comment){
		this.setComment(comment);
		return this;
	}
}
JPA 프레임워크의 CRUD 메서드 종류는 궁금하면 찾아보길 바란다.
LicenseRepositoy.java
package com.optimagrowth.license.repository;

import java.util.List;

import org.springframework.data.repository.CrudRepository;
import org.springframework.stereotype.Repository;

import com.optimagrowth.license.model.License;

// JPA 리포지터리 인터페이스라고 스프링 부트에 알린다. CrudRepository를 확장한다면 이 애너테이션은 선택적이다
@Repository
public interface LicenseRepository extends CrudRepository<License,String>  {
    // 쿼리 메서드를 SELECT... FRPM  쿼리로 구문 분석한다.
    public List<License> findByOrganizationId(String organizationId);
    public License findByOrganizationIdAndLicenseId(String organizationId,String licenseId);
}
licenseService.java
package com.optimagrowth.license.service;

import java.util.UUID;

import org.springframework.beans.factory.annotation.Autowired;
import org.springframework.context.MessageSource;
import org.springframework.stereotype.Service;

import com.optimagrowth.license.config.ServiceConfig;
import com.optimagrowth.license.model.License;
import com.optimagrowth.license.repository.LicenseRepository;

@Service
public class LicenseService {

	@Autowired
	MessageSource messages;

	@Autowired
	private LicenseRepository licenseRepository;

	@Autowired
	ServiceConfig config;


	public License getLicense(String licenseId, String organizationId){
		License license = licenseRepository.findByOrganizationIdAndLicenseId(organizationId, licenseId);
		if (null == license) {
			throw new IllegalArgumentException(String.format(messages.getMessage("license.search.error.message", null, null),licenseId, organizationId));
		}
		return license.withComment(config.getProperty());
	}

	public License createLicense(License license){
		license.setLicenseId(UUID.randomUUID().toString());
		licenseRepository.save(license);

		return license.withComment(config.getProperty());
	}

	public License updateLicense(License license){
		licenseRepository.save(license);

		return license.withComment(config.getProperty());
	}

	public String deleteLicense(String licenseId){
		String responseMessage = null;
		License license = new License();
		license.setLicenseId(licenseId);
		licenseRepository.delete(license);
		responseMessage = String.format(messages.getMessage("license.delete.message", null, null),licenseId);
		return responseMessage;

	}
}
LicenseService 클래스에서 getLicense() 메서드의 license.withComment() 값을 config.getProperty() 클래스 값으로 설정했다는 것을 알 수 있다.
스프링 데이터가 데이터베이스에 대한 구성 데이터를 데이터베이스 연결 객체에 주입되는 동안 다른 모든 커스텀 프로퍼티도 @ConfigurationProperties 애너테이션을 사용하여 주입할 수 있다.
@ConfigurationProperties(prefix = "example") 코드는 스프링 클라우드 컨피그 서버에서 모든 example 프로퍼티를 가져와 ServiceConfig 클래스의 프로퍼티 속성으로 주입힌다.
ServiceConfig
package com.optimagrowth.license.config;

import org.springframework.boot.context.properties.ConfigurationProperties;
import org.springframework.context.annotation.Configuration;

import lombok.Getter;
import lombok.Setter;

@Configuration
@ConfigurationProperties(prefix = "example")
@Getter @Setter
public class ServiceConfig{

  private String property;

}
스프링 부트 애플리케이션은 시작할 때만 프로퍼티를 읽기 때문에 컨피그 서버에서 변경된 프로퍼티가 자동으로 애플리케이션에 저장되지않는다.
그러나 스프링 액추에이터 @RefreshScope 애너테이션을 사용하여 스프링 애플리케이션 구성정보를 다시 읽게 만드는 /refresh 엔드포인트에 접근할 수 있다.
LicenseServiceApplication.java
package com.optimagrowth.license;

import java.util.Locale;

import org.springframework.boot.SpringApplication;
import org.springframework.boot.autoconfigure.SpringBootApplication;
import org.springframework.cloud.context.config.annotation.RefreshScope;
import org.springframework.context.annotation.Bean;
import org.springframework.context.support.ResourceBundleMessageSource;
import org.springframework.web.servlet.LocaleResolver;
import org.springframework.web.servlet.i18n.SessionLocaleResolver;

@SpringBootApplication
@RefreshScope
public class LicenseServiceApplication {

	public static void main(String[] args) {
		SpringApplication.run(LicenseServiceApplication.class, args);
	}

	@Bean
	public LocaleResolver localeResolver() {
		SessionLocaleResolver localeResolver = new SessionLocaleResolver();
		localeResolver.setDefaultLocale(Locale.US);
		return localeResolver;
	}
	@Bean
	public ResourceBundleMessageSource messageSource() {
		ResourceBundleMessageSource messageSource = new ResourceBundleMessageSource();
		messageSource.setUseCodeAsDefaultMessage(true);
		messageSource.setBasenames("messages");
		return messageSource;
	}

}
대칭 암호화키 설정
스프링 클라우드 컨피그는 중요한 프로퍼티를 쉽게 암호화 할 수 있는 기능을 제공하며 대칭 및 비대칭 암호화 키 사용을 지원한다.
처음 configServer의 bootstrap.yml로 돌아가보자
// 컨피그 서버는 이 값을 대칭키로 사용한다.
encrypt:
	key: secretkey
암호화 방법은 postman을 이용한다.
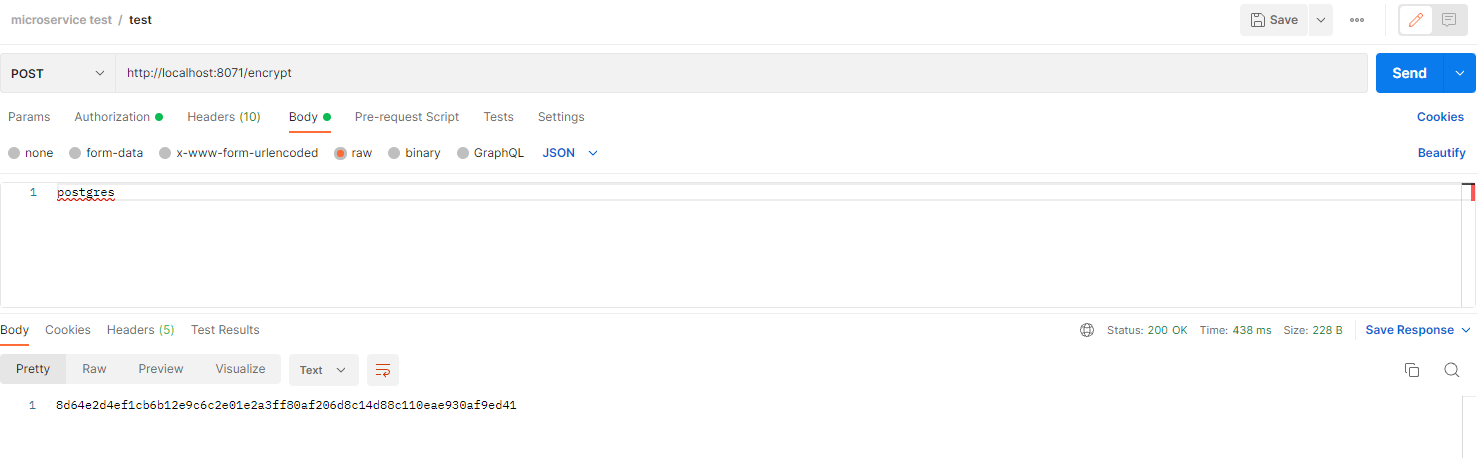
복호화 방법도 마찬가지로 url를 /decrypt를 통해 할 수 있다.
마지막으로 configServer와 licensing-service를 실행하여 잘 적용이 되는지 확인해보자
configServer, licensing-service pom.xml 경로에
mvn clean package dockerfile:bulid 명령어를 통해 이미지를 빌드하고, docker 폴더안의 docker-compose.yml을 찾아서 docker-compose up 명령어를 실행하면 된다.
해당 docker-compose.yml은 해당 애플리케이션이 잘 실행되도록 작성되어 있다.
docker-compose.yml
version: '2.1'
services:
database:
  image: postgres:latest
  ports:
    - "5432:5432"
  environment:
    POSTGRES_USER: "postgres"
    POSTGRES_PASSWORD: "postgres"
    POSTGRES_DB:       "ostock_dev"
  volumes:
      - ./init.sql:/docker-entrypoint-initdb.d/1-init.sql
      - ./data.sql:/docker-entrypoint-initdb.d/2-data.sql
  networks:
    backend:
      aliases:
        - "database"
  healthcheck:
    test: ["CMD-SHELL", "pg_isready -U postgres"]
    interval: 10s
    timeout: 5s
    retries: 5
configserver:
  image: ostock/configserver:0.0.1-SNAPSHOT
  ports:
     - "8071:8071"
  environment:
    ENCRYPT_KEY: "fje83Ki8403Iod87dne7Yjsl3THueh48jfuO9j4U2hf64Lo"
  networks:
    backend:
      aliases:
        - "configserver"
licensingservice:
  image: ostock/licensing-service:0.0.2-SNAPSHOT
  environment:
    PROFILE: "dev"
    CONFIGSERVER_URI: "http://configserver:8071"
    CONFIGSERVER_PORT:   "8071"
    DATABASESERVER_PORT: "5432"
    ENCRYPT_KEY: "fje83Ki8403Iod87dne7Yjsl3THueh48jfuO9j4U2hf64Lo" # "IMSYMMETRIC"
  depends_on:
    database:
      condition: service_healthy
    configserver:
      condition: service_started
  ports:
    - "8080:8080"
  networks:
    - backend

networks:
backend:
  driver: bridge
postman을 이용하여 조회를해보자
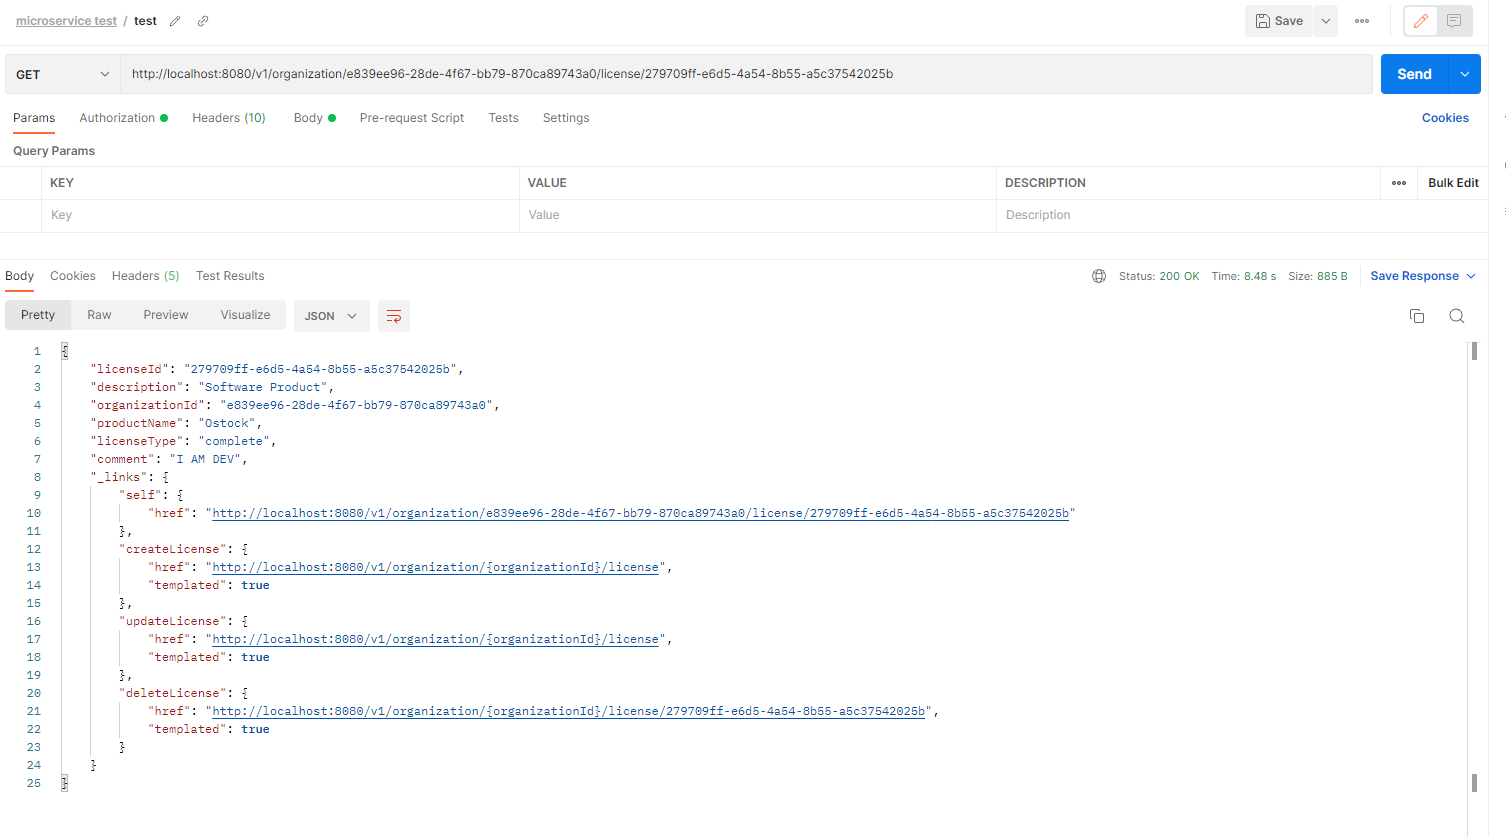
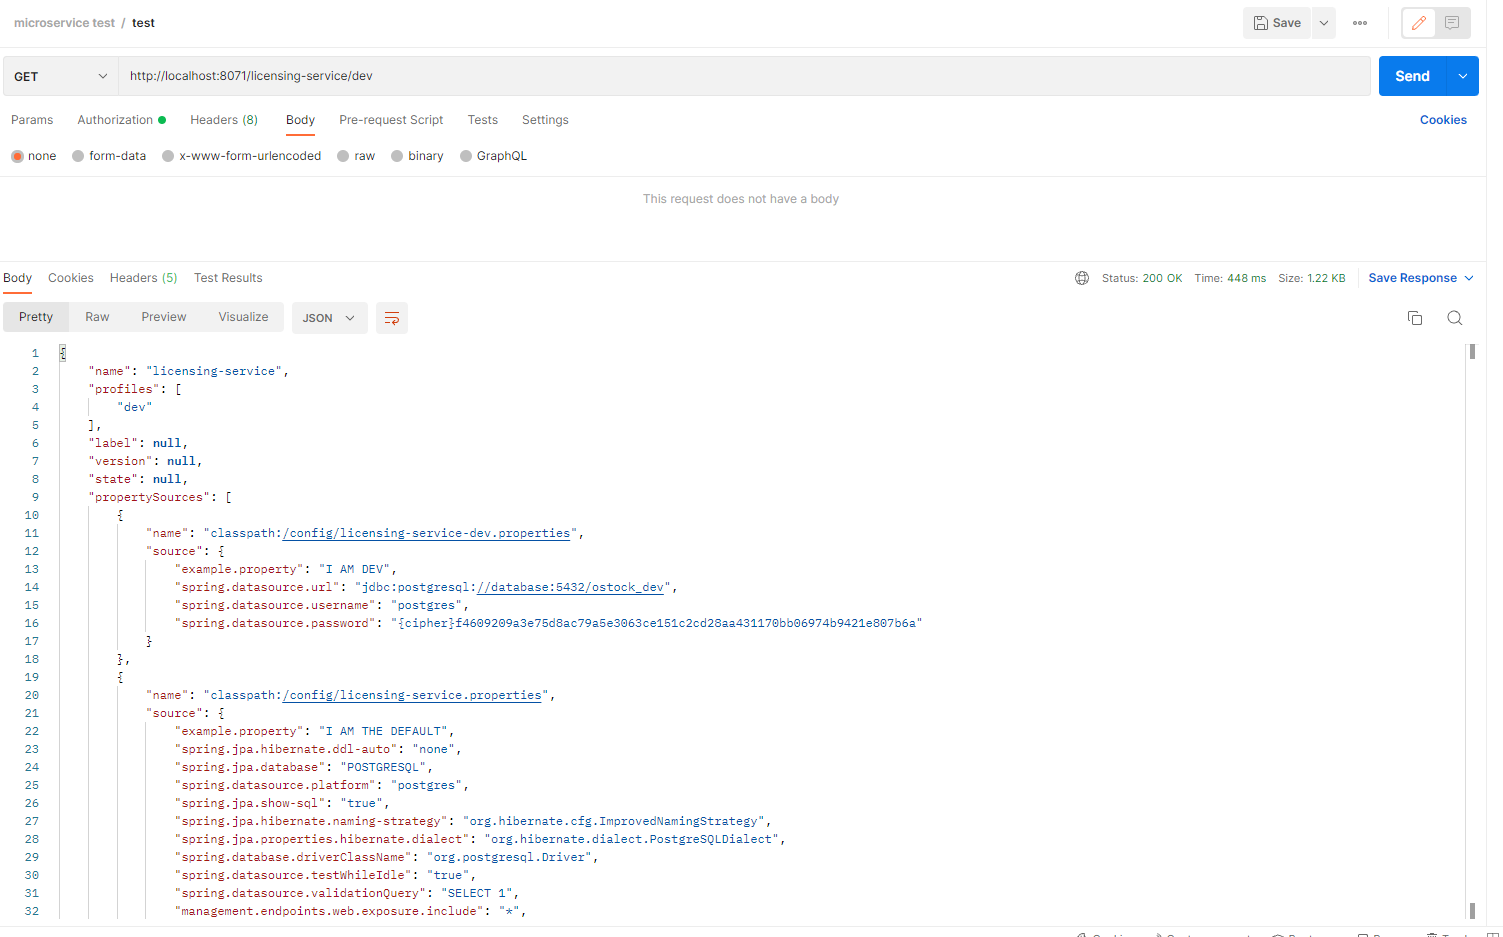
licensing-service와 configServer 모두 잘 실행되는 것을 확인할 수 있다.
🧨 다음 챕터에는 스프링 클라우드 디스커버리에 대해 알아보도록 하겠다.