📌 PrepareForReuse
어제 테이블뷰의 셀 재사용에 대해 공부했는데, 셀이 화면 안에 모두 보여지는 경우는 문제가 없지만 스크롤을 해야 다음 셀이 보이는 경우에는 dequeueReusableCell 메서드로 더이상 보이지 않는 셀을 재사용해서 사용했었다.
그런데 이런 경우를 보자.
class TableViewController: UITableViewController {

    override func viewDidLoad() {
        super.viewDidLoad()
    }

    /// 섹션 수 반환
    override func numberOfSections(in tableView: UITableView) -> Int {
        return 3
    }

    /// 섹션별 로우 수 반환
    override func tableView(_ tableView: UITableView, numberOfRowsInSection section: Int) -> Int {
        return 15
    }

    /// 인덱스에 해당하는 셀 반환
    override func tableView(_ tableView: UITableView, cellForRowAt indexPath: IndexPath) -> UITableViewCell {
        let cell = tableView.dequeueReusableCell(withIdentifier: "MyCell", for: indexPath)

        cell.textLabel?.text = "section \(indexPath.section), row: \(indexPath.row)"

        if indexPath.section == 0 {
            cell.textLabel?.textColor = UIColor.blue
        } else if indexPath.section == 2 {
            cell.textLabel?.textColor = UIColor.red
        }

        return cell
    }

    /// 섹션별 헤더 반환
    override func tableView(_ tableView: UITableView, titleForHeaderInSection section: Int) -> String? {
        return "Section \(section) Header"
    }
}
Section 0은 글자 색을 파란색으로, Section 1은 검은색으로, Section 2는 빨간색으로 만들어주었다.
 스크롤을 내리거나 올릴 때 셀 재사용에 의해 우리의 의도와는 달리 색이 바뀐 셀이 재사용되면서 검은색이어야 할 Section 1의 색이 파랑/빨강색으로 나타나고 있다.
셀에 configure되는 데이터 소스의 내용은 바꿔치기되지만, 셀 자체는 재사용되기 때문에 셀의 content와 무관한 text color, alpha, editing, selection state 등 속성이 이전에 사용된 그대로 남아있는 것이다.
재사용될 셀의 속성을 초기화할 필요가 있다.
이는 UITableViewCell 클래스의 prepareForReuse 메소드로 수행한다.
하지만 우리의 TableViewController는 이미 UITableViewController 클래스를 상속받고 있고, 스위프트에서는 클래스의 다중상속이 불가능하기 때문에 UITableViewCell 클래스를 추가로 사용하기 위해선 새 클래스 파일을 생성해주어야 한다.
즉, 셀을 커스텀해주는 것이다.
Ctrl+N > Cocoa Touch Class > UITableViewCell 클래스를 상속받는 CustomTableViewCell 클래스 생성
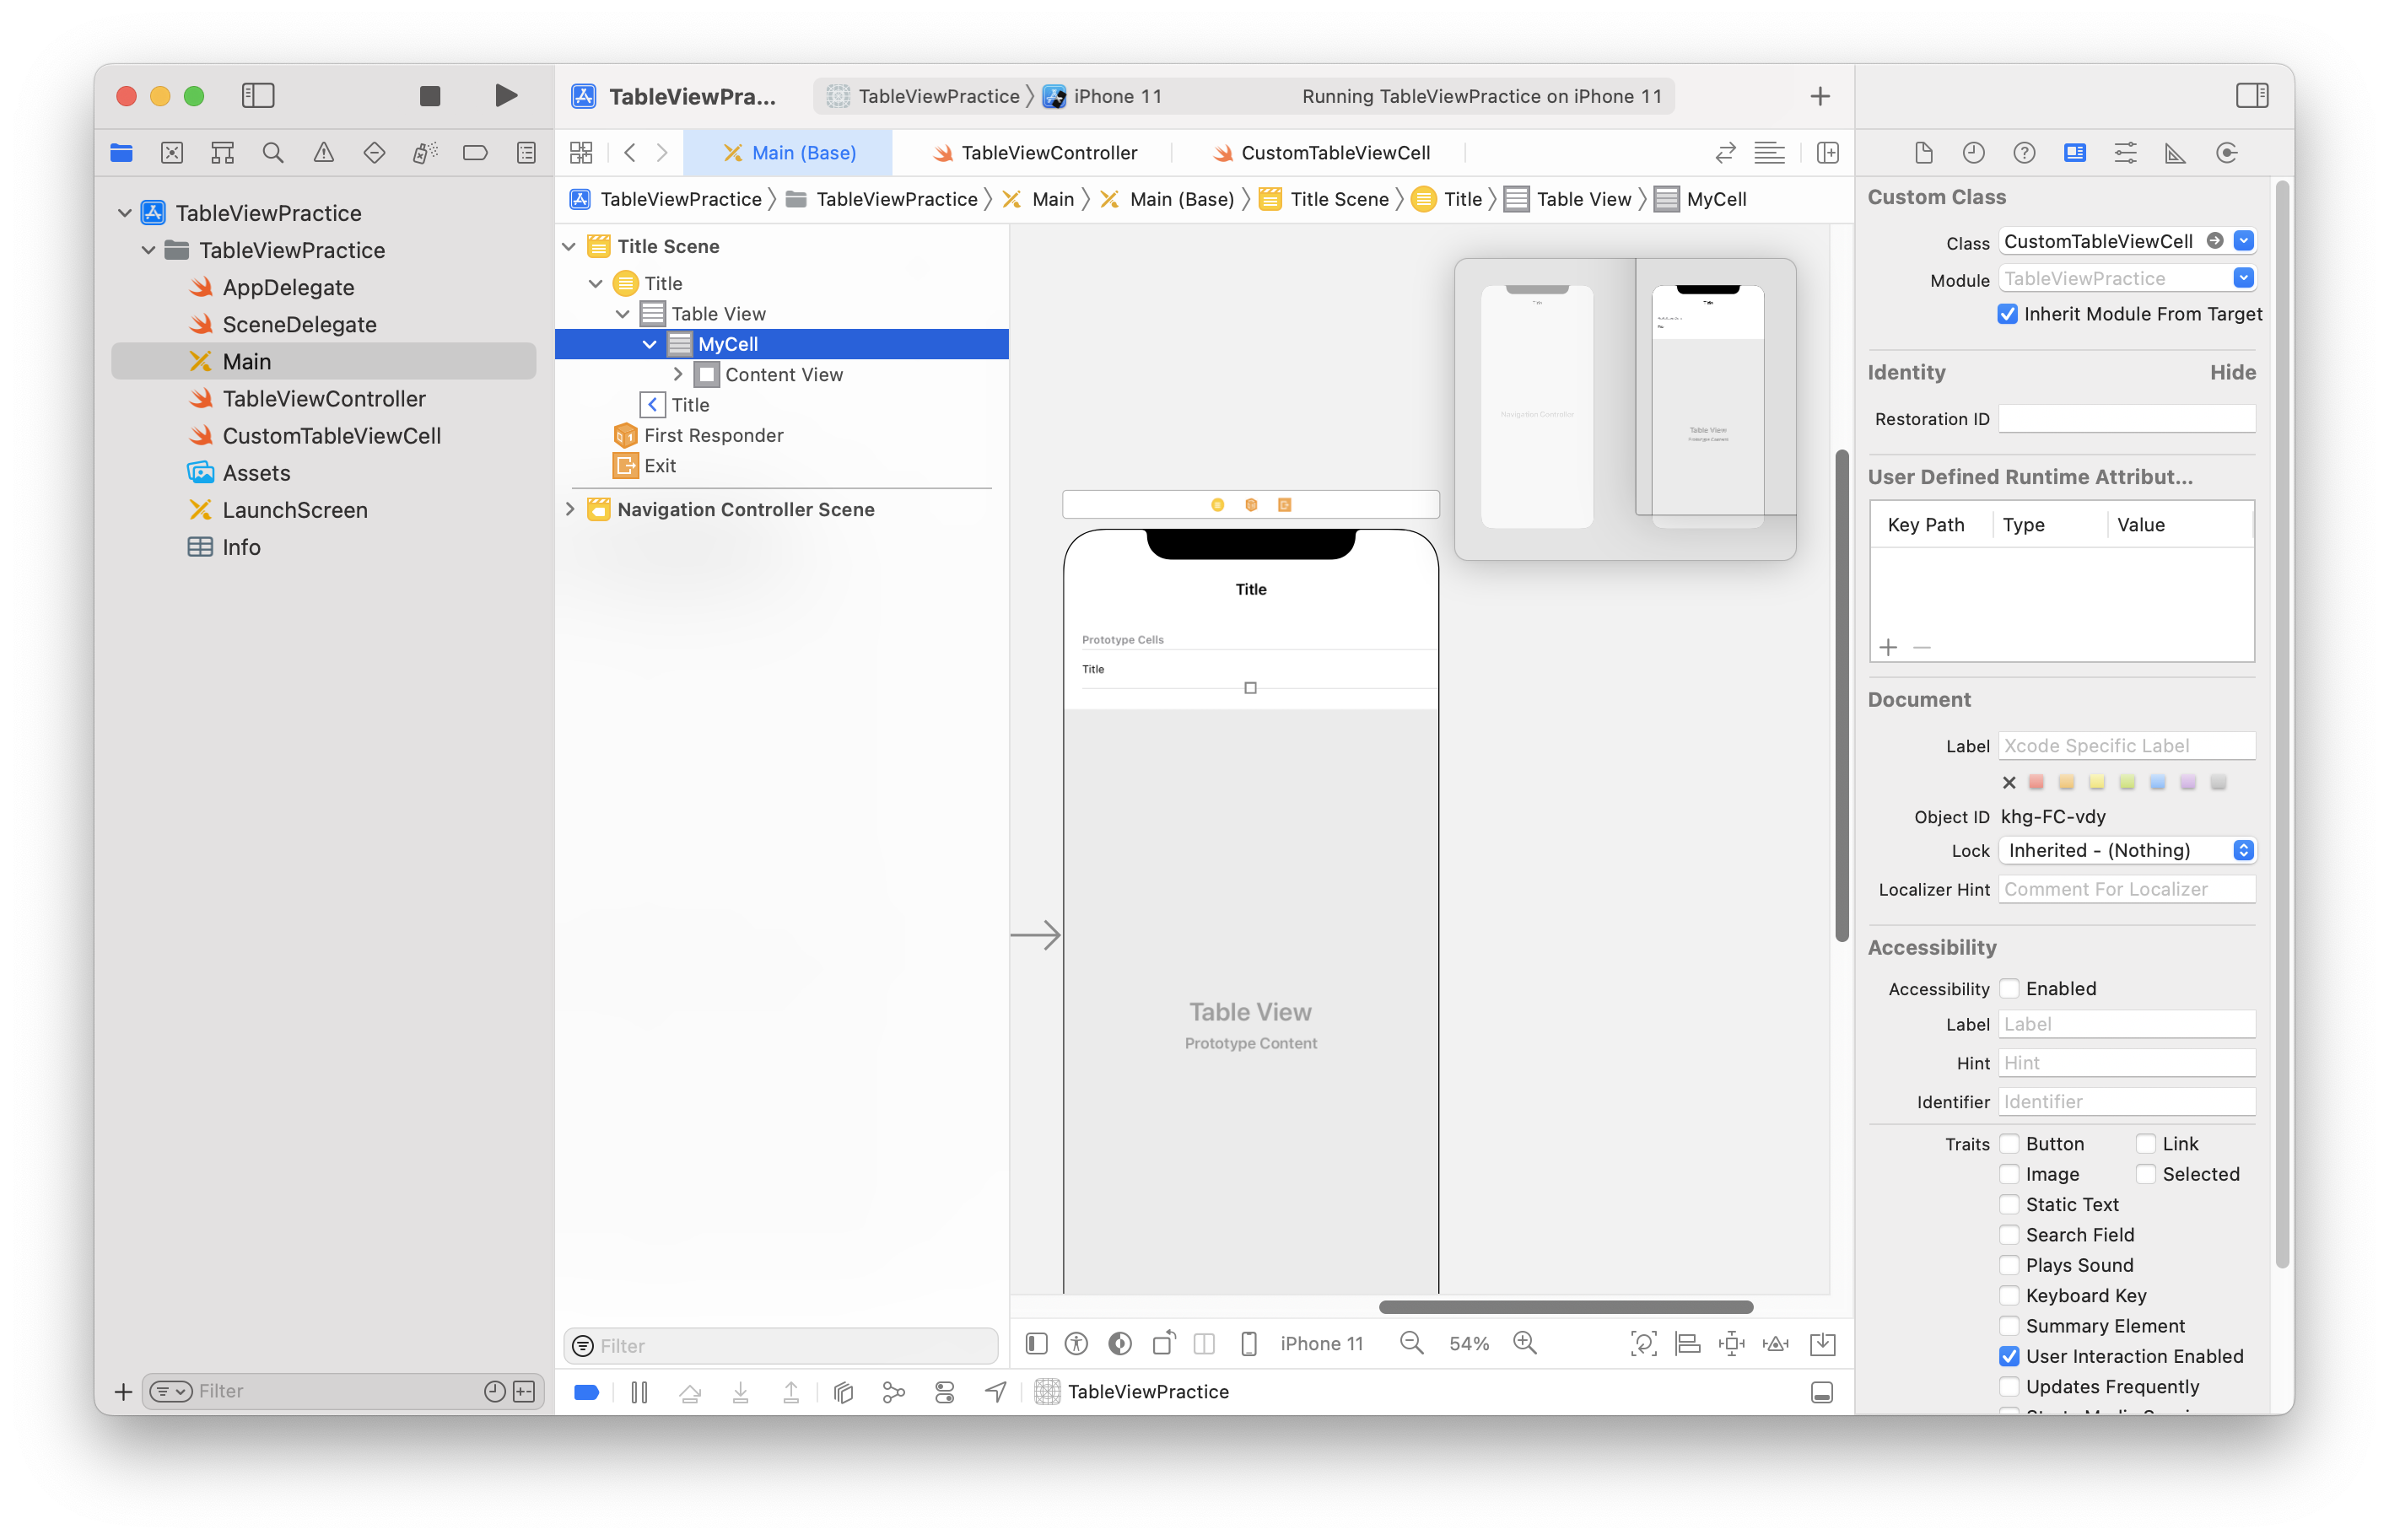 스토리보드에서 셀을 잡고 [Identify Inspector]에서 CustomTableViewCell과 연결해준다.
let cell = tableView.dequeueReusableCell(withIdentifier: "MyCell", for: indexPath) as! CustomTableViewCellTableViewController의 재사용 큐에서 셀을 받아올 때 우리의 커스텀셀 타입으로 받아오기 위해 코드에 as! CustomTableViewCell을 추가해준다.
이제 CustomTableViewCell로 와서 드디어 prepareForReuse 메소드를 오버라이드해줄 차례!
class CustomTableViewCell: UITableViewCell {
override func awakeFromNib() {
super.awakeFromNib()
// Initialization code
}
override func setSelected(_ selected: Bool, animated: Bool) {
super.setSelected(selected, animated: animated)
// Configure the view for the selected state
}
override func prepareForReuse() {
super.prepareForReuse()
self.textLabel?.textColor = UIColor.label
}
}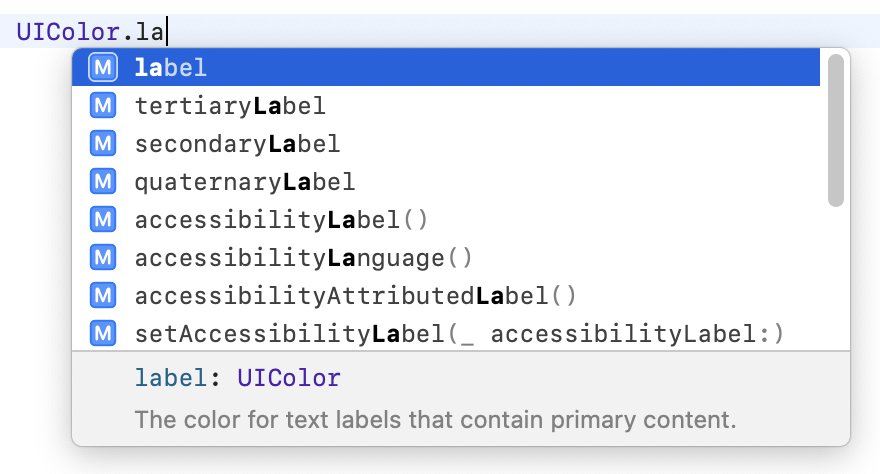 셀의 색을 기본 content의 색으로 초기화해준다.
시뮬레이터를 돌려보면 셀 초기화가 제대로 되면서 문제가 해결되었다!
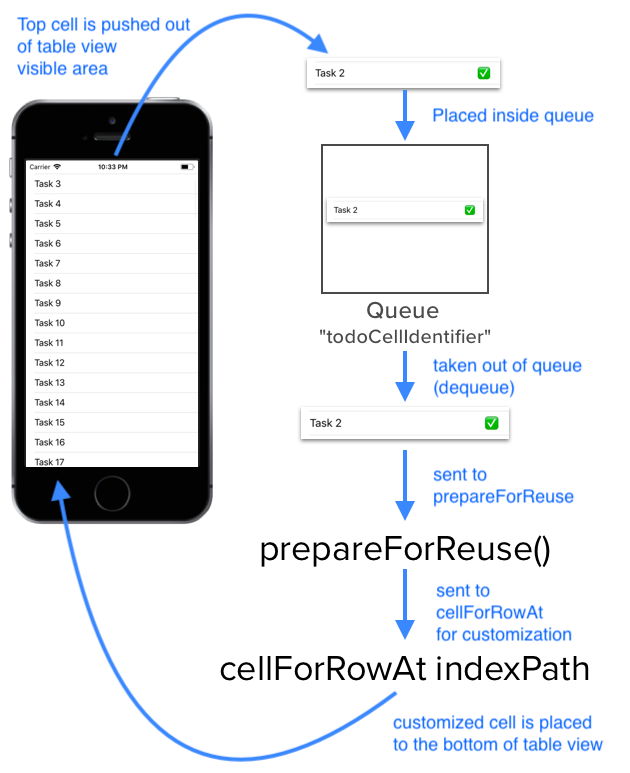 순서가 잘 나타난 그림이 있어 덧붙인다.
 dequeueReusableCell이 호출되면 셀이 재사용 큐에서 꺼내져서 cellForRowAt으로 가기 전에 prepareForReuse()를 거치므로 셀이 초기화된 후에 재사용되게 되는 것이다 ☺️
📌 FileManager
✏️ 파일 위치에 접근하기
Data Container 디렉토리는 애플리케이션 설치 후 처음 구동할 때 생성되기 때문에, 코드를 작성하는 순간에는 디렉토리의 실제 위치를 알기 어렵다.
따라서 Data Container와 관련된 디렉토리를 쉽게 찾아갈 수 있는 방법을 Foundation 프레임워크에서 제공하며, 그 방법이 바로 FileManager를 활용하는 것이다.
이 FileManager를 활용해 특정 파일을 특정 디렉토리에 저장하거나 불러오기 위해 필요한 경로를 만드는 코드는 다음과 같다.
FileManager.default.url(for: FileManager.SearchPathDirectory.applicationSupportDirectory,
                        in: FileManager.SearchPathDomainMask.userDomainMask,
                        appropriateFor: nil,
                        create: true).appendingPathComponent("todos.json")
하나하나 뜯어보자.
우선 FileManager.default 로 파일매니저 인스턴스를 만들어준다. default를 붙여주면 싱글톤 인스턴스로 만들어진다고 한다.
url 메소드의 정의부를 보면 다음과 같다.
func url(for directory: FileManager.SearchPathDirectory,
     in domain: FileManager.SearchPathDomainMask,
     appropriateFor url: URL?,
create shouldCreate: Bool) throws -> URLdirectory: 탐색할 디렉토리 지정- Document 디렉토리를 탐색하려면 .documentDirectory 추가
- Library 디렉토리를 탐색하려면 .libraryDirectory 추가
- Application Support 디렉토리를 탐색하려면 .applicationSupportDirectory 추가
- Caches 디렉토리를 탐색하려면 .cachesDirectory 추가
- 요런 식으로 이 외에도 많은 디렉토리를 지정할 수 있다.
domain: 이 이상은 못 가게 제한을 걸어주는 도메인 요소url: 반환된 url의 위치를 결정하는 데 사용되는 파일 urlshouldCreate: 디렉토리가 아직 없는 경우 생성할지 여부
appendingPathComponent는 경로를 추가하는 역할을 한다. 아래 코드를 보면 단번에 이해가 갈 것이다.
let oldURL = URL(string: "~/Document")
let newURL = documentsURL.appendingPathComponent("Hello")
print(newURL)
// ~/Document/Hello
✏️ 디렉토리의 역할
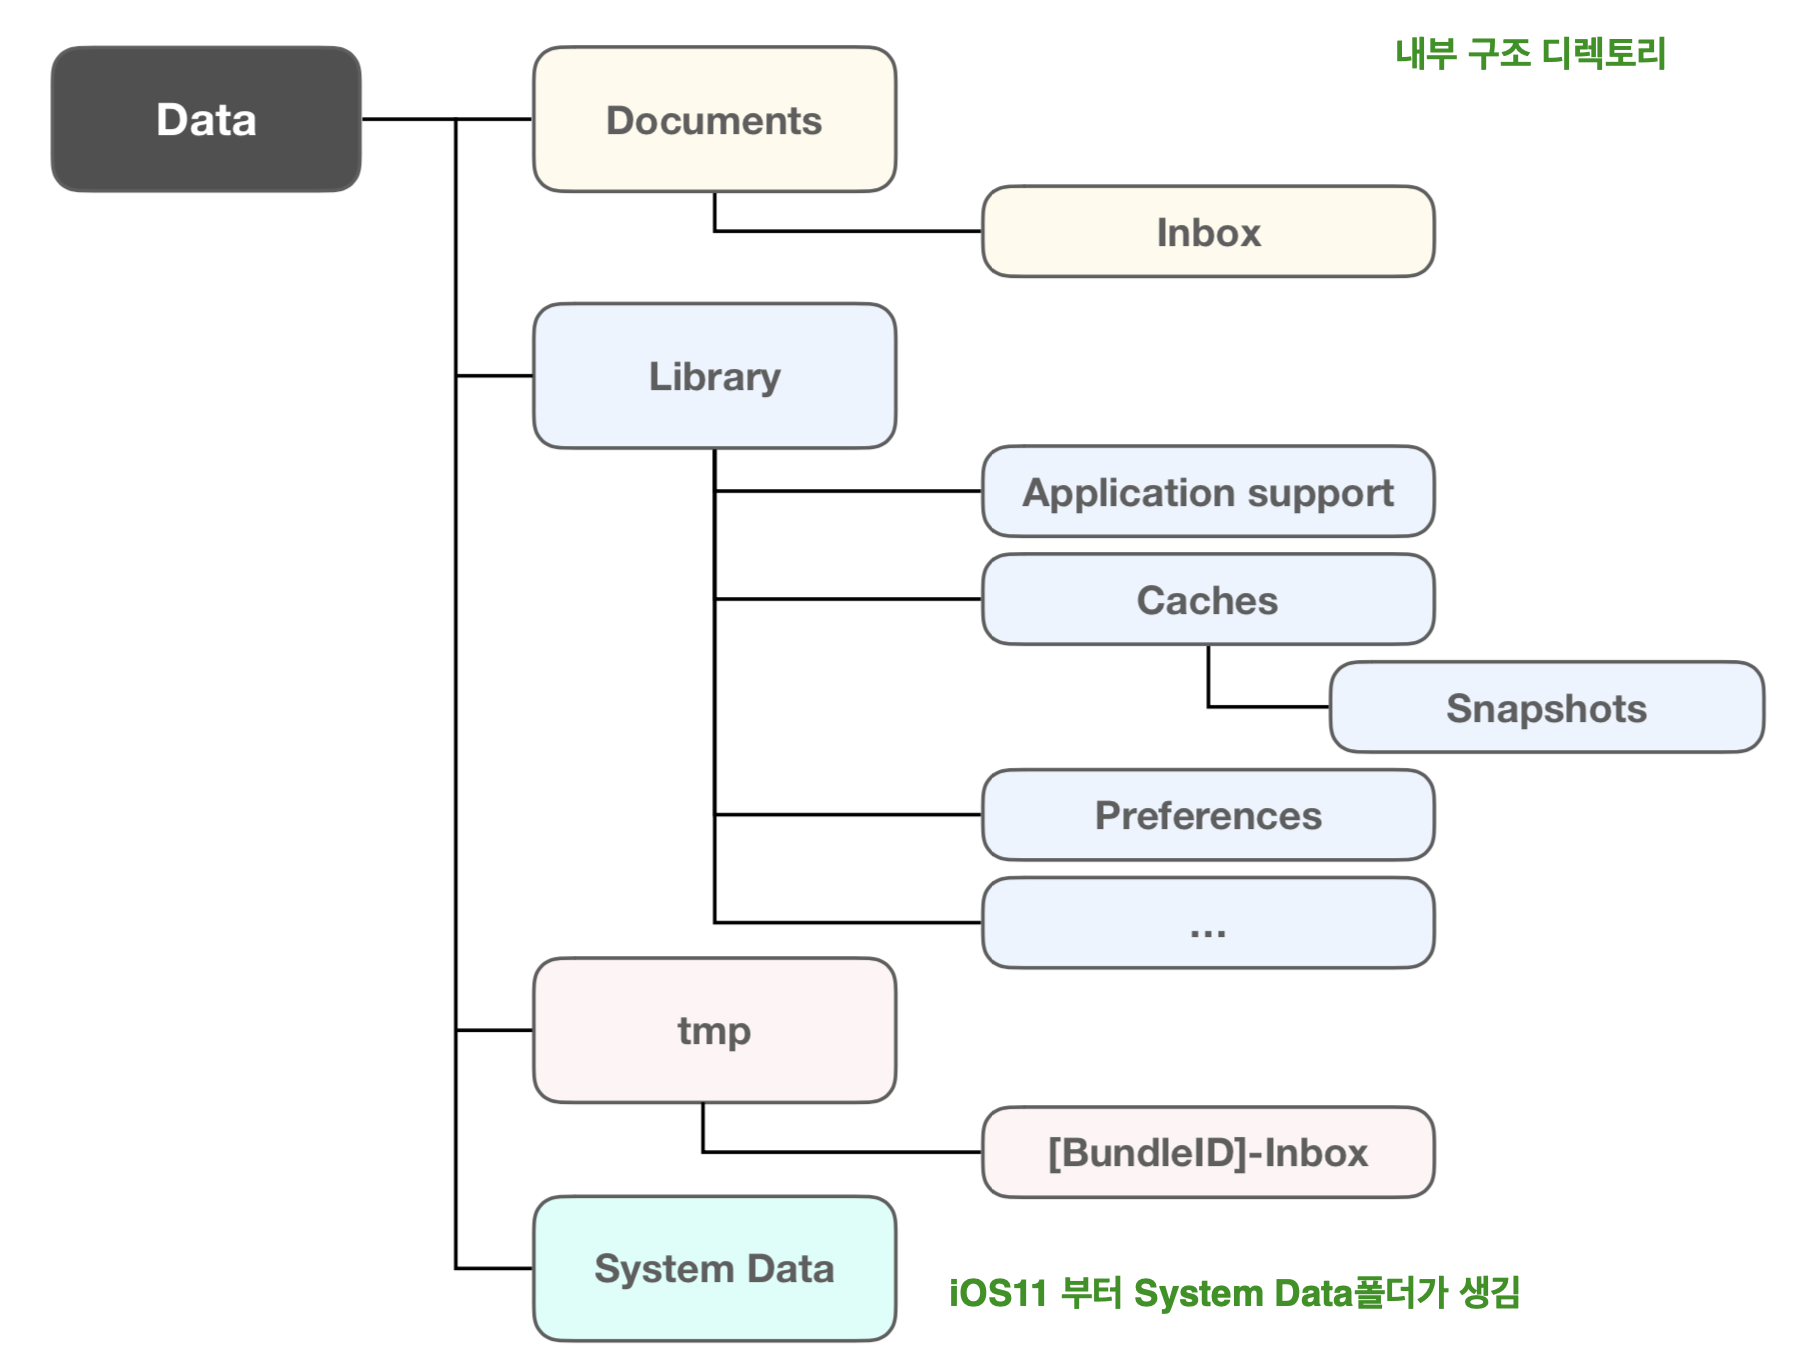
각각의 디렉토리가 어떤 역할을 하는지도 알아보자.
-
Documents- 사용자가 만들어낸 데이터를 저장한다.
- Documents 디렉토리 내부의 데이터를 사용자가 열람/수정/추가/삭제할 수 있다.
따라서 이 디렉토리에는 사용자가 봐도 무방한 데이터를 저장해야 한다. - iCloud / iTunes 백업 🙆♀️
Inbox- 외부 애플리케이션에서 받아온 데이터를 저장하는 하위 디렉토리
- iCloud / iTunes 백업 🙆♀️
-
Library- 사용자가 관리하는 데이터 외의 데이터, 즉 사용자에게 노출되면 안 되는 데이터를 저장한다.
- 세 개의 하위 디렉토리 외에도 사용자의 목적에 따라 추가적인 디렉토리 생성이 가능하다.
- iCloud / iTunes 백업 🙆♀️
Application Support- 애플리케이션에서 자체적으로 생성하는 데이터나 애플리케이션 관리를 위해 사용되는 데이터를 저장하는 하위 디렉토리
- iCloud / iTunes 백업 🙆♀️
Caches- 임시로 저장해두고 반복적으로 사용할만한 데이터를 저장하는 하위 디렉토리
- 디스크 용량 부족시 애플리케이션이 실행중이 아닐 때 시스템에서 Caches 디렉토리의 데이터를 자동으로 청소
- iCloud / iTunes 백업 🙅♀️
Preferences- 애플리케이션의 설정 데이터를 저장하는 하위 디렉토리
- 사용자의 직접 수정을 권장하지 않고, UserDefaults나 CFPreferences를 사용해 설정 데이터를 관리하기를 권장
- iCloud / iTunes 백업 🙆♀️
-
tmp- 재사용하지 않는 임시 데이터를 저장한다.
- 애플리케이션이 실행중이 아닐 때 시스템에서 tmp 디렉토리의 데이터를 주기적으로 청소한다.
- iCloud / iTunes 백업 🙅♀️
참고
Youtube | iOS Academy
Git Blog | 유셩장
Git Blog | Jiseob Kim
Git Blog | jinshine
Velog | Youngwoo Lee