📌 User Notification
Notification을 활용하려면 우선 사용자로부터 권한을 획득해야 한다.
사용자가 Notification 수신 여부를 한 번 선택하면, 해당 애플리케이션을 삭제하고 다시 설치한다거나 애플리케이션의 설정을 변경해주지 않는 한 다시 권한을 요청할 수 없다.
따라서 처음에 권한을 받을 때 띄우는 Alert 창에 권한을 받아야 할 필요성을 명확히 나타내주어야 함!
Local
- 조건 설정 후 조건이 충족되는 시점에 사용자에게 알림
- 네트워크에 연결되어있지 않아도 가능
Remote
- 따로 조건을 설정해두지 않고, 사용자 기기의 고유 번호를
Provider Server에 등록해둔 뒤 Notification이 필요한 시점에 Provider Server가APNs(Apple Push Notification Service)에 Notification 발송을 요청한다. APNs에서 발송한 Notification을 기기에서 받아서 Application으로 보여지게 된다.
🌟 Notification 구현 순서
권한 허용 요청하기 (UNUserNotificationCenter)
→ 알림 컨텐츠 설정하기 (UNMutableNotificationContent)
→ 알림 트리거 지정하기 (UN~NotificationTrigger)
→ 알림 요청하기 (UNNotificationRequest)
→ 알림 센터에 요청 추가하기 (UNUserNotificationCenter)
✏️ 권한 허용 요청하기 (UNUserNotificationCenter)
UNUserNotificationCenter 인스턴스를 가져와서 requestAuthorization 메서드를 호출한다. 이 메서드에선 권한을 얻고자 하는 상호작용 타입을 명시해야 한다. 이를테면 아래의 코드처럼 alert을 띄울 권한, sound를 낼 권한, 앱 아이콘 badge를 추가할 권한을 요청할 수 있다. 이 외에도 권한이 많은데 기술하진 않겠다. 문서에서 확인할 수 있다.
import UserNotifications

let center: UNUserNotificationCenter = UNUserNotificationCenter.current()

center.requestAuthorization(options: [.alert, .sound, .badge]) { (granted, error) in
    print("허용여부 \(granted), 오류: \(error?.localizedDescription ?? "없음")")
}
시스템은 사용자가 허용했는지의 여부를 granted에 담아 건네주고, error에는 에러가 났다면 에러 정보를 담고 에러가 없다면 nil을 담아 건네준다.
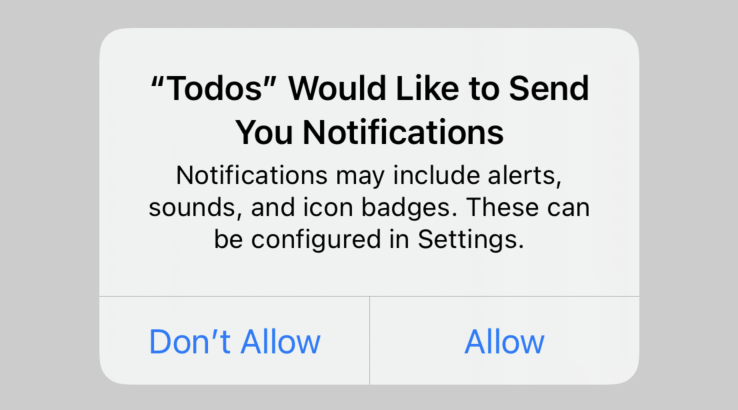 Allow를 누르면
 허용여부 true, 오류: 없음이라고 로그가 찍힌다.
✏️ 알림 컨텐츠 설정하기 (UNMutableNotificationContent)
push 알림에 들어갈 컨텐츠를 지정하는 클래스가 UNMutableNotificationContent 이다.
let content = UNMutableNotificationContent()
content.title = "알림"
content.body = "iOS 강의 들을 시간 ~!"
content.sound = UNNotificationSound.default
content.badge = 1
이 클래스의 객체를 만들어주고, title, body, sound, badge를 설정해주었다. badge는 앱 아이콘 오른쪽 상단에 빨간색으로 읽지 않은 알림의 갯수를 표시해주는 것을 말한다. 이 외에도 추가할 수 있는 것이 많은데 역시 문서에서 확인할 수 있다.
✏️ 알림 트리거 지정하기 (UN~NotificationTrigger)
노티피케이션을 언제 작동시킬건지 트리거를 만들어야 한다. 트리거에도 4가지 종류가 있다.
- UNTimeIntervalNotificationTrigger : 지정한 시간이 경과한 후 알림 전달
- UNCalendarNotificationTrigger : 특정 날짜 및 시간에 알림 전달
- UNLocationNotificationTrigger : 지정한 지역에 들어오거나 나갈 때 알림 전달
- UNPushNotificationTrigger : APNs가 알림 전달
매일 아침 8시 30분에 알림을 전달하는 트리거를 만들어 보자. repeats에 true를 지정하면 같은 시간에 반복적으로 알림이 작동된다.
var date = DateComponents()
date.hour = 8
date.minute = 30
let trigger = UNCalendarNotificationTrigger(dateMatching: dateInfo, repeats: false)
버튼을 누르면 3초 뒤에 알림을 전달하는 트리거를 만들어 보자. 만약 30분 뒤로 설정하려면 30*60으로 지정하면 된다.
let trigger = UNTimeIntervalNotificationTrigger(timeInterval: 3, repeats:false)✏️ 알림 요청하기 (UNNotificationRequest)
알림 요청은 UNNotificationRequest 클래스를 이용한다. 앞에서 만튼 content와 trigger를 넘겨주고 이대로 알림 요청을 보내는 것이다. 알림 요청이 여러개 있을 때 특정 알림 수정/제거가 필요한 상황을 대비해 식별자 identifier까지 같이 만들어 넘겨준다.
let request = UNNotificationRequest(identifier: "todoTimer", content: content, trigger: trigger)✏️ 알림 센터에 요청 추가하기 (UNUserNotificationCenter)
위에서 만들었던 UNUserNotificationCenter 객체에 요청을 추가해주면 UNUserNotificationCenter가 요청을 처리한다.
center.add(request, withCompletionHandler: nil)✏️ 예제
버튼을 누르면 3초 뒤에 Push 알림이 오는 예제를 만들어 보자.
ViewController.swift 코드 전문
import UserNotifications
class ViewController: UIViewController {
@IBAction func pushButton(_ sender: UIButton) {
// 노티피케이션 컨텐츠 설정
let content = UNMutableNotificationContent()
content.title = "알림"
content.body = "iOS 강의 들을 시간 ~!"
content.sound = UNNotificationSound.default
content.badge = 1
// 노티피케이션 트리거 지정
let trigger = UNTimeIntervalNotificationTrigger(timeInterval: 3, repeats: false)
// 노티피케이션 알림 요청
let request = UNNotificationRequest(identifier: "todoTimer", content: content, trigger: trigger)
// 알림 센터에 요청 추가
UNUserNotificationCenter.current().add(request, withCompletionHandler: nil)
}
override func viewDidLoad() {
super.viewDidLoad()
// 권한 허용 요청
UNUserNotificationCenter.current().requestAuthorization(options: [.alert, .sound, .badge]) { (granted, error) in
print("허용여부: \(granted), 오류: \(error?.localizedDescription ?? "없음")")
}
}
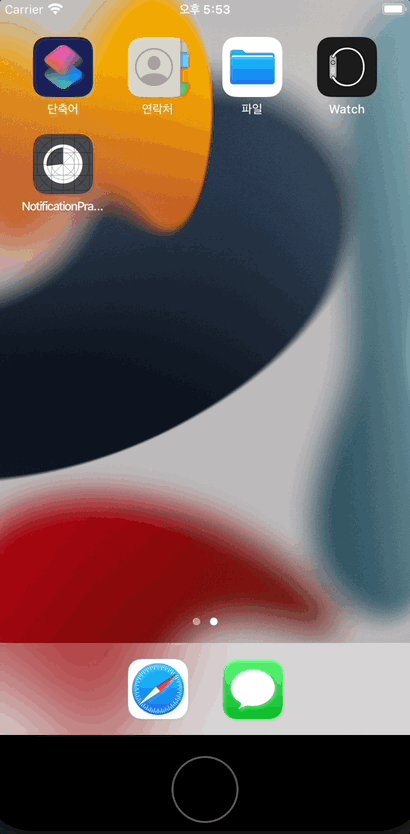
}앱이 foreground에 있을 때는 알림이 오지 않기 때문에 홈화면으로 간 상태에서 알림을 보여주었다. foreground에 있을 때도 알림이 오게 만들고 싶다면 Delegate를 사용하면 된다.
📌 UNUserNotificationCenterDelegate
유저 노티피케이션의 수신을 관리하거나 유저 노티피케이션 관련 액션을 제어하는 프로토콜
은 다음주에 공부해야겠다 ^^..