📌 tableView cellForRow의 nil 반환
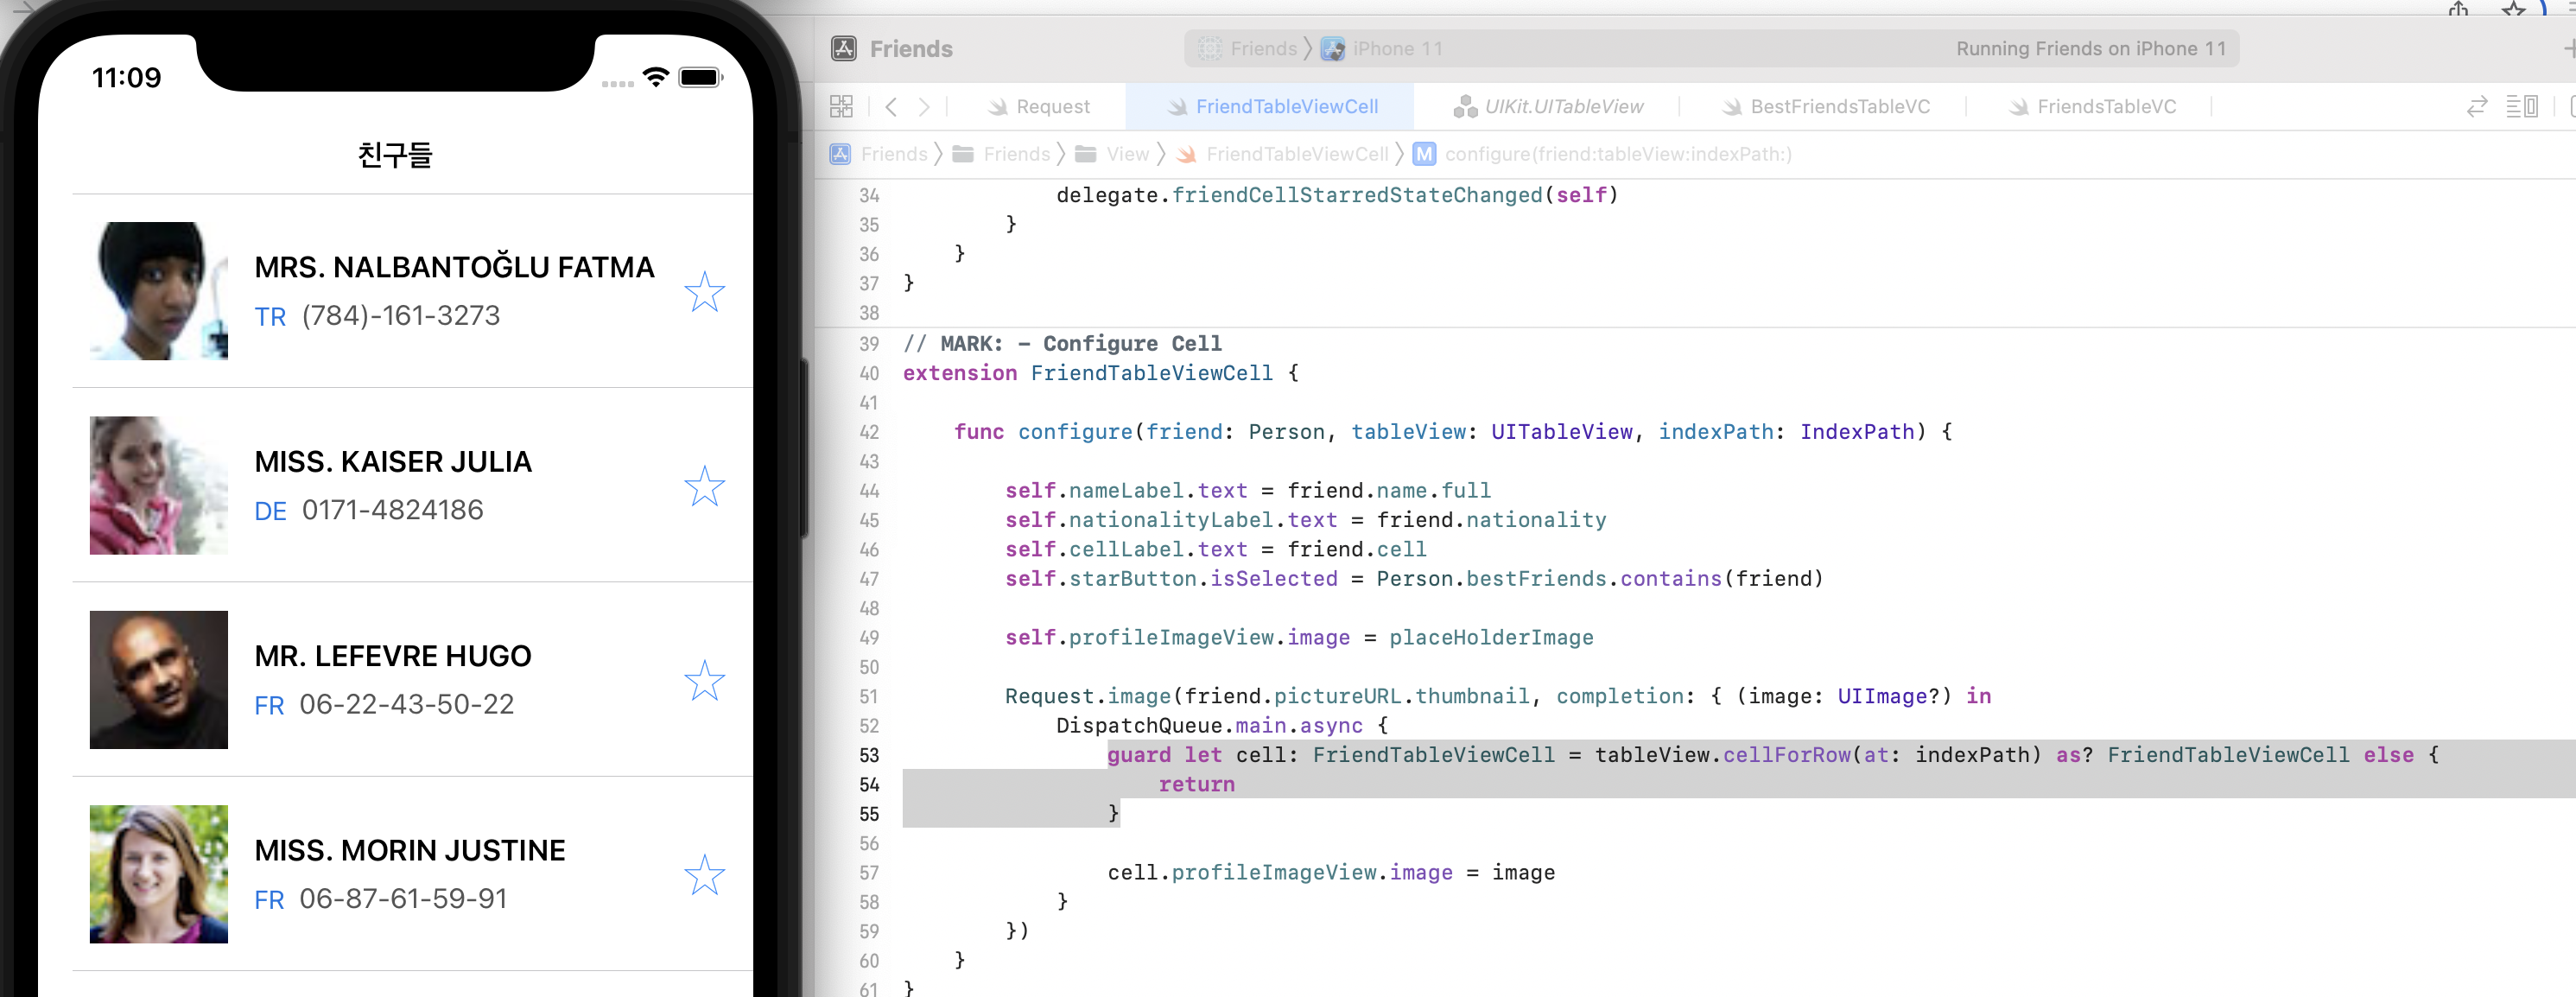 이미지를 비동기통신으로 받아와서 셀에 적용해주는 과정인데, 내가 작성한 코드가 아니기 때문에 야곰님이 왜 드래그해둔 부분에서 굳이 guard를 사용했는지 궁금했다. cellForRow 메소드가 tableViewCell이 아닌 다른 것(nil)을 반환하는 경우가 어떤 경우인지 보고 싶었음!
그래서 저 부분을
let cell: FriendTableViewCell = tableView.cellForRow(at: indexPath) as! FriendTableViewCell로 바꿔주고 시뮬레이터를 돌려보았다. 반환값이 tableViewCell이 아닐 리 없어! 하고 as!로 강제 다운캐스팅을 해 주었다.
 cellForRow 메소드에서 nil이 반환되는 바람에 런타임 에러가 발생했다 ㅋㅋ
공식문서를 보면,
In versions of iOS earlier than iOS 15,
this method returns nil if the cell isn’t visible or if indexPath is out of range.
iOS 15 이전 버전에서 cellForRow 메소드는 셀이 invisible 상태일 때와 indexPath가 범위를 벗어났을 때 nil을 반환한다고 한다.
우리의 경우 전자에 해당하는 것 같다. 스크롤을 너무 빨리 내리는 바람에, 이미지 로딩 차례가 된 셀이 화면 밖으로 벗어나 invisible 상태가 되어버려 nil이 반환되는 것으로 추측된다!
📌 UIActivityIndicatorView
 요렇게 생긴 로딩중 표시를 만들기 위해
 UIActivityIndicatorView를 적용해 보자.
private lazy var indicator: UIActivityIndicatorView = {
    let indicator: UIActivityIndicatorView = UIActivityIndicatorView()

    indicator.style = UIActivityIndicatorView.Style.large
    indicator.translatesAutoresizingMaskIntoConstraints = false

    return indicator
}()UIActivityIndicatorView를 만들었다. style이나 backgroundColor, translatesAuthoresizingMaskIntoConstraints 같은 기본적인 속성을 정의해주었다.
translatesAuthoresizingMaskIntoConstraints는 기본값이 true인데, true로 설정되어있을 경우 autoresizing mask constraint가 뷰의 크기와 위치를 완전히 컨트롤하기 때문에 해당 뷰의 크기와 위치를 수정하기 위한 추가적인 constraint를 코드상에서 줄 수 없다.
따라서 이 속성이 true로 설정되어있는 상태에서 constraint를 변경하는 코드를 작성하면 아래와 같은 문제에 직면하게 된다.
Will attempt to recover by breaking constraint <NSLayoutConstraint 0x6000002890....프로그래머가 코드로 작성한 constraint를 깨버리고 복구를 시도한다는 메시지이다.
private func showActivityIndicator() {
    self.view.addSubview(self.indicator)

    let safeAreaLayoutGuide: UILayoutGuide = self.view.safeAreaLayoutGuide

    self.indicator.centerXAnchor.constraint(equalTo: safeAreaLayoutGuide.centerXAnchor).isActive = true
    self.indicator.centerYAnchor.constraint(equalTo: safeAreaLayoutGuide.centerYAnchor).isActive = true

    indicator.startAnimating()
}

private func hideActivityIndicator() {
    self.indicator.stopAnimating()
    self.indicator.removeFromSuperview()
}
이 indicator를 보여주는 메소드와 숨겨주는 메소드를 만들었다.
- showActivityIndicator
addSubview로 화면에 indicator뷰를 얹어줬다.centerXAnchor,centerYAnchor로 중앙정렬을 해 주었다. translatesAuthoresizingMaskIntoConstraints 속성을 꺼 두었기 때문에 이렇게 코드상에서 제약조건을 설정할 수 있는 것!startAnimating으로 indicator를 실행한다.
- hideActivityIndicator
stopAnimating으로 indicator를 종료한다.removeFromeSuperView로 childe view를 삭제한다. >> indicator만 삭제하면 되는 거 아닌가? 차일드뷰가 있나?
아 더 봐야하는데 퇴근시간임 ~~~ ㅠ.ㅠ
내일은 UIActivityIndicatorView와 UIRefreshControl의 차이에 대해 공부해야겠당
전자는 뷰 위에 얹어지는 형태인 반면, 아래로 끌어당기는 만큼씩만 indicator를 서서히 보여주고 싶을 때는 후자를 써야 하는 건가?
https://furang-note.tistory.com/13 여기 참고해서 공부해보깅