
Debug UI
While you can create your own debug UI using HTML / CSS / JS, there are already multiple libraries:
dat.GUI
lil-gui <- 이걸 사용해보자
control-panel
ControlKit
Uil
Tweakpane
Guify
Oui
lil-gui

Three.js로 생성한 캔버스 속 여러 속성을 편집할 수 있는 라이브러리
yarn add lil-guiimport GUI from 'lil-gui'
// Debug
const gui = new GUI()Range
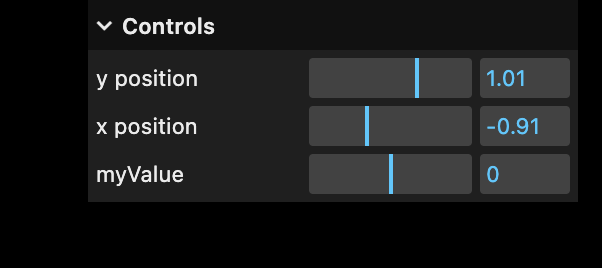
특정 값의 범위를 조절할 수 있는 GUI를 생성한다.
// 아래의 두가지 방법은 동일한 동작을 한다. 개인적으론 두번째 방식이 이해하기에 쉬운 것 같음.
/*
 * gui.add()의 파라미터
 * - object: THREE.Vector3
 * - property: keyof THREE.Vector3
 * - min?: number | object | any[]
 * - max?: number
 * - step?: number
 */
gui.add(mesh.position, 'y', -3, 3, 0.01).name('y position')
gui.add(mesh.position, 'x').min(-3).max(3).step(0.01).name('x position')

/*
 * gui.add 의 첫번째 파라미터는 항상 object여야 한다.
 * string이나 number 타입은 동작하지 않는다.
 */
const myObject = {
	myValue: 0,
}
gui.add(myObject, 'myValue').min(-3).max(3).step(0.01).name('myValue')
Checkbox
boolean 타입의 속성 변화를 줄 수 있다.

// Checkbox
gui.add(mesh, 'visible')
gui.add(material, 'wireframe')
Color
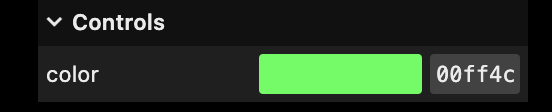
// Color
gui.addColor(material, 'color')

// onChange 메소드와 getHexString() 메소드를 사용하여 변화된 색상의
HexCode를 얻을 수 있다.
gui.addColor(material, 'color').onChange((value) => {
	console.log(value.getHexString())
})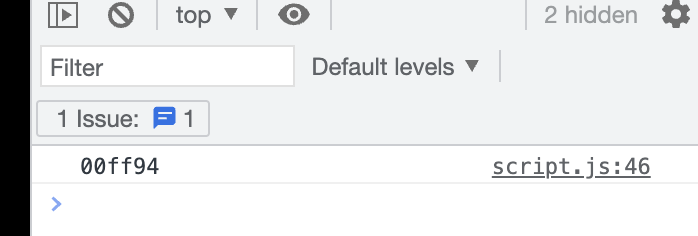
응용 : Three.js 바깥에서 색상정보를 관리하기
debugObject.color = '#e9b66a'

const geometry = new THREE.BoxGeometry(1, 1, 1, 2, 2, 2)
const material = new THREE.MeshBasicMaterial({ color: debugObject.color })
const mesh = new THREE.Mesh(geometry, material)
scene.add(mesh)

// Color
gui.addColor(debugObject, 'color').onChange(() => {
	material.color.set(debugObject.color)
})
Function / Button
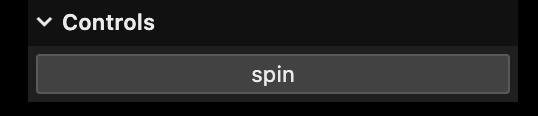
버튼을 눌렀을때 특정 함수를 실행시키기
// Function
debugObject.spin = () => {
	gsap.to(mesh.rotation, { duration: 1, y: mesh.rotation.y + Math.PI * 2 })
}

gui.add(debugObject, 'spin')
Geometry 변경하기

widthSegments, heightSegments, depthSegments는 처음 생성 후 변경이 불가능하다.
그래서 오래된 geometry를 destroy 하고, 새로운 geometry를 생성해야 한다.
오래된 geometry를 제거하지 않고 생성만 한다면 메모리 누수가 발생할 수 있으니 주의하자.
// init geometry
const geometry = new THREE.BoxGeometry(1, 1, 1, 2, 2, 2)
const material = new THREE.MeshBasicMaterial({ color: debugObject.color, wireframe: true })
const mesh = new THREE.Mesh(geometry, material)
scene.add(mesh)
// subdivision
debugObject.subdivision = 2
gui
.add(debugObject, 'subdivision')
.min(1)
.max(20)
.step(1)
.onFinishChange(() => {
// Remove old mesh or there will be memory leak!
mesh.geometry.dispose()
// Create new geometry
const subdivision = debugObject.subdivision
mesh.geometry = new THREE.BoxGeometry(1, 1, 1, subdivision, subdivision, subdivision)

})Folders
많은 ui controller들을 그룹으로 묶고 싶은 경우 라이브러리의 addFolder 메소드를 사용하면 정말 간단하게 해결할 수 있다. 폴더를 생성하고 gui.add 를 모두 폴더명.add 로 변경해주면 된다. nested folder도 생성이 가능하다.
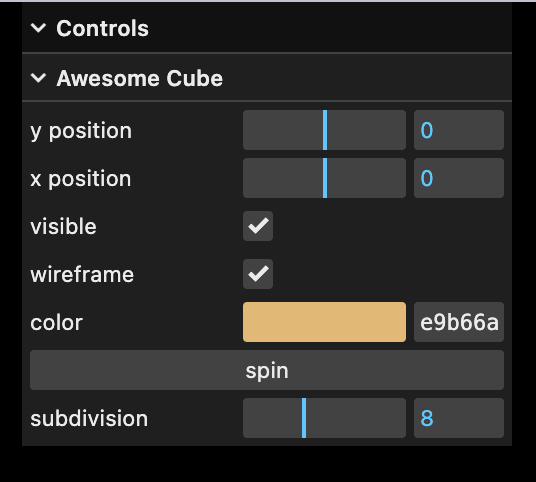
// Folder
const cubeTweaks = gui.addFolder('Awesome Cube')

...

// Checkbox
cubeTweaks.add(mesh, 'visible')
cubeTweaks.add(material, 'wireframe')

// Color
cubeTweaks.addColor(debugObject, 'color').onChange(() => {
	material.color.set(debugObject.color)
})
그 외의 여러가지 기능
// Debug
const gui = new GUI({
	width: 500,
	title: 'Nice Debug UI',
	closeFolders: false,
})


gui.close() // GUI를 닫는 method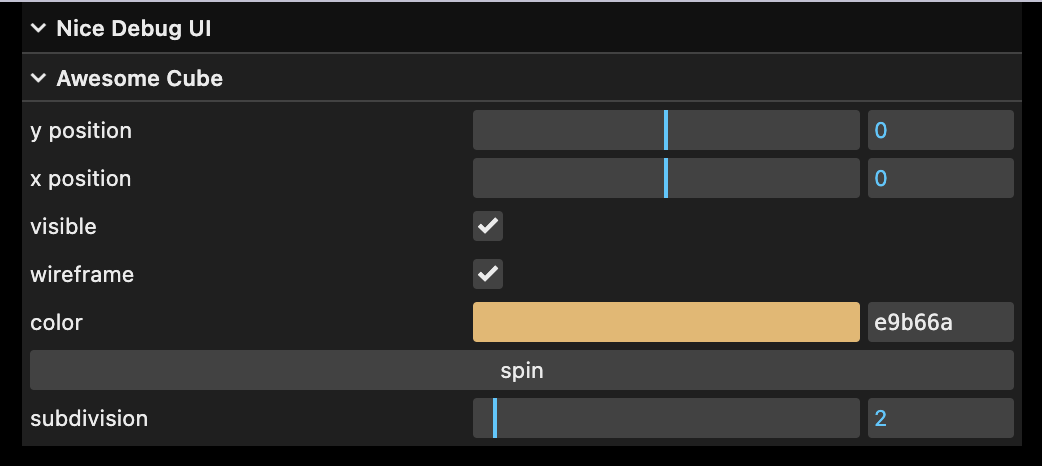
gui.hide() // GUI를 숨기는 method

// h키로 gui의 노출을 토글할 수 있다.
window.addEventListener('keydown', (e) => {
	if (e.key === 'h') {
		gui.show(gui._hidden)
	}
})
그 외의 다양한 기능들은 lil-gui의 공식문서를 참고하자. 중요한 것은 작업 중간에 gui를 반드시 활용하는 것이다. 손쉽게 최고의 화면 구성이나 색상, 중력 등을 고려하여 프로덕트를 만들 수 있을 것이다!
버튼UI 같은 것들 따로 만들 필요 없이 바로 기능만 붙여서 three.js 와 연동할 수 있다는게 엄청난 장점으로 느껴진다.. 잘 활용해봐야겠다!