
개체에 텍스쳐를 입혀보자!
Three.js에서 텍스쳐는 PBR원리를 따른다. PBR이란, 물리 기반 렌더링(Physically Based Rendering)을 의미한다. 이는 실제 현실의 물리 법칙을 따른다는 것을 의미한다. 빛 반사, 금속 재질의 특성 등등.. 다른 엔진들(유니티, 블렌더) 등도 마찬가지다.
참고하면 좋은 링크들
https://marmoset.co/posts/basic-theory-of-physically-based-rendering/
https://marmoset.co/posts/physically-based-rendering-and-you-can-too/
텍스쳐의 종류
- Color(albedo) : pixels of the texture that applied on the geometry
- Alpha : grayscale image where white will be visible
- Height : grayscale image that will move the vertices to create some relief
- Normal : lure the light into the face differently
- Ambient occlusion : grayscale image that fake shadow
- Metalness : metalic(white) & non-metalic(black)
- Roughness : rough(white) & smooth(black)
TextureLoader
하나의 TextureLoader로 여러 texture를 로드할 수 있다! 여러 번 호출 할 필요 없음.
const textureLoader = new THREE.TextureLoader()
const texture = textureLoader.load('/textures/door/color.jpg')
texture.colorSpace = THREE.SRGBColorSpace

// Canvas
const canvas = document.querySelector('canvas.webgl')

// Scene
const scene = new THREE.Scene()

/**
 * Objects
 */
const geometry = new THREE.BoxGeometry(1, 1, 1, 2, 2, 2)
const material = new THREE.MeshBasicMaterial({ map: texture })
const mesh = new THREE.Mesh(geometry, material)

scene.add(mesh)
로더에는 첫번째 인자로 image path를 입력하고, 뒤이어 세가지 인자로 콜백 함수를 넘길 수 있다. 로드 상태에 대한 값을 얻을 수 있다.
const texture = textureLoader.load(
	'/textures/door/color.jpg',
	() => {
		console.log('loaded')
	},
	() => {
		console.log('progress')
	},
	(error) => {
		console.log(error)
	}
)
LoadingManager
로딩 매니저를 사용하면 여러 텍스쳐의 로드를 추적할 수 있다. 여러가지 에셋을 받아와야 하는 경우 이를 활용해 로딩바 등을 노출하는데 사용할 수 있다.
// textures
const loadingManager = new THREE.LoadingManager()
loadingManager.onStart = () => {
	console.log('onStart')
}
loadingManager.onProgress = () => {
	console.log('onProgress')
}
loadingManager.onLoaded = () => {
	console.log('onLoaded')
}
loadingManager.onError = () => {
	console.log('onError')
}
const textureLoader = new THREE.TextureLoader(loadingManager)
const colorTexture = textureLoader.load('/textures/door/color.jpg')
colorTexture.colorSpace = THREE.SRGBColorSpace
const alphaTexture = textureLoader.load('/textures/door/alpha.jpg')
alphaTexture.colorSpace = THREE.SRGBColorSpace
const betaTexture = textureLoader.load('/textures/door/beta.jpg')
betaTexture.colorSpace = THREE.SRGBColorSpace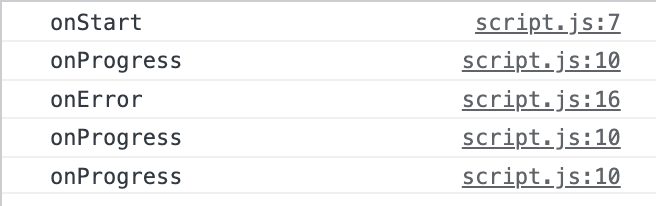
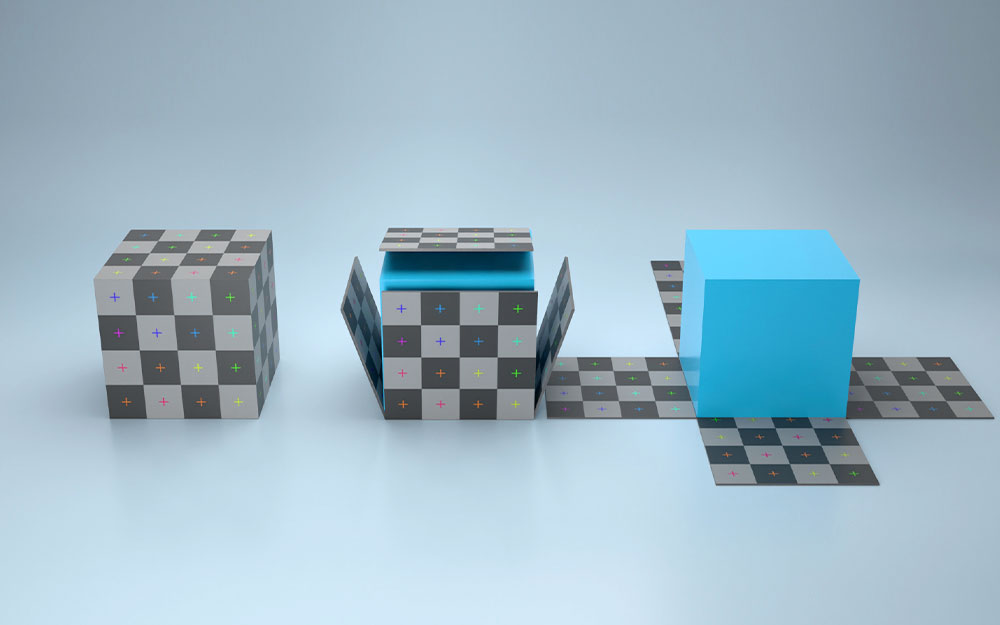
UV unwrapping
개체의 생김새에 맞게 텍스쳐를 입히기 위해서는 UV unwrapping 과정을 거쳐야 한다. 이는 마치 생일선물의 포장을 뜯었을 때의 모양을 보는 것과 같다.
Transform Texture
const textureLoader = new THREE.TextureLoader(loadingManager)
const colorTexture = textureLoader.load('/textures/door/color.jpg')
colorTexture.colorSpace = THREE.SRGBColorSpace

colorTexture.repeat.x = 2 // 가로로 2개 들어가는 크기
colorTexture.repeat.y = 3 // 세로로 3개 들어가는 크기
colorTexture.wrapS = THREE.RepeatWrapping // 가로 반복
colorTexture.wrapT = THREE.RepeatWrapping // 세로 반복
colorTexture.offset.x = 0.5
colorTexture.offset.y = 0.5
colorTexture.rotation = Math.PI * 0.25 // (반바퀴가 Math.PI) 0.25는 45도
colorTexture.center.x = 0.5
colorTexture.center.y = 0.5

// Canvas
const canvas = document.querySelector('canvas.webgl')

// Scene
const scene = new THREE.Scene()

/**
 * Objects
 */
const geometry = new THREE.BoxGeometry(1, 1, 1, 2, 2, 2)
const material = new THREE.MeshBasicMaterial({ map: colorTexture })
Mipmapping
Minification filter
개체가 극히 축소되었을 때 픽셀이 깨지는 것을 방지한다.
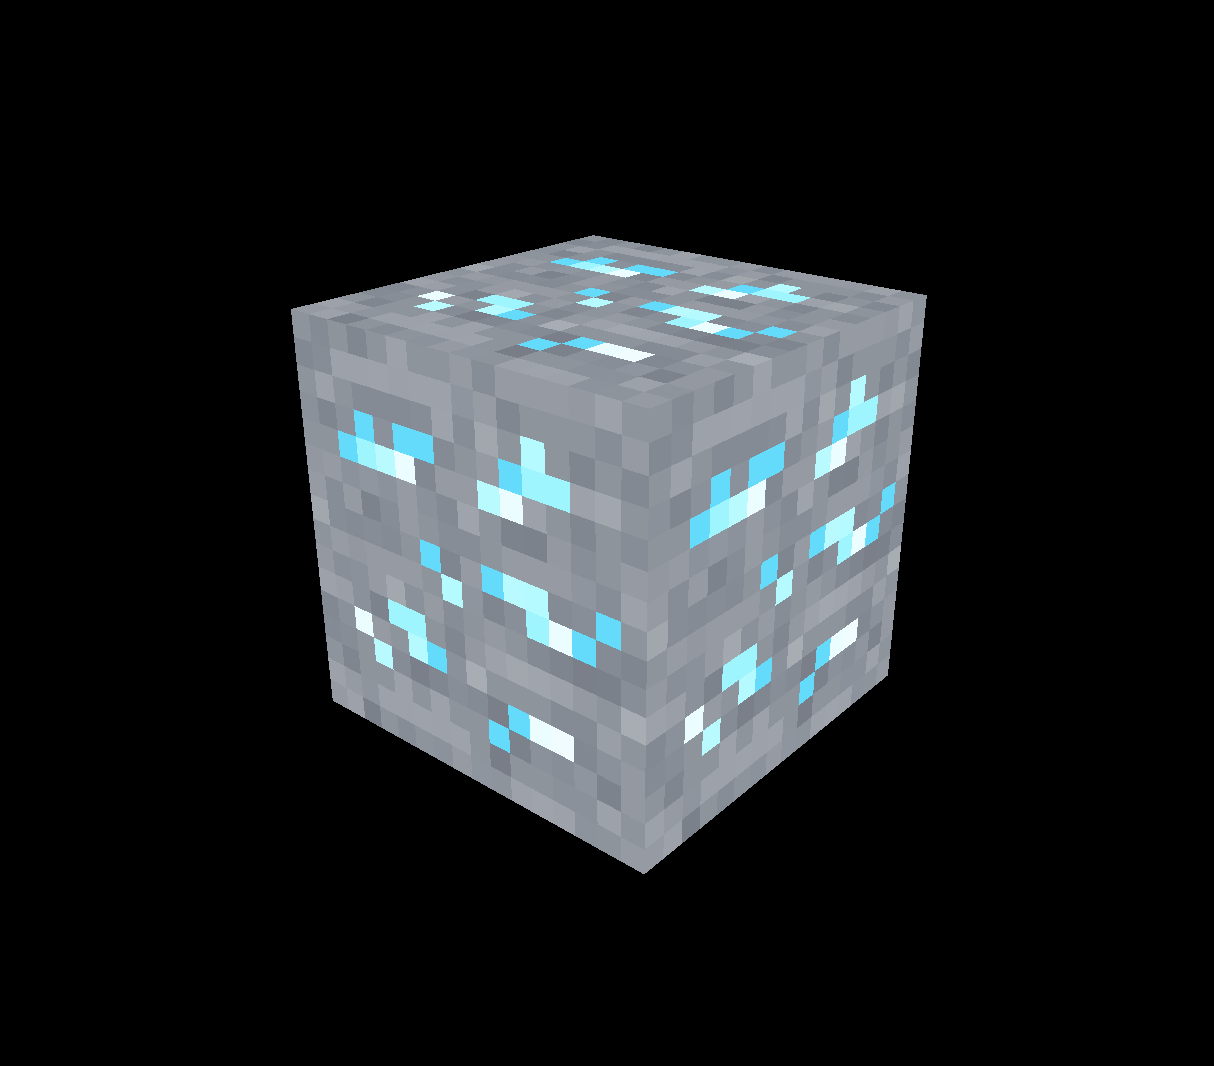
colorTexture.minFilter = THREE.NearestFilterMagnification filter
텍스쳐가 확대되었을 때(작은 이미지가 확대) 픽셀이 블러리해지는 것을 방지한다.
colorTexture.magFilter = THREE.NearestFilter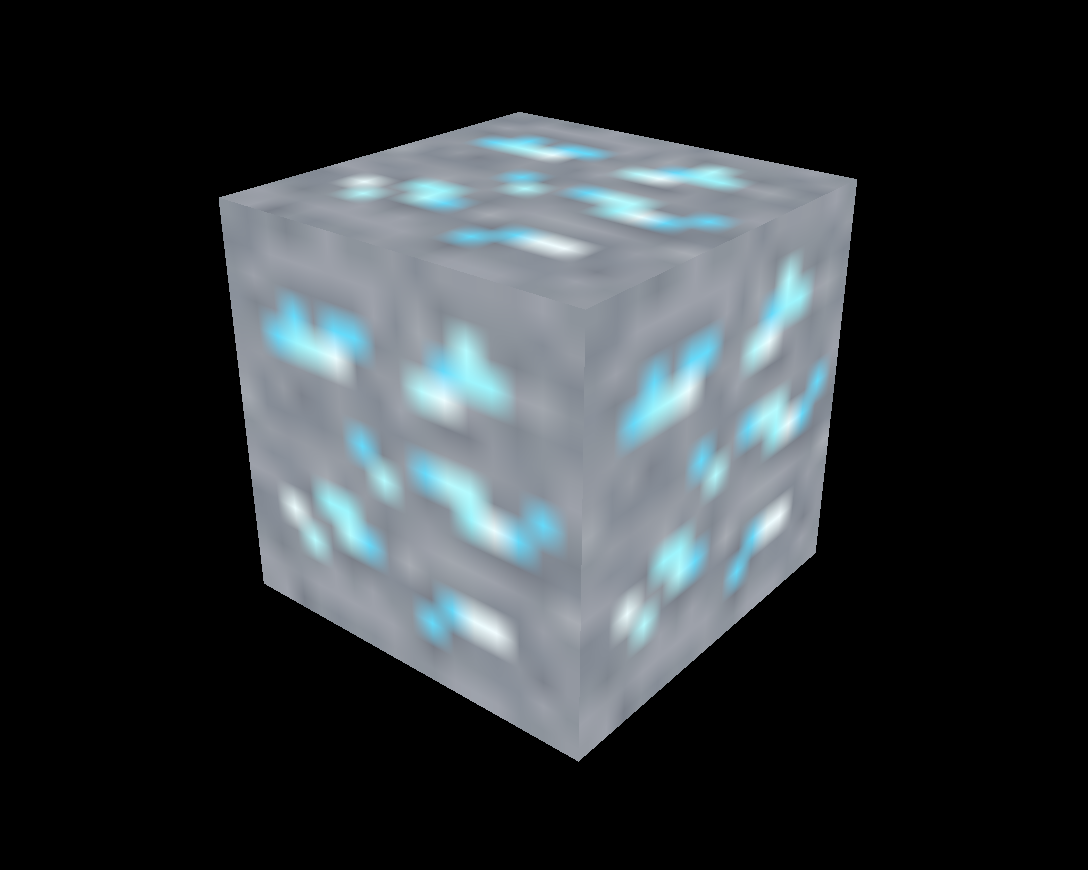
// mipmapping deactivation
colorTexture.generateMipmaps = false
texture에서 중요한 세가지
- 파일 무게는 작을 수록 좋다.
- jpg는 화질이 떨어질 수 있으나 가볍고, png는 화질 저하가 적으나 무겁다.
- TinyPNG 같은 소프트웨어를 사용해서 파일 크기를 줄여서 사용하자. (화질 저하 가능성 있음.)
- 이미지의 크기도 작을 수록 좋다.
- GPU의 한계가 있기 때문에 텍스쳐는 작을 수록 좋다.
- mipmapping을 고려해서 파일의 width와 height는 2의 제곱이 좋다.
- 512x512
- 1024x1024
- 512x2048
- 데이터
- 투명한 것을 제공하는 것이 좋다. jpg에서는 투명을 사용할 수 없지만 grayscale 이미지를 활용할 수 있다. 비교해보고 선택하자.
- normal 텍스쳐는 화질 저하가 없는 것이 좋으므로 .png를 사용하자.
작업물의 퍼포먼스와 연관이 되는 것이기 때문에 좋은 텍스쳐를 찾고, 용량 관리하는 것이 중요하다.
텍스쳐 레퍼런스

에엥 2년만에?!