상태를 관리할 때 useState 말고도 다른 방법이 있다. 바로 useReducer 를 사용하는 것이다. 이 hook 함수를 사용하면 컴포넌트의 상태 업데이트 로직을 컴포넌트에서 분리시킬 수 있다. 상태 업데이트 로직을 컴포넌트 바깥에 작성할 수도 있고, 다른 파일에 작성 후 불러와서 사용할 수도 있다.
useReducer hook 함수를 사용해보기 전에 우선 reducer 가 무엇인지 알아보자.
reducer 는 현재 상태와 액션 객체를 파라미터로 받아와서 새로운 상태를 반환해주는 함수이다.
function reducer(state, action) {
  // 새로운 상태를 만드는 로직
  // const nextState = ...
  return nextState;
}
reducer 가 반환하는 상태는 곧 컴포넌트가 지닐 새로운 상태가 된다 여기서 action 은 업데이트를 위한 정보를 가지고 있다. 주로 type 값을 지닌 객체 형태로 사용하지만, 꼭 따라야 할 규칙은 따로 없다.
action 의 예시들을 살펴보자.
// 카운터에 1을 더하는 액션
{
  type: 'INCREMENT'
}
// 카운터에 1을 빼는 액션
{
  type: 'DECREMENT'
}
// input 값을 바꾸는 액션
{
  type: 'CHANGE_INPUT',
  key: 'email',
  value: 'tester@react.com'
}
// 새 할 일을 등록하는 액션
{
  type: 'ADD_TODO',
  todo: {
    id: 1,
    text: 'useReducer 배우기',
    done: false,
  }
}
보는 것처럼 action 객체의 형태는 자유이다.type 값을 대문자와 _로 구성하는 관습이 있지만, 꼭 따라야 할 필요는 없다.
reducer 를 배웠으니 useReducer 의 사용법을 알아보자. useReducer 의 사용법은 다음과 같다.
const [state, dispatch] = useReducer(reducer, initialState);여기서 state 는 컴포넌트에서 사용할 수 있는 상태를 가르키고 있고, dispatch 는 액션을 발생시키는 함수이다. 이 함수는 다음과 같이 사용한다. dispatch({ type: 'INCREMENT' });
useState 를 이용한 컴포넌트를 useReducer 를 이용하도록 변경한 예시를 살펴보자.
Counter.js (useState)
import React, { useState } from 'react';

function Counter() {
  const [number, setNumber] = useState(0);

  const onIncrease = () => {
    setNumber(prevNumber => prevNumber + 1);
  };

  const onDecrease = () => {
    setNumber(prevNumber => prevNumber - 1);
  };

  return (
    <div>
      <h1>{number}</h1>
      <button onClick={onIncrease}>+1</button>
      <button onClick={onDecrease}>-1</button>
    </div>
  );
}

export default Counter;
Counter.js (useReducer)
import React, { useReducer } from 'react';

function reducer(state, action) {
  switch (action.type) {
    case 'INCREMENT':
      return state + 1;
    case 'DECREMENT':
      return state - 1;
    default:
      return state;
  }
}

function Counter() {
  const [number, dispatch] = useReducer(reducer, 0);

  const onIncrease = () => {
    dispatch({ type: 'INCREMENT' });
  };

  const onDecrease = () => {
    dispatch({ type: 'DECREMENT' });
  };

  return (
    <div>
      <h1>{number}</h1>
      <button onClick={onIncrease}>+1</button>
      <button onClick={onDecrease}>-1</button>
    </div>
  );
}

export default Counter;
index.js 에서 App 대신 Counter 를 렌더링하면 브라우저 화면에서 정상적으로 작동하는 것을 볼 수 있다.
App 컴포넌트를 useReducer 로 구현하기
이번에는 App 컴포넌트에 있던 상태 업데이트 로직들을 useState 가 아닌 useReducer 를 사용해서 구현해보겠다. 우선, App 에서 사용할 초기 상태를 컴포넌트 바깥으로 분리해주고, App 내부의 로직들을 모두 제거해주자. 우리가 앞으로 구현할 것이다.
import React, { useRef, useState, useMemo, useCallback } from 'react';
import UserList from './Components/UserList';
import CreateUser from './Components/CreateUser';

const countActiveUsers = (users) => {
  console.log('활성 사용자 수를 세는중...');
  return users.filter(user => user.active).length;
}

const initialState = {
  inputs: {
    username: '',
    email: ''
  },
  users: [
    {
      id: 1,
      username: 'velopert',
      email: 'public.velopert@gmail.com',
      active: true
    },
    {
      id: 2,
      username: 'tester',
      email: 'tester@example.com',
      active: false
    },
    {
      id: 3,
      username: 'liz',
      email: 'liz@example.com',
      active: false
    }
  ]
};

function App() {
  return (
    <>
      <CreateUser />
      <UserList users={[]} />
      <div>활성사용자 수 : 0</div>
    </>
  );
}

export default App;
reducer 함수의 틀만 만들어주고, useReducer 를 컴포넌트에서 구현하였고, state 에게서 필요한 값들을 비구조화 할당 문법을 사용하여 추출하여 각 컴포넌트에 전달해주었다.
import React, { useRef, useState, useMemo, useCallback } from 'react';
import UserList from './Components/UserList';
import CreateUser from './Components/CreateUser';

const countActiveUsers = (users) => {
  console.log('활성 사용자 수를 세는중...');
  return users.filter(user => user.active).length;
}

const initialState = {
  inputs: {
    username: '',
    email: ''
  },
  users: [
    {
      id: 1,
      username: 'velopert',
      email: 'public.velopert@gmail.com',
      active: true
    },
    {
      id: 2,
      username: 'tester',
      email: 'tester@example.com',
      active: false
    },
    {
      id: 3,
      username: 'liz',
      email: 'liz@example.com',
      active: false
    }
  ]
};

function reducer(state, action){
  switch (action.type){
}

function App() {
  const [state, dispatch] = useReducer(reducer, initialState);
  const { users } = state;
  const { username, email} = state.inputs;

  return (
    <>
      <CreateUser />
      <UserList users={users} />
      <div>활성사용자 수 : 0</div>
    </>
  );
}

export default App;onCreate, onRemove, onChange, onUpdate, onModify 함수들을 구현하였고, 기존의 활성 사용자수 구하는 코드를 그대로 사용하였다 (수정할 필요 X).
App.js
import React, { useRef, useState, useMemo, useCallback, useReducer } from 'react';
import UserList from './Components/UserList';
import CreateUser from './Components/CreateUser';
const countActiveUsers = (users) => {
console.log('활성 사용자 수를 세는중...');
return users.filter(user => user.active).length;
}
const initialState = {
input: {
username: '',
email: '',
id: ''
},
users: [
{
id: 1,
username: 'velopert',
email: 'public.velopert@gmail.com',
active: true
},
{
id: 2,
username: 'tester',
email: 'tester@example.com',
active: true
},
{
id: 3,
username: 'liz',
email: 'liz@example.com',
active: false
}
]
};
function reducer(state, action){
switch (action.type){
case 'CHANGE_INPUT':
return {
...state,
input:{
...state.input,
[action.name]:action.value
}
}
case 'CREATE_USER':
return {
users: state.users.concat(action.user),
//concat() 메서드는 인자로 주어진 배열이나 값들을 기존 배열에 합쳐서 새 배열을 반환한다.
input: {
username: '',
email: '',
}, //input 값 초기화
}
case 'TOGGLE_USER':
return {
...state,
users: state.users.map(user => user.id === action.id ? {...user, active: !user.active} : user)
}
case 'REMOVE_USER':
return {
...state,
users: state.users.filter(user => user.id !== action.id)
}
case 'MODIFY_USER':
return {
...state,
input: {
username: action.username,
email:action.email,
id: action.id
}
}
case 'UPDATE_USER':
return {
...state,
users: state.users.map(user => user.id === state.input.id ? {...user, username: state.input.username, email: state.input.email} : user)
}
default:
return state;
}
}
function App() {
const [state, dispatch] = useReducer(reducer, initialState);
const nextId = useRef(4);
const { users } = state;
const { username, email } = state.input;
const onChange = useCallback((e) => {
const { name, value } = e.target;
dispatch({
type: 'CHANGE_INPUT',
name,
value
})
}, []);//재선언할 필요가 없는 함수이다.
const onCreate = useCallback(() => {
dispatch({
type: 'CREATE_USER',
user: {
id: nextId.current,
username: username,
email: email
},
})
nextId.current += 1;
}, [username, email])
//여기서 ...(spread)users를 이용해 user를 업데이트하는게 아니기 때문에 user가 deps에 없음!
const onToggle = useCallback((id)=> {
dispatch({
type: 'TOGGLE_USER',
id: id
})
}, [])
const onRemove = useCallback((id) => {
dispatch({
type: 'REMOVE_USER',
id: id
})
}, [])
const onModify = useCallback(({username, email, id})=> {
dispatch({
type: 'MODIFY_USER',
username: username,
email: email,
id: id
//dispatch로 전달할때는 아래처럼 부연 설명 안해도 됨! 직관적으로 필요한 것만 정확하게 넘기자
//action.user.username, action.user.email, action.user.id 이렇게 사용하면 불편함. 이럴 이유도 X.
//user: {
// username: username,
// email: email,
// id: id
// }
})
}, [])
const onUpdate = useCallback(()=>{
dispatch({
type: 'UPDATE_USER'
})
}, [])
const count = useMemo(() => countActiveUsers(users), [users]);
return (
<>
<CreateUser username={username} email={email} onChange={onChange} onCreate={onCreate} onUpdate={onUpdate} />
<UserList users={users} onToggle={onToggle} onRemove={onRemove} onModify={onModify}/>
<div>활성사용자 수 : {count}</div>
</>
);
}
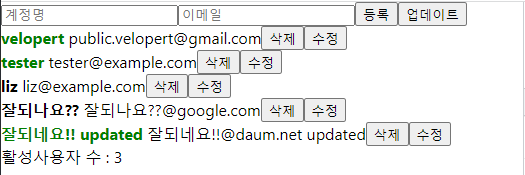
export default App;구현한 기능들이 잘 동작하는 것을 볼 수 있다. 이제 모든 기능들이 useReducer 를 사용하여 구현됐다. 정말 길다..
useReducer vs useState 어떤 것을 써야 할까?
정해진 답은 없다. 상황에 따라 달라진다고 볼 수 있다. 예를 들어 컴포넌트에서 관리하는 값이 딱 하나이고, 그 값이 단순한 숫자, 문자열 또는 boolean 값이라면 확실히 useState 로 관리하는게 편할 것이다.
const [number, setNumber] = useState(0);
하지만 컴포넌트에서 관리하는 값이 여러개가 되어서 상태의 구조가 복잡해진다면 useReducer 로 관리하는 것이 편할 것이다.
이것에 대한 결정은 개발자가 직접 useState, useReducer 를 사용해보고 맘에 드는 방식을 선택하면 된다.
velopert 님의 경우 setter 를 한 함수에서 여러번 사용해야 하는 일이 발생한다면
setUsers(users => users.concat(user));
setInputs({
  username: '',
  email: ''
});그때부터useReducer 를 쓸지 고민한다고 하셨다. useReducer 를 썼을때 편해질 것 같으면 useReducer 를 쓰고, 딱히 그럴 것 같지 않으면 useState 를 유지하면 된다.