http://www.yes24.com/Product/Goods/83849117
테스트 코드의 중요성
견고한 서비스를 만들고 싶은 개발자나 팀에선 TDD를 하거나 최소한의 테스트 코드는 꼭 작성했었음
모 서비스 회사의 경우 코딩 테스트를 알고리즘이 아닌 프로젝트를 만들고, 단위테스트를 필수조건으로 두었음
테스트 코드는 요즘 히트다 히트
테스트 코드 소개
TDD
테스트가 주도하는 개발
테스트 코드를 먼저 작성하는 것부터 시작함
레드 그린 사이클
항상 실패하는 테스트를 먼적 작성(red)
테스트가 통과하는 프로덕션 코드를 작성(greed)
테스트가 통과하면 프로덕션 코드를 리팩토링함(refactor)
단위 테스트(unit test)
TDD의 첫 번째 단계인 기능 단위의 테스트 코드를 작성하는 것을 이야기함
TDD와 달리 테스트 코드를 꼭 먼저 작성해야하는 것도 아니고, 리팩토링도 포함되지 않음
순수하게 테스트 코드만 작성하는 것을 이야기함
여기서는 단위 테스트 코드를 배울 예정
단위 테스트 코드 작성의 이점
개발단계 초기에 문제를 발견하게 해줌
개발자가 나중에 코드를 리팩토링하거나 라이브러리 업그레이드 등에서 기존 기능이 올바르게 작동하는지 확인할 수 있음 ex) 회귀 테스트
기능에 대한 불확실성을 감소시킬 수 있음
시스템에 대한 실제 문서를 제공함. 즉, 단위 테스트 자체가 문서로 사용할 수 있음
책 저자의 경험으로 느낀 이점
1.빠른 피드백
단위 테스트를 배우기 전의 개발방식은
코드 작성 -> 톰캣 실행 -> api 테스트 도구로 http 요청 -> 요청 결과를 println 으로 눈으로 검증 -> 결과가 다르면 다시 프로그램 중지하고 코드를 수정 -> 톰캣 다시 실행하여 테스트
이때 톰캣 재시작하는 시간은 수십 초에서 1분이상 소요되기도 하고 이를 수십번씩 수정해야하는 상황에서 1시간 이상 톰캣 재시작에 소요됨
테스트 코드를 작성하면 톰캣을 재시작 없이 수정된 기능 확인 가능
2.println으로 눈으로 검증이 아닌 자동검증 가능
단위 테스트를 실행만 하면 더는 수동 검증이 필요 없음
3. 개발자가 만든 기능을 안전하게 보호해줌
기능을 추가 하였을때 기존의 정상적으로 작동하던 다른 기능이 문제가 생기는 미리 파악하여 기존 기능 작동 보장 가능
테스트 코드 작성을 도와주는 프레임 워크
JUnit - Java
DBUnit - DB
CppUnit - C++
NUnit - .net
JUnit4로 테스트 코드 작성할 예정
Hello Controller 테스트 코드 작성하기
패키지와 java 클래스 생성
import org.springframework.boot.SpringApplication;
import org.springframework.boot.autoconfigure.SpringBootApplication;

@SpringBootApplication
public class Application {
    public static void main(String[] args){
        SpringApplication.run(Application.class, args);
    }
}
@SpringBootApplication 으로 인해 스프링 부트의 자동 설정, 스프링 Bean 읽기와 생성을 모두 자동으로 설정됨
특히 @SpringBootApplication 이 있는 위치부터 설정을 읽어가기 때문에 이 클래스는 항상 프로젝트 최상단에 위치해야함
main 메소드에서 실행하는 SpringApplication.run으로 인해 내장 WAS(웹 어플리케이션 서버)를 실행함
내장 WAS란 별도로 외부에 WAS를 두지 않고 애플리케이션을 실행할 때 내부에서 WAS를 실행하는 것
이렇게 되면 항상 서버에서 톰캣을 설치할 필요가 없게 되고, 스프링 부트로 만들어진 Jar파일(실행 가능한 Java 패키징 파일)로 실행하면 됨
스프링 부트는 내장 WAS 사용을 권장
언제 어디서나 같은 환경에서 스프링 부트를 배포할 수 있기 때문
외장 WAS를 쓴다면 모든 서버는 WAS의 종류와 버전, 설정을 일치 시켜야함
새로운 서버가 추가되면 모든 서버가 같은 WAS 환경을 구축해야함
많은 서버의 버전을 올린다면 실수할 여지도 많고, 많은 시간이 필요한 큰 작업이 될 수 있음
test를 위한 controller 만들기
import org.springframework.web.bind.annotation.GetMapping;
import org.springframework.web.bind.annotation.RestController;

@RestController
public class HelloController {

    @GetMapping("/hello")
    public String Hello(){
        return "hello";
    }
}
@RestController
컨트롤러를 json을 반환하는 컨트롤러로 만들어줌
예전에 @ResponseBody를 각 메소드 마다 선언했던 것을 한번에 사용할 수 있게 해줌
@GetMapping
HTTP Method인 Get의 요청을 받을 수 있는 API를 만들어 줌
예전에 @RequestMapping(method=RequestMethod.GET)으로 사용되었음
이제 이 프로젝트는 /hello로 요청이 오면 hello 문자열을 반환
테스트 코드로 검증
src/test/java/에 테스트할 패키지를 그대로 다시 생성
import org.junit.Test;
import org.junit.runner.RunWith;
import org.springframework.beans.factory.annotation.Autowired;
import org.springframework.boot.test.autoconfigure.web.servlet.WebMvcTest;
import org.springframework.test.context.junit4.SpringRunner;
import org.springframework.test.web.servlet.MockMvc;
import org.springframework.test.web.servlet.ResultActions;
import static org.springframework.test.web.servlet.request.MockMvcRequestBuilders.get;
import static org.springframework.test.web.servlet.result.MockMvcResultMatchers.content;
import static org.springframework.test.web.servlet.result.MockMvcResultMatchers.status;

@RunWith(SpringRunner.class)
@WebMvcTest
public class HelloControllerTest {

    @Autowired
    private MockMvc mvc;

    @Test
    public void hello가_리턴된다() throws Exception{
        String hello = "hello";
        mvc.perform(get("/hello")).andExpect(status().isOk()).andExpect(content().string(hello));
    }
}
@RunWith(SpringRunner.class)
테스트를 진행할 때 JUnit에 내장된 실행자 외에 다른 실행자를 실행시킴
여기서는 SpringRunner라는 스프링 실행자를 사용
즉, 스프링 부트 테스트와 JUnit 사이에 연결자 역할을 함
@WebMvcTest
여러 스프링 테스트 어노테이션 중, Web(Spring MVC)에 집중할 수 있는 어노테이션
선언할 경우 @Controller, @ControllerAdvice 등을 사용할 수 있음
@Service, @Component, @Repository 등은 사용할 수 없음
여기서는 컨트롤러만 사용하기 때문에 선언
@Autowired
스프링이 관리하는 빈(Bean)을 주입 받음
private MockMvc mvc
웹 API를 테스트할 때 사용함
스프링 MVC 테스트의 시작점임
이 클래스를 통해 HTTP GET, POST 등에 대한 API 테스트를 할 수 있음
mvc.perform(get("/hello"))
MockMvc를 통해 /hello 주소로 HTTP GET 요청을 함
체이닝이 지원되어 아래와 같이 여러 검증 기능을 이어서 선언할 수 있음
.andExpect(status().isOk())
mvc.perform의 결과를 검증함
HTTP Header의 Status를 검증함
200, 404, 500등의 상태를 검증함
여기선 OK인지 즉, 200인지 아닌지 검증함
.andExpect(content().string(hello))
mvc.perform의 결과를 검증함
응답 본문의 내용을 검증함
Controller에서 "hello"를 리턴하기 때문에 이 값이 맞는지 검증함
테스트 하기

메소드 왼쪽의 화살표를 클릭하여 Run
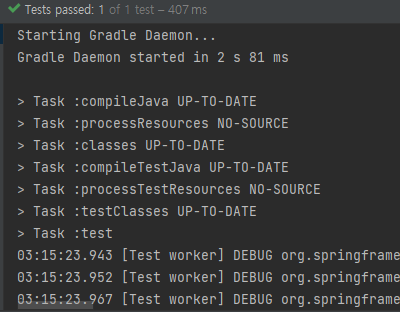
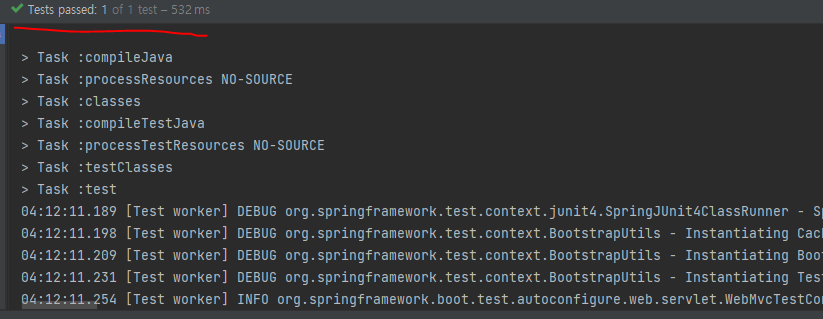
.andExpect(status().isOk()) 와 .andExpect(content().string(hello)) 가 모두 테스트 통과했음

수동검증으로 확인 완료
롬복
자바 개발할 때 자주 사용하는 코드 Getter, Setter, 기본생성자, toString 등을 어노테이션으로 자동 생성해줌
인텔리제이에서는 플러그인으로 쉽게 설정가능
build.gradle에 롬복 의존성 추가
dependencies {
    compile('org.springframework.boot:spring-boot-starter-web')
    compile('org.projectlombok:lombok')
    testCompile('org.springframework.boot:spring-boot-starter-test')
}
롬복 플러그인 설치
plugins -> market place -> lombok -> install
롬복 설정
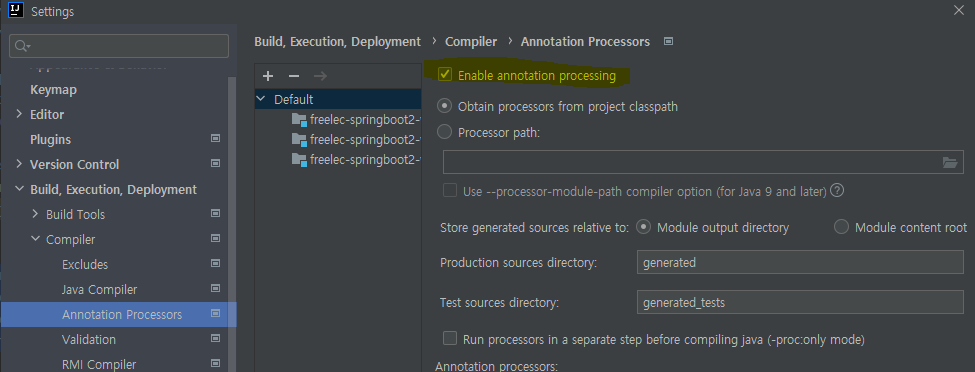
settings->build->compiler->Annotation Processors
Enable annotation processing 체크
롬복으로 리팩토링
web 패키지에 dto 패키지 추가하고 HelloResponseDto 생성
import lombok.Getter;
import lombok.RequiredArgsConstructor;

@Getter
@RequiredArgsConstructor
public class HelloResponseDto {

    private final String name;
    private final int amount;

}
@Getter
선언된 모든 필드의 get 메소드를 생성해 줍니다.
@RequiredArgsConstructor
선언된 모든 final 필드가 포함된 생성자를 생성해줌
final이 없는 필드는 생성자에 포함되지 않음
Dto에 적용된 롬복 테스트 코드 작성
import org.junit.Test;
import static org.assertj.core.api.Assertions.assertThat;

public class HelloResponseDtoTest {

    @Test
    public void 롬복_기능_테스트(){
        //given
        String name = "test";
        int amount = 1000;

        //when
        HelloResponseDto dto = new HelloResponseDto(name, amount);

        //then
        assertThat(dto.getName()).isEqualTo(name);
        assertThat(dto.getAmount()).isEqualTo(amount);
    }
}
assertThat
assertj 라는 테스트 검증 라이브러리의 검증 메소드
검증하고 싶은 대상을 메소드 인자로 받음
메소드 체이닝이 지원되어 isEqualTo와 같이 메소드를 이어어 사용할 수 있음
isEqualTo
assertj의 동등 비교 메소드
assertThat에 있는 값과 isEqualTo의 값을 비교해서 같을 때만 성공
Junit의 기본 assertThat이 아닌 assertj의 assertThat을 사용했음
assertj 역시 Junit에서 자동으로 라이브러리 등록을 해줌
Junit 과 비교하여 assertj 의 장점
CoreMatchers와 달리 추가적으로 라이브러리가 필요하지 않음
-> Junit의 assertThat을 쓰게 되면 is()와 같이 CoreMatchers 라이브러리가 필요함
자동완성이 좀 더 확실하게 지원됨
-> IDE에서는 CoreMatchers와 같은 Matcher 라이브러리의 자동완성 지원이 약함
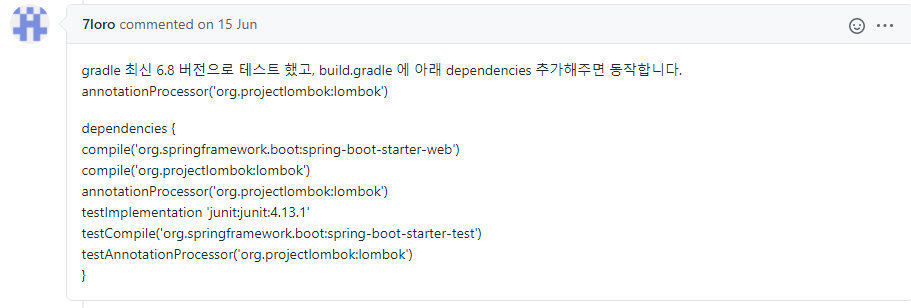
Dto 롬복 테스트 오류 발생

dependencies 추가로 해결
HelloController에서 ResponseDto 사용
HelloController에 코드 추가
@GetMapping("/hello/dto")
    public HelloResponseDto helloDto(@RequestParam("name") String name, @RequestParam("amount") int amount){
        return new HelloResponseDto(name, amount);
    }
@RequestParam
외부에서 API로 넘긴 파라미터를 가져오는 어노테이션
여기서는 외부에서 name (@RequestParam("name"))이란 이름으로 넘긴 파라미터를 메소드 파라미터 name (String name)에 저장하게 됨
HelloControllerTest에 Dto 사용 테스트 추가
import org.junit.Test;
import org.junit.runner.RunWith;
import org.springframework.beans.factory.annotation.Autowired;
import org.springframework.boot.test.autoconfigure.web.servlet.WebMvcTest;
import org.springframework.test.context.junit4.SpringRunner;
import org.springframework.test.web.servlet.MockMvc;

import static org.hamcrest.Matchers.is;
import static org.springframework.test.web.servlet.request.MockMvcRequestBuilders.get;
import static org.springframework.test.web.servlet.result.MockMvcResultMatchers.content;
import static org.springframework.test.web.servlet.result.MockMvcResultMatchers.jsonPath;
import static org.springframework.test.web.servlet.result.MockMvcResultMatchers.status;

@RunWith(SpringRunner.class)
@WebMvcTest
public class HelloControllerTest {

    @Autowired
    private MockMvc mvc;

    @Test
    public void hello가_리턴된다() throws Exception{
        String hello = "hello";
        mvc.perform(get("/hello")).andExpect(status().isOk()).andExpect(content().string(hello));
    }

    @Test
    public void helloDto가_리턴된다() throws Exception{
        String name = "hello";
        int amount = 1000;

        mvc.perform(
                get("/hello/dto")
                        .param("name", name)
                        .param("amount", String.
                                valueOf(amount)))
                .andExpect(status().isOk())
                .andExpect(jsonPath("$.name", is(name)))
                .andExpect(jsonPath("$.amount", is(amount)));
    }
}
param
API 테스트할 때 사용될 요청 파라미터를 설정함
단, 값은 String 만 허용됨
숫자/날짜 등의 데이터도 등록할 때는 문자열로 변경해야만 가능함
jsonPath
Json 응답값을 필드별로 검증할 수 있는 메소드
$를 기준으로 필드명을 명시함
여기서는 name과 amount를 검증하니 $.name, $.amount로 검증함
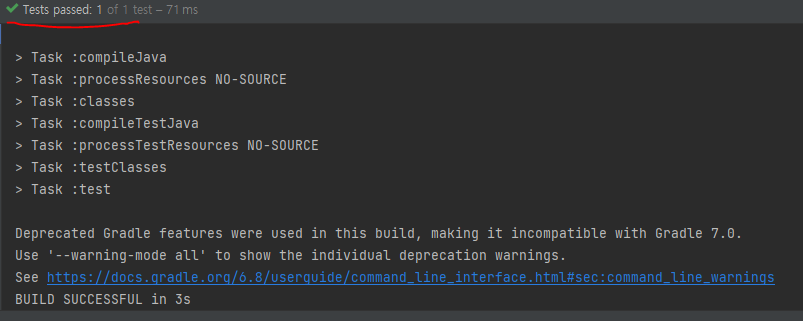
테스트 성공
