드디어 React Complete Guide 강의의 첫 과제다...
과제1. 컴포넌트 분할하기
- 지출 표시를 담당하는 새 컴포넌트를 생성하세요.
2. 해당 컴포넌트에 여러 개의 ExpenseItem 컴포넌트를 추가하세요.
3. 앱 컴포넌트에 지출 데이터를 그대로 유지하면서 해당 데이터를 새로 생성한 컴포넌트로 전달하세요.
- 이전의 App.js
import ExpenseItem from "./components/ExpenseItem";

function App() {
  // 아래 배열 expenses의 객체들의 데이터를 다른 expenseItem에 전달하고 싶어!
  // == ExpenseItem을 외부로부터 설정할 수 있도록 하고 싶다는 말.
  const expenses = [
    {
      id: "e1",
      title: "Toilet Paper",
      amount: 94.12,
      date: new Date(2020, 7, 14),
    },
    { id: "e2", title: "New TV", amount: 799.49, date: new Date(2021, 2, 12) },
    {
      id: "e3",
      title: "Car Insurance",
      amount: 294.67,
      date: new Date(2021, 2, 28),
    },
    {
      id: "e4",
      title: "New Desk (Wooden)",
      amount: 450,
      date: new Date(2021, 5, 12),
    },
  ];

  return (
    <div>
      <h2>Let's get started!</h2>
      <ExpenseItem
        title={expenses[0].title} // 점 뒤의 부분은 프로퍼티의 이름과 일치해야 한다. (이 객체들에 접근하고 있기 때문.)
        amount={expenses[0].amount}
        date={expenses[0].date}
      />
      <ExpenseItem
        title={expenses[1].title}
        amount={expenses[1].amount}
        date={expenses[1].date}
      />
      <ExpenseItem
        title={expenses[2].title}
        amount={expenses[2].amount}
        date={expenses[2].date}
      />
      <ExpenseItem
        title={expenses[3].title}
        amount={expenses[3].amount}
        date={expenses[3].date}
      />
    </div>
  );
}

export default App;
관건은 'App component의 expenses data를 그대로 유지하면서, 해당 데이터를 새로 생성한 컴포넌드(Expenses.js)로 전달하는 것이다.
따라서 Expenses.js에서는
- App component return에 있던 ExpenseItem component를 Expenses component로 옮긴다.
- props로 expenses data 값을 넘겨받는다.
💡 새로운
Expenses component에서 매개변수 props를 취할건데, 리액트는 이 **props 객체를 자동으로 전달**할 것이다! <br /> 자동적으로 이 props 객체를 얻게 되는 것이다. <br /> 그래서props.expenses`를 하면 App에 정의되어있는 expenses를 자동적으로~~~ 얻어쓸 수 있게 되는 것.
자동, 자동, 자동, props!!!
- Expenses.js
// 1. 지출 표시를 담당하는 새 컴포넌트를 생성하세요.
// 2. 해당 컴포넌트에 여러 개의 ExpenseItem 컴포넌트를 추가하세요.
// 3. 앱 컴포넌트에 지출 데이터를 그대로 유지하면서 해당 데이터를 새로 생성한 컴포넌트로 전달하세요.

import ExpenseItem from "./ExpenseItem";
import "./Expenses.css";

function Expenses(props) {
  <div></div>;
  return (
    <div className="expenses">
      <ExpenseItem
        title={props.items[0].title} // 점 뒤의 부분은 프로퍼티의 이름과 일치해야 한다. (이 객체들에 접근하고 있기 때문.)
        amount={props.items[0].amount}
        date={props.items[0].date}
      />
      <ExpenseItem
        title={props.items[1].title}
        amount={props.items[1].amount}
        date={props.items[1].date}
      />
      <ExpenseItem
        title={props.items[2].title}
        amount={props.items[2].amount}
        date={props.items[2].date}
      />
      <ExpenseItem
        title={props.items[3].title}
        amount={props.items[3].amount}
        date={props.items[3].date}
      />
    </div>
  );
}

export default Expenses;
App.js에서는
1. App component의 return에 Expenses component를 넣고, key로 item을 주고(위 Expenses.js를 보면 item으로 받았음), 값으로 expenses를 넣어서 Expenses component로 expenses data를 넘겨준다.
- App.js
// import ExpenseItem from "./components/ExpenseItem";
import Expenses from "./components/Expenses";

function App() {
  const expenses = [
    {
      id: "e1",
      title: "Toilet Paper",
      amount: 94.12,
      date: new Date(2020, 7, 14),
    },
    { id: "e2", title: "New TV", amount: 799.49, date: new Date(2021, 2, 12) },
    {
      id: "e3",
      title: "Car Insurance",
      amount: 294.67,
      date: new Date(2021, 2, 28),
    },
    {
      id: "e4",
      title: "New Desk (Wooden)",
      amount: 450,
      date: new Date(2021, 5, 12),
    },
  ];

  return (
    <div>
      <h2>Let's get started!</h2>
      <Expenses items={expenses}/>

    </div>
  );
}

export default App;
이렇게 하면 과제 끝!
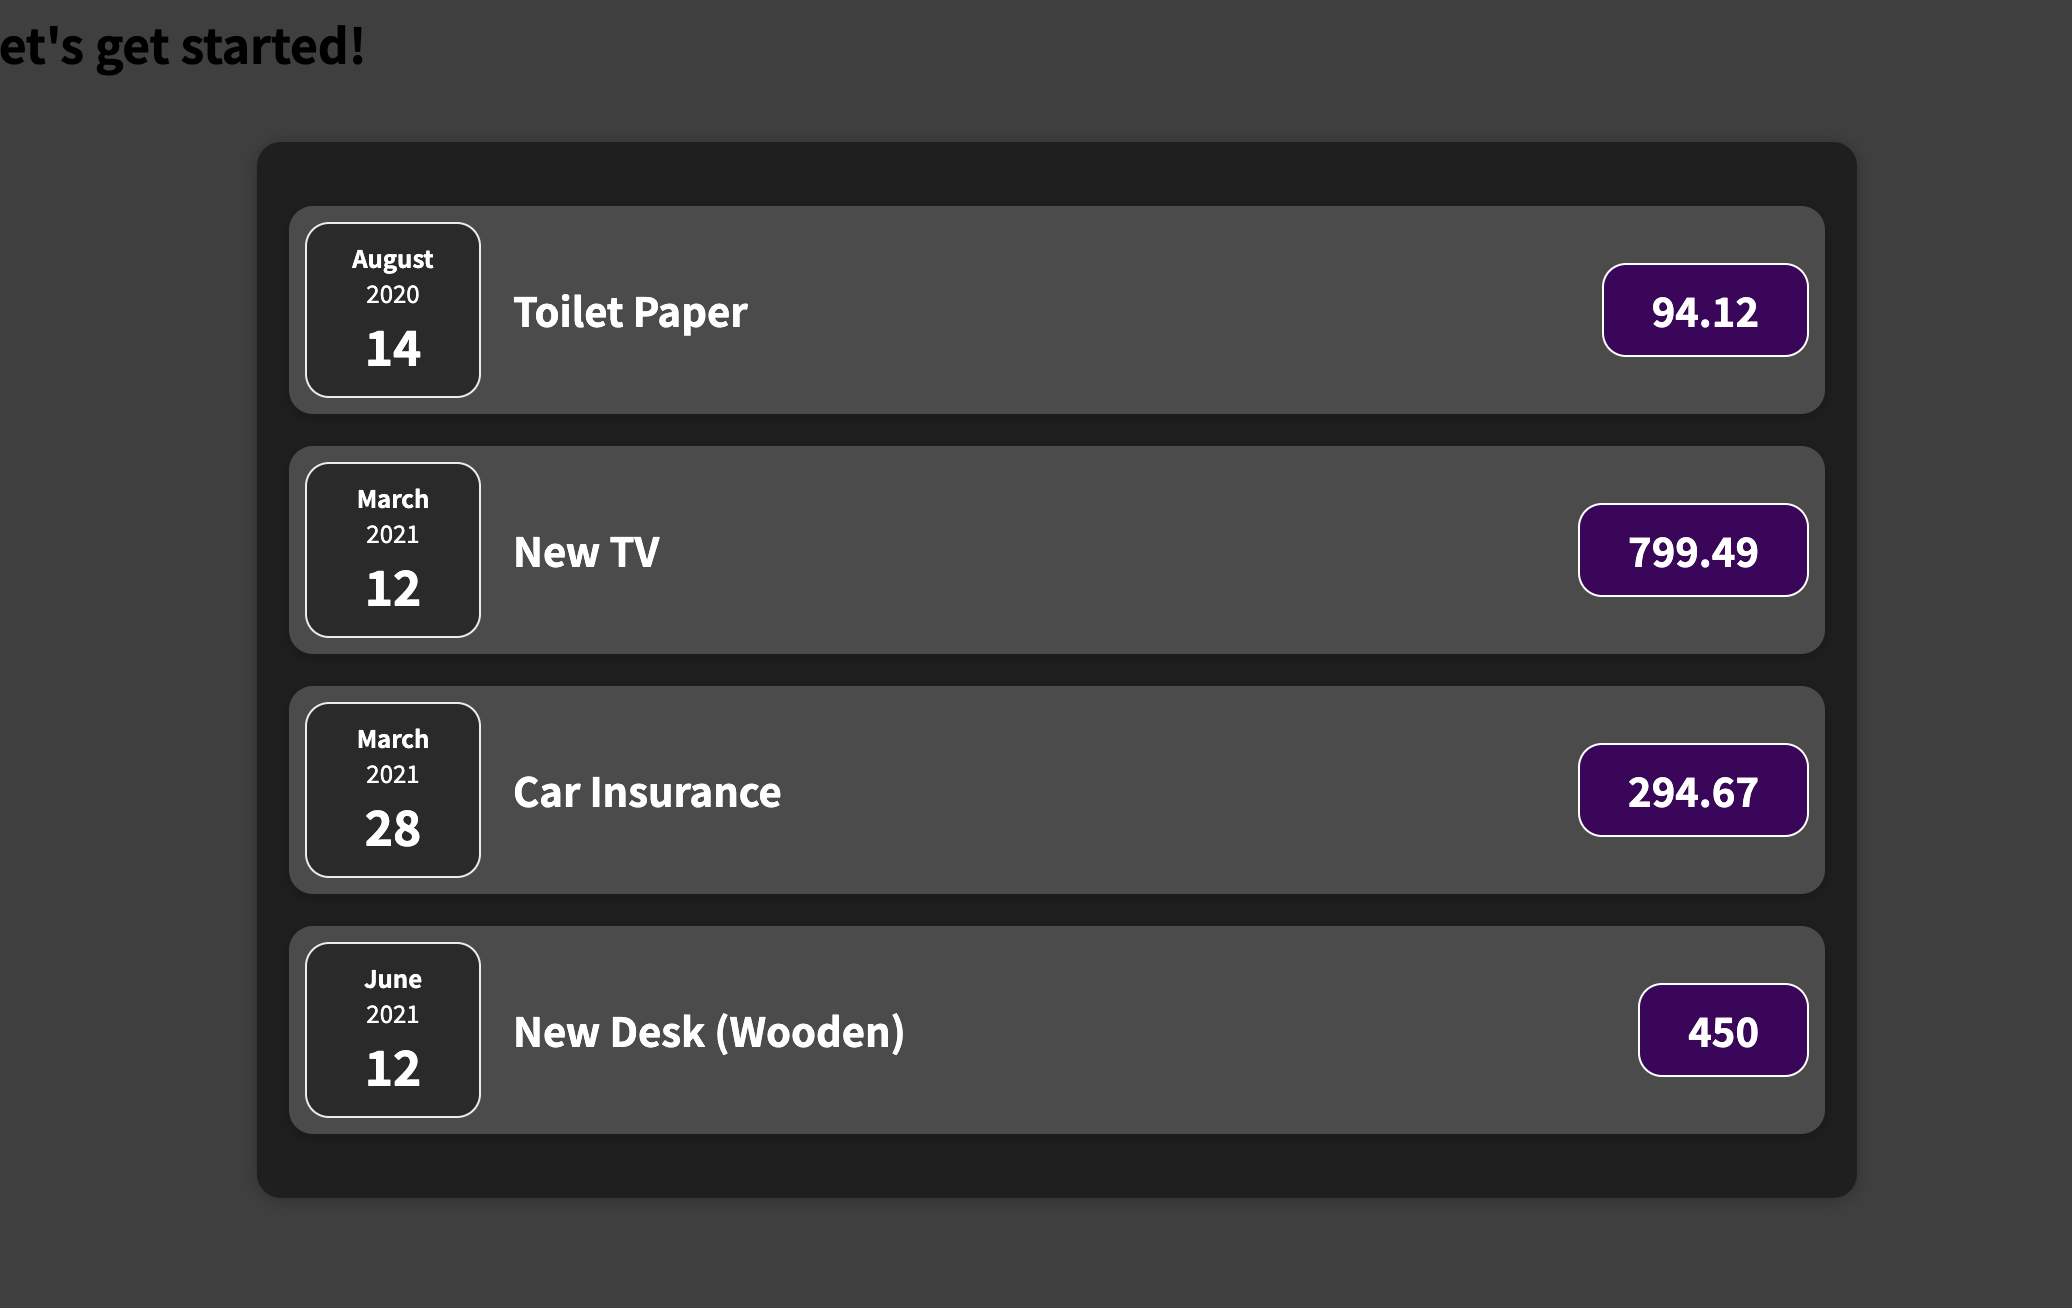
css까지 입힌 최종은 다음과 같다.
+ 강사님의 말씀
나는 array자체를 Expenses로 옮기면 안될까..? 생각했었는데(느낌적인 느낌으로다가 App은 Component로만 이루어지는 게 좋을 것 같아서)
쉬원하게도 다음 솔루션 강의에서 말씀해주셨다.
=> Now we could have moved this array into the Expenses components as well, but that was simply not the task of this assignment.
So intead we're forwarding it through props for the item prop, we're extracting it with that prop inside of the Expenses Component, and that should therefore still render all the expenses.

https://melonplaymods.com/2023/06/11/iron-man-tony-stark-mod-for-melon-playground-2/
https://melonplaymods.com/2023/06/10/mini-camera-spy-mod-for-melon-playground/
https://melonplaymods.com/2023/06/10/zizh-67-zubodrobitel-mod-for-melon-playground/
https://melonplaymods.com/2023/06/10/super-mario-bros-mod-for-melon-playground/
https://melonplaymods.com/2023/06/11/hi-tech-two-story-housejaahee-mod-for-melon-playground/
https://melonplaymods.com/2023/06/11/bendy-ax-bendys-ax-mod-for-melon-playground/
https://melonplaymods.com/2023/06/11/fnaf-mod-for-melon-playground/
https://melonplaymods.com/2023/06/11/melon-child-mod-for-melon-playground/
https://melonplaymods.com/2023/06/11/the-game-they-are-coming-mod-for-melon-playground/
https://melonplaymods.com/2023/06/11/borie-or-boreas-type-095-katyusha-mod-for-melon-playground/
https://melonplaymods.com/2023/06/10/swords-from-terraria-mod-for-melon-playground/
https://melonplaymods.com/2023/06/11/technology-apple-battle-form-mod-for-melon-playground/
https://melonplaymods.com/2023/06/10/cactus-mod-for-melon-playground/
https://melonplaymods.com/2023/06/11/monument-to-the-victory-over-the-virus-mod-for-melon-playground/
https://melonplaymods.com/2023/06/10/iron-man2008-mod-for-melon-playground/
https://melonplaymods.com/2023/06/10/buff-moai-mod-for-melon-playground/
https://melonplaymods.com/2023/06/11/crystal-purplenpc-mod-for-melon-playground/
https://melonplaymods.com/2023/06/10/hydra-toilet-mod-for-melon-playground/
https://melonplaymods.com/2023/06/10/ppg-miscellaneous-mod-for-melon-playground/
https://melonplaymods.com/2023/06/10/ichigo-kurosaki-mod-for-melon-playground/