Django-ALLAuth
이번에는 Django-Allauth를 이용해보자.
1) pip install django-allauth 이후 pip freeze > requirements.txt
2) 이후 settings.py로 와서 INSTALLED_APPS에 다음을 추가한다.
'allauth',
'allauth.account',
'allauth.socialaccount',
allauth는 상당히 강력하므로 이 셋을 추가하여 일반적인 SNS(ex. facebook, twitter)에서의 authentication을 진행할 수 있다.
또한 INSTALLED_APPS에
'django.contrib.sites' # 를 추가하고

'rest_auth' # 원래 여기까지만 있었지만
'rest_auth.registration', # 이것도 추가한다.
또한 settings.py 가장 하단에는
SITE_ID = 1

ACCOUNT_EMAIL_VERIFICATION = "none"
ACCOUNT_EMAIL_REQUIRED = (True)
를 추가한 뒤, migrate command를 쳐준다. python manage.py migrate
3) 이후 admin 페이지에 접속하면, 없던 것들이 보인다.
먼저 맨 상단에는 ACCOUNTS 앱이 생성되었을 것이다.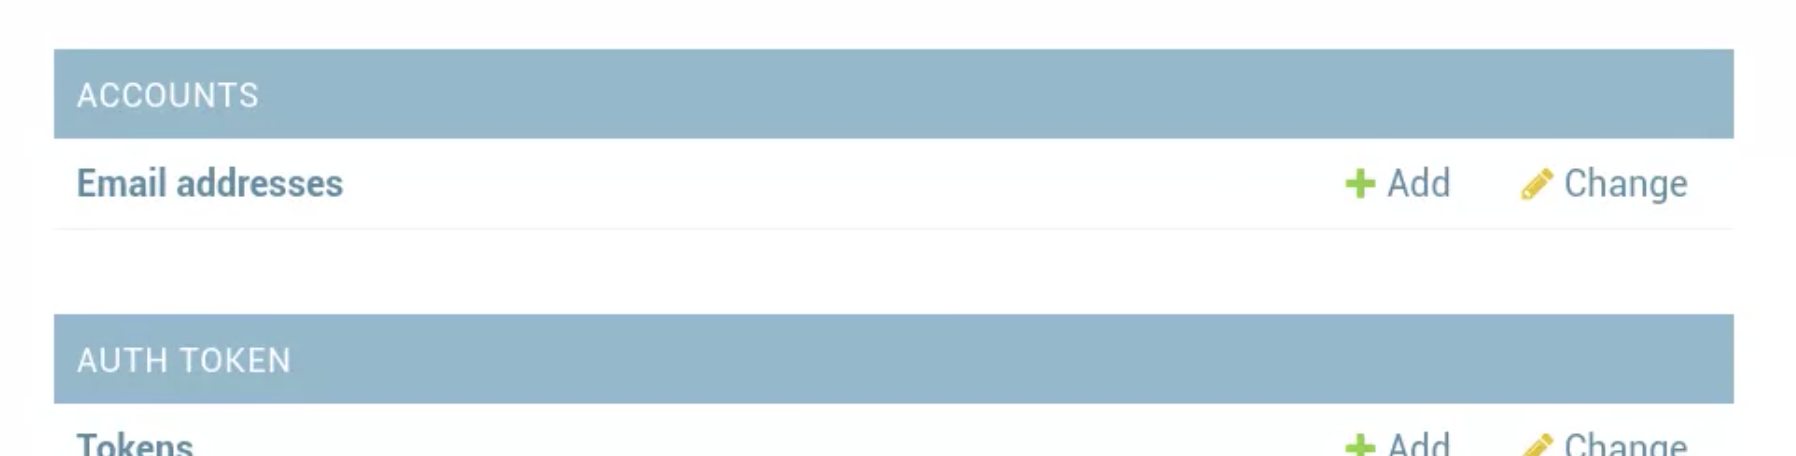
그리고 아래에는

이처럼 SITES와 SOCIAL ACCOUNTS앱이 생성되었을 것이다.
4) 방금전에 생성한 앱들에 접근할 수 있도록
profilesapi/profilesapi/urls.py에서 다음처럼 url을 수정한다.
from django.conf import settings
from django.conf.urls.static import static

from django.contrib import admin
from django.urls import path, include

urlpatterns = [
    path('admin/', admin.site.urls),
    path('api/', include('profiles.api.urls')),
    path('api-auth/', include('rest_framework.urls')),
    path('api/rest-auth/', include('rest_auth.urls')),
    path('api/rest-auth/registration/', include('rest_auth.registration.urls'))
    # 기존 urls에 이 부분을 추가해준다

]
5) 방금 추가한 url에 대한 실험을 위해
profilesapi/clients에 token-auth-test2.py를 생성한다. 작성될 코드는 token-auth-test1.py와 크게 다르지 않다.
import requests


def client():

    # 새로운 유저를 생성하는 것이므로 이번에는 username, email, password를 키값으로 적는다.
    data = {
         "username" : "resttest",
         "email" : "test@rest.com",
         "password1": "changeme123",
         "password2": "changeme123" # password confirmation 부분에 해당한다
         }

    response = requests.post("http://127.0.0.1:8000/api/rest-auth/registration/",
                             data=data)

    # token_h = 'Token a4a535588233b2896d3242bc1183cfeff7ad4d7b'
    # headers = {"Authorization": token_h}

    # response = requests.get(
    #    "http://127.0.0.1:8000/api/profiles/", headers=headers)
    # 지금은 token_h부터는 필요하지 않기에 주석처리 한다.


    print("Status Code: ", response.status_code)
    response_data = response.json()
    print(response_data)


if __name__ == "__main__":
    client()
서버를 켠 후, python token-auth-test2.py 실행
결과 값은?
Status Code: 201
{'key' : '---token---'}
바람직하게 리턴되었다. 그리고 여기서 기억해야 할 점! ⭐️ 새로운 유저를 등록시킨 경우, signal.py를 등록하면서 바로 새로운 Profile 인스턴스도 추가하게 설정해 두었다. ⭐️ 이를 확인하기 위해 Web단으로 가서 Users를 체크해보자.
Users에 들어가면 resttest라는 계정이 생긴 것은 확인할 수 있다. 자 그럼 Profiles를 확인할 차례이다. Profiles를 눌러보면,

방금 등록한 resttest 유저가 Profiles에도 같이 등록된 것을 확인할 수 있다!
5) 그럼 방금 등록된 resttest 유저로 이번에는 get 메소드를 보내는 요청을 보내보겠다.
test-auth-test2.py를 다시 수정해본다.
import requests

def client():
    #data = {
    #     "username" : "resttest",
    #     "email" : "test@rest.com",
    #     "password1": "changeme123",
    #     "password2": "changeme123" # password confirmation 부분에 해당한다
    #     }

    #response = requests.post("http://127.0.0.1:8000/api/rest-auth/registration/",
    #                         data=data)
    # 유저를 등록시키는데 사용한 요청은 주석처리한다.

    token_h = 'Token ---resttest유저에게 가입과 동시에 발행된 token---'
    headers = {"Authorization": token_h}

    response = requests.get("http://127.0.0.1:8000/api/profiles/",
    			    headers=headers)

    print("Status Code: ", response.status_code)

    response_data = response.json()
    print(response_data)
서버를 켠 후, python token-auth-test2.py 다시 실행
결과 값은?
Status Code: 200
{[{'id': 1, 'user':'admin', 'avatar':'--img src--', 'bio': 'Site Administrator', 'city':'Testland'},  {'id':2, 'user':'random' .... }, {'id': 3, 'user': 'resttest' .... }]
잘 출력되는 것을 확인할 수 있다. 특히 마지막에 등록한 resttest 유저까지 모두!