👏 사용자 인증을 위한 JWT 붙이기
사용자를 인증하기 위한 도구로 JWT를 선택했는데 이전에 사용 방법을 보니 이전에 내가 진행했던 내용이 거의 필요가 없어져서 다시 처음부터 작업을 해야하게 되었다 ㅜㅜ 그래도 혼자 작업하면서 그동안 기억에서 사라졌던 JPA와 테스트 코드 작성법, api 예외처리들을 할 수 있었으니... 만족해...
🔨 Security 설정
이전에 설정했던 내용으로 우선 진행한다.
이전에 진행했던 설정 내용
🔨 h2 설정 변경
h2는 이전에는 h2 batch 프로그램을 실행시켜서 사용했었는데 spring boot 내장으로 실행시킬 수 있다. 알았는데 그새 또 까먹었다... ㅜㅜ
server:
  port: 8080

spring:
  h2:
    console:
      enabled: true

  datasource:
    url: jdbc:h2:mem:logindb
    driver-class-name: org.h2.Driver
    username: sa

  jpa:
    database-platform: org.hibernate.dialect.H2Dialect
    hibernate:
      ddl-auto: create-drop
      format_sql: true
      show-sql: true
    defer-datasource-initialization: true

logging:
  level:
    root: info
위 내용으로 설정을 바꾸었고 이전과 다른 점은 h2: 라는 설정값을 주어서 enable:true로 내장시킨것이 달라진 점이다. 이렇게되면 서버가 실행되었을 때 h2 db가 내장되어서 테스트용으로 많이 사용한다.
spring 2.5 이상부터는 초기 실행 순서가 변경되어
defer-datasource-initialization: true이 설정을 빼고 실행하면 오류가 발생하므로 data.sql을 작성하지 않던지 해당 설정을 넣어두던지 해야한다!
👦 UserEntity
회원의 대한 DB를 정의해보자
@Entity
@Table(name = "user")
@Getter
@Setter
@Builder
@AllArgsConstructor
@NoArgsConstructor
public class UserEntity {

    @Id
    @Column(name = "user_id")
    @GeneratedValue(strategy = GenerationType.IDENTITY)
    private Long userId;

    @Column(name = "username", length = 50, unique = true)
    private String username;

    @Column(name = "password", length = 100)
    private String password;

    @Column(name = "nickname", length = 50)
    private String nickname;

    @Column(name = "activated")
    private boolean activated;

    @ManyToMany
    @JoinTable(
            name = "user_authority",
            joinColumns = {@JoinColumn(name = "user_id", referencedColumnName = "user_id")},
            inverseJoinColumns = {@JoinColumn(name = "authority_name", referencedColumnName = "authority_name")})
    private Set<Authority> authorities;
}
UserEntity는 다음과 같이 정의했고 Authority 테이블 또한 정의해주어야한다.
@Entity
@Table(name = "authority")
@Getter
@Setter
@Builder
@AllArgsConstructor
@NoArgsConstructor
public class Authority {

    @Id
    @Column(name = "authority_name", length = 50)
    private String authorityName;
}
권한에 대한 테이블은 권한 이름만 가지도록 정의했다. 그리고 위에서 join column으로 user_id값을 지정해두었기 때문에 키 값은 user_id가 된다.
INSERT INTO USER (USER_ID, USERNAME, PASSWORD, NICKNAME, ACTIVATED) VALUES (1, 'admin', '$2a$08$lDnHPz7eUkSi6ao14Twuau08mzhWrL4kyZGGU5xfiGALO/Vxd5DOi', 'admin', 1);

INSERT INTO AUTHORITY (AUTHORITY_NAME) values ('ROLE_USER');
INSERT INTO AUTHORITY (AUTHORITY_NAME) values ('ROLE_ADMIN');

INSERT INTO USER_AUTHORITY (USER_ID, AUTHORITY_NAME) values (1, 'ROLE_USER');
INSERT INTO USER_AUTHORITY (USER_ID, AUTHORITY_NAME) values (1, 'ROLE_ADMIN');
그리고 resource 폴더 아래에 data.sql 파일을 작성하여 서버가 실행될 때 정보를 insert 하도록 한다.
@EnableWebSecurity
public class SecurityConfig extends WebSecurityConfigurerAdapter {

    //security 암호화 encoder를 bean으로 등록
    @Bean
    public PasswordEncoder passwordEncoder() {
        return PasswordEncoderFactories.createDelegatingPasswordEncoder();
    }

    @Override
    protected void configure(HttpSecurity http) throws Exception {
        http
                .httpBasic().disable() // rest api 이므로 기본설정 사용안함. 기본설정은 비인증시 로그인폼 화면으로 리다이렉트 된다.
                .csrf().disable() // rest api이므로 csrf 보안이 필요없으므로 disable처리.
                .sessionManagement().sessionCreationPolicy(SessionCreationPolicy.STATELESS) // jwt token으로 인증하므로 세션은 필요없으므로 생성안함.
                .and()
                .authorizeRequests() // 다음 리퀘스트에 대한 사용권한 체크
                .antMatchers("/**").permitAll(); // 가입 및 인증 주소는 누구나 접근가능
                //.antMatchers("/v1/**").permitAll() // 가입 및 인증 주소는 누구나 접근가능
                //.anyRequest().hasRole("USER"); // 그외 나머지 요청은 모두 인증된 회원만 접근 가능
    }

    @Override
    public void configure(WebSecurity web) throws Exception {
        web
                .ignoring()
                .antMatchers(
                        "/h2-console/**",
                        "/favicon.ico"
                );
    }
}
마지막으로 security에 h2 콘솔과 파비콘(=지금 안해도 됨)의 접근이 가능하도록 위와 같이 설정해준다.
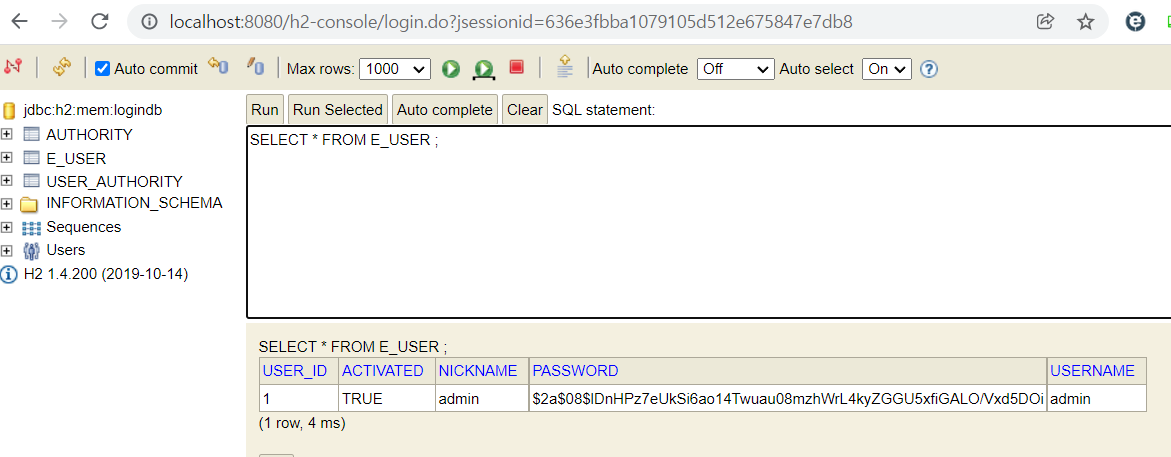
그 후에
http://localhost:8080/h2-console
에 접근하여 connect한 뒤 정상적으로 실행된 것을 확인할 수 있다.
🔨 JWT 설정 추가
jwt:
  header: Authorization
  secret: juno-eats-toy-project-spring-boot-jwt-secret-login-api-juno-eats-toy-project-spring-boot-jwt-secret-login-api
application.yml에 jwt에 대한 설정을 추가해준다.
server:
  port: 8080

spring:
  h2:
    console:
      enabled: true

  datasource:
    url: jdbc:h2:mem:logindb
    driver-class-name: org.h2.Driver
    username: sa

  jpa:
    database-platform: org.hibernate.dialect.H2Dialect
    hibernate:
      ddl-auto: create-drop
      format_sql: true
      show-sql: true
    defer-datasource-initialization: true

jwt:
  header: Authorization
  #HS512 알고리즘을 사용할 것이기 때문에 512bit, 즉 64byte 이상의 secret key를 사용해야 한다.
  #echo 'juno-eats-toy-project-spring-boot-jwt-secret-login-api-juno-eats-toy-project-spring-boot-jwt-secret-login-api-secret'|base64
  secret: juno-eats-toy-project-spring-boot-jwt-secret-login-api-juno-eats-toy-project-spring-boot-jwt-secret-login-api-secret
  token-validity-in-seconds: 8460000

logging:
  level:
    root: info
전체 내용은 이렇다.
그후에 gradle에 jwt 라이브러리를 추가한다.
plugins {
	id 'org.springframework.boot' version '2.6.2'
	id 'io.spring.dependency-management' version '1.0.11.RELEASE'
	id 'java'
	id "org.asciidoctor.jvm.convert" version "3.3.2"	//(1) asciidoctor 추가
}

group = 'com.juno'
version = '0.0.1-SNAPSHOT'
sourceCompatibility = '11'

configurations {
	compileOnly {
		extendsFrom annotationProcessor
	}
}

repositories {
	mavenCentral()
}

dependencies {
	implementation 'org.springframework.boot:spring-boot-starter-data-jpa'
	implementation 'org.springframework.boot:spring-boot-starter-security'
	implementation 'org.springframework.boot:spring-boot-starter-web'
	implementation 'org.springframework.boot:spring-boot-starter-validation'	//validated 추가
	compileOnly 'org.projectlombok:lombok'
	developmentOnly 'org.springframework.boot:spring-boot-devtools'
	runtimeOnly 'com.h2database:h2'
	runtimeOnly 'mysql:mysql-connector-java'
	annotationProcessor 'org.projectlombok:lombok'
	testImplementation 'org.springframework.boot:spring-boot-starter-test'
	testImplementation 'org.springframework.security:spring-security-test'
	testImplementation 'org.springframework.restdocs:spring-restdocs-mockmvc'	//(2) mockMvc에서 restdocs를 사용할 수 있도록 추가
	//jwt 추가
	implementation group: 'io.jsonwebtoken', name: 'jjwt-api', version: '0.11.2'
	runtimeOnly group: 'io.jsonwebtoken', name: 'jjwt-impl', version: '0.11.2'
	runtimeOnly group: 'io.jsonwebtoken', name: 'jjwt-jackson', version: '0.11.2'
}

ext {
	snippetsDir = file('build/generated-snippets')	//(3) 빌드시 snippets 파일들이 저장될 저장소
}

test {
	useJUnitPlatform()
	outputs.dir snippetsDir	//(4) test 실행 시 파일을 (3)에서 설정한 저장소에 출력하도록 설정
}

asciidoctor {	//(5) asccidoctor 설정
	dependsOn test
	inputs.dir snippetsDir
}

asciidoctor.doFirst {	//(6) asciidoctor가 실행될 때 docs 하위 파일 삭제
	delete file('src/main/resources/static/docs')
}

bootJar {	//(7) bootJar 시 asciidoctor 종속되고 build하위 스니펫츠 파일을 classes 하위로 복사
	dependsOn asciidoctor
	copy {
		from "${asciidoctor.outputDir}"
		into 'BOOT-INF/classes/static/docs'
	}
}

task copyDocument(type: Copy) {		//(8) from의 파일을 into로 복사
	dependsOn asciidoctor
	from file("build/docs/asciidoc")
	into file("src/main/resources/static/docs")
}

build {		//(9) build 시 copyDocument 실행
	dependsOn copyDocument
}
기존 설정 파일에 jwt 설정만 추가했다.
🔨 Token Provider 생성
Token Provider는 JWT에서 토큰의 생성과 유효성 검증을 담당한다.
@Component
@Slf4j
public class TokenProvider implements InitializingBean {

    private final String secretKey;   //@Value를 통해 yml에 저장된 secret 값을 가져옴, Lombok valid 아님!
    private final Long tokenValidityInMilliseconds; //토큰이 살아있는 시간 (1000L * 60 * 60 = 1시간)

    private Key key;    //afterPropertiesSet()에서 key값을 할당해줌
    private final String AUTH = "auth";

    //생성자에서 secretKey값을 base64로 인코딩하여 값을 넣어주고 토큰의 생명주기도 설정한다.
    public TokenProvider(@Value("${jwt.secret}") String secretKey, @Value("${jwt.token-validity-in-seconds}") Long tokenValidityInMilliseconds) {
        this.secretKey = Base64.getEncoder().encodeToString(secretKey.getBytes());
        this.tokenValidityInMilliseconds = tokenValidityInMilliseconds * 1000;
    }

    //bean이 생성되고 의존성 주입이 완료된 다음 init()을 실행하여 base64로 인코딩된 키 값을 decoding하여 key 변수에 할당
    @Override
    public void afterPropertiesSet() throws Exception {
        byte[] keyBytes = Base64.getDecoder().decode(secretKey);
        this.key = Keys.hmacShaKeyFor(keyBytes);
    }

    //Authentication 객체의 권한정보를 이용해서 토큰을 생성하는 createToken 메서드
    public String createToken(Authentication authentication){
        String authorities = authentication.getAuthorities().stream()   //authentication 정보를 가져옴
                .map(GrantedAuthority::getAuthority)                    //GrantedAuthority 객체로 변환 후 getAuthority()
                .collect(Collectors.joining(","));              //배열을 ,로 연결하여서 하나의 String으로 만듦

        Date now = new Date();
        long nowTime = now.getTime();  //현재 시간
        Date validity = new Date(nowTime + this.tokenValidityInMilliseconds);  //현재 시간 + 설정한 토큰 주기를 더해줌

        return Jwts.builder()                               //토큰 생성후 리턴
                .setSubject(authentication.getName())       //토큰 제목
                .setIssuedAt(now)                           //토큰 발행 일자
                .claim(AUTH, authorities)            //담고 싶은 데이터 (key, value) = payload에 들어가는 정보, 여기서는 권한들에 대한 정보를 넣어줌
                .signWith(key, SignatureAlgorithm.HS512)    //key값과 함께 우리가 사용할 암호화 알고리즘 선언
                .setExpiration(validity)                    //토큰 주기 설정
                .compact();
    }

    //token을 파라미터로 받아서 토큰의 정보를 읽어온 후 정보를 확인하여 권한을 반환하는 메서드
    public Authentication getAuthentication(String token){
        Claims claims = Jwts
                .parserBuilder()
                .setSigningKey(key)     //서명한 key 값
                .build()
                .parseClaimsJws(token)  //전달 받은 token
                .getBody();             //parse하여 전달된 값

        Collection<GrantedAuthority> authorities = Arrays.stream(claims.get(AUTH).toString().split(","))    //파싱하여 가져온 claims에서 auth key 값으로 권한들을 가져와서 배열로 만듦
                .map(SimpleGrantedAuthority::new)   //배열을 스트림으로 변환 후 SimpleGrantedAuthority 객체로 변환
                .collect(Collectors.toList());      //List로 만듦

        User principal = new User(claims.getSubject(), "", authorities);    //token에 저장된 제목으로 User 객체 생성

        return new UsernamePasswordAuthenticationToken(principal, token, authorities);  //인터페이스 Authentication의 구현체를 통해 Authentication객체 반환
    }

    //token의 유효성 검사, 각 Exception에 따라 처리 해주면 됨!
    public boolean validateToken(String token) {
        try {
            Jwts.parserBuilder().setSigningKey(key).build().parseClaimsJws(token);  //토큰을 파싱했을 때 정상이 아니라면 exception 발생
            return true;
        } catch (io.jsonwebtoken.security.SecurityException | MalformedJwtException e) {
            log.info("잘못된 JWT 서명입니다.");
        } catch (ExpiredJwtException e) {
            log.info("만료된 JWT 토큰입니다.");
        } catch (UnsupportedJwtException e) {
            log.info("지원되지 않는 JWT 토큰입니다.");
        } catch (IllegalArgumentException e) {
            log.info("JWT 토큰이 잘못되었습니다.");
        }
        return false;
    }
}
최대한 주석으로 자세한 내용을 적으려고 했는데 이해가 될수 있을지 모르겠다. 이해가 안된다면 많은 코드량부터 보지말고 하나의 메서드씩 뜯어봐보면 별거 아닐수도 있다
🔨 Jwt 커스텀 필터
@Slf4j
@RequiredArgsConstructor
public class JwtFilter extends GenericFilterBean {

    public static final String AUTHORIZATION_HEADER = "Authorization";
    private final TokenProvider provider;

    //jwt 토큰의 인증 정보를 현재 실행중인 security context에 저장하는 역할을 수행
    @Override
    public void doFilter(ServletRequest request, ServletResponse response, FilterChain chain) throws IOException, ServletException {
        HttpServletRequest httpServletRequest = (HttpServletRequest) request;
        String jwt = resolveToken(httpServletRequest);  //request로부터 header에서 토큰 정보를 가져옴
        String requestURI = httpServletRequest.getRequestURI();

        if (StringUtils.hasText(jwt) && provider.validateToken(jwt)) {  //TokenProvider에 작성한 토큰 유효성검사 실행
            Authentication authentication = provider.getAuthentication(jwt);    //토큰에서 Authentication 객체를 반환 받고
            SecurityContextHolder.getContext().setAuthentication(authentication);   //security context에 저장
            log.debug("Security Context에 '{}' 인증 정보를 저장했습니다, uri: {}", authentication.getName(), requestURI);
        } else {
            log.debug("유효한 JWT 토큰이 없습니다, uri: {}", requestURI); //유효성 검사 실패
        }

        chain.doFilter(request, response);
    }

    //reuqest의 header에서 토큰의 정보를 꺼내오기 위한 메서드
    private String resolveToken(HttpServletRequest request) {
        String bearerToken = request.getHeader(AUTHORIZATION_HEADER);
        if (StringUtils.hasText(bearerToken) && bearerToken.startsWith("Bearer ")) {
            return bearerToken.substring(7);
        }
        return null;
    }
}
JwtFilter 파일을 만들었고 이 필터는 jwt 토큰의 인증 정보를 security context에 저장시키기 위한 역할을 수행한다.
🔨 Jwt Security Config
위에 작성한 파일들을 Security에 적용시키기 위한 JwtSecurityConfig 파일을 작성해보자.
@RequiredArgsConstructor
public class JwtSecurityConfig extends SecurityConfigurerAdapter<DefaultSecurityFilterChain, HttpSecurity> {

    //TokenProvider를 주입
    private final TokenProvider tokenProvider;

    @Override
    public void configure(HttpSecurity http) {
        JwtFilter customFilter = new JwtFilter(tokenProvider);  //JwtFilter를 통해 Security로직에 등록
        http.addFilterBefore(customFilter, UsernamePasswordAuthenticationFilter.class);
    }
}
🔨 JwtAuthenticationEntryPoint
유효한 자격을 제공하지 않고 접근하려고 할때 401 Unauthorized 에러를 return
@Component
public class JwtAuthenticationEntryPoint implements AuthenticationEntryPoint {

    @Override
    public void commence(HttpServletRequest request,
                         HttpServletResponse response,
                         AuthenticationException authException) throws IOException {

        response.sendError(HttpServletResponse.SC_UNAUTHORIZED);    // 유효한 자격증명을 제공하지 않고 접근하려 할때 401
    }
}
🔨 JwtAccessDeniedHandler
필요한 권한이 존재하지 않는 경우 403 Forbidden 에러를 return
@Component
public class JwtAccessDeniedHandler implements AccessDeniedHandler {

    @Override
    public void handle(HttpServletRequest request, HttpServletResponse response, AccessDeniedException accessDeniedException) throws IOException {
        response.sendError(HttpServletResponse.SC_FORBIDDEN);   //필요한 권한이 없이 접근하려 할때 403
    }
}
🔨 SecurityConfig 재설정
@EnableWebSecurity
@EnableGlobalMethodSecurity(prePostEnabled = true)  //@PreAuthorize를 메서드 단위로 사용하기 위해 어노테이션 추가
public class SecurityConfig extends WebSecurityConfigurerAdapter {
    private final TokenProvider tokenProvider;
    private final JwtAuthenticationEntryPoint jwtAuthenticationEntryPoint;
    private final JwtAccessDeniedHandler jwtAccessDeniedHandler;

    public SecurityConfig(  //생성자 주입
            TokenProvider tokenProvider,
            JwtAuthenticationEntryPoint jwtAuthenticationEntryPoint,
            JwtAccessDeniedHandler jwtAccessDeniedHandler
    ) {
        this.tokenProvider = tokenProvider;
        this.jwtAuthenticationEntryPoint = jwtAuthenticationEntryPoint;
        this.jwtAccessDeniedHandler = jwtAccessDeniedHandler;
    }

    @Bean
    public PasswordEncoder passwordEncoder() {  //password endcoder
        return new BCryptPasswordEncoder();
    }

    @Override
    public void configure(WebSecurity web) {
        web.ignoring()
                .antMatchers(
                        "/h2-console/**"
                        ,"/favicon.ico"
                        ,"/error"
                );
    }

    @Override
    protected void configure(HttpSecurity httpSecurity) throws Exception {
        httpSecurity
                // token을 사용하는 방식이기 때문에 csrf를 disable합니다.
                .csrf().disable()

                //security exception handler
                .exceptionHandling()
                .authenticationEntryPoint(jwtAuthenticationEntryPoint)
                .accessDeniedHandler(jwtAccessDeniedHandler)

                // enable h2-console
                .and()
                .headers()
                .frameOptions()
                .sameOrigin()

                // 세션을 사용하지 않기 때문에 STATELESS로 설정
                .and()
                .sessionManagement()
                .sessionCreationPolicy(SessionCreationPolicy.STATELESS)

                .and()
                .authorizeRequests()
                .antMatchers("/v1/hello").permitAll()
                .antMatchers("/v1/authenticate").permitAll()
                .antMatchers("/v1/signup").permitAll()
                //그 외 요청은 권한을 가져야함
                .anyRequest().authenticated()
                .and()
                //JwtSecurityConfig 적용
                .apply(new JwtSecurityConfig(tokenProvider));
    }
}
이후 서버를 실행시켜서 정상 시작이 되면 우선 설정은 끝난것이다!
그리고 이 글에 추가할 내용으로 security와 jwt가 어떻게 동작하는지에 대해 적어보자.
다음 포스트에서는 실제 동작할 토큰 발급과 회원 인증을 구현해보자!
