순차회로 / Sequential circuit
- 메모리에 회로의 현 상태가 저장된다
- 입력값과 현재 상태에 따라 출력과 다음 상태가 결정된다.
- (출력, 다음상태) = f(입력, 현재상태)

래치 / Latch
- latch : 걸쇠 / 빗장
- 클럭 입력을 가지지 않는 기억 소자
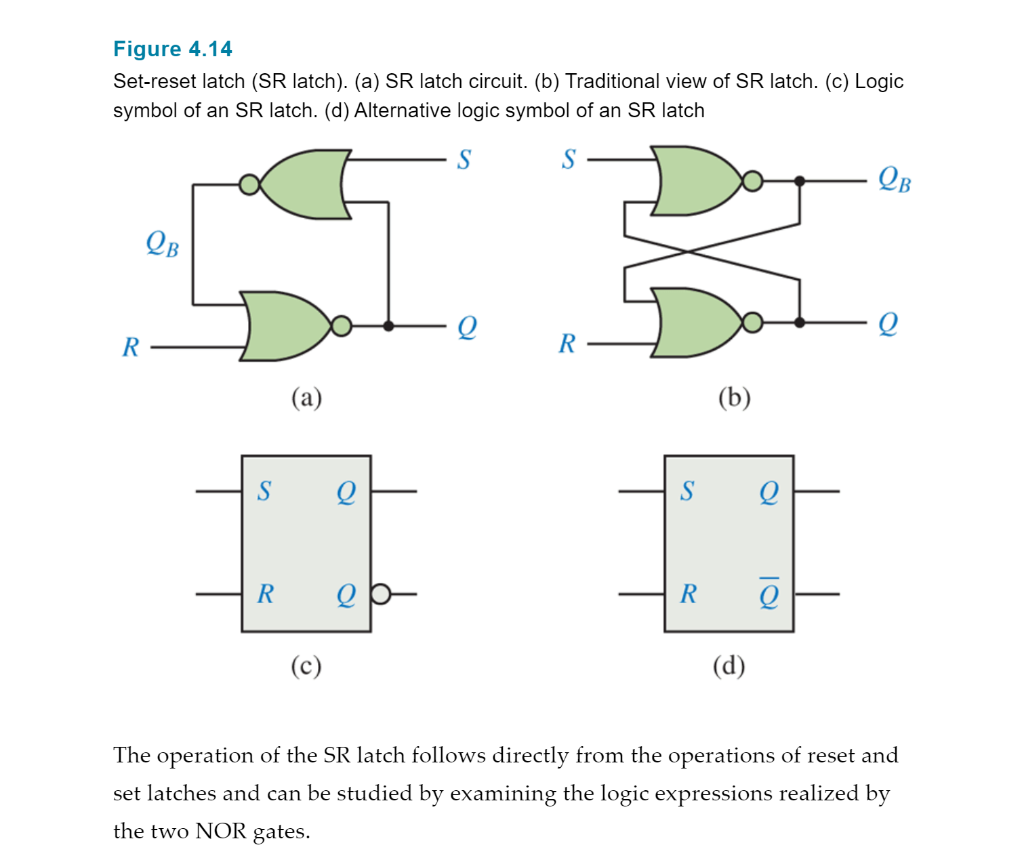
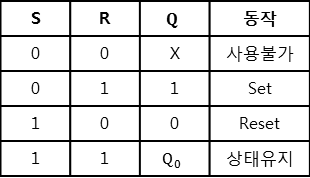
셋-리셋 리치 / Set-Reset Latch / S-R Latch
- S는 Set, R은 Reset의 역할을 한다.
- NOR 게이트 혹은 NAND 게이트를 이용해 만든다, 가장 단순한 순차회로
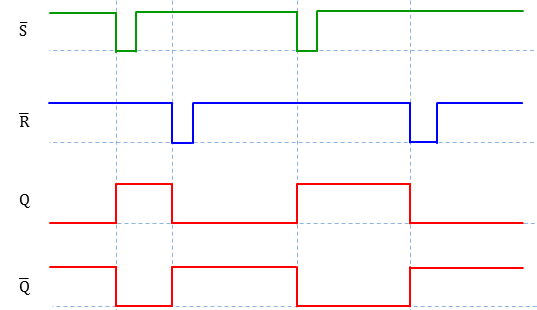
- Q의 값이 바뀌는데는 Gate Delay로 인해 시간이 걸린다.
S(t) - t 시점에서의 S의 값
- t+ : t 시간으로부터 gate delay만큼의 시간이 지난것.
=
=
- 카르노맵으로 구한 next-state equation
- 위는 특성식 / characteristic equation 으로도 부른다.
NOR 게이트로 만든 S-R Latch
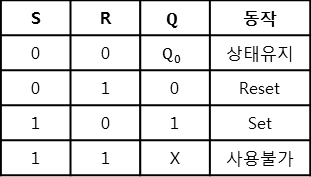
- Reset >> Q를 0으로 설정
- Set >> Q를 1으로 설정
- 1, 1은 사용불가 >> 출력값이 불안정해진다. >> Dont Care
NAND 게이트로 만든 S-R Latch
- NOR 에서 입출력에 invert가 된 모습을 취한다.

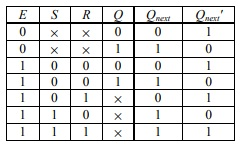
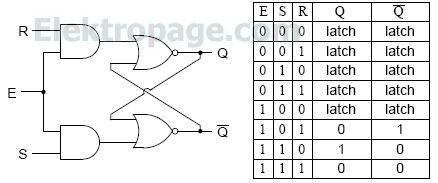
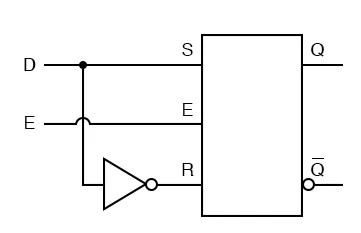
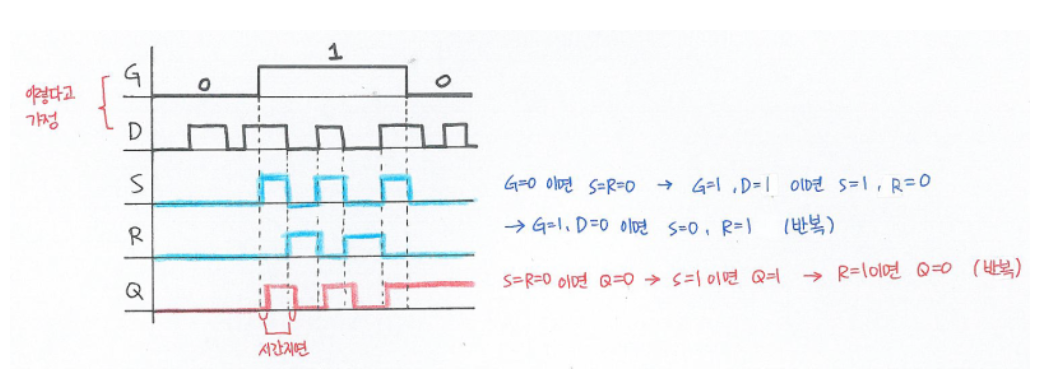
Gated SR NOR Latch
- Nor Latch 회로에 Enable 신호를 사용할수 있게 만든 회로.
- E 신호가 들어 와야 작동하고, E 신호가 없으면 Q값이 유지된다.
- Enable의 상태에 동기화되어 출력이 나타나 동기화 회로라 부른다.
- E 대신 G로 적기도 한다.
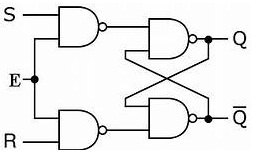
Gated SR NAND Latch
- S와 R의 위치가 뒤바뀌어있다.
- E가 연결되는 부분이 NAND 이다.
- 진리표는 NOR Latch와 동일하다.
D Latch
- SR 래치에 D라는 입력 하나만 넣는것이다.
- D의 값에 따라 Q의 값이 정해진다.
- 위는 Enable이 들어간 Gated D Latch이다.
Clock
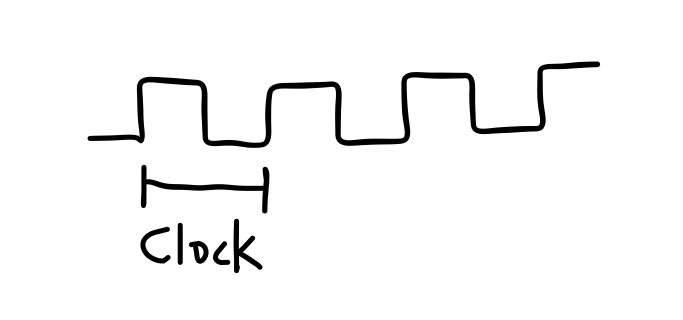
- 주기적으로 0과 1을 반복한다.
- 1회 1과 0을 반복하는것이 1 클럭이다.
- 클럭은 1초에 Nhz번 일어난다.
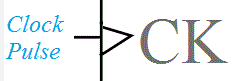
- 클럭을 받는 부분은 보통 이렇게 그려지는데, 이는클럭을 그대로 받는것이다.
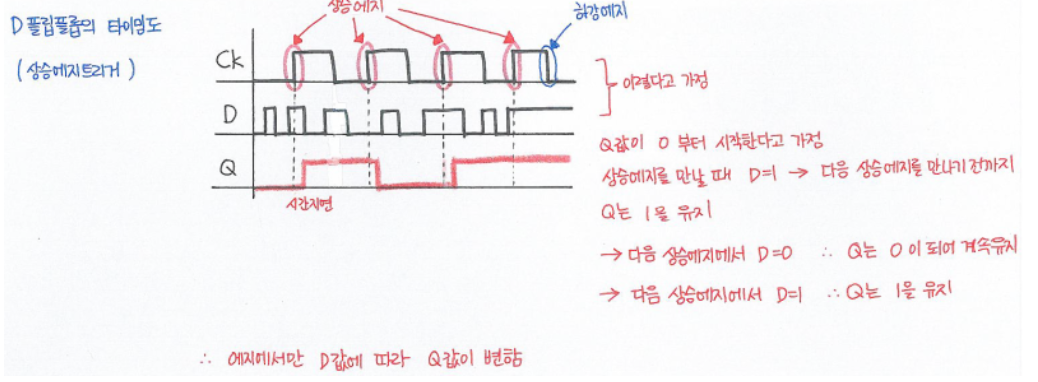
- 클럭이 1이 될때 작동하게 되어 상승 에지 트리거라 부른다. < Rising Edge Trigger >

- 이는 클럭에 NOT을 해 받는것이다.
- 클럭이 0이 될때 작동하게 되어 하강 에지트리거라 부른다. < Falling Edge Trigger >
Edge triggered D Flip flop
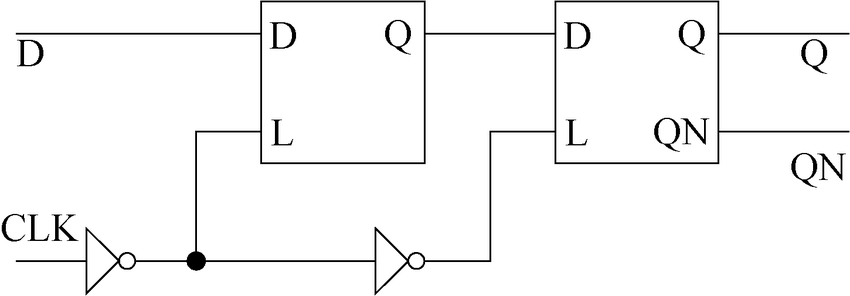
- 첫 D Latch에 Falling edge trigger, 두번째 D Latch에 Rising edge trigger가 들어간다.
- 클럭이 0일때 앞의 latch가 작동해 값이 바뀔동안, 뒷 latch는 값이 변하지 않는다.
- 클럭이 1로 변하는 순간, D에 입력되던 값이 앞의 latch에서 유지가 됨과 동시에 뒤 latch에도 들어가 그대로 나온다.
- 즉, 클럭이 Rising edge를 만나는 순간의 상태를 Q에 저장하는 꼴이 된다, 다음 값의 변경은 다음 Rising edge때 일어난다.
- 두 latch의 not이 붙는 곳이 서로 바뀌면, falling edge에 출력이 바뀌게 된다.
SR flip flop

- 입력이 들어가기 전에 clock과 and를 거치고 들어간다.
- Clock이 올라갈때 S/R 입력에 의해 Q의 값이 결정된다.
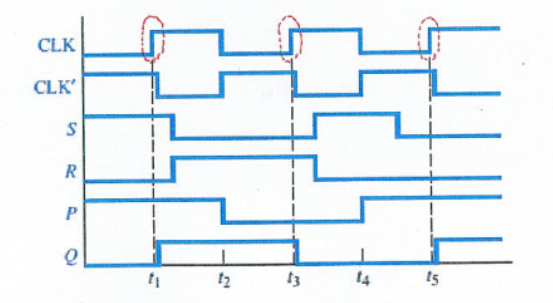
- 위 처럼 잘 작동하나, 뒷부분에 S와 R이 둘다 0인 상태에서 rising edge가 와도 0이 유지되는게 아니라 1이 오게 되는데,
이는 clock이 0일때 S나 R의 입력이 바뀌어서 그런것이다. - 즉, 클럭이 0일때는 S나 R의 입력이 바뀌면 안된다.
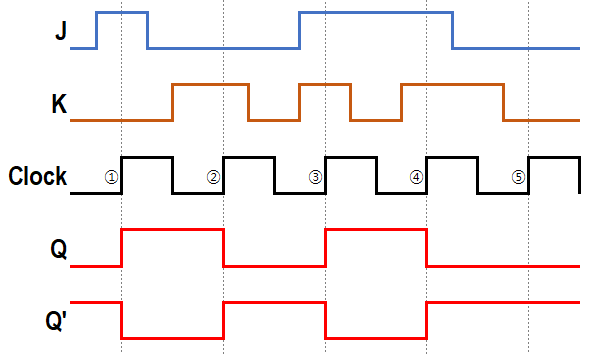
JK flip flop
- J는 S, K는 R과 같은 역할을 한다.
- 둘다 1일때도 동작한다, Q값이 반대/Invert 가 된다.
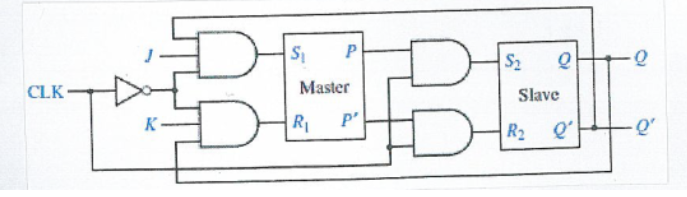
- SR 플립플롭의 결과를 교차해 앞에 되먹임한다.
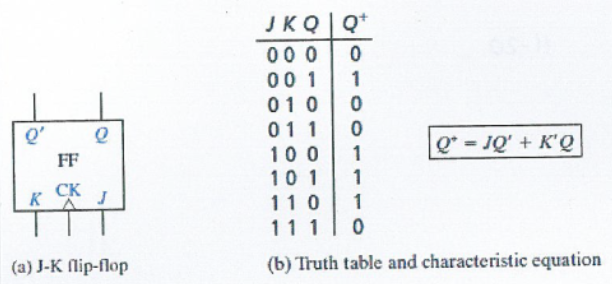

- P와 Q의 값은 같다.
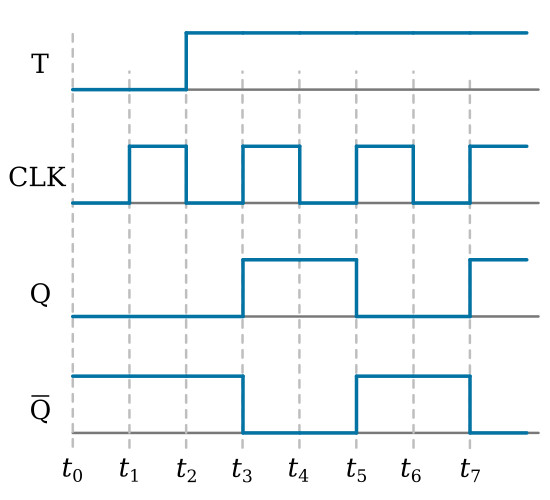
T 플립플롭
- 토글 플립플롭
- Q는 T가 0이면 유지, 1이면 invert된다.
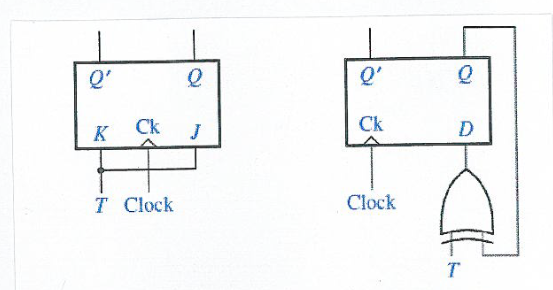
- JK 플립플롭 혹은 D 플립플롭을 이용해 구성 가능하다.
Additional input
- ClrN에 활성시 플립플롭은 0으로 리셋(reset)됩니다.
- PreN에 활성시 플립플롭은 1로 셋(set)됩니다.
- Active low : 0이 될때 작동
- Active high : 1이 될때 작동
- 정상적인 경우에서 ClrN과 PreN이 동시에 활성화 될수 없다.
- ClrN과 PreN은 그 동작이 클럭에 무관하기 때문에 비동기 클리어 및 프리셋이라고 불리운다.
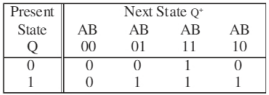
State Table

만능 컴덕후 겸 번지 팬